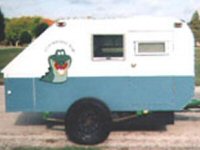
Citylights' Tear - SOLD! - update 08-01-16

...ask your questions in the appropriate forums BUT document your build here...preferably in a single thread...dates for updates, are appreciated....

Re: Citylights' Tear

Postby RandyG » Sat Jun 08, 2013 11:15 pm

Great start! You're doing it my way and planning as you go. Nothing wrong with that.
Randy
Aircraft fabricator, novice carpenter, electrical apprentice, audio engineer dropout.
Build thread - http://www.tnttt.com/viewtopic.php?f=50&t=54126
User avatar
RandyG
500 Club
 
Posts: 695
Images: 115
Joined: Thu May 10, 2012 6:52 pm

Re: Citylights' Tear

Postby Redhawk2 » Sun Jun 09, 2013 12:29 am

Looking pretty good. I like the ideas, and cant wait for more pictures.
User avatar
Redhawk2
Teardrop Inspector
 
Posts: 5
Joined: Tue Jan 01, 2013 8:10 am

Re: Citylights' Tear

Postby citylights » Mon Jun 10, 2013 10:41 pm

Beam compass and beam saw just about ready to go.

Image

Image
User avatar
citylights
500 Club
 
Posts: 591
Images: 1
Joined: Sun May 12, 2013 12:27 pm
Location: Las Vegas, Nevada
Top

Re: Citylights' Tear

Postby Junkboy999 » Mon Jun 10, 2013 11:02 pm

Gotta love the under floor storage. :thumbsup:
User avatar
Junkboy999
1000 Club
1000 Club
 
Posts: 1259
Images: 52
Joined: Fri Jul 06, 2012 9:18 pm
Location: Wichita, KS
Top

Re: Citylights' Tear

Postby citylights » Wed Jun 12, 2013 7:44 am

Beam saw ready to go. I was amazed at how smooth and perfect an arc this cut. Sweet! Side profiles are now cut.

Image
User avatar
citylights
500 Club
 
Posts: 591
Images: 1
Joined: Sun May 12, 2013 12:27 pm
Location: Las Vegas, Nevada
Top

Re: Citylights' Tear

Postby aggie79 » Wed Jun 12, 2013 10:23 am

citylights wrote:Beam saw ready to go. I was amazed at how smooth and perfect an arc this cut. Sweet! Side profiles are now cut.

Image


I can't wait to see your finished profile!

This is a good technique to use and it's fairly easy. Plus, you don't have to buy the jig - you can make your own setup for your router. I built a similar jig out of t-track and scrap plywood to cut the door radius on the template I made for my sidewalls. The pivot point is just held in place with double-stick tape.

Image
Tom (& Linda)
For build info on our former Silver Beatle teardrop:
Build Thread

93503
User avatar
aggie79
Super Duper Lifetime Member
 
Posts: 5405
Images: 686
Joined: Tue Aug 07, 2007 5:42 pm
Location: Watauga, Texas
Top

Re: Citylights' Tear

Postby citylights » Wed Jun 12, 2013 8:02 pm

More progress. Side profiles complete with doors cut and imperfections sanded out. Used a frame guide to cut out the door with the router. Slow, careful, and easy. It did a great job.

Image

Image

Image
User avatar
citylights
500 Club
 
Posts: 591
Images: 1
Joined: Sun May 12, 2013 12:27 pm
Location: Las Vegas, Nevada
Top

Re: Citylights' Tear

Postby citylights » Thu Jun 13, 2013 4:40 pm

Dang, ran out of materials again. Back to the store...

Image
User avatar
citylights
500 Club
 
Posts: 591
Images: 1
Joined: Sun May 12, 2013 12:27 pm
Location: Las Vegas, Nevada
Top

Re: Citylights' Tear

Postby citylights » Sat Jun 15, 2013 4:59 pm

Dang, that is not supposed to happen. I know... Slower.

This is the inside piece, I am just pre bending it on the outside so it will be easier to install on the inside. Doing the, crank ratchet, wait one hour, crank the ratchet again, thing now. It's about 75% done and looking good. Maybe I will get there without breaking it.

Image
User avatar
citylights
500 Club
 
Posts: 591
Images: 1
Joined: Sun May 12, 2013 12:27 pm
Location: Las Vegas, Nevada
Top

Re: Citylights' Tear

Postby citylights » Mon Jun 17, 2013 10:56 pm

A little more progress, cabinets going inside. Piece by piece. I got that front headliner to bend and go in too. Had to wet down the laun and go real slow.

Image
User avatar
citylights
500 Club
 
Posts: 591
Images: 1
Joined: Sun May 12, 2013 12:27 pm
Location: Las Vegas, Nevada
Top

Re: Citylights' Tear

Postby citylights » Fri Jun 21, 2013 5:18 pm

Got some work done on the galley.

Image
User avatar
citylights
500 Club
 
Posts: 591
Images: 1
Joined: Sun May 12, 2013 12:27 pm
Location: Las Vegas, Nevada
Top

Re: Citylights' Tear

Postby citylights » Sat Jun 22, 2013 9:44 am

I stepped up on the galley ledge to work on the wiring. I guess the countertop, shelves, and cabinets that i put into the kitchen changed the balance of the trailer because when I stepped up, the tongue started levitating! Fortunately, it was a pretty close thing because I stepped down gently and the tongue didn't hit the ground too hard.

I have a few heavy things left to install in the kitchen, pull out cook top, ice chest, drawers, and the galley hatch. I am going to put an aluminum or steel tongue box on the front. The debate and balancing point will be where to locate the battery and AC unit. For the battery, Tongue box or kitchen? For the AC I have a spot over the axel (in one of the inside cabinets, with a slide out to the outside) or in the tongue box (with a punch through the front tear wall).

I guess I might have to wait until everything else is done to decide based on how it balances out.
User avatar
citylights
500 Club
 
Posts: 591
Images: 1
Joined: Sun May 12, 2013 12:27 pm
Location: Las Vegas, Nevada
Top

Re: Citylights' Tear

Postby Junkboy999 » Sat Jun 22, 2013 11:27 am

It looking good.

I like the idea of the AC being in the back. Although it take up space back there, it is at least 60” away from your head while running. The ones in the front looks ( to me ) to close to your head for a good night sleep.
User avatar
Junkboy999
1000 Club
1000 Club
 
Posts: 1259
Images: 52
Joined: Fri Jul 06, 2012 9:18 pm
Location: Wichita, KS
Top

Re: Citylights' Tear

Postby citylights » Sun Jun 23, 2013 8:56 pm

Ran all the wiring in the roof. Installed foam insulation. Some times it seems like progress is fast, sometimes it seems to take forever...

Image


Image
User avatar
citylights
500 Club
 
Posts: 591
Images: 1
Joined: Sun May 12, 2013 12:27 pm
Location: Las Vegas, Nevada
Top

Re: Citylights' Tear

Postby citylights » Wed Jun 26, 2013 10:27 pm

Well I busted the budget. It looked like costs on here were $1500 to $2000 for a tear and that included the trailer! So I already had a trailer, I figured (and promised the wife) that I could do mine for $1500 - $2000. But I now think that number was for a bare bones tear? No lights, no battery, not much kitchen?

Anyway, mine just topped $2000 and I think I need about $500 or $600 more in materials. Most of that, about $350, will be for the aluminum skin and trim. Ummm.... It will be tight, but I think I can finish with $600 more.
User avatar
citylights
500 Club
 
Posts: 591
Images: 1
Joined: Sun May 12, 2013 12:27 pm
Location: Las Vegas, Nevada
Top

PreviousNext

Return to Build Journals

Who is online

Users browsing this forum: No registered users and 31 guests