Regal Eagle Done! Video Tour 6/29/15

...ask your questions in the appropriate forums BUT document your build here...preferably in a single thread...dates for updates, are appreciated....

Re: 1st Build - Regal Eagle- Floor Framing Started

Postby Gunguy05 » Sat Apr 05, 2014 9:39 pm

We have had 3-4 things going on this week.

1 . Ordered the axle and it came in yesterday. cost about 245 + 36 shipping and it got here in 9 days from order to front door. Can't beat that with a stick :shock: 
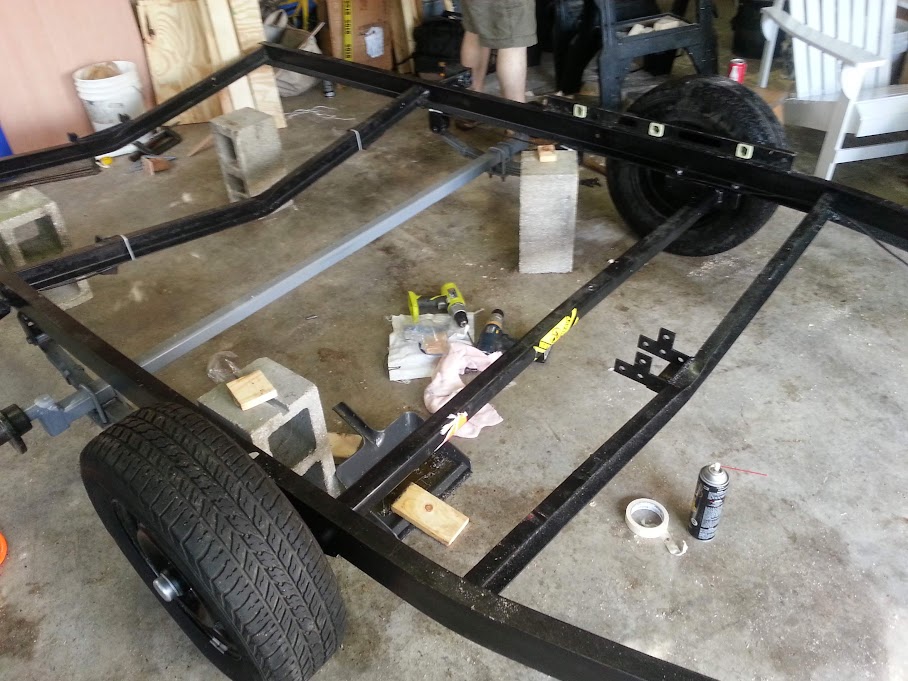
We got the holes drilled in the frame, and the axle installed this afternoon. Not that big a deal, just took a little time, the right drill bits, and a few blocks and jacks. We will cut off the back, the spring hangers and other axle this week. They are fine to take it to the welder though, a buddy who is going to take care of that for us.

I had some issue (they were mine, not others) of figuring out the axle fitting between the frame and the torsion arm. I snapped a pic before I installed it, just for future reference.

Image

2. Got the wheels in the mail from summit racing, US wheels smoothie, all chrome with a chrome baby moon hubcap. They look great and fit like a glove :) Going to hold off on the finish tires for now. The others will work fine for moving it around and such. Will probably end up buying a little bit bigger set of tires. The one on there now are 195-70-14. I think we might go with a 205, since these wheels are 14x7. There will be about 1 1/2 or so of clearance once the cab is installed.

Image

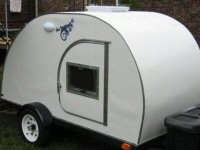
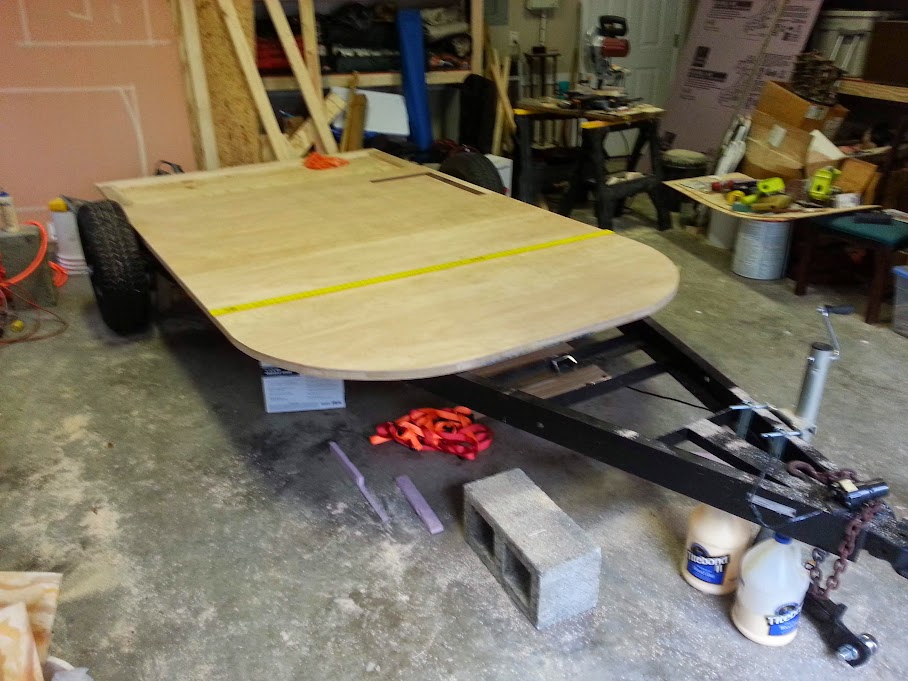
For now we have a dual axle TD in the making, but like I said, that back will be cut off.

Image

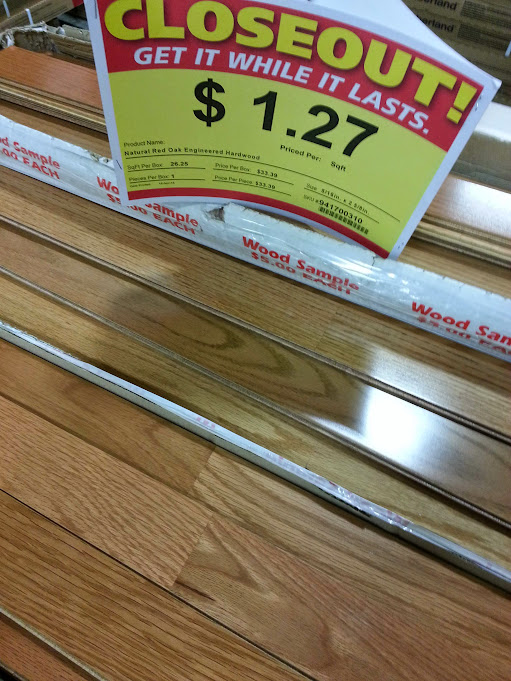
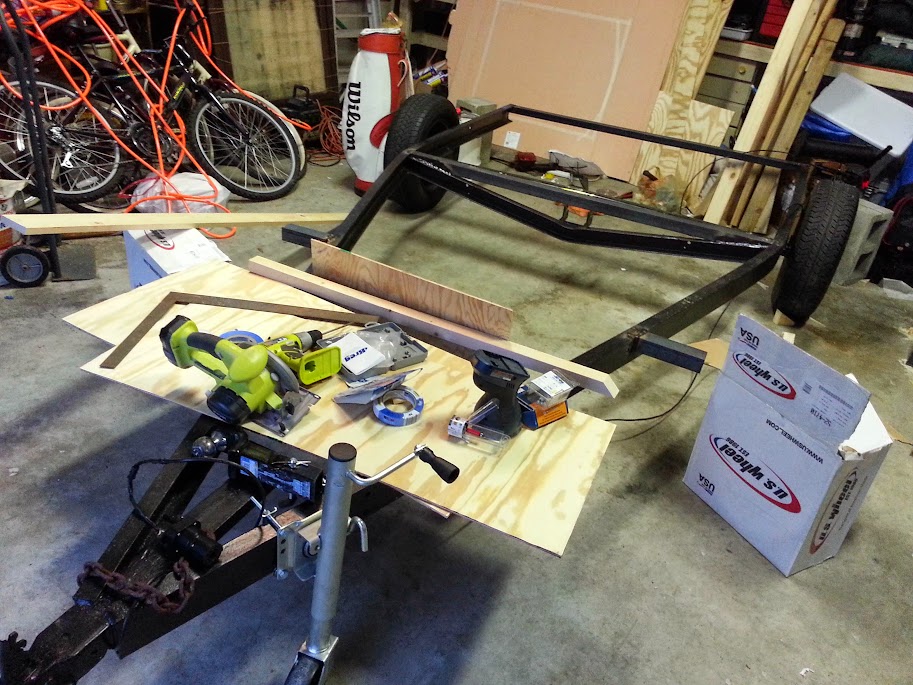
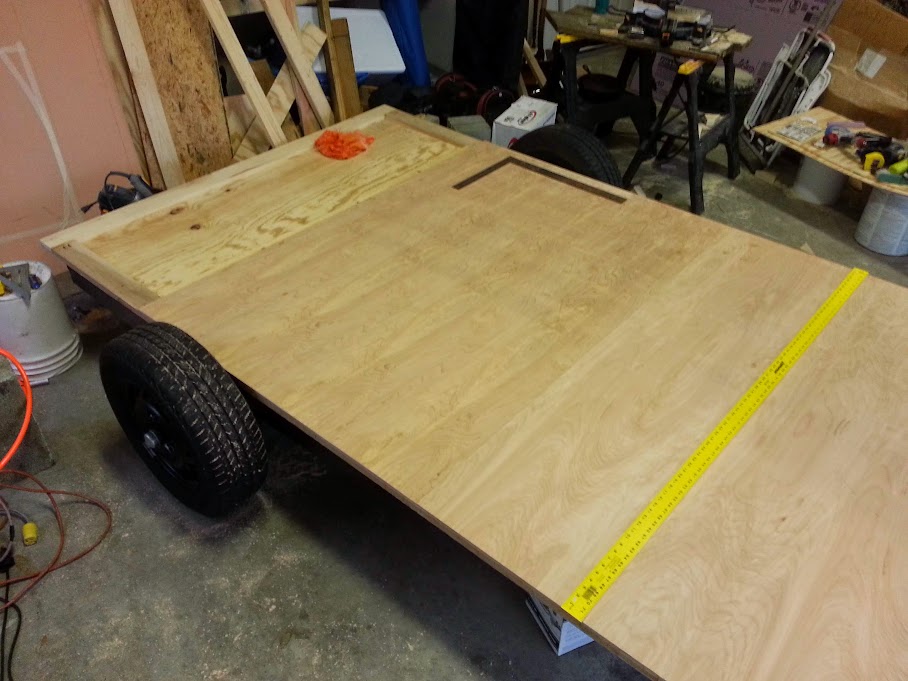
3. Got a little more of the framing on the floor done, just need to cut a couple more 1x4's, cut and glue the foam, and then route all of the overhang to meet the edge of the 1x4's and to the template for the bow in the front. Looking forward to trying out that router for the first time :?

4. Have decided that the AC is going to go in the floor in the back. Since our frame is 4" thick, we will use that space to recess the AC in the floor. Should only stick up about 5-6 inches above the floor under the counter top in the galley. Will direct vent the return into the lower cabin, and the output of cold air into a chase that will vent into the middle of the top of cabin. Sort of like what OakInteriors did http://tnttt.com/viewtopic.php?f=50&t=57906&start=15. Just need to get the distances worked out on that.

On a side note, had to put front brakes on the TV on Tues night.. then took a short camping trip wed, thur, and came back friday. Been a busy week to say the least.

Best move we have made so far is replacing the axle. Not until we put the new one on, and I jumped on it a bit did I realize how stiff the old one was. It didn't move a bit! The new one has just the right amount of spring in it.
Brian


Checkout my buildThe Regal Eagle Bow front for 4
Image
Also my teardrop updates from blog on Dad Rambles
User avatar
Gunguy05
The 300 Club
 
Posts: 385
Images: 6
Joined: Mon Dec 02, 2013 4:45 pm
Location: South GA

Re: 1st Build - Regal Eagle- Floor Framing Started

Postby Gunguy05 » Tue Apr 15, 2014 8:36 pm

I don't have any photos for the night, I forgot to snap any of the finished work before I left, but:

THE FRAME IS DONE!

It seems like this has been hanging over us for a while now, just trying to get it chopped and fixed the way we wanted it. I finally got my welding buddy to come over and we now have the frame just the size that it needs to be with all of the additional supports added where they needed to be.

Next thing is to get the floor frame finished and evertyhing foamed and glued up. Hopefully this weekend we can get some or all of that finished. We will see, Sat is packed with a family reunion, but maybe Sunday afternoon, we will see.
Brian


Checkout my buildThe Regal Eagle Bow front for 4
Image
Also my teardrop updates from blog on Dad Rambles
User avatar
Gunguy05
The 300 Club
 
Posts: 385
Images: 6
Joined: Mon Dec 02, 2013 4:45 pm
Location: South GA

Re: 1st Build - Regal Eagle- Floor Framing Started

Postby aggie79 » Thu Apr 17, 2014 2:17 pm

Bryan,

It's gotta be a good feeling to have the frame construction done.

I can't wait to see more sawdust flying! I've always admired the Raindrop style design.

Take care,
Tom
Tom (& Linda)
For build info on our former Silver Beatle teardrop:
Build Thread

93503
User avatar
aggie79
Super Duper Lifetime Member
 
Posts: 5405
Images: 686
Joined: Tue Aug 07, 2007 5:42 pm
Location: Watauga, Texas
Top

Re: 1st Build - Regal Eagle- Floor Framing Started

Postby Gunguy05 » Sat Apr 19, 2014 9:24 pm

Had to drive about an hour away today for wife's family reunion. Ahhhhh... about 15 minute from the place where I was scoping out to buy the 5/16" flooring for the interior walls. Managed to break away for a few and get over there. The price was too good to pass up, able to do all of the inside side walls for just over a hundred bucks. Also, this is the last thing that we will need for a while that we have the drive a ways for, so it was worth buying it now. My thought is to go ahead and stock up on the materials needed for the walls, and hopefully that will push us to get them done.

Image

Gonna try and get a little more done on the floor tomorrow afternoon if possible, but that is all for now.
Brian


Checkout my buildThe Regal Eagle Bow front for 4
Image
Also my teardrop updates from blog on Dad Rambles
User avatar
Gunguy05
The 300 Club
 
Posts: 385
Images: 6
Joined: Mon Dec 02, 2013 4:45 pm
Location: South GA
Top

Re: 1st Build - Regal Eagle- Floor Framing Started

Postby Gunguy05 » Sun Apr 20, 2014 9:04 pm

We got a little bit more done on the floor tonight, just inching along at this point it seems like. Nothing is getting finished, but we are making progress.

Image

Still have to add 1 more section of foam to the floor, but we have to figure out the placement of the A/C first. Not sure if we are still doing floor or not. I want to make it work so that we can vent it down rather than into the galley, but it will depend on if we can make the ducting work like I want it to.

Next steps are to flip it over (after the glue dries, which is why we stopped tonight) route off the edges, the front edge to the template, and the attach to top skin to the floor. Should be able to get some or most of that does Tuesday night, as I have a little time then. Otherwise, I am on a trip next weekend, and there won't be much done until the first weekend in May..
Brian


Checkout my buildThe Regal Eagle Bow front for 4
Image
Also my teardrop updates from blog on Dad Rambles
User avatar
Gunguy05
The 300 Club
 
Posts: 385
Images: 6
Joined: Mon Dec 02, 2013 4:45 pm
Location: South GA
Top

Re: 1st Build - Regal Eagle- Floor Framing Started

Postby RandyG » Sun Apr 20, 2014 10:10 pm

Take a look at Planovet's Little swiss teardrop for a good ac install that vents through the floor.
Randy
Aircraft fabricator, novice carpenter, electrical apprentice, audio engineer dropout.
Build thread - http://www.tnttt.com/viewtopic.php?f=50&t=54126
User avatar
RandyG
500 Club
 
Posts: 695
Images: 115
Joined: Thu May 10, 2012 6:52 pm
Top

Re: 1st Build - Regal Eagle- Floor Framing Started

Postby Gunguy05 » Sun Apr 20, 2014 10:23 pm

RandyG wrote:Take a look at Planovet's Little swiss teardrop for a good ac install that vents through the floor.


That is sort of the one that got me to thinking about it. I would like to recess mine a little more in the floor, and am not sure if I want to direct vent it or not. I was thinking about a vent something line this http://www.tnttt.com/viewtopic.php?f=50&t=57906&start=15 . My ideea is to have it under my water bottle in the back, so that that space under the counter serves double duty. AC underneath, vented to cabin, with water bottle on top. Should have enough room, an only have 2-3 inches of it under the frame.

I think once we get the front of the floor done, we are going to put it on the frame, get the AC and work it out that way, the finish the cutout for it in the back. I can draw things all day, but I have a tough time seeing them until they are actually in place.

Thanks,
Brian


Checkout my buildThe Regal Eagle Bow front for 4
Image
Also my teardrop updates from blog on Dad Rambles
User avatar
Gunguy05
The 300 Club
 
Posts: 385
Images: 6
Joined: Mon Dec 02, 2013 4:45 pm
Location: South GA
Top

Re: 1st Build - Regal Eagle- Floor Framing Started

Postby RandyG » Mon Apr 21, 2014 8:28 am

Yeah, I hear ya, I can draw it but then to put it together and see the type of cuts and joints to make kinda takes trial and error. I may move my ac to the bow front, the more I look at all that space, the more I think it will be wasted space.
Randy
Aircraft fabricator, novice carpenter, electrical apprentice, audio engineer dropout.
Build thread - http://www.tnttt.com/viewtopic.php?f=50&t=54126
User avatar
RandyG
500 Club
 
Posts: 695
Images: 115
Joined: Thu May 10, 2012 6:52 pm
Top

Re: 1st Build - Regal Eagle- Floor Framing ALMOST DONE

Postby Gunguy05 » Thu Apr 24, 2014 8:42 am

We got the frame cut down finally. Have everything in place now to get the floor put on.

Not a great photo, but you get the idea. Also, it's not as long as it looks in this photo.
Image

We added some foam to the floor, got it all filled in, except for the back. We still need to figure out the exact placment for the A/C (that is the next goal)

Image

Image

Then we put the template that we made for the bow front back on. Now it's time to route the 1x4 to the shape of the front.

https://lh5.googleusercontent.com/-CqR-I_8QfvY/U1bjm_VjRxI/AAAAAAAAIzw/1cIebtT4fjc/w514-h685-no/20140422_174019.jpg

Image

First time I had ever used a router. Turned out pretty well. Key was to use the jig saw first and to cut it down so that, at least in teh 1x4 areas, that you don't cut more than the width of the router bit. In our case that was a 1/2 bit. Also, we marked the center lines of all of the cross members and took photos, that way we would know where everything is inside the floor once it's sealed up.

Image

After we finished this step, we glued the top layer of 1/4 birch across the front two sections and it has been drying now for a couple days. No time this weekend to work on the camper, but maybe next week we can work out the AC location and finish that flooring section in the galley.

Edit: also, we weighed the trailer on each tire and the tongue jack. It came in right about 400 lbs. Not too bad I don't think, considering the size of it.
Last edited by Gunguy05 on Tue Apr 29, 2014 1:29 pm, edited 1 time in total.
Brian


Checkout my buildThe Regal Eagle Bow front for 4
Image
Also my teardrop updates from blog on Dad Rambles
User avatar
Gunguy05
The 300 Club
 
Posts: 385
Images: 6
Joined: Mon Dec 02, 2013 4:45 pm
Location: South GA
Top

Re: 1st Build - Regal Eagle- Floor Framing Started

Postby KCStudly » Fri Apr 25, 2014 6:38 am

That's a good milestone. You should be pretty pleased with your progress! :thumbsup:
KC
My Build: The Poet Creek Express Hybrid Foamie

Poet Creek Or Bust
Engineering the TLAR way - "That Looks About Right"
TnTTT ORIGINAL 200A LANTERN CLUB = "The 200A Gang"
Green Lantern Corpsmen
User avatar
KCStudly
Donating Member
 
Posts: 9612
Images: 8169
Joined: Mon Feb 06, 2012 10:18 pm
Location: Southeastern CT, USA
Top

Re: 1st Build - Regal Eagle- Floor Framing Started

Postby Gunguy05 » Tue Apr 29, 2014 8:17 pm

Not much progress, but a little, and hey any progress is progress. It all adds up.

Had a few minutes tonight so, since the floor was dry we routed the front edge off on the top side of the 1/4 plywood. The set it on the frame...

Ahhhhhhh! That felt good. Something that I could actually stand on! :D :D :) :) :shock: :shock:

The kids were excited.
Image


Image


All of my fears about it being flimsy or bouncy were gone! :shock: I had numerous people tell me that 1/4 top and bottom with 3/4 in the middle and foam would be plenty solid, but... I wasn't too sure until I stood on it and bounced up and down a couple of times.. AHHHHH.. It all WORKS!

Next step is to get the AC worked out. Still trying to decide on that. Once we have that figured out, it will be closing the back up and then on to touch up a little paint on the frame from where we had it chopped.

Image
Brian


Checkout my buildThe Regal Eagle Bow front for 4
Image
Also my teardrop updates from blog on Dad Rambles
User avatar
Gunguy05
The 300 Club
 
Posts: 385
Images: 6
Joined: Mon Dec 02, 2013 4:45 pm
Location: South GA
Top

Re: 1st Build - Regal Eagle- Floor Framing Started

Postby Junkboy999 » Tue Apr 29, 2014 11:57 pm

Brian

It is starting to come together. I belive this makes 4 rounded nose teardrops in work now. You guy might need your own section.

Plz keep ua posted.
User avatar
Junkboy999
1000 Club
1000 Club
 
Posts: 1259
Images: 52
Joined: Fri Jul 06, 2012 9:18 pm
Location: Wichita, KS
Top

1st Build - Regal Eagle- Floor Framing Started

Postby aggie79 » Wed Apr 30, 2014 6:07 am

Brian,

Fantastic job on the floor! I know that must be a good feeling to complete that milestone.

Taking photos of your progress is helpful as well as marking concealed framing. You'll probably need to rely on one or both later on in your build.

Take care,
Tom
Tom (& Linda)
For build info on our former Silver Beatle teardrop:
Build Thread

93503
User avatar
aggie79
Super Duper Lifetime Member
 
Posts: 5405
Images: 686
Joined: Tue Aug 07, 2007 5:42 pm
Location: Watauga, Texas
Top

Re: 1st Build - Regal Eagle- Floor Framing Started

Postby RandyG » Wed Apr 30, 2014 2:42 pm

Junkboy999 wrote:Brian

It is starting to come together. I belive this makes 4 rounded nose teardrops in work now. You guy might need your own section.

Plz keep ua posted.

I may have seen one more started! Getting popular I guess. Maybe we need to come up with a universal name for them. I'd hate to use raindrop and run into any type of legal rights issues.
Ryu, it looks great so far. Don't forget to get a template of that front edge before you start adding anything else, makes it so much easier.
Randy
Aircraft fabricator, novice carpenter, electrical apprentice, audio engineer dropout.
Build thread - http://www.tnttt.com/viewtopic.php?f=50&t=54126
User avatar
RandyG
500 Club
 
Posts: 695
Images: 115
Joined: Thu May 10, 2012 6:52 pm
Top

Re: 1st Build - Regal Eagle- Floor Framing Started

Postby Gunguy05 » Wed Apr 30, 2014 8:15 pm

aggie79 wrote:Brian,

Fantastic job on the floor! I know that must be a good feeling to complete that milestone.

Taking photos of your progress is helpful as well as marking concealed framing. You'll probably need to rely on one or both later on in your build.

Take care,
Tom


Thanks Tom, It does feel good...... every time I would add something to the floor (foam, more ply, glue, screws), I would become more confident in the stability of it. Once we trimmed it and put on on the frame I jumped up and down on it a bit. The only give in it was the fantastic torsion axle. I'm glad to finally be able to look at the finished footprint too. Give me an idea of exactly how HUGE this thing is going to be inside, but that's a good thing. My son laid down in the front area and there is plenty of room for growth.

Junkboy999 wrote:Brian

It is starting to come together. I belive this makes 4 rounded nose teardrops in work now. You guy might need your own section.

Plz keep ua posted.


I think this is. When i was looking for larger designs, as soon as I saw the Raindrop I said "that's it!". The use of space just makes sense with the bunks in the front. Thanks!

RandyG wrote:
Junkboy999 wrote:Brian

It is starting to come together. I believe this makes 4 rounded nose teardrops in work now. You guy might need your own section.

Plz keep ua posted.

I may have seen one more started! Getting popular I guess. Maybe we need to come up with a universal name for them. I'd hate to use raindrop and run into any type of legal rights issues.
Ryu, it looks great so far. Don't forget to get a template of that front edge before you start adding anything else, makes it so much easier.


Randy,

I have the template, we used it to route out all of the front edge of the floor.
Image
The plan is to use it to make the bed pieces, and the top, as well as the middle bow support ledge. I think we are going to put a ledge rib around the front (like the RD). Seems to make structural sense to hold it all together, as well as serve to support the top bunk.

Thanks,
Brian
Brian


Checkout my buildThe Regal Eagle Bow front for 4
Image
Also my teardrop updates from blog on Dad Rambles
User avatar
Gunguy05
The 300 Club
 
Posts: 385
Images: 6
Joined: Mon Dec 02, 2013 4:45 pm
Location: South GA
Top

PreviousNext

Return to Build Journals

Who is online

Users browsing this forum: No registered users and 32 guests