Sleepin Around, New Zealand. The Build

...ask your questions in the appropriate forums BUT document your build here...preferably in a single thread...dates for updates, are appreciated....

Re: Sleepin Around, New Zealand. The Build

Postby KCStudly » Sat Jan 31, 2015 6:32 pm

Looks very nice. :thumbsup:

Are you using riv-nuts or tapping directly into the wall of your frame tubing? If the later, any concern about the limited number of threads you will have in the relatively thin wall of the tubing?

I used the riv-nuts to mount the fenders and nerf bars on my flat deck tandem and was really happy with them. The only thing is they space whatever you are bolting out just a tad due to the flange on the insert.
KC
My Build: The Poet Creek Express Hybrid Foamie

Poet Creek Or Bust
Engineering the TLAR way - "That Looks About Right"
TnTTT ORIGINAL 200A LANTERN CLUB = "The 200A Gang"
Green Lantern Corpsmen
User avatar
KCStudly
Donating Member
 
Posts: 9613
Images: 8169
Joined: Mon Feb 06, 2012 10:18 pm
Location: Southeastern CT, USA

Re: Sleepin Around, New Zealand. The Build

Postby Sheddie » Sat Jan 31, 2015 6:35 pm

dales133 wrote:Looks good brian

Thank you Morris. :o
User avatar
Sheddie
1000 Club
1000 Club
 
Posts: 1499
Images: 1129
Joined: Mon Jul 01, 2013 3:26 pm
Location: Whangarei, New Zealand

Re: Sleepin Around, New Zealand. The Build

Postby Sheddie » Sat Jan 31, 2015 6:48 pm

KCStudly wrote:Looks very nice. :thumbsup:

Are you usinwill probably take the belts and braces approach and add some horng riv-nuts or tapping directly into the wall of your frame tubing? If the later, any concern about the limited number of threads you will have in the relatively thin wall of the tubing?

I used the riv-nuts to mount the fenders and nerf bars on my flat deck tandem and was really happy with them. The only thing is they space whatever you are bolting out just a tad due to the flange on the insert.


I haven't got riv-nuts, so going will the latter. Yes it has been concerning me so I will probably take the belt and braces approach and add some horizontal bolts as well.
User avatar
Sheddie
1000 Club
1000 Club
 
Posts: 1499
Images: 1129
Joined: Mon Jul 01, 2013 3:26 pm
Location: Whangarei, New Zealand
Top

Re: Sleepin Around, New Zealand. The Build

Postby dales133 » Sat Jan 31, 2015 7:11 pm

I used rivnut to mount my gaurds and when disassembling it the other day they failed when the weight was held by only one.
I've got a tool for installing them and it's great for pannel steel but the 3mm wall of the trailer frame didn't give it enough purchase.
So I drilled the holes out larger and hammered flange nuts in the welded and flap sanded them back.
Worked a treat
User avatar
dales133
4000 Club
4000 Club
 
Posts: 4605
Images: 1
Joined: Mon Oct 13, 2014 5:26 pm
Top

Re: Sleepin Around, New Zealand. The Build

Postby KCStudly » Sat Jan 31, 2015 7:20 pm

I would have no concern hanging it the way you have using the nut rivets. They are not that expensive and can usually be installed without the special tool by using a bolt with a washer and nut installed ahead of the insert: spin the nut on the bolt; add the washer; spin the insert on; slip the insert in the drilled hole; hold the bolt with a wrench and drive the nut with a second wrench to pull the bolt thus setting the insert. I had no trouble driving 3/8-16 steel inserts this way. My guess is you are using M6 or 8 bolts(?).

These guys are in Wellington, I'm sure there must be a supplier near you.
KC
My Build: The Poet Creek Express Hybrid Foamie

Poet Creek Or Bust
Engineering the TLAR way - "That Looks About Right"
TnTTT ORIGINAL 200A LANTERN CLUB = "The 200A Gang"
Green Lantern Corpsmen
User avatar
KCStudly
Donating Member
 
Posts: 9613
Images: 8169
Joined: Mon Feb 06, 2012 10:18 pm
Location: Southeastern CT, USA
Top

Re: Sleepin Around, New Zealand. The Build

Postby Sheddie » Sat Jan 31, 2015 9:18 pm

Time for the next :coffee: actually late lunch.
Thanks for the input guys, it is always good to get different points of view. :thinking:
I am going ahead with the belts, braces option. One reason is that I really want to get this finished off today, as we are going away on Thursday for the weekend. :vroom:
Also I have all the materials I need here in the shed, so wont need to go hunting around town.
User avatar
Sheddie
1000 Club
1000 Club
 
Posts: 1499
Images: 1129
Joined: Mon Jul 01, 2013 3:26 pm
Location: Whangarei, New Zealand
Top

Re: Sleepin Around, New Zealand. The Build

Postby Vedette » Sat Jan 31, 2015 9:35 pm

I agree with weld in nuts for something that heavy!
Frank it looks like you have this under control! :thumbsup:
Sometimes it takes longer to get the right advice than it does to just get at it and make it.
Good Roads
Brian & Sandi
Good Roads
Brian & Sandi
Here is a link to my Build Journal
viewtopic.php?f=50&t=50912
Image109106109111109110138766
User avatar
Vedette
Silver Donating Member
 
Posts: 5141
Images: 443
Joined: Thu Dec 01, 2011 4:28 am
Location: Westbank B.C.
Top

Re: Sleepin Around, New Zealand. The Build

Postby KCStudly » Sat Jan 31, 2015 9:58 pm

Well Sheddie has made his choice for good reasons, so I won't belabor the issue, except to add that you have to use the correct grip size insert for the application. The ones I used were specific to the 3/16 wall tubing I was going into (they have different ranges), and were a reasonably large size fastener, so were perhaps more robust than the ones Dale used. Weld in would be better, I agree, but overhead welding is not for everyone. Pays yer money, takes yer choice.

Sheddie, I'm sure you will get it done in time and to your satisfaction so that you can have a safe and wonderful trip. I'm looking forward to many more of your great trip reports! :thumbsup: Your fab skills are good, so maybe just add a couple of hearty tack welds between your mounting bracket and frame. That would be fast and they could be cut out easily later if something should change. Either way, it's a good project and I like they way your swing arm came out with the formed tubing. Nice! :thumbsup:
KC
My Build: The Poet Creek Express Hybrid Foamie

Poet Creek Or Bust
Engineering the TLAR way - "That Looks About Right"
TnTTT ORIGINAL 200A LANTERN CLUB = "The 200A Gang"
Green Lantern Corpsmen
User avatar
KCStudly
Donating Member
 
Posts: 9613
Images: 8169
Joined: Mon Feb 06, 2012 10:18 pm
Location: Southeastern CT, USA
Top

Re: Sleepin Around, New Zealand. The Build

Postby Sheddie » Sun Feb 01, 2015 1:17 am

Thanks again guys for your support. :applause: The riv-nut idea would have been good, but not having any to hand would have meant a trip into town to get some and I doubt that there would have been anyone open today that would have had what I needed. And having to fit five days of work into 3 days I wont have much time through the week. We are heading off on Thursday morning, and I have just seen the weather for cast for the week and Friday is looking like crap :EXP :rainy:
Anyway its coffee time again :coffee: this time will a dash of Baileys in it to celebrate :D
It is all done and I am very pleased with the way it came out. :ok: You're not wrong about welding underneath the frame it is bad enough just getting up and down under that thing now that the ground is much lower than it used to be. :shock:
So here are the results.
I have got 200 mm (8 ins) ground clearance and it sits well above the exit angle between the bottom of the wheel and the rear of the frame. The wheel weighs about 9kg and there is not much weight in the rest of it,
2015-02-01 17.52.32 (640x360).jpg
2015-02-01 17.52.32 (640x360).jpg (105.57 KiB) Viewed 2513 times

2015-02-01 17.53.59 (640x360).jpg
2015-02-01 17.53.59 (640x360).jpg (118.8 KiB) Viewed 2513 times

2015-02-01 17.55.29 (640x360).jpg
2015-02-01 17.55.29 (640x360).jpg (117.35 KiB) Viewed 2513 times

With 8 bolts in that bar it should be as solid as a brick :poop:
User avatar
Sheddie
1000 Club
1000 Club
 
Posts: 1499
Images: 1129
Joined: Mon Jul 01, 2013 3:26 pm
Location: Whangarei, New Zealand
Top

Re: Sleepin Around, New Zealand. The Build

Postby KCStudly » Sun Feb 01, 2015 1:38 am

Nice job. Looks like a really clean install. :thumbsup:
KC
My Build: The Poet Creek Express Hybrid Foamie

Poet Creek Or Bust
Engineering the TLAR way - "That Looks About Right"
TnTTT ORIGINAL 200A LANTERN CLUB = "The 200A Gang"
Green Lantern Corpsmen
User avatar
KCStudly
Donating Member
 
Posts: 9613
Images: 8169
Joined: Mon Feb 06, 2012 10:18 pm
Location: Southeastern CT, USA
Top

Re: Sleepin Around, New Zealand. The Build

Postby dales133 » Sun Feb 01, 2015 2:53 am

Tidy job Frank aka brian .
Looks like it's factory... so to speak.
User avatar
dales133
4000 Club
4000 Club
 
Posts: 4605
Images: 1
Joined: Mon Oct 13, 2014 5:26 pm
Top

Re: Sleepin Around, New Zealand. The Build

Postby Sheddie » Sun Feb 01, 2015 3:41 am

:beer: :beer:
User avatar
Sheddie
1000 Club
1000 Club
 
Posts: 1499
Images: 1129
Joined: Mon Jul 01, 2013 3:26 pm
Location: Whangarei, New Zealand
Top

Re: Sleepin Around, New Zealand. The Build

Postby Bantam » Tue Feb 03, 2015 4:44 am

Hi Frank,
Just sent you an email at xtra but got bounced back. Whats your new one.
Cheers
Jeff
Bantam
Teardrop Advisor
 
Posts: 51
Images: 6
Joined: Tue Feb 11, 2014 6:42 pm
Location: Auckland, New Zealand
Top

Re: Sleepin Around, New Zealand. The Build

Postby Sheddie » Tue Feb 03, 2015 4:54 am

Hi Jeff,
Same as before but now with vodafone.
User avatar
Sheddie
1000 Club
1000 Club
 
Posts: 1499
Images: 1129
Joined: Mon Jul 01, 2013 3:26 pm
Location: Whangarei, New Zealand
Top

Re: Sleepin Around, New Zealand. The Build

Postby Sheddie » Sat Mar 21, 2015 9:16 pm

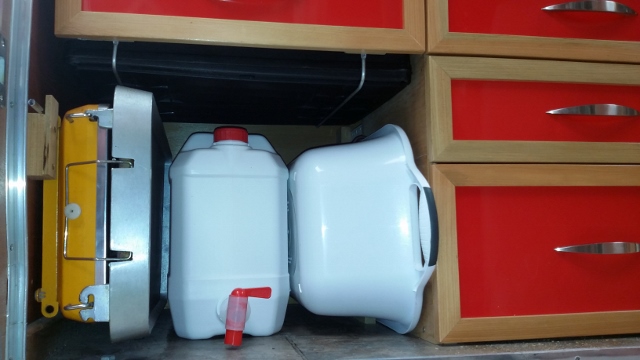
We are having a bit of a re-hash in the galley. It started with wanting to change our water container to something a little better than the transparent 10 litre disposable supermarket bottled water type with the funny little squeeze valve.
Image
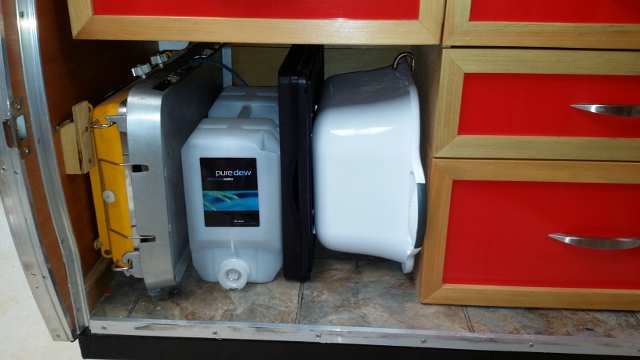
Bar-B-Q, water container, folding crate, wash basin.
On our way through Auckland recently, with the TD, we called in on a plastics manufacturer to look at what options they had, and bought a more substantial 10 litre container with a proper tap on it. The tap has an air bleed vent built in to it, so you can keep the lid on top shut tight.
Image
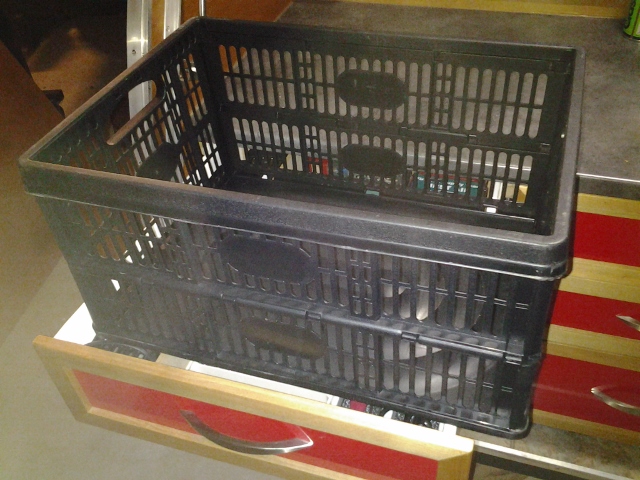
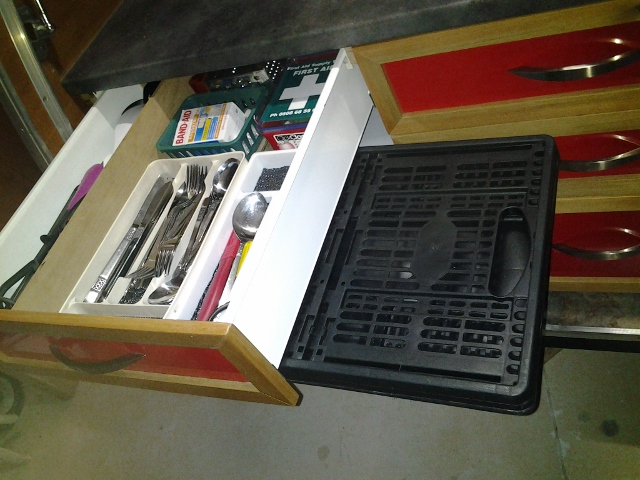
The container was a bit wider than the old one, which meant finding another place to stow our folding crate.
Image
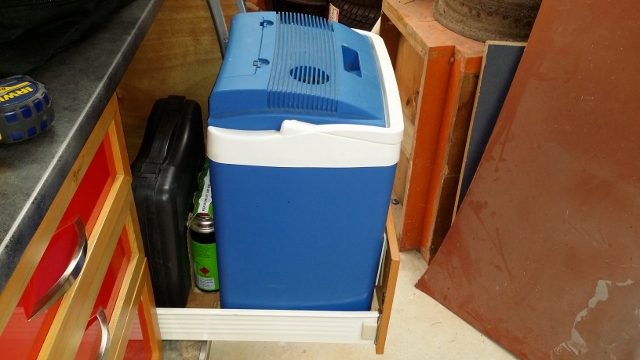
There is space in the drawer behind the chiller with the portable cooker and gas canisters but that would make things a bit awkward to get in and out.
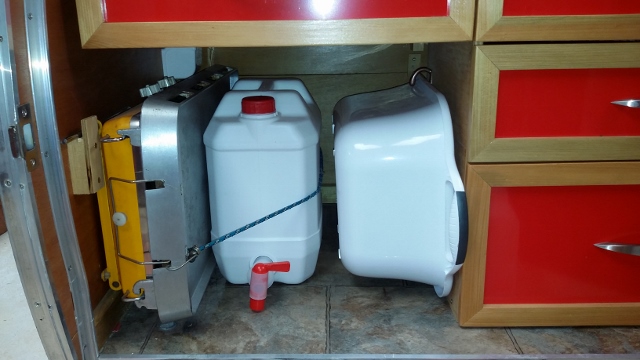
Then I saw I had space to hang it under the drawer above the water container.
Image
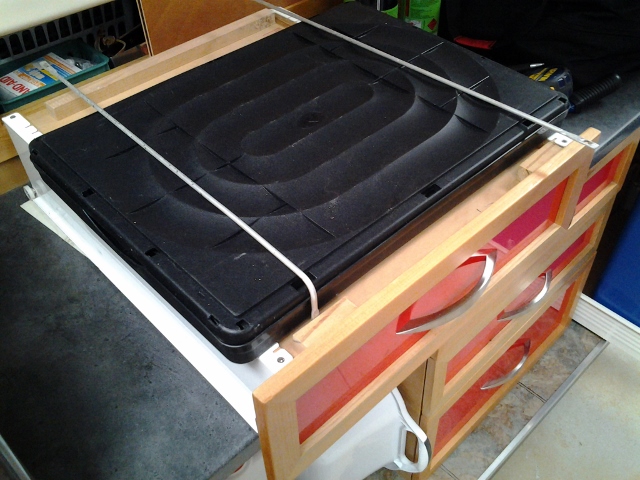
Next issue, how to stow it there. A timber frame was going to be too bulky, so I went looking amongst the scrap metals in the corner of the shed and spotted some 3mm alloy rod (parts of an old tv aerial).
Image
Image
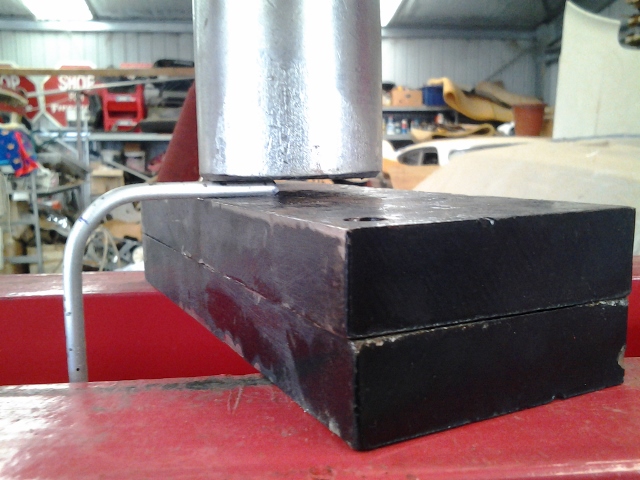
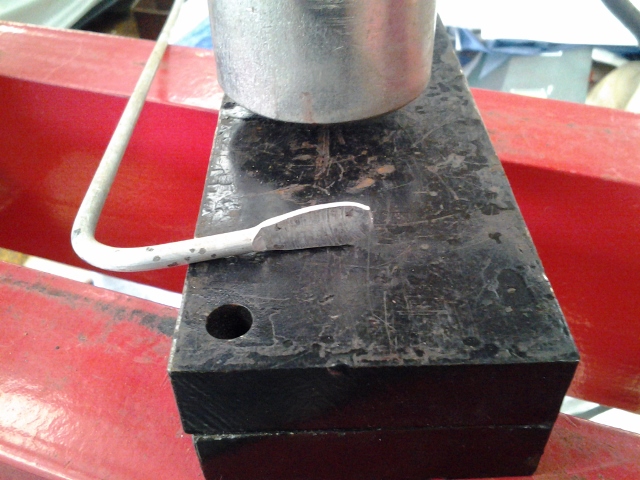
Thanks to a 20 tonne press I flattened the ends to take screw holes,
Image
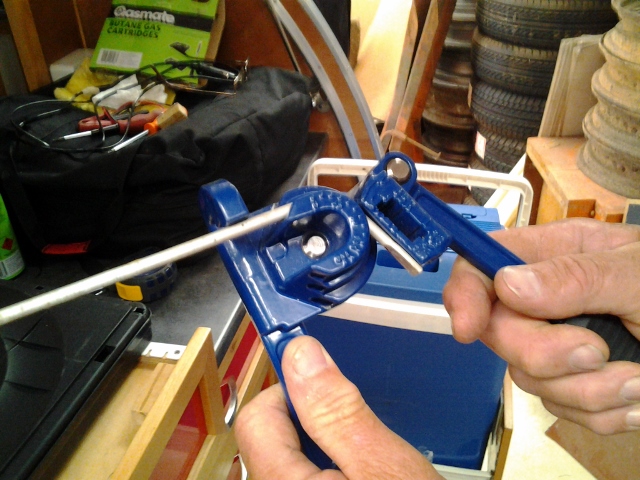
and bent it to shape with a tube bender and screwed it in,
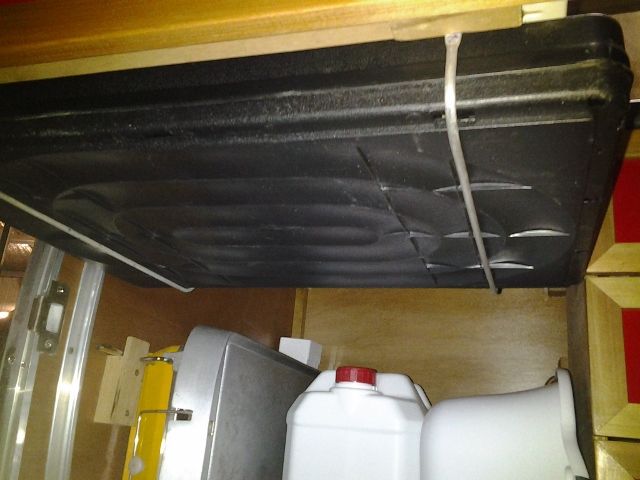
Image
Image
Image
Image
perfect. :EXP
So now that I am thinking about it, I am going to re organise the chiller drawer.
User avatar
Sheddie
1000 Club
1000 Club
 
Posts: 1499
Images: 1129
Joined: Mon Jul 01, 2013 3:26 pm
Location: Whangarei, New Zealand
Top

PreviousNext

Return to Build Journals

Who is online

Users browsing this forum: No registered users and 23 guests