Lifting roof XPStream - Almost Finished!

...ask your questions in the appropriate forums BUT document your build here...preferably in a single thread...dates for updates, are appreciated....

Re: Foldable foamie transformer with amenities

Postby Bluebunny » Tue Apr 21, 2015 8:59 am

OP827 wrote:Thanks Bluebunny. Looks like I am on a right track with my trailer overall profile. Are you saying that in order for the flow to be attached to the trailer roof, I will have to gradually raise the roof above TV height? I am not sure I understand where is a sharp edge downslope at the front of my trailer in particular if the vertical front wall will start at same or slightly lower height than TV.

I'm just not sure what the behavior of the airflow will be as a result of the sharp leading edge. I would expect some buffeting to occur that may intermittently stall the flow and screw up economy (but I guess). I'd suggest you go ahead and not worry too much about it, but you might consider a sturdy mounting point for a thin canard to study its effect. Pay attention to some of those armored cars that run around town. Some of them have a canard mounted above the sharp leading edge. I can make you a not-beautiful sketch of one if you need help with the concept.
off topic Stitch-and-Glue ply kayak build... https://www.facebook.com/media/set/?set ... 254&type=3
Bluebunny
Teardrop Master
 
Posts: 101
Images: 44
Joined: Fri Jan 30, 2015 4:21 pm
Location: northern illinois

Re: Foldable foamie transformer with amenities

Postby OP827 » Tue Apr 21, 2015 11:53 am

Bluebunny wrote:
OP827 wrote:Thanks Bluebunny. Looks like I am on a right track with my trailer overall profile. Are you saying that in order for the flow to be attached to the trailer roof, I will have to gradually raise the roof above TV height? I am not sure I understand where is a sharp edge downslope at the front of my trailer in particular if the vertical front wall will start at same or slightly lower height than TV.

I'm just not sure what the behavior of the airflow will be as a result of the sharp leading edge. I would expect some buffeting to occur that may intermittently stall the flow and screw up economy (but I guess). I'd suggest you go ahead and not worry too much about it, but you might consider a sturdy mounting point for a thin canard to study its effect. Pay attention to some of those armored cars that run around town. Some of them have a canard mounted above the sharp leading edge. I can make you a not-beautiful sketch of one if you need help with the concept.


If that's the point you mean, I am not concerned that it is an issue. It is located close behind TV and should not change much. In fact sharper could be better in this case. If you could sketch the canard you noted above, that would help to undderstand the idea. Thanks!

Image
User avatar
OP827
Donating Member
 
Posts: 1556
Images: 405
Joined: Fri Apr 25, 2014 7:27 pm
Location: Bruce County Ontario

Re: Foldable foamie transformer with amenities

Postby Bluebunny » Tue Apr 21, 2015 4:11 pm

OP827 wrote:
Bluebunny wrote:I'm just not sure what the behavior of the airflow will be as a result of the sharp leading edge. I would expect some buffeting to occur that may intermittently stall the flow and screw up economy (but I guess). I'd suggest you go ahead and not worry too much about it, but you might consider a sturdy mounting point for a thin canard to study its effect. Pay attention to some of those armored cars that run around town. Some of them have a canard mounted above the sharp leading edge. I can make you a not-beautiful sketch of one if you need help with the concept.


If that's the point you mean, I am not concerned that it is an issue. It is located close behind TV and should not change much. In fact sharper could be better in this case. If you could sketch the canard you noted above, that would help to understand the idea. Thanks!


OK. I snooped through your album to get an idea of where you are going...this is a nice shot showing that the box rather close to the hitch point, with some lovely trimmed corners for maneuvering and aero.
130897
Therefore, your box is quite close in the tow shadow; this is very good for aero. Second, your new roof line now has some upslope at the front, which I believe is helpful...In conclusion I have nothing helpful to add to what you are already doing! Great form design! :applause:

For the record I have included the canard device I was earlier referring to. Adding a canard adds drag, but sometimes can reduce drag overall if the base form causes stalling or buffeting. Your form however looks very good!
130899130898130896
off topic Stitch-and-Glue ply kayak build... https://www.facebook.com/media/set/?set ... 254&type=3
Bluebunny
Teardrop Master
 
Posts: 101
Images: 44
Joined: Fri Jan 30, 2015 4:21 pm
Location: northern illinois
Top

Re: Foldable foamie transformer with amenities

Postby OP827 » Tue Apr 21, 2015 5:08 pm

Thanks BB, appreciate that :thumbsup:
User avatar
OP827
Donating Member
 
Posts: 1556
Images: 405
Joined: Fri Apr 25, 2014 7:27 pm
Location: Bruce County Ontario
Top

Re: Foldable foamie transformer with amenities

Postby OP827 » Mon Apr 27, 2015 1:54 pm

KCStudly wrote:..
Not sure if the stripper foamie has been done yet, but it certainly was discussed. No reason it can't work.
...


Once I start looking into the foam strip planking building method, I found a few links. While this method maybe new to trailer build, it is not [completely] new to a boat building:
http://www.farriermarine.com/pdf/Foamstr.pdf
http://www.westsystem.com/ss/assets/Uploads/Foam-Strip-Plank.pdf
User avatar
OP827
Donating Member
 
Posts: 1556
Images: 405
Joined: Fri Apr 25, 2014 7:27 pm
Location: Bruce County Ontario
Top

Re: Foldable foamie transformer with amenities

Postby OP827 » Mon Apr 27, 2015 9:06 pm

Sloooow progress due to stepping back, thinking about how to shape, clamp, glueup, and make it work.

Front wall panel is clamped and glued to match front curve floor and I am happy with the curved length and kerfing, it is where it should be 8) .

Image

Image

Image
User avatar
OP827
Donating Member
 
Posts: 1556
Images: 405
Joined: Fri Apr 25, 2014 7:27 pm
Location: Bruce County Ontario
Top

Re: Foldable foamie transformer with amenities

Postby Bluebunny » Mon Apr 27, 2015 10:13 pm

OP827 wrote:
KCStudly wrote:..
Not sure if the stripper foamie has been done yet, but it certainly was discussed. No reason it can't work.
...


Once I start looking into the foam strip planking building method, I found a few links. While this method maybe new to trailer build, it is not [completely] new to a boat building:
http://www.farriermarine.com/pdf/Foamstr.pdf
http://www.westsystem.com/ss/assets/Uploads/Foam-Strip-Plank.pdf


Boldly lead on! :pictures: With no one for you to learn from but your own trials, we'll allow you false paths and mistakes and try to encourage you on!

The methods of "strip planking" in the links seem to more resemble "cold-molding", in that the thickness of the strip is much less than the width of the strip.

Consider this cold-molding technique if the 2" thick-and-narrow strip method becomes impractical. May need no sanding to speak of. I've found cold molding to be faster and simpler than the thick-and-narrow strip method for gentle curves using rather wide, flexible, thin strips to "plank" each layer. But my experience is only at model scale using both methods.

Cold-molding the thin sheets requires a form, and key is clamping the layers; heavy blankets may be enough for the foam? Say four layers of 1/2" foam sheet. Bottom layer from say 8" wide strips run crosswise across the trailer on a foam-form-grid. Next layer from say 8" wide strips running -45 glued over the first layer. Next layer of say 8” wide strips running +45 glued over the prior two layers. Top layer lengthwise carefully fit edge-to-edge by trimming widths of the NEXT installed strip toward the ends, using the edge of the PRIOR installed strip as your guide.

Alternatively, 2” thick-and-narrow strip construction requires kerfs plus some keen and compound angles to be cut along the strip edges?

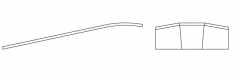
Finally, (my favorite due to simple construction but difficult shape lay out), three or more cylindric/flat sections (similar to your design before adding conics) butted at say 10 degree crown angle may be easiest? The inside joints aren't too bad, but the flare-out of the sides and the ends are a little dicey to get right...but as drawn, the roof has four identical "edges"; go ahead and kerf/model one "edge", say 3" wide, and hold it up to your beautiful walls and see what goes and what gives?
131129
Here is the wikipedia "boat building" explanation for cold molding..."Cold-Molding is a composite method of wooden boat building that uses 2 or more layers of thin wood, called veneers, oriented in different directions, resulting in a strong monocoque structure, similar to a fibreglass hull but substantially lighter. Usually composed of a base layer of strip planking followed by multiple veneers, cold-molding is popular in small, medium and very large, wooden super-yachts. Using different types of wood the builder can lighten some areas such as bow and stern and strengthen other high stress areas. Sometimes cold molded hulls are protected either inside or out or both with fibreglass or similar products for impact resistance especially when lightweight, soft timber such as cedar is used. This method lends itself to great flexibility in hull shape."

You could foam-grid the interior and ply away at thin flexible layers using this method?

I'm out of ideas! :baby:
off topic Stitch-and-Glue ply kayak build... https://www.facebook.com/media/set/?set ... 254&type=3
Bluebunny
Teardrop Master
 
Posts: 101
Images: 44
Joined: Fri Jan 30, 2015 4:21 pm
Location: northern illinois
Top

Re: Foldable foamie transformer with amenities

Postby Bluebunny » Mon Apr 27, 2015 10:24 pm

OP827 wrote:Sloooow progress due to stepping back, thinking about how to shape, clamp, glueup, and make it work.

Front wall panel is clamped and glued to match front curve floor and I am happy with the curved length and kerfing, it is where it should be 8) .


Beautiful work! :applause:
off topic Stitch-and-Glue ply kayak build... https://www.facebook.com/media/set/?set ... 254&type=3
Bluebunny
Teardrop Master
 
Posts: 101
Images: 44
Joined: Fri Jan 30, 2015 4:21 pm
Location: northern illinois
Top

Re: Foldable foamie transformer with amenities

Postby OP827 » Tue Apr 28, 2015 12:57 am

Thanks for encouragement and support Bluebunny.
I am thinking of the ideas you mentioned above. Once the front panel is dried, I'll start on the roof part. I lean towards foam strip planking along the trailer length... Stay tuned. :)
User avatar
OP827
Donating Member
 
Posts: 1556
Images: 405
Joined: Fri Apr 25, 2014 7:27 pm
Location: Bruce County Ontario
Top

Re: Foldable foamie transformer with amenities

Postby OP827 » Wed Apr 29, 2015 9:46 pm

A picture of frontal assembly before it will be split into upper and lower parts...

Image
User avatar
OP827
Donating Member
 
Posts: 1556
Images: 405
Joined: Fri Apr 25, 2014 7:27 pm
Location: Bruce County Ontario
Top

Re: Foldable foamie transformer with amenities

Postby OP827 » Sat May 02, 2015 1:07 pm

Foam stripping, looking for inspiration, came accross this beatiful wood stripping build ..http://www.tnttt.com/viewtopic.php?f=27&t=2846&start=30. Wow.
User avatar
OP827
Donating Member
 
Posts: 1556
Images: 405
Joined: Fri Apr 25, 2014 7:27 pm
Location: Bruce County Ontario
Top

Re: Foldable foamie transformer with amenities

Postby OP827 » Fri May 08, 2015 9:52 pm

Glued up front wall today. Slow, but some progress is better than no progress.
Took me some time to figure out how to clamp the panels.

Image
Image
User avatar
OP827
Donating Member
 
Posts: 1556
Images: 405
Joined: Fri Apr 25, 2014 7:27 pm
Location: Bruce County Ontario
Top

Re: Foldable foamie transformer with amenities

Postby KCStudly » Fri May 08, 2015 10:18 pm

Impressive. :thumbsup:
KC
My Build: The Poet Creek Express Hybrid Foamie

Poet Creek Or Bust
Engineering the TLAR way - "That Looks About Right"
TnTTT ORIGINAL 200A LANTERN CLUB = "The 200A Gang"
Green Lantern Corpsmen
User avatar
KCStudly
Donating Member
 
Posts: 9613
Images: 8169
Joined: Mon Feb 06, 2012 10:18 pm
Location: Southeastern CT, USA
Top

Re: Foldable foamie transformer with amenities

Postby OP827 » Wed May 20, 2015 11:21 pm

Thanks KC for support.
Cut the front section into two for lower and lifting part and continued to laminating the wall with interior birch plywood. At first panel I used TB2 but on the second bigger one decided to go with epoxy due to longer working time. It takes some time to clamp the plywood especially for the bigger section I did today.
Previously during the week I worked on front section compartment that will have separate isolated and vented outside space for propane bottle and two other separate compartments for 12V batteries. There will be interior shelf by panoramic window above the compartment. Three storage compartments with access from inside. Electrical boxes should go inside battery compartments. The front compartment dry fit picture is below. The arrangement will fit inside the lower front wall section I am laminating now.

Image

Image

Image
User avatar
OP827
Donating Member
 
Posts: 1556
Images: 405
Joined: Fri Apr 25, 2014 7:27 pm
Location: Bruce County Ontario
Top

Re: Foldable foamie transformer with amenities

Postby OP827 » Sun May 24, 2015 2:28 pm

Front compartment fitted up and ready for glueup. Strong and light structure.

Image

Image
User avatar
OP827
Donating Member
 
Posts: 1556
Images: 405
Joined: Fri Apr 25, 2014 7:27 pm
Location: Bruce County Ontario
Top

PreviousNext

Return to Build Journals

Who is online

Users browsing this forum: No registered users and 44 guests