4X8(ish) Benroy Build

...ask your questions in the appropriate forums BUT document your build here...preferably in a single thread...dates for updates, are appreciated....

Re: 4X8(ish) Benroy Build

Postby Vedette » Sun Dec 21, 2014 5:59 pm

Good Work!
Sometimes you can accomplish things without having to be out in the Weather!
I have had a day of R & D........well it started that way anyway?? :thinking:
It is expensive to watch Football on TV with a laptop on your lap????? :oops:
I always tell the Newbies that ebay is their friend! Well it is mine!
Found a lot of must have things for my Kermit project today!!!
Always going back to my Mother's sayings....."Money is made round to go round", well guess I am keeping it rolling?? :R
Good Roads
Brian & Sandi
Good Roads
Brian & Sandi
Here is a link to my Build Journal
viewtopic.php?f=50&t=50912
Image109106109111109110138766
User avatar
Vedette
Silver Donating Member
 
Posts: 5141
Images: 443
Joined: Thu Dec 01, 2011 4:28 am
Location: Westbank B.C.

Re: 4X8(ish) Benroy Build

Postby Wobbly Wheels » Mon Dec 22, 2014 1:19 am

Thx Brian - it's good to be moving along on it, however small the steps.
I want to sleep in it Jan 10 and there's still so much to do. Hopefully the weather timing and my progress match up.
Speaking of keeping the pennies rolling, I might have found my door latches in Canada from your TeardropTrailer.com friend in Ontario...
User avatar
Wobbly Wheels
Donating Member
 
Posts: 1080
Joined: Tue Mar 15, 2011 9:51 am

Ready for a roof !

Postby Wobbly Wheels » Sat Dec 27, 2014 9:14 pm

A little progress today but, because the rain socked in again, the pics had to be taken under the tarp.

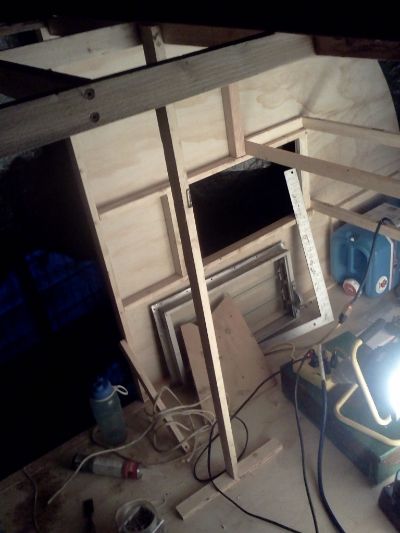
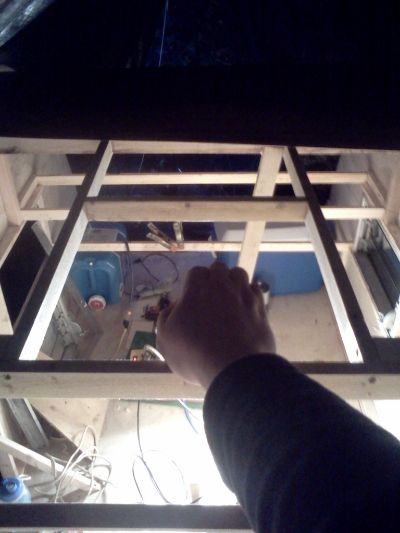
I got the roof hatch opening framed and I let in the header over the other door (had to cover the light with my hand)
Image
In the back you can see (from L to R) the water can, stove (the work light is sitting on it) and cooler I'm using for layout. The cooler is where it will sit on drawer slides and the water container will be above it on the upper shelf. For transit, it'll be further back from where you see it though on that side in order to help balance the weight of the cooler (batteries are on cooler side as well, although on tongue). There will also be a jerry can of water in front of where it sits if there's room when it's all together, otherwise it'll be beside it.

With that stuff done, I'm ready to start skinning the roof. Something funny happened that made me thinking about the overbuilding we all tend to do:
The largest single section of unframed roof is going to be about 20" (& full width) of the flat spot on the top of the Benroy profile just forward of the hatch hinge spar (clear fir 2X2). With two laminations of the 1/8" ply plus glass and the three glassed-in 1X2 rails running fore and aft to mount the solar panels to, it will be plenty strong. I've been trying to lay out the framing and blocking so that it serves mainly just as nailers to catch the edges of panels rather than providing a lot of structural strength and even so it's closed up the open spaces pretty well. When I look at that 20"X52" 'hole', it looks like it should have a frame member in there because it's a big space compared to the rest of the framing.

This is where I stepped back and said STOP ADDING MORE WOOD :lol:
If I really need it, I can glue it in later...

Anyway...
I also grabbed one of my pre-cut skins and tried it on the 18" radius of the front corner. It bends pretty readily just by hand though I have ratchet straps at the ready for when I do it for real because, as we all know, there's nothing worse than realizing you don't have everything you need AFTER you've applied the glue.
The first roof skin will be a 9-1/2" wide strip, then a full 48" wide skin. I did this so the center of the bend would be closer to the middle of the sheet. I went with 9-1/2" because that will be the width of the offcut will be when I rip down the 3X7 sheets I got to run fore and aft as the 2nd layer.

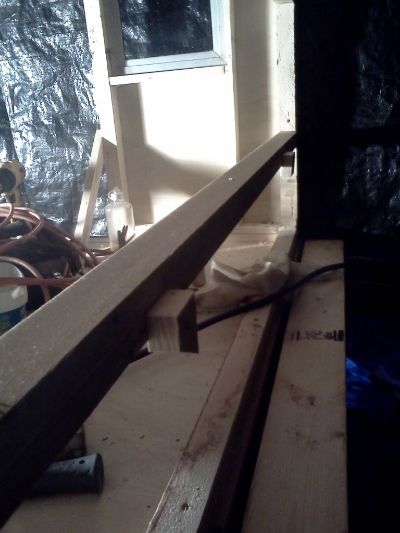
I added a couple of temporary cleats to the doubled spar to hold the 4' skin while I start pinning it into place. I don't relish the thought of trying to hold it in place, line it up, and nail it all while the glue is wet. Talk about inviting ol' Murphy to the party !
Image

When I started this, I took a chunk of 1/4" nylon cord and marked 48" from the end. That way, I can follow the curve on the outside of the wall skin to find where the edges of the sheets land, just like using a piece of thread to measure distance on a map...
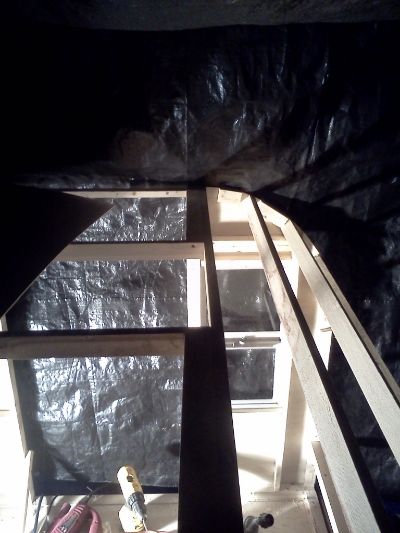
I used that and screwed/glued the blocking for the seam between the first and second sheets:
Image

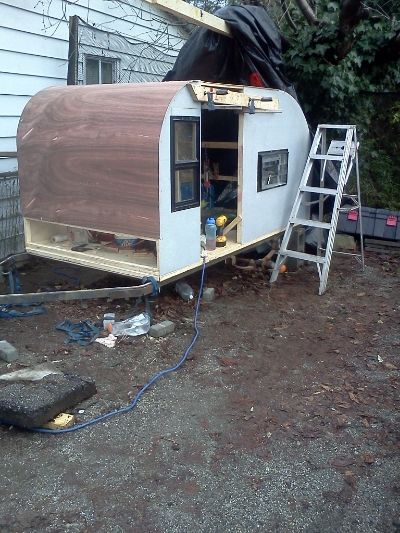
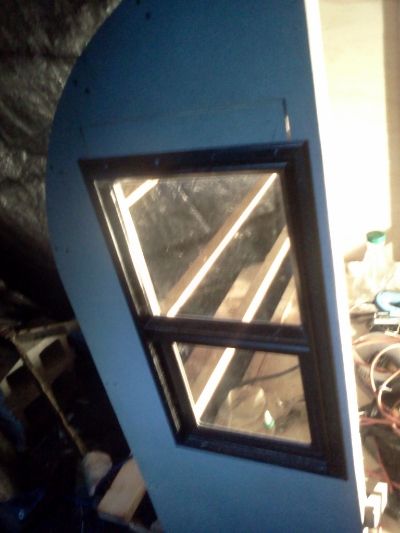
I also got the front window (on the left side) dropped down to the level of the jalousie windows further back - it HAD to be fixed...
I measured the height of the back window from the bottom of the opening to the floor and laid that out as the new sill height, where I glued and screwed a new sill in. I then cut out the glassed 1/4" plywood skin down to the new sill. I used the piece I cut out as a patch to fill the newly created hole at the top and Bob's yer uncle. There's a bit of a gap still from the kerf of the jigsaw, but that's a glass repair that I'll do while I'm glassing the roof.
Image
Wow, what a bad pic...

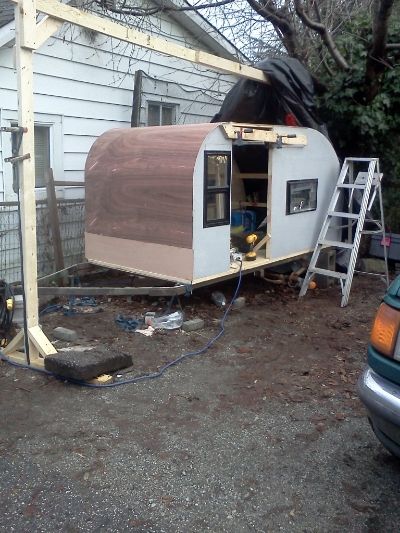
I also made up a temporary shore to support the roof framing until the roof is on and glassed. I won't be crawling around up there, but I'm not crazy about even leaning on individual 1X2's while gluing or later glassing until everything is locked in as a single unit so this ought to help carry that post-Xmas 'structural loading'
...namely me :wine party:
Image

We're supposed to get a couple days of rain and then clear next week and around freezing. I've got an IR heater I'll get going to warm up the wood, I'll keep the PL in the house, and I should be good to start putting on the roof skins on Monday.
:woohoo:
It's a milestone because that's when I'll renew the insurance and be able to tow it up to the shop (about a 45 min drive) to glass it like I did the walls. Once that and the doors are done, I can sleep in it....to meet my Jan 12th goal.

...with an exception...

Because of where the first layer of roof skin lands at the back of the roof (right behind the hinge spar), I'm not going to skin the hatch and trailer roof as a single unit and then cut them apart later as I had thought. Instead, I'll get the main section of roof skinned and glassed, then park the trailer so it's nose-in to leave the galley accessible and do that separately. Now that the Xmas commitments are done, I should have enough time left before I go back to work to close in the cabin/galley area since most of the framing is already in since I used it to hold the walls plumb when I glued them in. I had to change my plan a bit when, after making up the pattern for the hatch ribs, I realized I have to clean up the shop - ok, more like 'drain the swamp' - before I can do anything in there and that pretty well blows my target date out of the water.
I'll be 'wasting' sunny build days doing dump runs and driving a shop vac around but it'll be great when it's done and I have my workspace back to lay up the ribs. And technically it does help the build move forward...
User avatar
Wobbly Wheels
Donating Member
 
Posts: 1080
Joined: Tue Mar 15, 2011 9:51 am
Top

Re: 4X8(ish) Benroy Build

Postby KCStudly » Sun Dec 28, 2014 1:18 am

Excellent progress!

Have you checked your actual roof vent against your framing? I know you said you don't want to add anymore wood to your roof, but what I found, despite using the usual 14+ inch RO (rough opening), was that the preformed holes in my MaxxAir vent would have split the edge of a single 1x, so I doubled them.

Also, I suggest that you use an off cut strip of your roof ply material, just a 1/4 to 1/2 inch wide strip, as your story pole. It will bend very easily compared to a wider piece, will hold a straight line better, can be marked more accurately, and will not stretch like cord can. It worked very well for me.

:thumbsup:
KC
My Build: The Poet Creek Express Hybrid Foamie

Poet Creek Or Bust
Engineering the TLAR way - "That Looks About Right"
TnTTT ORIGINAL 200A LANTERN CLUB = "The 200A Gang"
Green Lantern Corpsmen
User avatar
KCStudly
Donating Member
 
Posts: 9611
Images: 8169
Joined: Mon Feb 06, 2012 10:18 pm
Location: Southeastern CT, USA
Top

Re: 4X8(ish) Benroy Build

Postby Vedette » Sun Dec 28, 2014 2:09 am

Fabulous progress! :applause:
You are making me feel lazy! :oops:
Brian
Good Roads
Brian & Sandi
Here is a link to my Build Journal
viewtopic.php?f=50&t=50912
Image109106109111109110138766
User avatar
Vedette
Silver Donating Member
 
Posts: 5141
Images: 443
Joined: Thu Dec 01, 2011 4:28 am
Location: Westbank B.C.
Top

Re: 4X8(ish) Benroy Build

Postby Wobbly Wheels » Sun Dec 28, 2014 3:24 am

Hmmm...funny you mention that, KC. I was thinking "I should grab the frame and drop it in, just to be sure"...but what's the worst that could happen ?
I'll be doing that first thing tomorrow after the glue has had time to set up.
Unless I get out there tonight... :lol:
I can definitely see how the screw could land right on the outer edge of 3/4" stock. I allowed a smidge extra on the opening to allow me to square it up if need be so hopefully that's enough to get the screws a bit closer to center as well.
It's always easier to walk in the footsteps of others who have already been there than to blaze the trail so thanks for the check on that !

Brian, I saw where you're at: you've got a flying car. Not even Paul Moller can say that !
Lazy ? Not likely. :thumbsup:
User avatar
Wobbly Wheels
Donating Member
 
Posts: 1080
Joined: Tue Mar 15, 2011 9:51 am
Top

There will be roof...

Postby Wobbly Wheels » Sun Dec 28, 2014 10:49 pm

The first layer of roof skin went on today !!!
With the surface grains running across the trailer horizontally, it was no problem to bend over the 18" radius. Had I gone with a single layer of 1/4", I doubt it would have bent without the inner ply buckling. I have a little electric Arrow nailer that has served me well for working with doorskin but it failed here. The heads of the pins aren't big enough and just pull through the low-grade ply. I switch to the 1" deck screws I'm using for framing and that went fine once I got the clutch on the drill adjusted just so. I wanted to use pins so that I could put the second layer on right away, but no matter. I'll get out there tomorrow and pull the screws and put a bunch of pins in just as a mechanical backup and repeat the process for the second layer of skin. Still, the delay is a bit of a bummer...

Image

Because of where the upper edge of the first sheets lands, the edge didn't come down smoothly but has little ripples all along the edge, despite using a strip of aluminum to clamp it down while I screwed it. When I pull the screws tomorrow, I'll sand down the highs so the next layer sits flat. After the front and upper skins were on and secure, I ripped down the 3X7s to get my filler piece for the bottom and, because that was a flat rather than a stressed (bent) panel, pins were fine till the glue sets up.

Image

I double checked the hatch frame and, sure enough, the screws would have hit the edge of the 3/4" framing so I added a couple extra nailers to catch the screws.
Thx KC! :thumbsup:

The temp is supposed to drop to freezing tonight and stay there all week, so I've got the PL in the house. I've tarped off the doors and galley (besides the main tarp) and stuck the IR heater in there. The minimum temp for PL is listed at 5 degC, so I think it should cure just fine.

I picked up a half sheet of 1/2 sheet (2X8) of G1S fir ply for the galley counter today as well. The upper counter will be 1/4" and the backs will be 1/8". I took the bricks off the 1X4s that I stickered to dry for the hatch rib framing and they seem to have dried pretty straight, though I'll going to be cutting them into short lengths so the odd fault won't be a problem anyway. That being said, I'm still thinking about ripping a fir 2X into 1/4" strips and laminating the ribs instead. I'll mull that over while I'm framing out the galley.

Tomorrow: the other layer of roof skin !!
User avatar
Wobbly Wheels
Donating Member
 
Posts: 1080
Joined: Tue Mar 15, 2011 9:51 am
Top

Re: 4X8(ish) Benroy Build

Postby KCStudly » Sun Dec 28, 2014 11:12 pm

:thumbsup:
KC
My Build: The Poet Creek Express Hybrid Foamie

Poet Creek Or Bust
Engineering the TLAR way - "That Looks About Right"
TnTTT ORIGINAL 200A LANTERN CLUB = "The 200A Gang"
Green Lantern Corpsmen
User avatar
KCStudly
Donating Member
 
Posts: 9611
Images: 8169
Joined: Mon Feb 06, 2012 10:18 pm
Location: Southeastern CT, USA
Top

Re: 4X8(ish) Benroy Build

Postby Ned B » Mon Dec 29, 2014 11:11 pm

WW,
looking fabulous!

day (months) late on this, but for best results on lumber, it is often best to buy wider stock & rip it down, especially when it comes to BORG supplied lumber. They do such a horrible job of drying it that you're better off buying a 2x10 and ripping vs a 1x3 etc... The wider pieces just about 'have' to be taken from rift sawn straighter grained stock, which even after you rip them to thinner pieces are bound to be more stable than those which you buy at the target dimension.
User avatar
Ned B
1000 Club
1000 Club
 
Posts: 1036
Joined: Sat Apr 16, 2011 10:25 am
Location: Syracuse NY (ish)
Top

Re: 4X8(ish) Benroy Build

Postby Wobbly Wheels » Tue Dec 30, 2014 12:03 am

Thx Ned !
Absolutely agree with you on ripping down larger stock. :thumbsup:

Fortunately, we don't have the Borg over here - it's a couple of healthy mom-and-pop yards. The one that I normally buy from has only recently realized that they need to be conscientious about replacing the lumber wraps in such a wet climate. Their stock used to be horrendous, but it's not so bad now...though I still sticker everything. Unfortunately, my old workhorse of a tablesaw is offline for the time being so I'm stuck without one. You never realize how much you use it until it's gone. It's not like the chopsaw that I use all the time, but when I do use the tablesaw, I use it a lot and nothing else will work. I picked up a sheet of 1/2" G1 for the countertop and I had to get the yard to rip it into 2 - 2X8 sheets. I don't think I've ever 'bought' a cut before.

I did pick up a little Delta tabletop one, but that's for when I don't want to drag out the big saw for a small job. I doubt it would be up to the job of resawing larger stock though.

Made a little progress today, though I got a late start. I got the 2nd layer of roof skin on running front to back. It started to let go at the sharpest part of the 18" radius because the surface grain was running along the trailer instead of across it. One of the sheets looks like it had a flaw - almost like something dragged across it in the mill - and that's where it started to fail. I thought about using hot towels or something but I've found this stuff is looking for an excuse to start delaminating so I soldiered on, carefully bending it, weighting it and screwing it down.

I did get both sheets screwed down and I'll have to fair them a little bit before I glass them. If they were any more than just a surface to hold the 'glass I would have pulled em off and re-thought my plan but with the glass tying everything together I still think it'll be overbuilt. I still need to add in one small piece at the back on the flat section in front of the hinge spar, but I was finishing up under a worklight and I was out of PL anyway.

Speaking of which: I need to take some time tomorrow and clean up the tools the trailer - I know I have another tube of PL in there somewhere. Not really sure how I can lose a tube of glue in an 8' trailer...I had to buy another chalk line yesterday because mine's in the trailer somewhere as well because I knew I'd need it at this stage.
I'll glue that last piece in tomorrow and start trimming and sanding the roof skin to prep for glass. I was going to tow it up to the shop to glass it but, given how much heat that IR heater cranks out, I think I can do it under the tarp. This morning, the wood was warm to the touch after it had been on medium (900W, I think) all night. I'm feeding it with a 12ga cord from a 20A circuit so it should run fine on high as well.

Now that everything's fixed in place, I measured up the rough openings for the doors so I can finish the doors themselves. I want to try and keep some of the walnut-looking veneer as the interior finish. The first one I skinned with it looks pretty good up close.
I need to make up the inner flanges which I will do from 4" strips ripped from the 2nd 2X8 sheet of 1/2". The flange's corners will get rounded over and be glassed in as a structural part of the door frame. I also need to put the filler blocks in to the door framing to match the radius I put on the upper corners of the doors.

So it looks like tomorrow will be mostly a shop day and a shopping day (need more resin & 5/8" pins). Like I said above, I finished up in the dark today, so no pics. It doesn't look much different anyway - the whole roof is the lighter brown of the lower front filler piece....

Now to get the glassing done before the snow hits at the end of the week :lol:
I only have this week and next left before I go back to work :shock:
User avatar
Wobbly Wheels
Donating Member
 
Posts: 1080
Joined: Tue Mar 15, 2011 9:51 am
Top

Re: 4X8(ish) Benroy Build

Postby Vedette » Tue Dec 30, 2014 12:36 am

Keep going man! You are amazing us! :thumbsup:
Cold weather is here already, glad I am inside.:thinking:
Good Roads
Brian & Sandi
Good Roads
Brian & Sandi
Here is a link to my Build Journal
viewtopic.php?f=50&t=50912
Image109106109111109110138766
User avatar
Vedette
Silver Donating Member
 
Posts: 5141
Images: 443
Joined: Thu Dec 01, 2011 4:28 am
Location: Westbank B.C.
Top

Re: 4X8(ish) Benroy Build

Postby Wobbly Wheels » Tue Dec 30, 2014 12:49 pm

Thx Brian, you're great for my ego ! :lol:

It's all relative: 'cold' here is a whole lot warmer than 'cold' there...working at around zero is great because you don't overheat and, as long as you keep busy, you don't need to wear cumbersome layers.
User avatar
Wobbly Wheels
Donating Member
 
Posts: 1080
Joined: Tue Mar 15, 2011 9:51 am
Top

Re: 4X8(ish) Benroy Build

Postby dales133 » Tue Dec 30, 2014 2:06 pm

Yea excellent work.
If mine turns out as good as yours I'll be a very happy man
User avatar
dales133
4000 Club
4000 Club
 
Posts: 4605
Images: 1
Joined: Mon Oct 13, 2014 5:26 pm
Top

Re: 4X8(ish) Benroy Build

Postby Wobbly Wheels » Tue Dec 30, 2014 7:14 pm

Thx Dales. Truth be told, I'm much better at taking pics than I am at building !

Didn't get a whole lot done today, but I'm a little further along than I was yesterday. It was too cold for either TB3 or PL (not that I have any left) to set up outdoors, so most of what I did was in the shop. I got the filler piece at the back of the roof scabbed in today and got the drip moldings over the doors made up and installed.

First off...
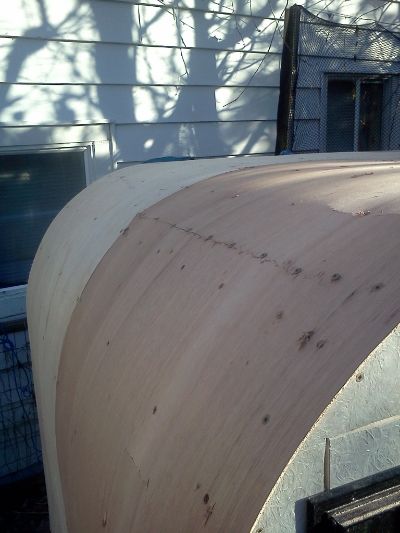
In the harsh light of day, the failure of the bent layers I did yesterday was evident. Overall the bond was good, but at the sharpest point of the bend this material wasn't up to the task. It is about the cheapest ply one can buy (and all that's locally available in 1/8"), so that's not really a surprise. I didn't tackle that task today: I want to give the PL an extra day to set up before I pull the screws because of the low temps (that's my story and I'm sticking to it).
Image
I know others have some success with this stuff by laying hot, wet towels over it but I do not want to add any water to this stuff....ever....given the delam I've seen with it. I'll grind away that cracked line until I get back to where the plies are bonded well, then I'll feather the edges back and glass it. I'll fill the resulting depression with another layer of glass and then fair it out when I prep for paint. I won't lose any build time that way and the repair becomes a finishing issue rather than a build issue. Replacing the 1/8" ply with more glass is another nod to the 'overbuilding' mantra of TDs, but obviously it's a high stress area so it's justified.

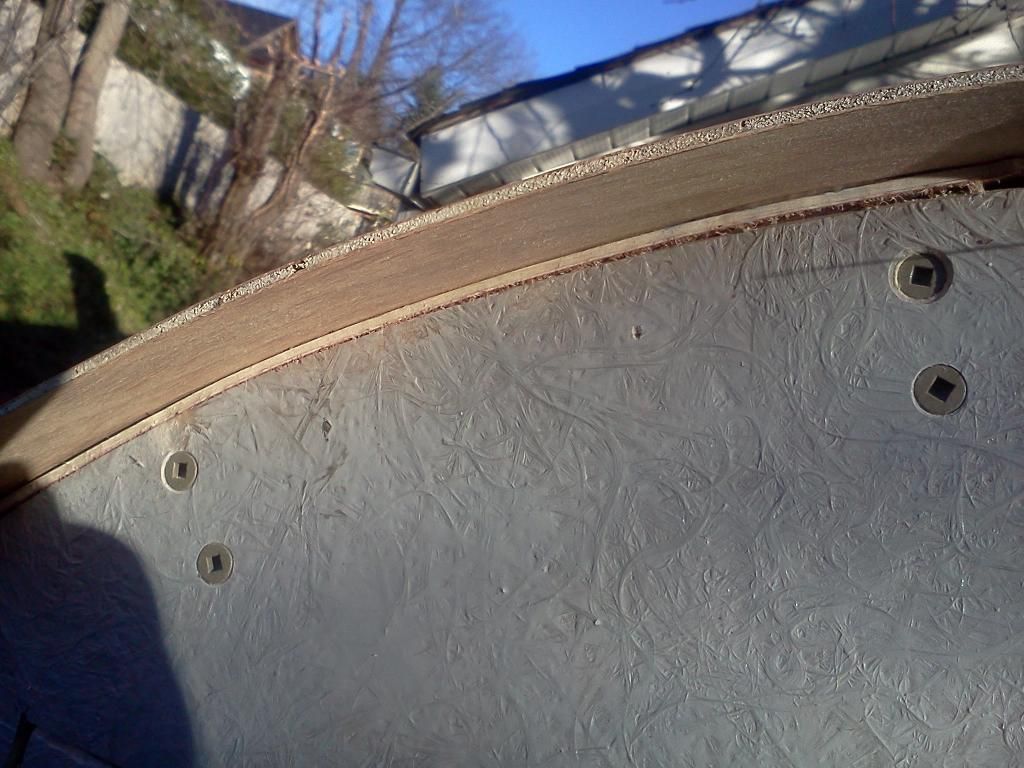
At least the edges bonded well...
Image

I drained the swamp a bit but found that most of what was cluttering the inside of the trailer was stuff I'm still using. I can say for sure that the last tube of PL was not in there - odd. I don't really need any more now anyway, but that's not the point.

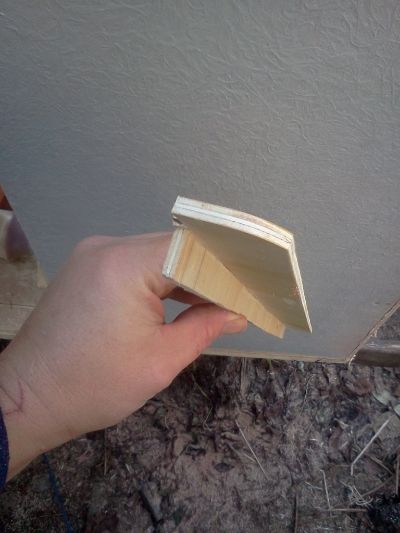
I also made up the drip moldings over the doors and glued them on. I will be glassing over them when I glass the roof rather than screwing on an extrusion so I made up my own.
Image
I gave them an arbitrary 5 degree slope to shed water without interfering with opening and closing the door.
Image

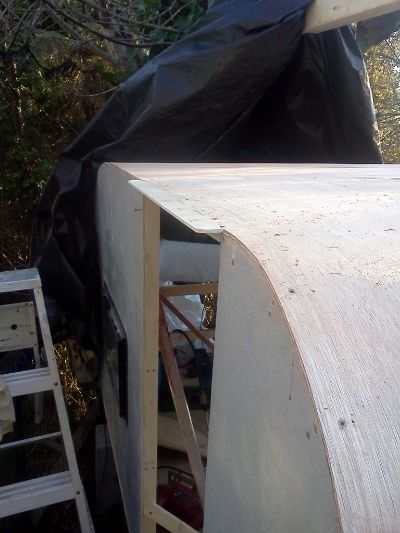
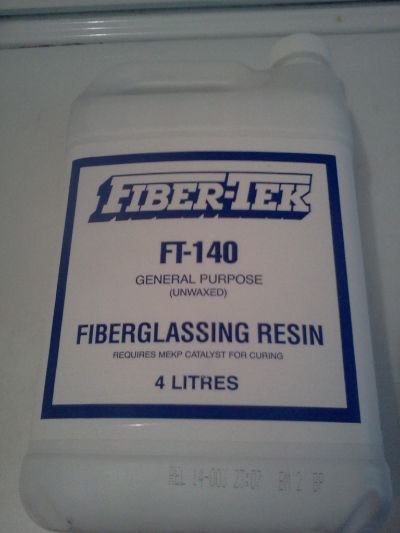
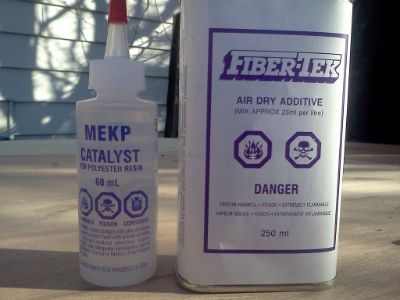
I also picked up what I'll need to glass the roof: 16' lineal feet of 38" X 1 oz fiberglass mat, a gallon of unwaxed resin a can of air dry (wax), catalyst and a 30cc syringe to measure out the catalyst. I'll try and lay out the glassing process I use but, because it's all about the timing, it's not very picture-friendly. I am going to wait until the end of the week to glass because it's supposed to warm up, so the rest of this week will be spent on the galley except for a couple jobs to get out of the way before glassing: mainly fixing the cracked skins, filling a few spots and sanding everything smooth.
Image

Image
I still may throw some plates on it and tow it up to the shop to glass it...
With apologies to Jimmy Buffet: "indecision may or may not be my problem"

Tonight I'll probably putz around in the shop working on the doors and their frames. I also want to make up a couple shims because the door jambs aren't dead square.
...but we'll keep that as our little secret.... :shhh:
User avatar
Wobbly Wheels
Donating Member
 
Posts: 1080
Joined: Tue Mar 15, 2011 9:51 am
Top

Re: 4X8(ish) Benroy Build

Postby Vedette » Tue Dec 30, 2014 10:42 pm

Brian
Yours is truly a "Build Journal" that will help those who may be planning to build their own trailer....to realize just how much work goes into it! ;)
Go man Go! :thumbsup:
Happy New Year
Brian & Sandi
Good Roads
Brian & Sandi
Here is a link to my Build Journal
viewtopic.php?f=50&t=50912
Image109106109111109110138766
User avatar
Vedette
Silver Donating Member
 
Posts: 5141
Images: 443
Joined: Thu Dec 01, 2011 4:28 am
Location: Westbank B.C.
Top

PreviousNext

Return to Build Journals

Who is online

Users browsing this forum: No registered users and 5 guests