4X8(ish) Benroy Build

...ask your questions in the appropriate forums BUT document your build here...preferably in a single thread...dates for updates, are appreciated....

Re: 4X8(ish) Benroy Build

Postby Wobbly Wheels » Sat May 09, 2015 8:10 pm

Ok, a little late on the update so I'll back up a bit. This is a long one so I'll break it up.

I towed it to the marina and, except for the blown flasher relay, it was uneventful. It towed perfectly behind the Ranger and was narrow enough I couldn't see it in the side mirrors. I was running a gear lower on the hills, but it's been a right-lane truck for a long time - left lane for those down under :lol:

After moving the trailer, I observed something I thought I'd share.
On a sunny Sunday morning, everyone coming into the marina had to drive by the trailer. Being about 15 degree C and sunny, as one might imagine the marina was pretty busy and I was working away. It seems that every second or third person had to stop and inquire about the trailer. Most of these people are marina regulars I know by sight if not by name so I couldn't really say "bugger off, I'm trying to work" like I do to my nosy drunk neighbour when he sees I'm gloved up for glassing and can't get away.

I'm not sure how many times I related the story of the Benroy trailers or the nature of teardropping (as it seems to me), but it was kind of cool. I have heard (read) that this would happen. When was the last time someone had that interest in a Jayco or a Fleetwood ?
I've had neighbours come around to chat while I'm building and, while polite and friendly, I don't stop what I'm working on and they soon take the hint (aforementioned nosy drunk excepted).

Strangely enough, once I started glassing no one else came around.
Maybe because it was getting late in the afternoon, maybe because I cranked up the stereo in the car, maybe just the styrene wafting on the afternoon breeze ?
More likely they just figured that, since I was wearing a respirator, I was doing something they didn't want any part of. I'll have to try wearing one next time I just don't want to be bothered...like if I'm riding on transit....

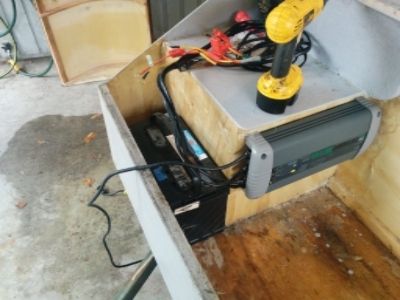
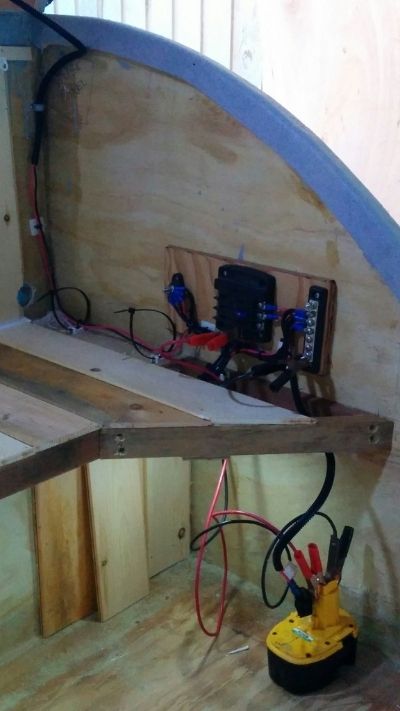
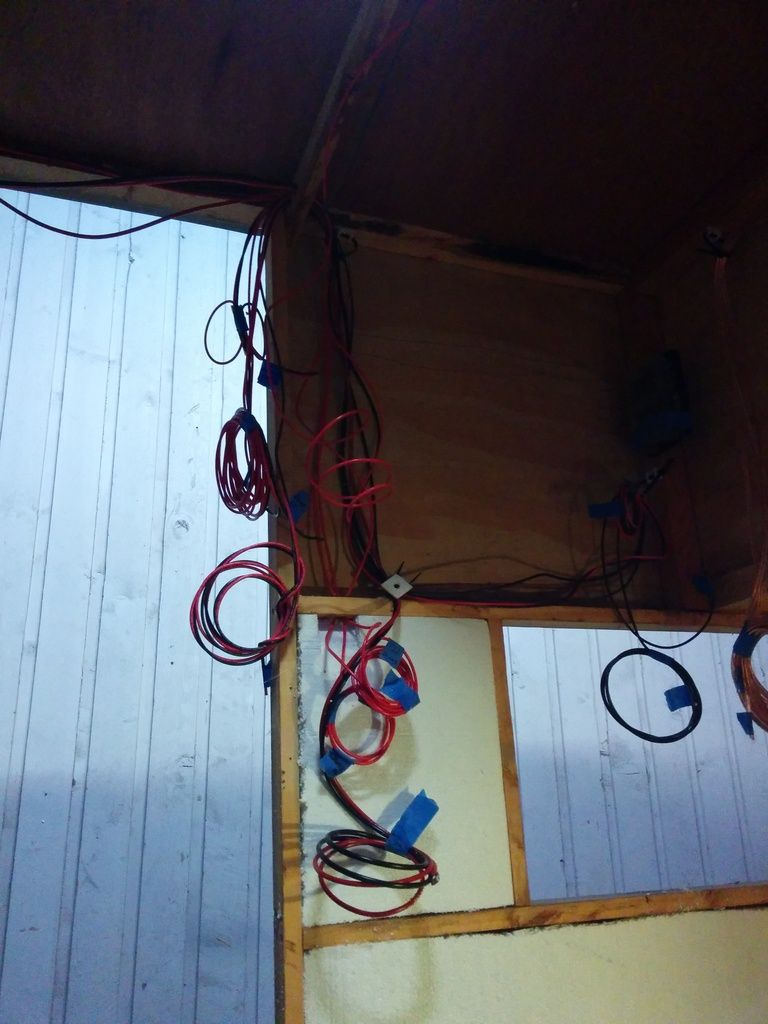
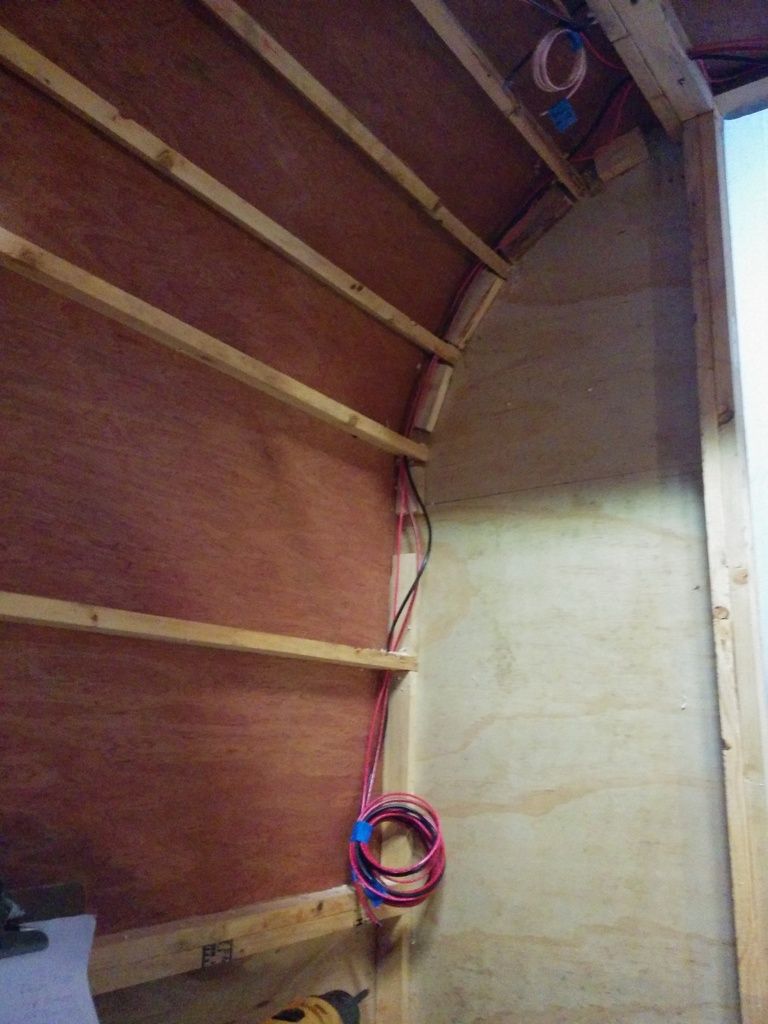
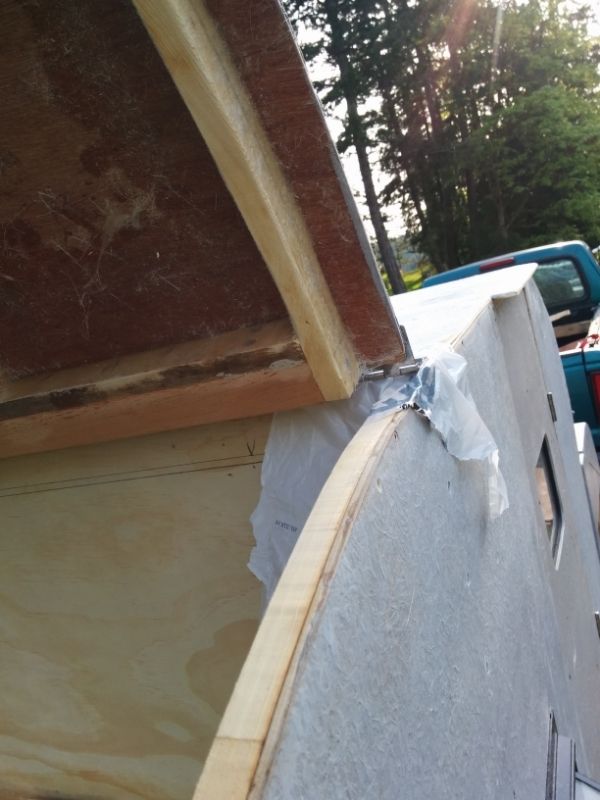
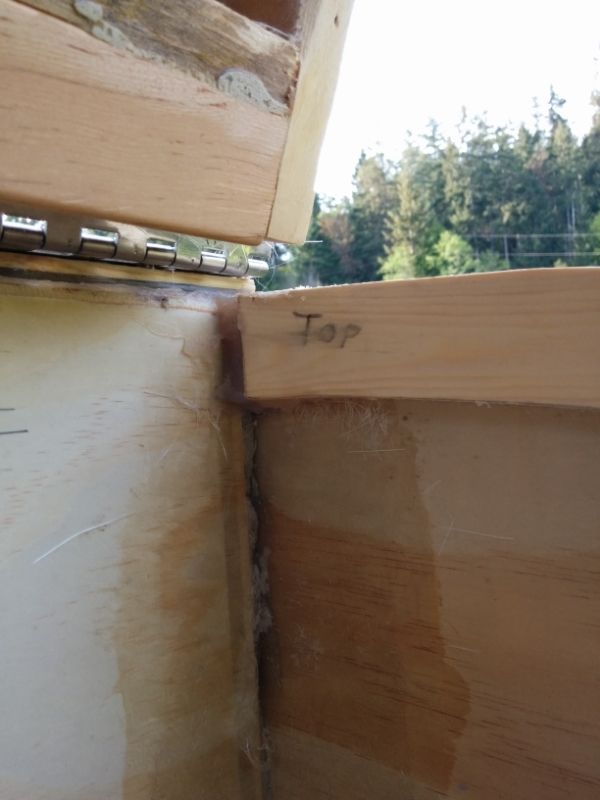
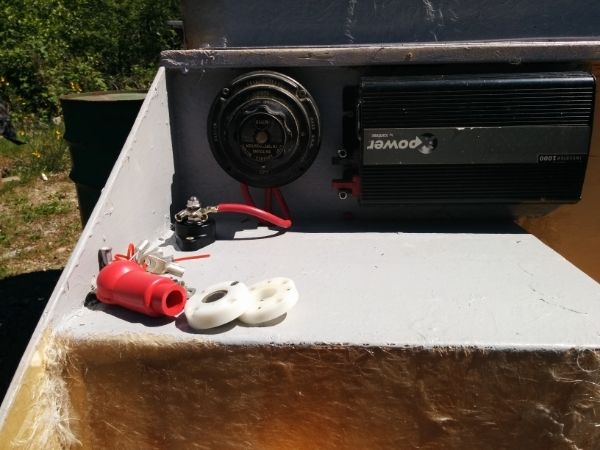
I took the batteries and inverter with me. I rigged them up temporarily and they ran the angle grinder and sander just great, which was good because, in one of my previous battles with fiberglassing in the weather, I hurriedly threw the tarp over fresh glass. It had a ridgepole to keep it up off the roof, but the tarp still hit the roof/wall corner and messed up the still-wet glass. I ground away that mess along both sides so I could redo the corners. That's about when the first round of lookey-loos came by. With the corners ready for glass, I got the next glass job ready so that, once I 'gloved-up', it would be a clear path to glass everything at once and keep the long term nervous system damage to a minimum.
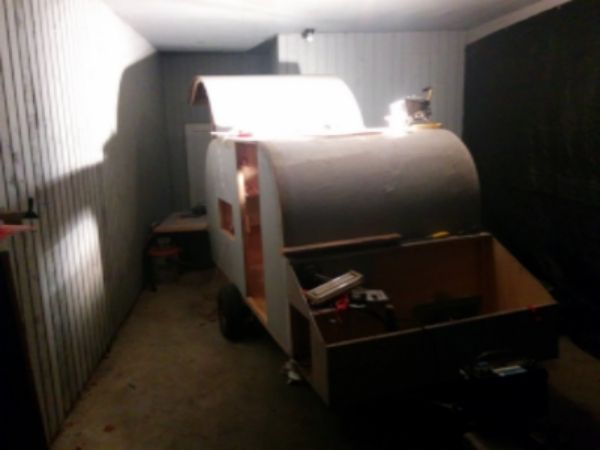
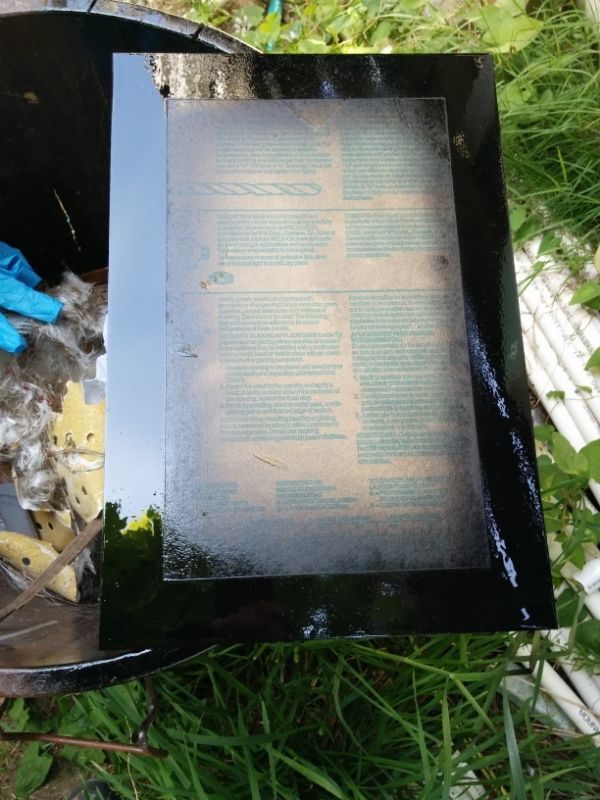
The mess:
Image

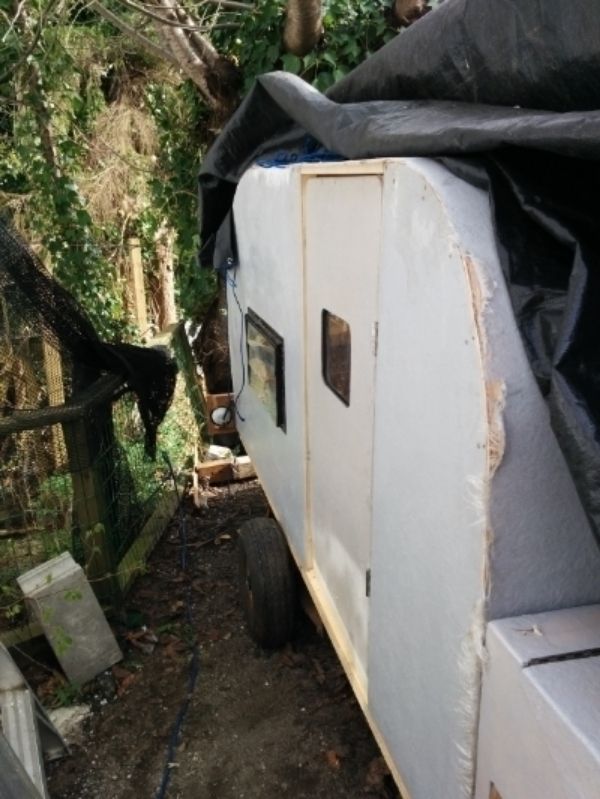
In my haste to get the trailer moved, I didn't bother to goop up the bottom of the tongue box the way I had the floor. It made the run with the front edge secured with two carriage bolts, which I now undid so I could flip it over and make a nasty, gooey black mess. I have found that cutting the roof patch with paint thinner makes it a lot easier to soak into wood...and skin...and brand new leather seats - not sure how I'm gonna 'splain that one when she notices it. :lol:
I'm certain that any long term benefits gained by wearing a respirator in the previous step were promptly undone by my impromptu arm-bath in straight paint thinner to get rid of the offending stain (Out, damned spot. Out I say!). I'm a mechanic and see nothing wrong with being covered in grease, dirty oil, or anything else rolling around in the bilge of a boat, but a let a few drops of paint hit my skin and I cry like a little girl.

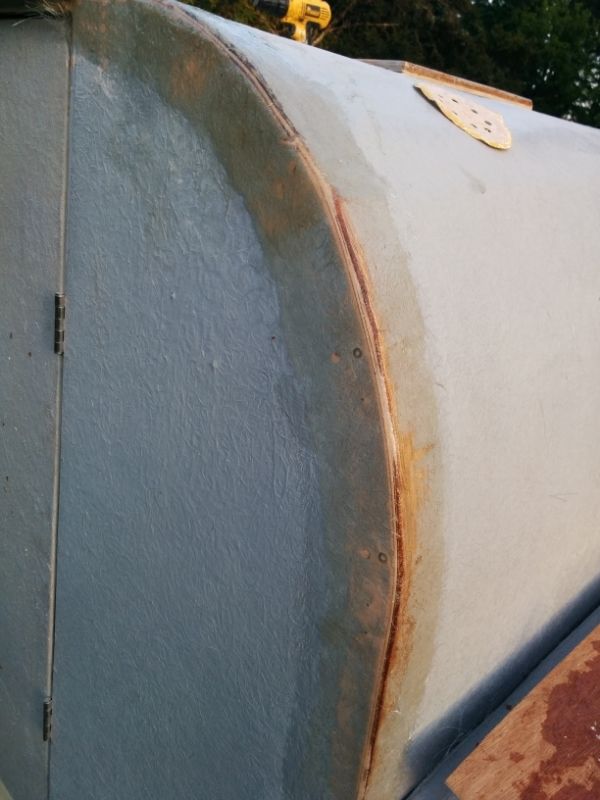
I got the box gooped up and after it dried I flipped it over and put the bolts back in. The back edges and top are going to get glassed so they blend into the front and side walls, so another glass job was ready to go.

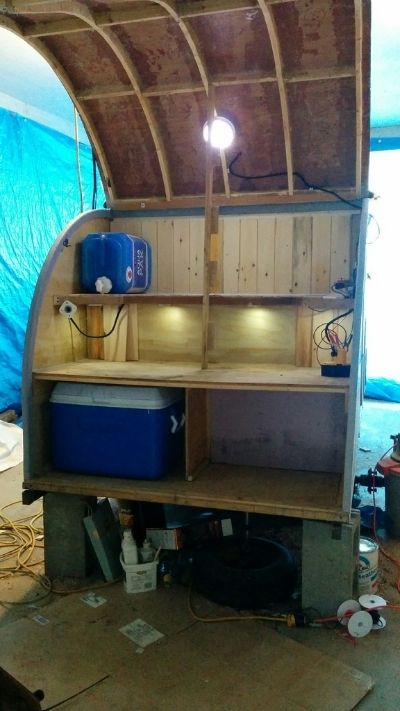
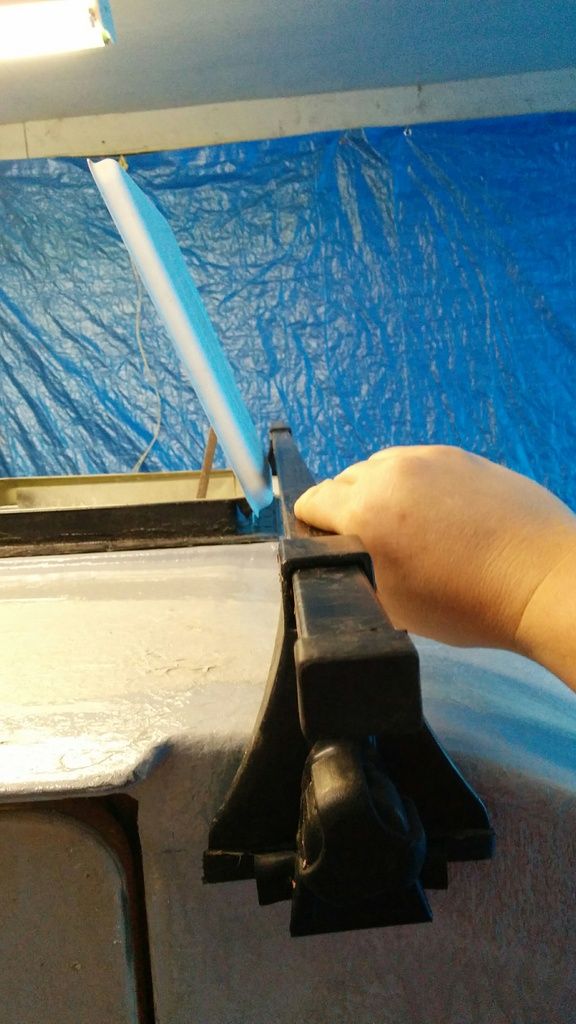
We use steel drums for blocking up boats and, with so many boats going back into the water, they're everywhere as we haven't had a chance to tidy up yet. It looks a bit like all those boulders left behind by glaciers where they don't belong. I grabbed one and rolled it over because the next job to do was on the roof. Well, I tried to but wouldn't you know it, it was half full of water. I knocked it over to drain, selected another candidate, and dragged it over to the trailer. It looked fine from the outside but when I stood on it the rusted-out top started to cave in, giving me a premonition of myself stuck in a leg-hold trap...so into the scrap bin for that one.
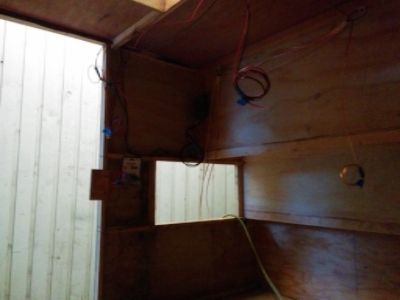
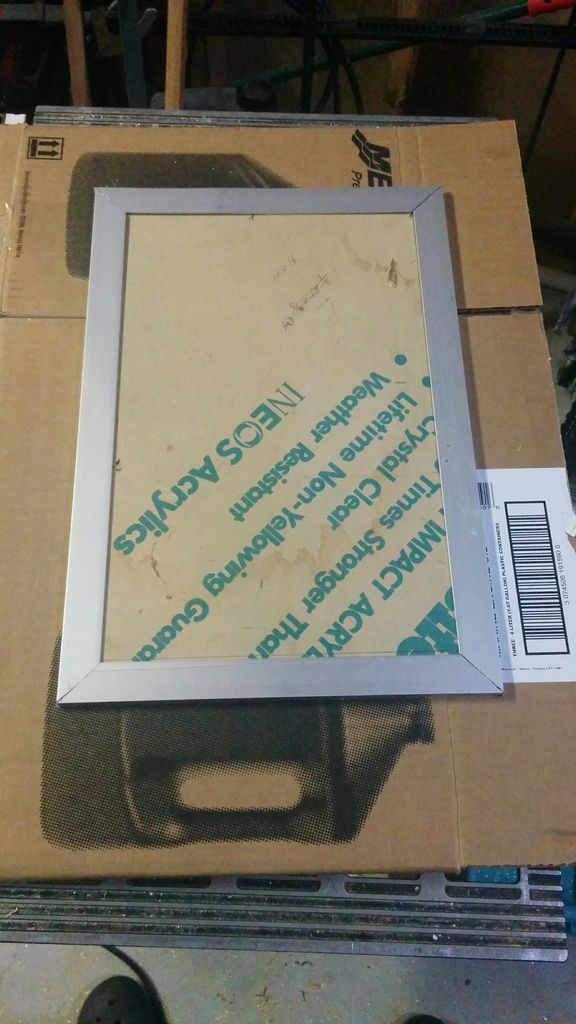
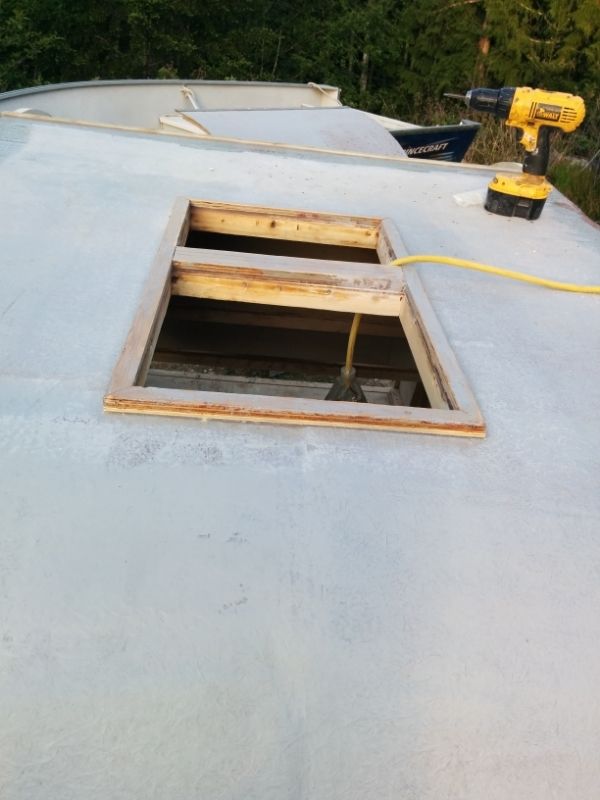
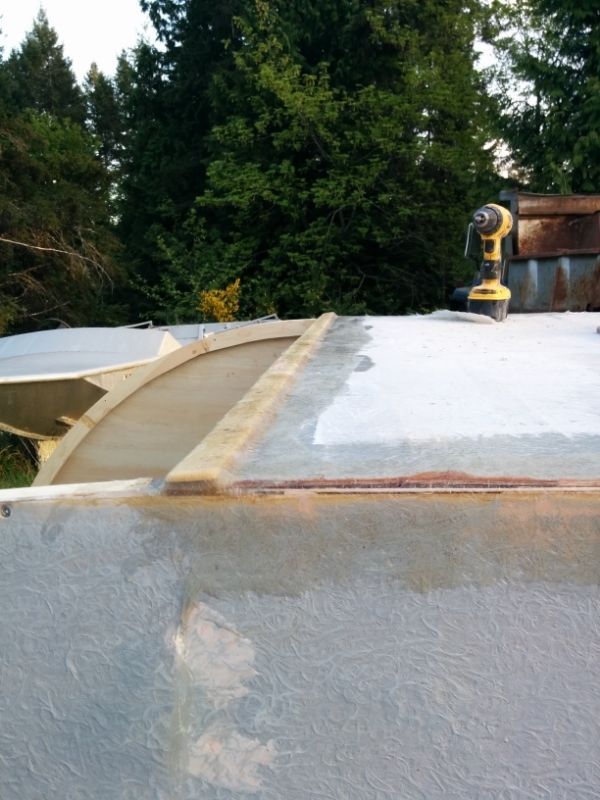
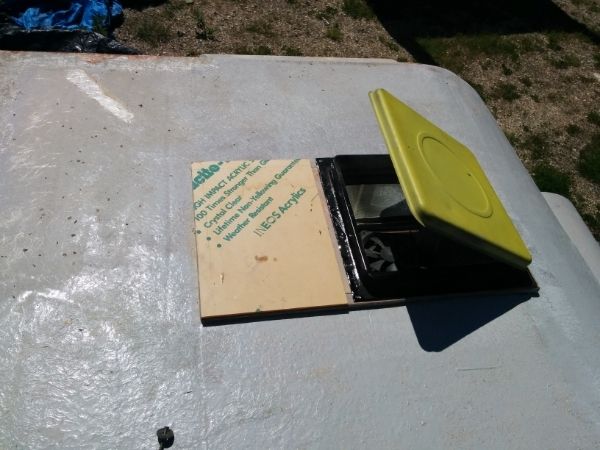
Third time's the charm - I got up to where I could work on the roof and pulled off the scrap of 1/8" ply I had pinned over the hatch/skylight opening. I pulled out the remaining pins and ground/sanded away the excess glass from the inside edge. I mixed up some resin with some cab-o-sil to make a thick resin-based glue lovingly referred to in the industry as bearsh*t. I glued down the curbing I had previously made up from 1/2" ply to keep any standing water on the roof out of contact with the hatch/skylight fasteners. The screws will be heavily bedded in sealant but the first rule with any sealant is not to rely on it !
The next job was to cover it in strips of glass so that the roof glass would effectively run up and over it, so now that too was ready to go.
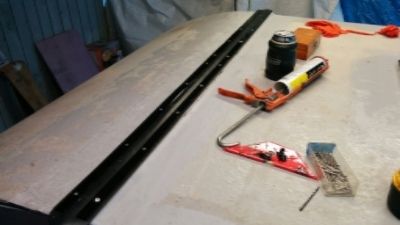
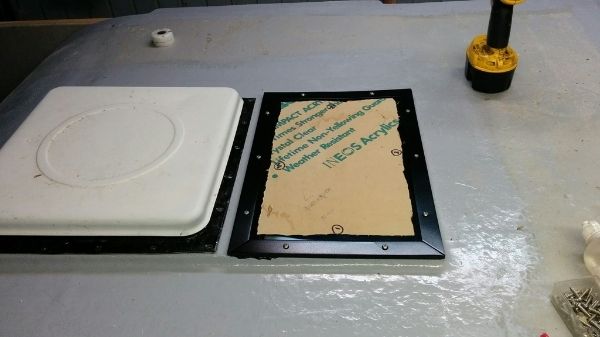
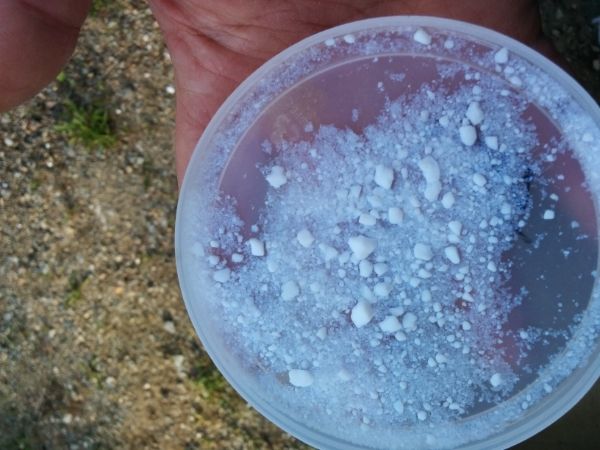
Curbing glued down (not glassed yet):
Image

Cab-O-Sil texture:
Image

Not longer after I realized I'd forgotten my electrical stuff, the sky clouded over...and my mood with it. I wrapped the trailer back up and put it to bed for another week.
User avatar
Wobbly Wheels
Donating Member
 
Posts: 1080
Joined: Tue Mar 15, 2011 9:51 am

Re: 4X8(ish) Benroy Build

Postby Wobbly Wheels » Sat May 09, 2015 8:41 pm

I picked up the aluminum strips to secure the gasket over the piano hinges on the hatch and tongue box. I tried some scrap material we had around the shop to figure out what thickness aluminum to use. Because the gasket material I'm using doesn't compress much, it didn't seem to make much difference going with thicker stock to keep it from puckering where the screws went in, so I ordered 4X 3/4" wide strips of 1/8". If it doesn't seal I can easily replace it with thicker material later. I had mounted the hinge to the hatch and roof at every other screw hole so I could use the remaining ones to secure these strips as well as the hinge. This is the tongue box hinge with its strips drilled out (every hole on this one, every other one on the hatch hinge):
Image

And the way they'll be installed (imagine the gasket between them):
Image

Like the hatch/skylight, I wanted to have a bit of a curb at the hatch hinge to keep the screw penetrations and the edges of the hinge and gasket up out of any potential standing water. I ripped a 1/8 X 1-1/2 strip of pine that would serve as a core for the glass that would wrap up and over it, encapsulating it. It should also help as a 'gutter' to channel wind-blown water outward from the hinge while driving in rain. That strip is serving double duty - since the hinge was attached to the trailer out in the yard and I wanted to use the drill press in the shop to drill out the clearance holes for the screws to secure the aluminum gasket hold-down strips, I first used it as a template to lay out the alternate holes for those screws and drilled them out.

End of the week now (Friday May 1)...
The wind had been picking up all day but it was warm and the rain was holding off, so I could un-tarp it (de-tarp?) and get some work done. I starting off by grinding away the thickened resin (bearsh*t) where it squeezed out around the edges of the hatch frame. I mixed up some more and glued my 1/8" template strip into place over the hatch hinge spar. Once that was secure I glassed over the strip.

Hinge curb glued down and glassed in place:
Image

I also packed some bearsh** into the outboard corners where the upper edge of the hatch closes in behind the roof spar. I laid in some plastic and closed the hatch onto it so that it will harden and create a tight seal where the upper outer corner of the hatch closes without it sticking to the hatch.

Image

In reading others' builds, this seems to be an area prone to leaks and this seems to be the simplest fix given the materials I'm using. I had originally made the outer ribs longer because they would be secured to the outside walls, but cut them down so they were actually shorter to give me more surface area to pack in some more of the "high density structural filler/adhesive compound"...yep, bearsh**

So I've now dammed the flow of water from the front with the curb and from above with the gasket over the hatch hinge. The sides will get a D-molding weatherstrip that will wrap up onto the short vertical face as well, so I think I'm good. If you see a gap I've missed, please sound off !
First application of the putty:
Image
This is right after it was glued in - now it's glassed.

I drilled a 1/4" hole in the end of each rib for the resin to fill but in hindsight it would have been better to have a dowel coming out of the hole and into that gap...like a piece of rebar...but I think that's a great example of how we tend to overbuild: while I would have liked to fasten the end of that rib, it will be backed up structurally by galley cabinet framing. It is mainly a seal rather than a structural joint. It doesn't 'seem' right to do it that way....but I'm not trying to build a tank either....

That completes the structural work I have to do before I finish the glassing. I'm sure there will be little bits here and there but the next plan is to glass over the curbs on the skylight/roof hatch and around the three back edges of the tongue box. Except for the gaping hole in the roof, it will then be weathertight. Next week I'll drill the perimeter holes in the plexi and install it and the hatch.
This is the hatch and plexi as they'll be installed (front is to the right - you can just see the tongue box)
Image
User avatar
Wobbly Wheels
Donating Member
 
Posts: 1080
Joined: Tue Mar 15, 2011 9:51 am

Re: 4X8(ish) Benroy Build

Postby Wobbly Wheels » Sat May 09, 2015 9:12 pm

I also got the roof-to-wall corners glassed over. They still need the pigmented resin.
Image

I'm not going to round the bottom corners of the doors after all - I've decided to keep the wheels to 12" instead of sizing them to the truck (15"). It will put my counter top and door sills higher than I'd like and I don't know how much longer I'll have this truck anyway. I'm getting a hitch put on the Escape (its 3500lb tow cap still blows me away !! )
That means I can also start on the door seal flanges...which means I'm finally starting on the interior !!
:P :dancing :dancing
I considered using some of the cedar I ripped for the paneling for the door flanges but instead ripped some 1/2" ply strips and will paint it to match however I do the interior door liners. Like the other three windows, the door windows will be still trimmed in cedar to match.
With all that freshly milled old cedar, I'm sure it'll smell like a sauna inside (at least until I seal the wood)...but I'm ok with that !!

On the skylight, I wanted to get some black paint around the edges to hide the adhesive (just like around the edges of your windshield) so I centered it on the curbing and marked the inside of the opening on the protective paper with a Sharpie. The margin was around 1 1/4 so I penciled another line at 1 1/2" all the way around. That would be the painted margin.
Image

Being careful not to go too deep with my Olfa knife because I didn't want to score the plastic any more than necessary, I scored and peeled off the margin's protective paper. I then sanded it with some 220 wet/dry on a block.
Image

Then it got two coats of Krylon's spray bomb for plastic.
Image
User avatar
Wobbly Wheels
Donating Member
 
Posts: 1080
Joined: Tue Mar 15, 2011 9:51 am
Top

Re: 4X8(ish) Benroy Build

Postby KCStudly » Sat May 09, 2015 10:03 pm

You've been busy! Keep up the good work. :thumbsup:

You've got me thinking that maybe I should add a curb for my roof vent. I did a good job leveling off the surface with shims, but didn't think to curb it up any significant amount. Good job. :thumbsup:
KC
My Build: The Poet Creek Express Hybrid Foamie

Poet Creek Or Bust
Engineering the TLAR way - "That Looks About Right"
TnTTT ORIGINAL 200A LANTERN CLUB = "The 200A Gang"
Green Lantern Corpsmen
User avatar
KCStudly
Donating Member
 
Posts: 9607
Images: 8169
Joined: Mon Feb 06, 2012 10:18 pm
Location: Southeastern CT, USA
Top

Re: 4X8(ish) Benroy Build

Postby Wobbly Wheels » Sat May 09, 2015 10:15 pm

I've been getting some of the electrical done as well (my favorite part of any job).
I got the battery switch and inverter physically mounted onto their board and was able to make up the 6AWG cables. Because the switch and inverter are mounted right at the batteries, the runs are really short and I can go a little lighter on the guage. I am building to ABYC (marine) code.

Here you can see the two positive cables coming up from the battery compartment into the switch and the "COM" lead coming out of the switch onto a BlueSea 2002 post. From here I'll feed the inverter and the Blue Sea 6-gang ATO fuse panel. It will also serve as a power point for charging: through the battery switch I can select #1, #2, or both to charge. The BlueSea Cable Clam in the foreground will prevent H2 gas leaking into the box should the batteries ever be overcharged. There are no combustion sources within the box, but there could be so it's code. There will also be a clam shell vent fitting on the battery compartment door.
Image

I picked up an anti-rattle hatch lock for the battery compartment door. In the worst case scenario, a high speed left turn could see 120lbs of batteries leaning on the latch despite my angling the battery drawer slides inward 1/16" so they'll start to bind. This latch is progressive so it should cinch down the door gasket and rest just over center. It also allows for a padlock to secure it when closed.
Closed:
Image

Open:
Image

I also got a pleasant surprise with my wall switches. It turns out that the switches installed in the plates are SPDT, not SPST as the catalog says. That means that each switch has an A or B function instead of just switching on or off. With the double wall plates I've bought, that allows me to select between interior vs exterior/courtesy lights on the same switch. I figure I'll use the second switch for the lights on the other side of the trailer. Or I'll just proceed as planned with one switch for inside and one switch for outside.
Image

This is the gasketing for the hatch and tongue box hinge.
Image

So....
Between herring (bait) fishing, cod fishing (the need for the bait), and work, just getting time in on the trailer is tough enough. Not sure when I'll be able to update next...
User avatar
Wobbly Wheels
Donating Member
 
Posts: 1080
Joined: Tue Mar 15, 2011 9:51 am
Top

Re: 4X8(ish) Benroy Build

Postby Wobbly Wheels » Sat May 09, 2015 10:23 pm

Thx KC, missed your reply while I was pasting pics into the next post.

The curb seemed like a natch - it's how all manner of cabin top stuff is mounted in boats and how skylights are mounted in roofs. As I see it, it doesn't even need to be that high on these little trailers since it's so easy to have them tilt down a bit for storage.

Tomorrow I'm swapping my sweet li'l rowboat for a mtn bike so I don't know how much I'll get done...but I should be able to get the the heat shrink onto the battery cables at least.

It's funny - I can't think think of a reason not to set the windows and hatch in permanently with sealant and yet I can't seem to bring myself to actually do it...
User avatar
Wobbly Wheels
Donating Member
 
Posts: 1080
Joined: Tue Mar 15, 2011 9:51 am
Top

Re: 4X8(ish) Benroy Build

Postby KCStudly » Sun May 10, 2015 12:16 pm

Sleep on it. Sometimes that little nagging voice is right.

I've forgotten more things about my build sequence that I intended to do, but then again you can usually come up with a work around, or it was something that was so negligible it didn't matter anyway. Still, better to sleep on it and be sure.

Also, sometimes I go back and read my own thread and it reminds me of stuff I intended to do at some point in the future, even if it is too late to do, but it has saved me sometimes.
KC
My Build: The Poet Creek Express Hybrid Foamie

Poet Creek Or Bust
Engineering the TLAR way - "That Looks About Right"
TnTTT ORIGINAL 200A LANTERN CLUB = "The 200A Gang"
Green Lantern Corpsmen
User avatar
KCStudly
Donating Member
 
Posts: 9607
Images: 8169
Joined: Mon Feb 06, 2012 10:18 pm
Location: Southeastern CT, USA
Top

Re: 4X8(ish) Benroy Build

Postby Wobbly Wheels » Mon May 11, 2015 9:51 pm

Haha, that's to funny KC. A couple days later and the light went on. I need to replace the screen and it will be easier to press the new spline in with it upside down on the bench rather than trying to do it up through the hole. The window screens are removable so they aren't a big deal but the hatch screen is fixed.

Sage advice as always :thumbsup:

Its funny you mention reading back through the thread - when I go into excruciating detail about how I'm doing something, it's more about leaving bread crumbs for myself later than about tormenting the folks following along :lol:
User avatar
Wobbly Wheels
Donating Member
 
Posts: 1080
Joined: Tue Mar 15, 2011 9:51 am
Top

Re: 4X8(ish) Benroy Build

Postby KCStudly » Mon May 11, 2015 11:35 pm

Wobbly Wheels wrote:...it's more about leaving bread crumbs for myself later than about tormenting the folks following along :lol:


Roger that. :R
KC
My Build: The Poet Creek Express Hybrid Foamie

Poet Creek Or Bust
Engineering the TLAR way - "That Looks About Right"
TnTTT ORIGINAL 200A LANTERN CLUB = "The 200A Gang"
Green Lantern Corpsmen
User avatar
KCStudly
Donating Member
 
Posts: 9607
Images: 8169
Joined: Mon Feb 06, 2012 10:18 pm
Location: Southeastern CT, USA
Top

Re: 4X8(ish) Benroy Build

Postby Vedette » Wed May 13, 2015 9:22 am

Hi Brian?
Glad to see you are still making steady progress ( I know this is your busy season at work! :thinking: ).
Are you still on schedule?
We hope so, as we look forward to seeing you and your trailer at the Farm Gathering! :thumbsup:
My progress on Kermit has come to a grinding halt for now, as we are camping on weekends and working on the Farm when we are home........Busy time of year for me too!
Good Roads
Brian & Sandi
Good Roads
Brian & Sandi
Here is a link to my Build Journal
viewtopic.php?f=50&t=50912
Image109106109111109110138766
User avatar
Vedette
Silver Donating Member
 
Posts: 5141
Images: 443
Joined: Thu Dec 01, 2011 4:28 am
Location: Westbank B.C.
Top

Re: 4X8(ish) Benroy Build

Postby Wobbly Wheels » Thu May 14, 2015 10:53 pm

Ugh - last post was on Monday night and by Tues am I had picked up a stomach flu. Muscled through Tues and then took yesterday off.
I slept literally ALL day - well, in two hour stretches, anyway ;)
I still felt like garbage today and the boss' wife (who infected me in the first place) said I looked bad and should bail out early (last hour of the day)

I thought so too...so that's exactly when our busiest long weekend of the year began (Monday is a holiday in Canada):

We were shuttling boats in and out of the water all day and most of our regulars know not to dally on the launch ramp because it's always busy. We have this trio of guys that regularly use the ramp to launch their tin boat with its 9.9 Yamaha. It's the kind of boat two organized guys could lift out of the truck (with the motor on) and put in the water while the third goes to park the truck. But these aren't organized guys...
They took about 20 minutes just to get it out of the truck and into the water. The third went to park the truck and the other two promptly flipped the boat right on the ramp in knee deep water in front of a line up of people waiting to put in (including us).
We now have to get the motor out of the water, flush out the salt water and get it running again right away...otherwise it will never run again. And by now it's getting close to the end of the day.

A half hour earlier, our sales manager had gotten a call asking about prices for small outboards. Normally people take that info and hum and hah, check prices online, and then wonder why 'offshore' motors are so much cheaper...and then they come in to look at one.
He came in a half hour later to buy one....which is a first time for us.
It takes about a half hour to get a small motor out of the box, run up and tested, and out the door.
There went any thought of my getting out early :lol: :lol:

That's the marina biz though - you do what it takes to make it all work. The best job I've ever had.

Unfortunately, I'm not doing anything on the trailer at the moment having been so sick (and it takes a lot to make me miss a day) Hopefully I'll be able to replace my front fence this weekend (posts cemented in on Sat, fence on Sunday/Mon) so no trailer work then either.
Unless I blow off the fence till next weekend :thinking: :thinking:
User avatar
Wobbly Wheels
Donating Member
 
Posts: 1080
Joined: Tue Mar 15, 2011 9:51 am
Top

Re: 4X8(ish) Benroy Build

Postby Wobbly Wheels » Wed Jun 24, 2015 11:22 pm

We've been readying for a move instead of building a trailer, hence the long time without progress. Sadly, I'll miss Vedette's gathering at the Farm (the one in my sig)
:cry:
We get the keys Jun 30th and the trailer moves to the new house July 1st so the build will be back on in earnest for its first trip (now in August).

I have done a little tiny smidge of trailer work though: I got the interior dome lights switched over from 1157 bulbs to 4X5W LED panels.
These are the lights (salvaged from the same ambulance as my battery switch) after the LED swap:
Image

Image

I figure I'll either paint the outer mounting flange flat black or cut it off altogether and flush mount the lights with only the lens protruding from the headliner...but that's a decision that's way down on the list at this point. They will go aft of the hatch/skylight and will be switched by the wall plates at each door.
Image

The second switch on each wall plate will be courtesy/exterior lights. I have LED landscape lights for courtesy lights and for exterior lights over the doors. I'll pick up some cheap auto fog lights and swap out the bulbs with some LED H3 bulbs I already have. They aren't bright enough for a vehicle but they'll throw plenty of light for getting in and out of the trailer in the dark. I figure I'll attach them to the outer ends of the forward roof rack load bar to save me from penetrating the glass on the roof to mount them. I already have a cable clam for the roof for (future) solar so that's where these wires will come through as well.

I have a Dietz RV dome light from a salvaged slide in camper that I put a single LED panel into. I'm not sure where I'll use it (either in the galley hatch or in the tongue box on a pin switch).
Image

I shut off the shop lights and ran both lights. I tried to come up with a good standard to compare the two, so I used an old magazine I had in the shop about 3' below the light.
Here is the single-panel Dietz light:
Image

And the 2 4-panel dome lights:
Image

Work has been smokin' busy at the marina ('tis the season) but I can't wait to have the trailer in the carport and be able to jump back on it !!
Only a week now...
User avatar
Wobbly Wheels
Donating Member
 
Posts: 1080
Joined: Tue Mar 15, 2011 9:51 am
Top

The Beat Goes On

Postby Wobbly Wheels » Mon Oct 19, 2015 12:24 am

It's been a while with the move and a busy summer and all but things are back in motion on the trailer. I've been putzing along on it for the last week or so, but nothing really update-or-pic-worthy. Mostly it's been fairing, prepping for glass, etc but I figured something out that I want to share.


I'm not sure if anyone else has done this, but I put "the mix" into a spray bottle to pre-treat the interior before gluing in the insulation.
Holy cow, did that ever work great !
I mixed it 4 parts of mineral spirits to one part PU and, while I fully expect the solvent to destroy the rubber inside the sprayer over time, it lasted as long as I needed and then some. It allowed me to mist the stuff over everything without slopping it around and took a fraction of the time brushing it did. I was doing other stuff (sanding, more putty, more sanding...) and I would spray it again every half hour or so. It took about 10 mins to do the inside each time and I figured I used about 1/3 to 1/2 liter per coat. After probably 7 or 8 coats and an overnight, the sprayer hasn't disintegrated yet...
I used it to seal up some mildew as a result of a bit of water getting in while it was in storage - the bleach I sprayed first killed the sprayer it was in...but the mix didn't
Is there anything it can't do ? :lol:

From the time I started, pulling wires was something of a milestone since electrical is something I enjoy doing. Today was that day: I pulled the wires for the lighting and speakers. I'm not planning on installing an entertainment system, but the wiring will be in for 4 speakers in the cabin, 2 in the galley, and a 12V and a 110 outlet for the head unit mounted on the back wall. In a bit of another milestone, I got the footboard installed that separates the galley from the cabin - finally they are two separate spaces. When all is said and done, I have a 52" X 79" bed and a counter top that's 24" deep with enough space underneath for the cooler.
Wiring started:
Image
I am running wires from the fuse panel for a fantastic fan. I don't actually plan on installing one but wire is cheap and who knows ?
Need to figure out which corner of the hatch to coil up the wire at though...

Today I glassed the hatch/skylight curb (hence the work light). Here it is in its new home (not sure why it's blurry...):
Image

Since the last post, I have also come into a ProMariner 3-bank 36A battery charger. It was installed in a boat and the batteries were subsequently changed to AGMs without any though to the charger. The charger failed after a few months and I replaced it. I took the old one home to see what I could learn from it (yes, I also used to disassemble my toys to see how they worked). I replaced two bulging capacitors in the power supply and whaddya know, it fired right up. I've cycled a few batteries through it and it seems to work normally again. The three banks will give keep the two house batteries up as well as a trolling motor battery as shown in the pic. The AC inlet will be installed in the box side just outboard of the battery and will feed only the battery charger. I don't have AC power available when camping so it'll be for nothing more than battery charging and maintenance after I get home.
Image

This week the plan is to finish glassing a few spots and get some more tinted resin down. I've also started applying the excess putty on the walls so I guess now I've committed to fairing out the finish of the mat and painting.
I'd like to be camping in it by the end of November but it'll be done when it's done. Though they're never 'done', right ?....
User avatar
Wobbly Wheels
Donating Member
 
Posts: 1080
Joined: Tue Mar 15, 2011 9:51 am
Top

Re: 4X8(ish) Benroy Build

Postby Wobbly Wheels » Thu Feb 25, 2016 12:20 am

Four months since I last posted, but the build has been continuing on despite a few breaks for various reasons.
Most recently, I've gotten the galley upper shelf and backsplashes paneled and the under cabinet lights installed. In the pic you can see the T&G pine that will get painted white. The sides will be paneled with the off cuts from the cedar I milled for the interior paneling and will get an ebony stain. To throw in a bit of color, I think I'm going to do the counter and shelf nosings in purple heart with a clear PU.

Here is the galley with the lights on:
Image
The 12V outlet on the left and the light switch on the right are dangling by their wiring because they'll be mounted in the facing of the upper shelf. It will be wide (tall) enough that it provides a valence for the lighting below and a fiddle for the shelf above.

The unpaneled section on the right side of the shelf will be boxed in as a wire chase with a door to access the fuse panel. The unpaneled section on the backsplash will be some sort of tile accent, but I haven't seen anything yet that I want to put there. You can also see where I've located the ball studs for the gas springs. I wanted to keep the hatch loading close to the hinge line so it'll mean a couple of 12-20", 80lb springs.

Here is a shot of the galley electrical:
Image
It will be fed by a 10 AWG pair from the cabin fuse panel with that power lead fused in the tongue box right after the battery switch. I have the lighting on one circuit, the 12V outlet on another and the rest are spares, though I'm sure they'll fill up. The power post on the left is switched power for the lights. It keeps the fuse panel from having all those connections stacked on a single screw and still allows me to isolate individual light circuits for troubleshooting or replacement...especially since I don't know how well those valence lights are going to stand up to vibration: good thing I have spares !

I am going to run the wires for the road lighting inside the trailer rather than along the frame because I don't want a penetration through the SIP floor.

As we go further back, I got the hatch mounted. I went with a 3" SS piano hinge rather than a hurricane hinge and sealed the top with some rubber belting held down with aluminum strips. I drilled the strips to match every other hole in the hinge so they are structural as well. The whole mess is sealed up with marine sealant (BoatLife) but we'll see how it does when it sees the outdoors for the first time !
Image

The skylight is in as well. Having already glued down a curb to keep it up out of any potential standing water, I made up a frame by mitering some aluminum angle trim. I drilled it out, etched it and painted it black to match the other exterior trim. Lots more sealant and it became permanent as well.
Image

Image

The hatch isn't in yet because I still haven't gotten as far as replacing the bug screen. I have the mesh and the roller, I just need to pick up some spline...but there's always something more important to do. The black and white thing behind the hatch a little wonder called a Cable Clam. We use them all the time on boats and they are about the only reliable way to get wiring from inside to outside without water getting in and ruining your day. There's a pic below from when I was laying out the location for the boat rack mounting brackets (roof racks). This cable clam will feed the wiring for spotlights facing outward on each end of the front rack. These will serve as spot lights in camp. Most of the camping I do means rolling into a site well after dark on a Friday night so kicking these lights on for an hour or so will make setup quicker and give me more time around the fire...which is what it's all about !!
It'll be so great not to be pitching a tent using the headlights.

Here's the front roof rack location: just enough room without having to get creative. I have some aluminum drip rail molding that was left over from a job that will hold the brackets nicely and still look decent should I decide to run without the boat on top.
Image
The rear rack can go wherever it's needed as long as it's forward enough not to interfere with the rear hatch so I'm not too worried about it at this point.

After this and a few other jobs are done, I am going to learn to weld properly by making a rooftop basket. We have the steel, the rigs, and the expertise at work so I'll be buying a few cases of beer...
Right now I can make a solid but ugly mess with a stick welder so learning should be a gas. :R :lol:

Going back a little further to when I was pulling the wires through. It's amazing that you can have such a pile of spaghetti in such a simple trailer. I use about 90' of 16AWG red wire and about 60' of black. I'm still not sure where it all went.
Image

This is the wires running down the front wall to punch through the wall into the tongue box where the primary distribution happens. There's a 10AWG pair to feed the cabin and galley fuse blocks and a 16AWG pair for exterior courtesy lights. Again not wanting to pierce the floor, I ran this wire to the common exit point in the front wall. From there it will feed the small LEDs under the door sill on each side.
Image

Lastly, these are the latches I bought:
Image
Pretty standard RV paddle latches - they are both right hand but mounting one upside down won't present a problem. I've cut the doors for the handle and now just have to mortise for the bolt...which is the plan for this weekend along with slopping some paint around in the galley and installing the batteries (the battery box is now gelcoated as well).

Not sure when I'll post again but I'll try and make these a little more frequent, even if it's so I remember what the heck I was thinking when I look back later :lol:
User avatar
Wobbly Wheels
Donating Member
 
Posts: 1080
Joined: Tue Mar 15, 2011 9:51 am
Top

Re: 4X8(ish) Benroy Build

Postby Vedette » Thu Feb 25, 2016 11:16 am

Good Morning Brian
Great Progress! :thumbsup: :thumbsup:
I woke up this morning and turned on my computer........and your latest post just popped up on my screen???? :shock:
I had not seen a lot of the above pictures before. :(
Don't know how I missed them???
Things are looking just so wonderful. Glad to see you are back on track. :thinking:
We need you guys in our "Camping Circle" ;)
Let's make 2016 the Camping Year it should be.
Keep up the Great Work! :beer:
Brian & Sandi
Good Roads
Brian & Sandi
Here is a link to my Build Journal
viewtopic.php?f=50&t=50912
Image109106109111109110138766
User avatar
Vedette
Silver Donating Member
 
Posts: 5141
Images: 443
Joined: Thu Dec 01, 2011 4:28 am
Location: Westbank B.C.
Top

PreviousNext

Return to Build Journals

Who is online

Users browsing this forum: No registered users and 1 guest