4X8(ish) Benroy Build

...ask your questions in the appropriate forums BUT document your build here...preferably in a single thread...dates for updates, are appreciated....

Re: 4X8(ish) Benroy Build

Postby Wobbly Wheels » Fri Apr 10, 2015 8:25 pm

ibbowhunting wrote:what are the clamps your using in the picture? they look like abs/pvc pipe


That's exactly what they are, thanks for asking. I keep the scrap from plumbing jobs and rip them once lengthwise on the tablesaw to make the gap. Then they get bucked into rings with the chop saw. By varying the pipe diam and schedule, width of the rings, and width of the gap, you have almost limitless adjustability in the amount of clamping force. I've got a good-sized box of them now, all made from scrap material.
User avatar
Wobbly Wheels
Donating Member
 
Posts: 1080
Joined: Tue Mar 15, 2011 9:51 am

Re: 4X8(ish) Benroy Build

Postby ibbowhunting » Fri Apr 10, 2015 10:08 pm

Wobbly Wheels wrote:
ibbowhunting wrote:what are the clamps your using in the picture? they look like abs/pvc pipe


That's exactly what they are, thanks for asking. I keep the scrap from plumbing jobs and rip them once lengthwise on the tablesaw to make the gap. Then they get bucked into rings with the chop saw. By varying the pipe diam and schedule, width of the rings, and width of the gap, you have almost limitless adjustability in the amount of clamping force. I've got a good-sized box of them now, all made from scrap material.


:thumbsup: I'm going to try that out
ibbowhunting
Teardrop Advisor
 
Posts: 65
Joined: Sun Mar 22, 2015 12:12 pm

Re: 4X8(ish) Benroy Build

Postby Wobbly Wheels » Sun Apr 12, 2015 9:18 pm

ibbowhunting wrote:I'm going to try that out


They work great and are dirt cheap. Be careful with PVC and power equipment - too fast a feed and the plastic can shatter. When it does, the shards are pretty sharp. PPE and a slow feed - let the saw do the work.

It looks like I'm taking the trailer to the shop tomorrow (Monday) morning, where it will live until we move. That will mean staying late in the evenings and heading up there on the weekends to work on it, so I wanted to get the rest of the 'big' jobs done while it's still here at the house.
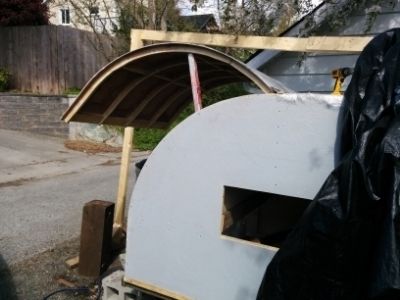
To that end, the hatch went on yesterday:
Image
I still need to chamfer the corners of the outer ribs and wall stiffeners to guide the hatch as it comes down, but otherwise it comes down nicely with no twist and the curve follows the wall pretty well. The walls still 'curl' outward a little where the hatch lands, making it seem like the hatch is about 1/2" too narrow, but that will be corrected when the cabinet framing goes in because it will pull the walls in a bit so they are parallel again. The hatch is pretty light - even with the 1/8" interior panel and some lights, it still won't need much lift from the hatch struts. I screwed the hinge down through every second hole with the rest of the holes reserved for the screws that will through the aluminum strips that will clamp the gasket down over the hinge. The hinge runs to the sides and the the gasket will run an inch or so past the side walls on each side. Before I put the hinge on, I had the foresight to make up a drilling template for the aluminum strips

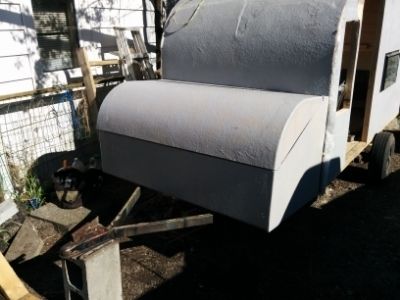
I also got the tongue box secured to the frame:
Image
When I mounted the lid, I had forgotten that I allowed for the hinge to sit flat on top instead of being folded over in the gap so the lid isn't sitting right. I'll fix that today. Later, it will be covered with aluminum strip holding down a gasket, just like its bigger brother, the hatch hinge. There is a carriage bolt running through the floor and each frame member at the front of the box and the side and top corners will be glassed to the front and side walls to blend them in. Now that it's fitted, I'll undo the bolts and lift the box so that I can coat the bottom in black goo before setting it down for good.

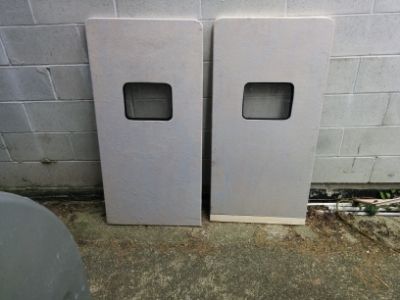
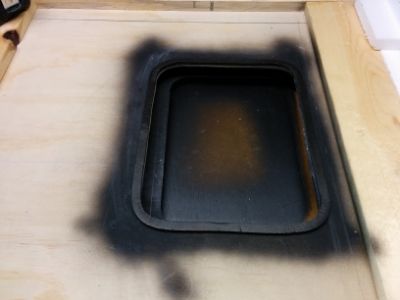
I assembled the doors today. This is the inside face of the outer skin. Note the foam tape that will seal against the glass. I also ran a bead of sealant around the tape. The paint around the opening is just to seal the wood :
Image

This is the sealant I used:
Image

Both doors with glass installed:
Image

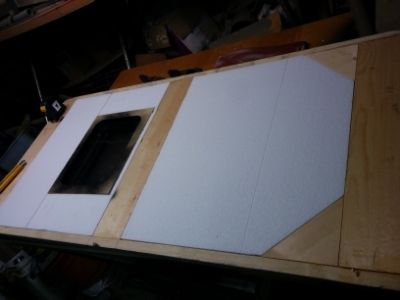
Here is one door with the foam core fitted. The extra blocking in the bottom corners will allow me to put a radius on the corners if I need extra clearance for the fenders.
Image

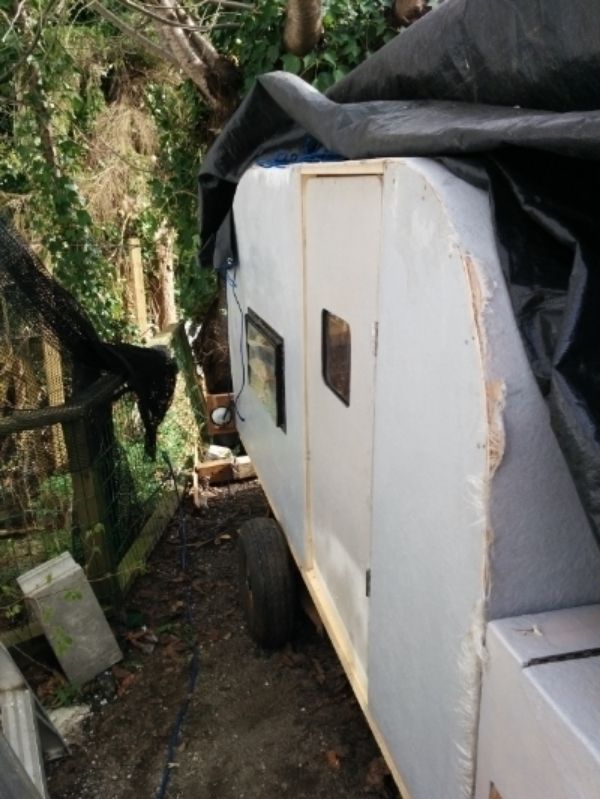
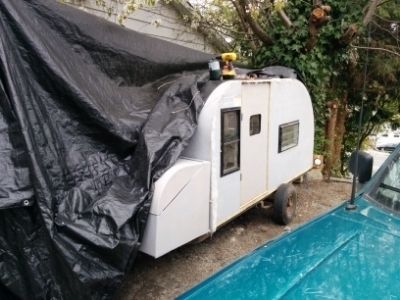
Starboard door hung:
Image

Port door hung:
Image

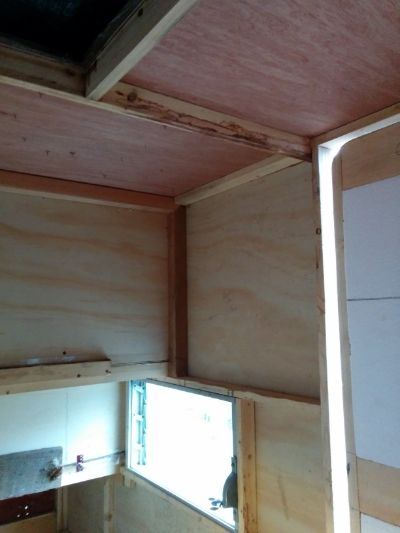
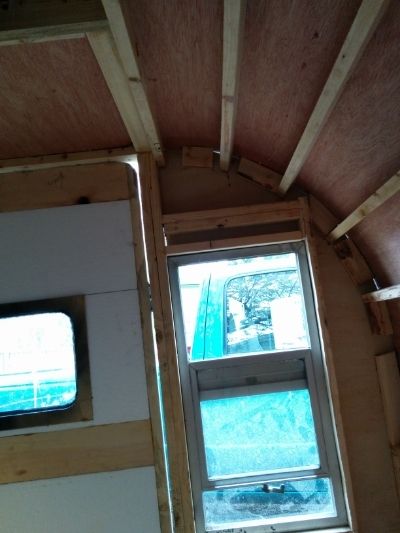
Tonight was the first time I've actually sat inside it to figure the locations of stuff. I am amazed by how much space there actually is. Obviously it'll close up pretty quick when the cabinets are going in, but I think there's enough natural light coming in that it won't feel like sleeping in a coffin :lol:
Image

Image
User avatar
Wobbly Wheels
Donating Member
 
Posts: 1080
Joined: Tue Mar 15, 2011 9:51 am
Top

Re: 4X8(ish) Benroy Build

Postby KCStudly » Mon Apr 13, 2015 12:38 am

It's coming together fast for the move. :thumbsup:
KC
My Build: The Poet Creek Express Hybrid Foamie

Poet Creek Or Bust
Engineering the TLAR way - "That Looks About Right"
TnTTT ORIGINAL 200A LANTERN CLUB = "The 200A Gang"
Green Lantern Corpsmen
User avatar
KCStudly
Donating Member
 
Posts: 9607
Images: 8169
Joined: Mon Feb 06, 2012 10:18 pm
Location: Southeastern CT, USA
Top

Re: 4X8(ish) Benroy Build

Postby Wobbly Wheels » Mon Apr 13, 2015 8:25 am

Yeah, once the pieces (hatch doors etc) were done it was a matter of screwing them on. I realized as I was assembling the doors that I was WAY over thinking them instead of just getting it done...but I've been known to do that. :lol:
There's still a lot of fairing and little stuff to do, but it's almost 'campable' now. Looks like the move happens tomorrow morning.
User avatar
Wobbly Wheels
Donating Member
 
Posts: 1080
Joined: Tue Mar 15, 2011 9:51 am
Top

Re: 4X8(ish) Benroy Build

Postby Vedette » Mon Apr 13, 2015 10:52 am

Brian
You must have Sunday Monday off??
Once again you are making progress and I am lolly gagging.
Went on a Garage tour yesterday with the Car Club.........52 Guys, 13 Garages, over 100 cars, and ??? Beers! :twisted:
Makes for a long day riding around on a school bus , but great fun. Except nothing gets done on the trailer project. :R
The guys did get to see Kermit. We also saw the 1959 Serro Scotty that I found for a friend in the club, who is now into a serious restoration on it. He has replaced everything from the ground up.
Keep up the good work! :thumbsup:
Campable already? That mean no worries for the Farm Gathering.
Good Roads
Brian & Sandi
Good Roads
Brian & Sandi
Here is a link to my Build Journal
viewtopic.php?f=50&t=50912
Image109106109111109110138766
User avatar
Vedette
Silver Donating Member
 
Posts: 5141
Images: 443
Joined: Thu Dec 01, 2011 4:28 am
Location: Westbank B.C.
Top

Re: 4X8(ish) Benroy Build

Postby KCStudly » Mon Apr 13, 2015 5:17 pm

Wobbly Wheels wrote:... I was WAY over thinking them instead of just getting it done...but I've been known to do that.

As they say, that line forms directly behind me! :R ;)
KC
My Build: The Poet Creek Express Hybrid Foamie

Poet Creek Or Bust
Engineering the TLAR way - "That Looks About Right"
TnTTT ORIGINAL 200A LANTERN CLUB = "The 200A Gang"
Green Lantern Corpsmen
User avatar
KCStudly
Donating Member
 
Posts: 9607
Images: 8169
Joined: Mon Feb 06, 2012 10:18 pm
Location: Southeastern CT, USA
Top

Re: 4X8(ish) Benroy Build

Postby Wobbly Wheels » Tue Apr 14, 2015 7:42 am

Vedette wrote:You must have Sunday Monday off??
Campable already? That mean no worries for the Farm Gathering.


Nope, weekends. Although I can see how, when one is 'living a life of leisure', the days can run together :lol:
Besides, days when you guys aren't on the road don't really count anyway, do they ?

Speaking of which, that sounds like a heck of a tour...when I was on the reserve base in Vernon, a buddy knew a guy with a shop that held a bunch of restored classics. We signed out an Iltis one weekend and checked it out. I wasn't much of a car guy then, but even so I was blown away upon walking into a plain-looking building and realizing the investment in time and money it must have taken to create (or re-create...) all of that.

I'm a little ways from actually campable yet - it would still be a pretty wet weekend !! The big things are to get the hatch and skylight in the roof, seal the galley and tongue box hinges, and make up the fenders. I'm banging together some quick ones for this morning's trip, so I'd better get on it. Otherwise it's ready to roll !

KC, that's too funny. Reminds of the T-shirt slogan:
"When you are up to your a** in alligators, sometimes it's difficult to remind yourself that the initial objective was to drain the swamp."

Well folks, how it goes in the next hour determines whether my next post is a positive one or a big black cloud :lol:
User avatar
Wobbly Wheels
Donating Member
 
Posts: 1080
Joined: Tue Mar 15, 2011 9:51 am
Top

Re: 4X8(ish) Benroy Build

Postby Vedette » Tue Apr 14, 2015 11:22 am

Fenders? Can you say Princess Auto?? :R
Brian
Good Roads
Brian & Sandi
Here is a link to my Build Journal
viewtopic.php?f=50&t=50912
Image109106109111109110138766
User avatar
Vedette
Silver Donating Member
 
Posts: 5141
Images: 443
Joined: Thu Dec 01, 2011 4:28 am
Location: Westbank B.C.
Top

Re: 4X8(ish) Benroy Build

Postby JaggedEdges » Tue Apr 14, 2015 2:00 pm

Wobbly Wheels wrote:
Vedette wrote:
"When you are up to your a** in alligators, sometimes it's difficult to remind yourself that the initial objective was to drain the swamp."


Hah, that's where I keep finding myself. Need some good alligator spray... like a small battery of miniguns might just do it.
Jack of all trades, Doctor of rocket surgery and fellow of the noble college of shadetree meddlers. "in argentum tenax vinculum speramus"
JaggedEdges
Teardrop Master
 
Posts: 224
Joined: Mon Apr 06, 2015 5:32 pm
Location: Niagara Region, Ontario
Top

Re: 4X8(ish) Benroy Build

Postby Wobbly Wheels » Wed Apr 15, 2015 8:18 am

Brian, I have thought abut just buying them, but I want to try and build as much of this as I can...though it may well come to that !

Need some good alligator spray... like a small battery of miniguns might just do it.

I've been turfing out the basement to get rid of ten years' of accumulate junk before we move, but I wind up getting sidetracked by those pesky gators.
I have recently taken the nuclear option: if I haven't opened the box in the ten years we've been here, I don't need it and out it goes...

The tow went well. With tongue box, doors, and hatch on I would guess it weighs about 600# right now. The tongue weight felt like around 50 or 60 lbs so that's in line, though it's just a guess. The trailer tracked well and sat within the profile of the Ranger: I couldn't see it in the mirrors. Probably because it's so short, I didn't need to corner any differently, though it was all highway with no intersections. I am used to backing boat trailers up about 40', so I had to make comparatively tiny corrections while backing it.

One minor 'hitch' - when I plugged in my (brand new) brake light converter into the tail light harness and hooked it up to the light bar on the trailer, I lost my turn signals altogether. I still had stop and brake lights but no turn/hazards. Fortunately it was all highway so I unrolled the window the two times I did need to signal. Except for the converter, everything else was the same as the last time I used the trailer. I suspect it's just from the extra load on a probably-already-dying flasher....just another problem to solve....

Gave the folks at work the 50-cent tour last night and got a lot of 'it's so cute' and 'can you build me one'. I can see what people mean about getting that when they stop for gas or at a restaurant.

Since the truck and trailer are now 45 mins away it'll be Sunday night updates of weekend progress from this point, at least until we move to a place that has more space. Not sure how I'm gonna keep out of trouble on weeknights...I guess I could get onto the fence rebuild I've been putting off, or the gutters, or...
:lol: :lol:
User avatar
Wobbly Wheels
Donating Member
 
Posts: 1080
Joined: Tue Mar 15, 2011 9:51 am
Top

Re: 4X8(ish) Benroy Build

Postby Vedette » Sat Apr 18, 2015 12:50 am

Careful........don't get distracted by household chores! :roll:
Steady the course. :twisted:
Even if you have to work on accessories??? :thinking:
Good Roads
Brian & Sandi
Good Roads
Brian & Sandi
Here is a link to my Build Journal
viewtopic.php?f=50&t=50912
Image109106109111109110138766
User avatar
Vedette
Silver Donating Member
 
Posts: 5141
Images: 443
Joined: Thu Dec 01, 2011 4:28 am
Location: Westbank B.C.
Top

Re: 4X8(ish) Benroy Build

Postby Wobbly Wheels » Sat Apr 18, 2015 3:12 am

I hear ya Brian !

I'm heading up there to work on it tomorrow after the chores are done, lol. The first job is to plunk the batteries onto their shelf and mount the inverter and battery switch. Then I can cut the 6AWG and 8AWG cables to length so that I can do the lugs and heat shrinks at home in the evenings. Because I don't have power there, it will also let me run the angle grinder to clean up the glass so I can do the roof-to-wall corners. I also want to get the curb ring glued down for the hatch/skylight as well so that I can fit the skylight one night after work. The main thing I want to get done though is to glass the tongue box to the front wall to blend it in, and undercoat the bottom of it...which was supposed to happen before the tow but didn't.

It probably won't happen tomorrow, but I also want to make a pattern of the galley sides so that I can build the cabinets as a complete slide-in unit. I have a couple ideas I want to play around with and that seems like the easiest way to accommodate them.

I never thought I would say this, but I think the trailer's small wheels are growing on me. I could use a couple more inches of sill height at the door to get it to a normal chair height, but the foam ought to do that for me.

I have pretty much settled on having a section of the counter slide out like a keyboard shelf. That will house the cook stove and a healthy amount of countertop. I can also push the cabinet faces out further (back) by doing that, since I don't 'need' to keep that counter space clear. That all means that my actual working countertop height will be lower than originally intended...which is of course the other crucial measurement affected by wheel size and ground clearance.

I think I will still go up to 12" wheels from the current 8" popup wheels, but not much bigger than that...certainly not to the 15" rims of the truck.
Which makes my fender-fabbing (also an evening, at-home job) that much easier....
User avatar
Wobbly Wheels
Donating Member
 
Posts: 1080
Joined: Tue Mar 15, 2011 9:51 am
Top

Re: 4X8(ish) Benroy Build

Postby Vedette » Sun Apr 19, 2015 11:03 am

Good morning Brian
Just sent you a PM as I had not yet read this update.
Sounds like you have an ambitious day ahead of you??
I bought my battery yesterday and did get to run down to the states to pick up my Dexter axle....but, that is as much as I have accomplished on Kermit this week.
Hope to get Miss Piggy out of the barn later today for here spring bath before we head to the Dam Gathering!
Your kitchen plans sound great.......and I might be doing the same "bread board or computer tray" counter tops in Kermit?
Good Luck with your day.
Brian
Good Roads
Brian & Sandi
Here is a link to my Build Journal
viewtopic.php?f=50&t=50912
Image109106109111109110138766
User avatar
Vedette
Silver Donating Member
 
Posts: 5141
Images: 443
Joined: Thu Dec 01, 2011 4:28 am
Location: Westbank B.C.
Top

Re: 4X8(ish) Benroy Build

Postby Wobbly Wheels » Sun Apr 19, 2015 12:08 pm

PM received.
I loaded up the car last night with the batteries, battery drawer and the electrical sundries I'll need.
I have a tote with my glassing stuff in it but leaving it in the car overnight would drown out the new car smell and we can't have that ! :lol:

Just checking in here to see what's new and then I'm heading up to the shop for the day.

Looks like a great day to be washing the trailer (but an even better day to be working on one: poke, poke)

As I stood behind the trailer it seemed as though I was leaning forward to use the counter, probably because the edge of the counter is inset a couple inches. I like to cook when camping so I can see myself spending enough time standing there for it to be uncomfortable. Besides, I can as much as double my counter space with no loss of usable space, so it seems like a no-brainer...though there must be a reason why no one else is doing it....

Will update tonight.
User avatar
Wobbly Wheels
Donating Member
 
Posts: 1080
Joined: Tue Mar 15, 2011 9:51 am
Top

PreviousNext

Return to Build Journals

Who is online

Users browsing this forum: No registered users and 5 guests