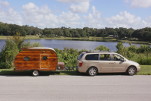
Conch Fritter Woodie - Finally gets its topsides painted!

...ask your questions in the appropriate forums BUT document your build here...preferably in a single thread...dates for updates, are appreciated....

Re: D and R's Conch Fritter Woodie - Wings

Postby daveesl77 » Sat May 02, 2015 7:05 am

Well, to be honest, it only works that well when I add in the Yoyodyne Propulsion System Dimensional Modulator. In reality, many of my ideas come from YPS. Just remember...

The Future Starts Tomorrow!


dave
*******
Dave and Regina - Enjoying old age, a LOT!

Build Journal - http://www.tnttt.com/viewtopic.php?f=50&t=62386
User avatar
daveesl77
Donating Member
 
Posts: 871
Images: 273
Joined: Tue Jan 27, 2015 4:33 pm
Location: Pocahontas County, West Virginia

Re: D and R's Conch Fritter Woodie - Wings

Postby OP827 » Sat May 02, 2015 9:42 am

Oh, I did not know, that makes sense! Your work is wonderful, thanks for sharing! :thumbsup: :applause:
User avatar
OP827
Donating Member
 
Posts: 1555
Images: 405
Joined: Fri Apr 25, 2014 7:27 pm
Location: Bruce County Ontario

Re: D and R's Conch Fritter Woodie - Wings

Postby daveesl77 » Mon May 04, 2015 1:29 pm

For anyone not familiar with YPS, then you need to watch "Buckaroo Bonzai" and then many, many other shows such as Star Trek, Back to the Future, et al. "Monkey Boy to the Rescue" and "The only reason for time is so that everything doesn't happen all at once."

Not a lot to take pics of, but did get a fair amount of the baseline stuff done over the past couple of days. Got the wiley window frames made and mounted on the "cloud" windows. Got the windows designed and cut out for the doors. They are in the shape of big scallop shells. Got my door frames mounted and everything that could be exposed to the elements with at least 2 coats of epoxy, more to come on other parts. Everything is curing today from the second coat. I might actually get the doors mounted tomorrow and build the wiley window frames for the doors.

Regina got the interior walls painted, and yes we did paint them as the sheer amount of wood we had originally planned was just kind of overwhelming to the eye. Figured do a fun paint scheme and accent with wood. So the interior front/ceiling/rear is white plastic panels and the base wall color is a light blue. Goes along with the Conch Fritter theme. Oh, and Regina also got both of the "Conky's" cut out and painted. I like them and will do a pic when they are mounted on the window panes. (we'll see who gets the Conky reference - TPB Forever!)

I guess by Friday I'll have the electric, water and gas lines run. Then time to build the front cabinet system, ventilation duct system and the galley rail system.

dave
*******
Dave and Regina - Enjoying old age, a LOT!

Build Journal - http://www.tnttt.com/viewtopic.php?f=50&t=62386
User avatar
daveesl77
Donating Member
 
Posts: 871
Images: 273
Joined: Tue Jan 27, 2015 4:33 pm
Location: Pocahontas County, West Virginia
Top

Re: D and R's Conch Fritter Woodie - Wiley Windows

Postby daveesl77 » Tue May 05, 2015 5:24 pm

Wiley windows are installed in the wall. Door windows are now cut out (did them like big scallop shells). Got the handle openings all cut out and will probably be installing the doors tomorrow.

Wiley Windows! These are placed and first coat of epoxy and poly are on, but still need to do finish coats, cut in color and build trim around lexan. A "wiley" in the open position. Actually there are triangle shaped pieces that hold the lexan open or closed, just not installed in these photos. The plastic can also be removed to have full open. In this position, it can be raining like crazy and it doesn't matter, as it just runs right back out. Window base is angled both down and to center then fully covered with about 1/8" epoxy. This flows all water out to the drain in the lower center of the opening. Oh and ignore the gaps in the plastic, this all gets covered with trim panels, raceways and ducting. Plus they had to have 1/8-1/4 gap for expansion, so saith the manufacturer. I think it is a bunch of hooey, since it was like 90 when I installed it, but I knew I was putting in the wood covering, so I don't mind.
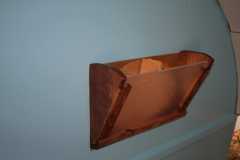
131430

The "Wiley" in a sort-of closed position. Once again, the wooden triangles are not installed, but when they are they hold the lexan tight against the wall. Wall is coated with epoxy and water just runs out the bottom. The outside edges of the lexan still have to be trimmed and finished.
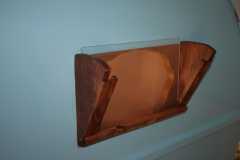
131431

The wiley from the outside, in the open position. The lexan still has its protective plastic coating on it, but it will be frosted anyway, so this is kind of what it will look like.
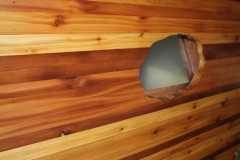
131432

The Wiley closed. You can barely see the water drain at the very bottom. The interior foot of the window is angled to move all water to the center and out. It is a complete epoxy fill. You can see a slight drip from where I tested it by throwing a 2 gal. bucket of water at it. Not a drop inside.
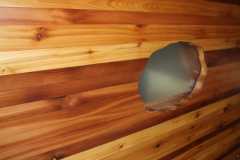
131433

Almost done, except for the finishin' :D

Cost to date is $1,590 +/-

dave
*******
Dave and Regina - Enjoying old age, a LOT!

Build Journal - http://www.tnttt.com/viewtopic.php?f=50&t=62386
User avatar
daveesl77
Donating Member
 
Posts: 871
Images: 273
Joined: Tue Jan 27, 2015 4:33 pm
Location: Pocahontas County, West Virginia
Top

Re: D and R's Conch Fritter Woodie - Wiley Windows

Postby Atomic77 » Tue May 05, 2015 5:56 pm

Great job on the windows Dave! Really coming together... They really go well with the overall look. Nice!
Michael

"The Strength is in the Sum of the Parts..."

The Astroliner

Follow The Astroliner Blog Here!

Check out our YouTube video
User avatar
Atomic77
1000 Club
1000 Club
 
Posts: 1463
Images: 309
Joined: Tue Oct 08, 2013 5:29 pm
Location: Fort Wayne Indiana
Top

Re: D and R's Conch Fritter Woodie - EPDM and PMF

Postby rowerwet » Wed May 06, 2015 1:26 pm

daveesl77 wrote:Finally got around to uploading a couple of pics. Installed the EPDM and PMF (Poor Man's Fiberglas)

Today I took down the giant tarp/canopy rig (also called my temporary build shelter) so I could install the EPDM on the roof. Canvas/TB2/Paint covering is on the front and rear, EPDM across the top.

Front and rear canvas glued on and 1st coat of paint. EPDM laying on top getting hot and ready for installation.

130970

EPDM glued down, initial trim cuts on all facing material cut. I used the latex adhesive with the EPDM, as advised here and WOW it is easy to do with that!

There will be several wood trim pieces running across and then I'm hoping to steam bend the outer trim boards. Haven't steam bent wood in about 30+ years, so hopefully I remember how to do it. If not, then I'm about to wreck some expensive hardwood. Aluminum sheet runs across the base of the front section as a rock guard.

130971

Got the first paint coat sanded and a second coat put on today. Tomorrow I'll sand it down again and put on a 3rd. Will probably have 4 coats when done. Fingers cross that the latex adhesive on the EPDM is cured by tomorrow so I can bend in the overlap and adhere.

This is the first time the trailer has been out in the sun, but it is now covered back up again. Next up is the door trim and wiley windows.

dave

Not sure why you are doing EPDM and PMF
User avatar
rowerwet
Gold Donating Member
 
Posts: 2075
Images: 521
Joined: Mon Apr 20, 2009 12:52 am
Location: Merrimack River Valley
Top

Re: D and R's Conch Fritter Woodie - Wiley Windows

Postby daveesl77 » Wed May 06, 2015 2:21 pm

If I do another, I won't do the EPDM. After seeing how well the PMF came out I'd only use that. I wasn't fully convinced in the beginning on how the PMF would hold up in Florida weather, but now I can see that it would be fine by itself.

dave
*******
Dave and Regina - Enjoying old age, a LOT!

Build Journal - http://www.tnttt.com/viewtopic.php?f=50&t=62386
User avatar
daveesl77
Donating Member
 
Posts: 871
Images: 273
Joined: Tue Jan 27, 2015 4:33 pm
Location: Pocahontas County, West Virginia
Top

Re: D and R's Conch Fritter Woodie - Windows & Doors

Postby daveesl77 » Wed May 06, 2015 2:40 pm

Conch Fritter has doors! Put the wing back up to see how it looks. Still need to build and cut out the trim. Then varnish, varnish, varnish and ... These guys are super tight, like no light can be seen from the inside and I haven't put the seals on yet. The primary core ply in the doors had been sitting in my garage for over 8 years, so it had plenty of time to stabilize to heat/cold/humidity.

131450

Yes, it actually opens. However, they will also come back off, as I need to do some more sanding and finishing on them. Also tested out the interior cabinets and refrigerator, they work great! But I need to get some new linoleum as the stuff I had just didn't look good for the floor.
131451

Curb side door. Still have to build the wiley windows for the doors. Didn't feel good today, so took the afternoon off. Still need to seal the bolt holes for the spars and tension rods with epoxy, make the perimeter trim, the door and window trim and the base trim and storage compartments. Then a few more coats of poly on the cedar, the cedar cross trim, the galley door, etc, etc
131452

Yep, almost done except for the finishin' :D

dave
*******
Dave and Regina - Enjoying old age, a LOT!

Build Journal - http://www.tnttt.com/viewtopic.php?f=50&t=62386
User avatar
daveesl77
Donating Member
 
Posts: 871
Images: 273
Joined: Tue Jan 27, 2015 4:33 pm
Location: Pocahontas County, West Virginia
Top

Re: D and R's Conch Fritter Woodie - Windows & Doors

Postby KCStudly » Wed May 06, 2015 2:58 pm

Train kept a rollin'. :thumbsup:
KC
My Build: The Poet Creek Express Hybrid Foamie

Poet Creek Or Bust
Engineering the TLAR way - "That Looks About Right"
TnTTT ORIGINAL 200A LANTERN CLUB = "The 200A Gang"
Green Lantern Corpsmen
User avatar
KCStudly
Donating Member
 
Posts: 9613
Images: 8169
Joined: Mon Feb 06, 2012 10:18 pm
Location: Southeastern CT, USA
Top

Re: D and R's Conch Fritter Woodie - Junkyards and Profit!

Postby daveesl77 » Fri May 08, 2015 9:20 am

Nice, profitable day at the salvage yard!

We have a small RV junk yard near my house and they give you some great deals on stuff. Essentially it is "you name the price and get it yourself". So, I offered $25 for a 35 gallon water tank and a 45 amp converter. The guy behind the counter said if I wanted, just give him another $5 and I could get anything I wanted out of the one RV. It was in pretty rough shape, but I figured for 5 bucks, why not. So I also found a really nice Flojet water pump. Thought that would be a nice deal for the $5. Then I began to look under the foldout settee. The last owner obviously liked to lay on the couch, drink wine and beer then stick the bottles under the couch between the back and seat. I then saw the dollar bill. It was pretty dirty, but I figured "why not". Then the next dollar, and another, and another, then the $5 bill, then another, then the $20, then 2 more of those, by the end I had collected $71 in cash, so I paid for my treasures with the found money and still made a $41 profit.

Now, with the water tank, no I will not be putting a 35 gallon water tank in Conch Fritter, but it will go in the back of my truck. That way, when we go to places that we know water is hard to come by we can fill up the truck tank and have a nice reserve for the 8 gallon tank in the camper. The 45 amp converter is big for the trailer, but what the heck, why not? The Flowjet pump is way better than the cheap $20 pump I've been using for my hot water system, so all around a good deal.

8)

dave
*******
Dave and Regina - Enjoying old age, a LOT!

Build Journal - http://www.tnttt.com/viewtopic.php?f=50&t=62386
User avatar
daveesl77
Donating Member
 
Posts: 871
Images: 273
Joined: Tue Jan 27, 2015 4:33 pm
Location: Pocahontas County, West Virginia
Top

Re: D and R's Conch Fritter Woodie - Windows & Doors

Postby dogscats » Fri May 08, 2015 1:59 pm

Great windows
TODAY IS THE OLDEST YOU'VE EVER BEEN,
YET AT THE SAME TIME, THE YOUNGEST YOU'LL EVER BE,,, SO MAKE THE BEST OF IT WHILE YOU CAN, AND ENJOY THIS DAY WHILE IT LASTS
User avatar
dogscats
Donating Member
 
Posts: 235
Images: 20
Joined: Wed Mar 26, 2014 5:05 pm
Top

Re: D and R's Conch Fritter Woodie - Getting closer

Postby daveesl77 » Tue May 12, 2015 5:38 pm

The last couple of days have been pretty good on the construction front. Got all of the wiley windows in and epoxied, lexan cut. Began painting the inside edges of the windows and doors, still need to do another sand and final coat of poly over the epoxy. Doors hung. Got the primary ventilation duct holes cut through the floor. Got the base wiring for both 12v and 120v systems installed. Installed the vinyl flooring. Got the forward cabinet frames sanded, next up are the doors and shelving system.

If things keep up at this pace then we should be ready to do a couple of test runs by Memorial day. I got in my different flavors of LED lights, so now I have about a half-dozen different designs to play with. The end of June was our original "hope for" date, as it is when my step-grandson graduates high school, so we'll be up in NY for that. As a side note, he will be attending the same university as my daughter did for her undergrad. He'll also be staying in the same dorm. He did not know any of this. It goes back though, my brother also attended the same university, albeit 40 years ago and my daughter did not know that when she attended.

dave
*******
Dave and Regina - Enjoying old age, a LOT!

Build Journal - http://www.tnttt.com/viewtopic.php?f=50&t=62386
User avatar
daveesl77
Donating Member
 
Posts: 871
Images: 273
Joined: Tue Jan 27, 2015 4:33 pm
Location: Pocahontas County, West Virginia
Top

Re: D and R's Conch Fritter Woodie - Getting closer

Postby daveesl77 » Tue May 12, 2015 7:16 pm

Got the first curve and circle cut for the "wings" You really can't see it yet, but there will be a full circle sitting inside a larger, offset partial circle that comes from the outer curve. Wood is just leaning up for now. Not doing a steam bend as I just can't count on the quality of available hardwood. Instead I'm using pine, with all grain going horizontal. It will be encapsulated in epoxy and polyurethane.

131588

In this shot you can barely make out the circle and curve lines that will be. The trim that will continue along the curve of the trailer is 1/2 as thick as the wing section. The forward lip of this will gradually curve down to match the thickness

131589

The curves will continue from the back, coming out of the lower portion of the wing and then fully wrapping the entire trailer. Thin cedar strips will cap the top and there is a cedar strip that runs across the connection of EPDM to PMF

131590

Test fitting the front, side trim. The circle section will end up being routed to show the curve and wings. It will then form into the forward trim, which is 1/2 as thick as the wings. And the door looks strange because it is 1) just leaned up and 2) just sanded getting ready for it's final coat of polyurethane before it is reattached. The trim will continue around the rear curves. The base trim will be about 7" tall as it will enclose the small, lower compartments I'm building below the floor to hold stuff like water hoses or electric stuff. The compartment boxes will be all aluminum, but covered with wood on the side.

131591

I've never done this before but I think it'll work ok. The photos are laminated to the door. Kind of a twist on the idea of papering with a map. The wiley windows on the doors we are doing as kind of a rustic look (same with the doors themselves). I did not want a glass smooth finish, but instead something kind of bumpy. The poly gives the photos a slight amber tinge. I distressed the wiley frames to go along with the interior theme.

131592

So we have built an almost waterproof and very rugged trailer, so of course I had to begin cutting out floor sections. Here is a sample of the floor, cut out for the ventilation and AC ducting. That is 2" solid and the lamination is amazingly strong. The top canvas in the photo is actually the bottom layer. I was able to pull/tear some of the canvas from the ply, but it wasn't easy. None of the other layers will budge. That is all TB2 on all layers.

131593

coming along

dave
*******
Dave and Regina - Enjoying old age, a LOT!

Build Journal - http://www.tnttt.com/viewtopic.php?f=50&t=62386
User avatar
daveesl77
Donating Member
 
Posts: 871
Images: 273
Joined: Tue Jan 27, 2015 4:33 pm
Location: Pocahontas County, West Virginia
Top

Re: D and R's Conch Fritter Woodie - Getting closer

Postby KCStudly » Tue May 12, 2015 8:12 pm

Very nice progress. You are doing a very fine job! :thumbsup:
KC
My Build: The Poet Creek Express Hybrid Foamie

Poet Creek Or Bust
Engineering the TLAR way - "That Looks About Right"
TnTTT ORIGINAL 200A LANTERN CLUB = "The 200A Gang"
Green Lantern Corpsmen
User avatar
KCStudly
Donating Member
 
Posts: 9613
Images: 8169
Joined: Mon Feb 06, 2012 10:18 pm
Location: Southeastern CT, USA
Top

Re: D and R's Conch Fritter Woodie - Getting closer

Postby Atomic77 » Tue May 12, 2015 8:30 pm

Love the look. Great job!
Michael

"The Strength is in the Sum of the Parts..."

The Astroliner

Follow The Astroliner Blog Here!

Check out our YouTube video
User avatar
Atomic77
1000 Club
1000 Club
 
Posts: 1463
Images: 309
Joined: Tue Oct 08, 2013 5:29 pm
Location: Fort Wayne Indiana
Top

PreviousNext

Return to Build Journals

Who is online

Users browsing this forum: No registered users and 21 guests