A different kind of pop-up (11-5-17) fixing lessons learned

...ask your questions in the appropriate forums BUT document your build here...preferably in a single thread...dates for updates, are appreciated....

Re: A different kind of pop-up (update-new Dexter axle)

Postby lrrowe » Thu Feb 04, 2016 4:40 pm

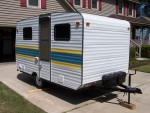
Yep...got that. Looked under the trailer today and see where I can put it on the frame.
Thanks.
Bob
Bob

First Post on Purchase of Trailer: http://www.tnttt.com/viewtopic.php?f=42&t=60722
Hot water infloor and radiator heating project:[url]http://www.tnttt.com/posting.php?mode=reply&f=54&t=62327[/

Image Image
User avatar
lrrowe
Donating Member
 
Posts: 3285
Images: 439
Joined: Sun Feb 10, 2013 5:54 am
Location: SW Virigina

Re: A different kind of pop-up (update-new Dexter axle)

Postby lrrowe » Fri Feb 05, 2016 4:30 pm

les45 wrote:
lrrowe wrote:But if we have the contact point behind the hub and arm, on the frame itself in the same area, I cannot see why that will not work. Regarding Dexter's advice, you can just image the load on the bottom of the hub rather then on the spindle. When I think about it, it seems for sure the weight of the trailer would deform the bottom of the brake mechanism (if you have one) or in your case, the point of stress (forgot my engineering terms) would be too concentrated on the bottom of the plate.


Yes, the mounting brackets are made to take the load so you should be good to set it down on the mounting brackets or that area of the frame. I guess the load on the hub coming through the lug nuts on a mounted wheel is better distributed to the bearings than a point load on the bottom of the hub rim.


Well Les45, I have to give up my idea. I got under the trailer again and I was using the wrong reference point. I had not considered that the brake drum's extension down is the limiting item. As it is now, there is only 6 inches from the drum bottom and the concrete. And if I were to support the trailer by the frame, then the drum would actually be closer to the ground given that the torsion spring would not be compressed as much while not under load.

I guess it is back to the drawing board. For me, I think the last option as was suggested to me about a year ago is to make a steel wheel plate just larger then the drum and lower the trailer down. It might work, but it will be close. I think I will make one up for the heck of it. Maybe I will have to remove the vent cover to gain an extra 1/2 inch or so of clearance.

My suggestion to others who have not yet planned or purchased their trailer and who wish it to go inside the garage to first do all the measuring they can.
Bob

First Post on Purchase of Trailer: http://www.tnttt.com/viewtopic.php?f=42&t=60722
Hot water infloor and radiator heating project:[url]http://www.tnttt.com/posting.php?mode=reply&f=54&t=62327[/

Image Image
User avatar
lrrowe
Donating Member
 
Posts: 3285
Images: 439
Joined: Sun Feb 10, 2013 5:54 am
Location: SW Virigina

Re: A different kind of pop-up (2-16-16 mock up cables)

Postby les45 » Tue Feb 16, 2016 3:17 pm

For those who are not familiar with the lift system on a pop-up, it is kind of complicated with four lift cables of different lengths and lots of pulleys all controlled by one main winch cable. The Jayco system uses a series of small plastic pulleys that route the four main lift cables from a single winch block ultimately to a flexible spring-like rod on each corner that pushes each telescoping leg up and thus raises the top. Since I am replacing the entire cable system, I decided to make a lot of changes, especially to the pulleys themselves. Replacement pulleys are hard to find and quite expensive so I decided to use an inexpensive wall mount type metal pulley readily available at Lowes to replace most of the system along the side wall that routes the two rear cables. Instead of one small double pulley to take the cables over the wheel well, I used two separate pulleys and several extra pulleys not in the original system to better line up the cables with their respective lifting rods. I mocked up with string to determine the locations of the pulleys to avoid interference. I will also use string to determine the length when cutting and installing the individual metal cables. That part of the process will also be somewhat complicated and I will cover that in my next update.

The original system simply routed both rear cables through a single double pulley over the wheel well which resulted in a lot of chafing. I replaced the double pulley with separate pulleys for each cable to keep the cables separated and to reduce the chafing.
Image

The two rear cables were so close along the side wall that they touched each other most of the way. This new system keeps a good separation for all the cables
Image

The front corner also used a small double pulley. I replaced the double with a single and added the wall mount pulley on the other side of the lift rod to separate the two cables.
Image

The rear corner originally used a single double pulley and the previous owner actually replaced it with a newer wall mount pulley but he ran both cables on the same sheave. It worked somewhat but just didn't look right. I added another wall mount pulley on the other side to separate the two cables.
Image

These two pulleys (or their equivalents) were not in the original system. I added them to better align the cables as they go to the rear pulleys. These two cables had a lot of chafing and were causing problems lifting the left rear leg on the original system This will eliminate any chafing in this area.
Image
User avatar
les45
500 Club
 
Posts: 974
Images: 605
Joined: Sat Feb 25, 2012 8:57 am
Location: Aiken, South Carolina
Top

Re: A different kind of pop-up (2-26-16 windows)

Postby les45 » Fri Feb 26, 2016 2:34 pm

I know I'm jumping around a bit but it is still too cold to crawl under the frame and I just didn't feel like working in the cabin with the 28" head space right now. So, I found a really good deal on some window frames and I started mocking them up and prepping them for some custom window work later. I plan to have small fixed windows in some of the portable panels. Even the fixed windows can run $100 each or more if purchased ready made. I found these frames for about $9.00 each including shipping on eBay so I bought enough for five windows (two frames per window). They are actually the inside frame for an RV door and have a clear opening of 12"X21". They have some screw posts and corner reinforcements that have to be cut off to make them fit fairly flush to the walls but that was just a few minutes of work on each one with a Dremel tool. I will install one frame on each side of the window and purchase the tempered glass locally to fit between the two frames. I figure I will have less than $30 in each window.

I purchased 10 frames but three are still on backorder with delivery in about three weeks. These came from Camping World on eBay.
Image

I mocked them up in the cardboard box they shipped in to find the optimal opening that I will have to frame and cut in my wall panels.
Image

This is the interior view of the mockup. The wall panel will be about 1 1/4" thick and framed with 1"X2". The window frames will simply screw into the wall from each side.
Image

Screw posts and corner braces had to be cut down. This will still leave about a 1/4" gap between the frame and wall at the edges and that will be filled with wood pieces cut to fit and silicone caulk.
Image
User avatar
les45
500 Club
 
Posts: 974
Images: 605
Joined: Sat Feb 25, 2012 8:57 am
Location: Aiken, South Carolina
Top

Re: A different kind of pop-up (3-8-16 update - paint frame

Postby les45 » Tue Mar 08, 2016 4:17 pm

Finally completed what is probably the most physically demanding job of sanding and painting the frame. As I said previously, the metal is in good shape with just a little surface rust. I decided to use Corroseal as a primer as it bonds with the rusty spots to form a protective layer for top coating. I used Rustoleum gloss black oil based paint for the top coat. With 15" of headroom I was able to use a creeper to do the sanding using sanding sponges and a narrow wire brush for the insides of the C-channels. However, when I started painting it was obvious that the creeper wouldn't work so it was belly crawling on plastic drop cloth for the Corroseal and Rustoleum. As seen in the pics, the Corroseal turns black when it bonds with rust. I left the outer edges of the perimeter frame, the bumper, and the tongue to clean and paint later when I can roll the trailer out of the garage. I plan to use a power wire brush and spray paint on those areas. Next step is to install the new Dexter axle.

Metal after sanding. I have no clue what that metal strap is that runs the length of the frame and bows out in places. It is only on the one side.
Image

After coating with Corroseal. Black spots indicate rusty spots in original paint where Corroseal has bonded with rust to form a primer.
Image

Top coat with gloss black Rustoleum.
Image

Materials used to paint. The square tube with the wood paddle was used to move the paint container around under the trailer (without spilling it) and also came in handy to retrieve the light and other tools.
Ready to install new Dexter axle.
Image
User avatar
les45
500 Club
 
Posts: 974
Images: 605
Joined: Sat Feb 25, 2012 8:57 am
Location: Aiken, South Carolina
Top

Re: A different kind of pop-up (3-8-16 update - paint frame

Postby KCStudly » Tue Mar 08, 2016 7:07 pm

I bet you're relieved that that task is complete! :thumbsup:
KC
My Build: The Poet Creek Express Hybrid Foamie

Poet Creek Or Bust
Engineering the TLAR way - "That Looks About Right"
TnTTT ORIGINAL 200A LANTERN CLUB = "The 200A Gang"
Green Lantern Corpsmen
User avatar
KCStudly
Donating Member
 
Posts: 9611
Images: 8169
Joined: Mon Feb 06, 2012 10:18 pm
Location: Southeastern CT, USA
Top

Re: A different kind of pop-up (3-8-16 update - paint frame

Postby les45 » Tue Mar 08, 2016 9:55 pm

KCStudly wrote:I bet you're relieved that that task is complete! :thumbsup:


That's for sure. After three days of rolling and crawling around under the trailer, my 70 year old bones felt like I had been doing sit ups all day. I have three new holes in the top of my head from an odd cross beam that I kept forgetting was there. It took about a quart of mineral spirits to get all the black paint off (me, the floor, and my tools). Of course I still have to make one more trip down under to install the new axle but hopefully that is just four bolts and done.
User avatar
les45
500 Club
 
Posts: 974
Images: 605
Joined: Sat Feb 25, 2012 8:57 am
Location: Aiken, South Carolina
Top

Re: A different kind of pop-up (3-8-16 update - paint frame

Postby Mitchelkitman » Wed Mar 09, 2016 6:20 pm

I made GRP panel just using female moulds made from Contiboard with edge barriers and a plasticine fillet to radius the moulds. See my creation by doing a search on the forum for Quantumsleep.
I'll be interested in your build thread.
Mitchelkitman
Teardrop Inspector
 
Posts: 22
Images: 4
Joined: Wed Feb 06, 2013 6:22 pm
Top

Re: A different kind of pop-up (3-26-16 update-lift cables)

Postby les45 » Sat Mar 26, 2016 1:50 pm

I reached a major milestone by installing the lift cables this week. Like everything else on this project so far they were a real pain in the @$$. Imagine connecting four small cables on one side and one large cable on the other side of a small metal plate floating in mid air and maintaining tension on the cables. That was the challenge. Luckily, I had an old portable vise that was perfect for this occasion. I fastened the vise at a point 48" from the winch since that is the lifting height of the roof. It had to be built up on 2X2's to straddle the two front lifting tubes. I connected the two rear cables first while the vise held the tension on the plate. I then connected the larger winch cable on the other side to balance the tension on each side and allow me to remove the vise and install the two front cables. Swaging the ferrule fittings was the hardest part as it almost took three hands to hold everything in place and still crank down on the swaging tool. I used two ferrules on each cable. I made up a test cable with the same fittings and pulled it with an 8,000 lb come along. I put a significant load on the test cable without any failure so I believe these will be fine for my purpose. Everything is only dry fitted for now. I still have to remove each cable one at a time and grease the entire length of each of the flexible lifting rods and then install lock nuts and thrust washers on each eye bolt and make final tension adjustments. I hope to have that done in the coming week so I can crank the roof up and allow me to work more comfortably on the interior modifications (electrical, bed, dinette, etc.).

Two rear cables were connected to the plate while it was clamped in the vise.
Image

Winch cable was then fastened from the other side to balance the load and allow the vise to be removed.
Image

With vise removed and load balanced on plate, the two front cables were connected. All fasteners are temporary. Lock nuts and thrust washers will be installed on all eye bolts after flexible lifting rods are greased and all rod tubes are bolted down solid.
Image
User avatar
les45
500 Club
 
Posts: 974
Images: 605
Joined: Sat Feb 25, 2012 8:57 am
Location: Aiken, South Carolina
Top

Re: A different kind of pop-up (5-11-16 lift system works)

Postby les45 » Wed May 11, 2016 3:14 pm

Reached a major milestone today with the completion of the lift system. It actually works! After several weeks of working on a major church playground system and moving my youngest son to a new job in Washington, D.C., I was finally able to get back to my pop-up project. I had dry fitted all the cables previously so now I had to take it all apart in order to grease the lifting rods. That turned out to be a little easier than I expected. The hard part was bolting all the tubes and the winch back down to the floor. My wife was out of town so I didn't have a helper to hold the bolt that went through the floor. Had to get clever and create a helping hand. After trying a towel in a concrete block (see pics), I finally had better success by taping a wrench to the underside of the floor and wedging it against the frame. I could then tighten the nuts from the inside. After getting everything back in place (again, using the portable vise jig to hold the eyebolt plate), I finally cranked up the roof as far as I could inside the garage. Everything looked good and all corners were within 1/4" of each other which is well within the Jayco specs for the system. After getting the roof up and looking around, it looks like the next order of work will be repairing the water damage on the rear end. That looks like it will involve complete disassembly of the rear wall. First, I have to install some temporary supports for the roof as the telescoping lifting poles are a little shaky.


Greasing the lifting rods turned out to be a little easier then I anticipated. Simply brushed on some bearing grease along the entire length with a little extra in the corners.
Image

Tried this with a socket wrench sitting on a towel inside a concrete block but it was too hard to adjust and took too much time.
Image

This worked a lot better and really sped up the process.
Image

Success!! The lift system works. Now to get some real work done.
Image
Last edited by les45 on Wed May 11, 2016 8:08 pm, edited 1 time in total.
User avatar
les45
500 Club
 
Posts: 974
Images: 605
Joined: Sat Feb 25, 2012 8:57 am
Location: Aiken, South Carolina
Top

Re: A different kind of pop-up (5-11-16 lift system works)

Postby Rainier70 » Wed May 11, 2016 5:23 pm

Great to see a true craftsman at work. :thumbsup:
User avatar
Rainier70
1000 Club
1000 Club
 
Posts: 1083
Images: 244
Joined: Wed Jan 30, 2013 4:35 am
Location: Southeast Idaho
Top

Re: A different kind of pop-up (5-11-16 lift system works)

Postby KCStudly » Wed May 11, 2016 7:23 pm

Huzzah! Milestone achieved! :thumbsup:
KC
My Build: The Poet Creek Express Hybrid Foamie

Poet Creek Or Bust
Engineering the TLAR way - "That Looks About Right"
TnTTT ORIGINAL 200A LANTERN CLUB = "The 200A Gang"
Green Lantern Corpsmen
User avatar
KCStudly
Donating Member
 
Posts: 9611
Images: 8169
Joined: Mon Feb 06, 2012 10:18 pm
Location: Southeastern CT, USA
Top

Re: A different kind of pop-up (5-11-16 lift system works)

Postby Alan_H » Wed May 11, 2016 8:51 pm

Congrats on getting it "lifted"!

I meant to respond to the post back in March. I bet that metal strap is a grounding strap for your frame.
Alan_H
Lifetime member
 
Posts: 245
Images: 17
Joined: Mon Dec 02, 2013 4:44 pm
Top

Re: A different kind of pop-up (5-11-16 lift system works)

Postby Nobes » Wed May 11, 2016 10:58 pm

Way to go, it has been very interesting to watch your progress.
Nobes
Teardrop Master
 
Posts: 214
Images: 508
Joined: Sun Dec 20, 2015 5:01 am
Top

Re: A different kind of pop-up (5-11-16 lift system works)

Postby les45 » Thu May 12, 2016 3:20 am

Alan_H wrote:
I meant to respond to the post back in March. I bet that metal strap is a grounding strap for your frame.


You are probably right as it does not appear to serve any other purpose; definitely nothing structural. It seems to be superfluous though as the frame is very robust and the ground wires are all connected to the main perimeter frame on the left side. The strap connects to all the cross members. In any event, I plan to run all new wiring with a dedicated ground system rather than to use the frame for ground.
User avatar
les45
500 Club
 
Posts: 974
Images: 605
Joined: Sat Feb 25, 2012 8:57 am
Location: Aiken, South Carolina
Top

PreviousNext

Return to Build Journals

Who is online

Users browsing this forum: Google [Bot] and 13 guests