First TTT Build- The Mobile Mango

...ask your questions in the appropriate forums BUT document your build here...preferably in a single thread...dates for updates, are appreciated....

First TTT Build- The Mobile Mango

Postby MadMango » Tue Aug 30, 2016 1:51 pm

I still don't have a trailer, still debating between a HF or a NT 4x8. I eventually want to upgrade to 15" tires, and think the NT trailer will be better supported with parts for this. I do know that I want my build to be 60" wide on the exterior. I have some components on order now, like LED lights for the interior, 14" ceiling fan, charge controller, etc.

Since I'm set on the 60" width, I thought it was safe to build my front wall. I used 15/32 plywood for the exterior, 1x2 furring strips, and 5mm luan. I figured the front wall will take the brunt of highway abuse, so wanted a fairly durable section there. I plan on side walls to be 1/4 plywood, along with the hatch and one of the roof panels. The other roof panel that secures the solar panels will probably be the 15/32 material again.

Image
My first photo!

I had to spend a solid hour digging out our table saw from the garage, and finding other items. Then had to buy a new pneumatic finish nailer. Will probably have to buy a new circular saw (currently a death trap with tapped power cord about 80% of it's length), and jig saw (deck won't stay flat). Or maybe I'll just buy a Roto-zip, I read one of forums here that was all a member had used to build his TD.
MadMango
"Art without engineering is dreaming; Engineering without art is calculating." ~Quentin Stafford-Fraser

You can see my design planning, The Mobile Mango.
You can follow my TTT build here, The Mobile Mango
User avatar
MadMango
Teardrop Master
 
Posts: 156
Joined: Wed Aug 24, 2016 3:40 am
Location: Space Coast, FL

Re: First TTT Build- The Mobile Mango

Postby MadMango » Wed Sep 14, 2016 11:53 am

I'm also considering to only prewire the roof panels, so I'll have no wires on the side walls. Switches will either be surface mounted on the Galley/kitchen wall, or installed in the roof. Has anyone done that before? It sort of makes sense to me... but I'm new to all this.
MadMango
"Art without engineering is dreaming; Engineering without art is calculating." ~Quentin Stafford-Fraser

You can see my design planning, The Mobile Mango.
You can follow my TTT build here, The Mobile Mango
User avatar
MadMango
Teardrop Master
 
Posts: 156
Joined: Wed Aug 24, 2016 3:40 am
Location: Space Coast, FL

Re: First TTT Build- The Mobile Mango

Postby MadMango » Sun Sep 18, 2016 6:19 pm

I decided to go with the Harbor Freight 4x8 trailer. No time to start assembly tonight, maybe later this week or the coming weekend. So ready to get this together!

Image
MadMango
"Art without engineering is dreaming; Engineering without art is calculating." ~Quentin Stafford-Fraser

You can see my design planning, The Mobile Mango.
You can follow my TTT build here, The Mobile Mango
User avatar
MadMango
Teardrop Master
 
Posts: 156
Joined: Wed Aug 24, 2016 3:40 am
Location: Space Coast, FL
Top

Re: First TTT Build- The Mobile Mango

Postby Larry8 » Sun Sep 18, 2016 6:44 pm

Good luck on your build, that's part of the fun--to make what makes sense to you.

Larry
Larry8
Teardrop Inspector
 
Posts: 17
Images: 11
Joined: Mon Jul 18, 2016 3:34 pm
Top

Re: First TTT Build- The Mobile Mango

Postby MadMango » Thu Sep 22, 2016 7:41 pm

Well, got a little work done on the trailer, built both halves. Working under my 10x12 tiki hut. I wish I had a garage. I hope to have the suspension, wheels, and halves together by this time tomorrow night. That will give me the weekend to build the floor and maybe a main wall or two.

Image

Quick question about the floor. If I wanted to put a vinyl floor down in th sleeping and kitchen area, should I do that first, or is it better to do it after the exterior and interior walls are installed? I'm thinking after, but just wanted to double check.

Also, if I'm going to epoxy the walls and edges, should I do that before they are attached? I've seen it done both ways, but maybe the pre-epoxy is just for foamy builds and post-epoxy is the norm?
MadMango
"Art without engineering is dreaming; Engineering without art is calculating." ~Quentin Stafford-Fraser

You can see my design planning, The Mobile Mango.
You can follow my TTT build here, The Mobile Mango
User avatar
MadMango
Teardrop Master
 
Posts: 156
Joined: Wed Aug 24, 2016 3:40 am
Location: Space Coast, FL
Top

Re: First TTT Build- The Mobile Mango

Postby greygoos » Thu Sep 22, 2016 8:02 pm

Good luck with your build.
greygoos
Silver Donating Member
 
Posts: 630
Joined: Sun Sep 27, 2015 6:15 am
Location: Syracuse NY
Top

Re: First TTT Build- The Mobile Mango

Postby KCStudly » Fri Sep 23, 2016 2:05 pm

First, make sure to paint your trailer frame. Those little red kit trailers are notorious for fading to a "pretty" shade of pink in very short order.

On the vinyl floor, if it were me I would wait. I'd rather have a good solid glue bond than rely on mechanical fasteners alone (I don't expect much will stick to the vinyl top, at least not as well as wood to wood).

For epoxy the more you can do "in the flat" the better. Epoxy likes to run and can get sloppy when applying to vertical or over head surfaces. (Remember your PPE.) You can mask off or just avoid doing the joint areas and then just touch up any bare spots later.

IIRC you mentioned in another post that you didn't think you would be able to move your axle back due to the frame split (was that you?). What most people do is use the steel xmbr's as splice spuds (nested in the outer rail channel lengthwise) to bridge the joint; drill and bolt; then make new xmbr's out of dimensional lumber. IIRC at least one builder even went so far as to order replacement xmbr's and another had custom channels bent. Pay's yer money, takes yer choice.
KC
My Build: The Poet Creek Express Hybrid Foamie

Poet Creek Or Bust
Engineering the TLAR way - "That Looks About Right"
TnTTT ORIGINAL 200A LANTERN CLUB = "The 200A Gang"
Green Lantern Corpsmen
User avatar
KCStudly
Donating Member
 
Posts: 9607
Images: 8169
Joined: Mon Feb 06, 2012 10:18 pm
Location: Southeastern CT, USA
Top

Re: First TTT Build- The Mobile Mango

Postby MadMango » Sat Sep 24, 2016 3:01 am

I got the two halves together and the suspension on. For those wondering like me, the distance from the rear of the HF 4x8 trailer bed to the center of the axel is pretty close to 42-inches. I couldn't find this info anywhere, but maybe I didn't look hard enough. I still need to repack the wheel bearings, but left off the dust caps as a reminder. I'm holding off on doing the trailer lights, as I'm still debating if I want to install them on the rear hatch.

I plan on painting the trailer with black epoxy paint, scuffing with a pad first. When I build my floor, I'll coat the bottom side with roll-on bed liner, and may cover the trailer too. I live 3 blocks from the ocean and salt spray makes anything metal rust and corrode. I'll use the completed trailer as my workbench for now.
MadMango
"Art without engineering is dreaming; Engineering without art is calculating." ~Quentin Stafford-Fraser

You can see my design planning, The Mobile Mango.
You can follow my TTT build here, The Mobile Mango
User avatar
MadMango
Teardrop Master
 
Posts: 156
Joined: Wed Aug 24, 2016 3:40 am
Location: Space Coast, FL
Top

Re: First TTT Build- The Mobile Mango

Postby bonnie » Sat Sep 24, 2016 7:28 am

I have the same trailer. I had it welded and extended. I painted mine with black equipment paint. I've left it out to cure as I'm using it for the build/renovation. I keep an eye on it and anytime I see a place that needs a bit more coverage, I daub some more paint on. Take care with all those nooks and crannies, they keep you hopping to cover up potential rust spots.

Love your trailer name, btw.

Bonnie
Remember, the turtle won. :)
User avatar
bonnie
Donating Member
 
Posts: 1389
Images: 107
Joined: Sun Jul 24, 2011 4:14 pm
Location: Roxana, IL
Top

Re: First TTT Build- The Mobile Mango

Postby MadMango » Sun Sep 25, 2016 6:20 pm

Thanks Bonnie. "Mango" is a nickname I've had since grade school, and I've embraced it. For dessert my mom (Filipino) would always pack a mango in my paper bag lunch... amazing how many cookies you could get in 4th grade on trade.

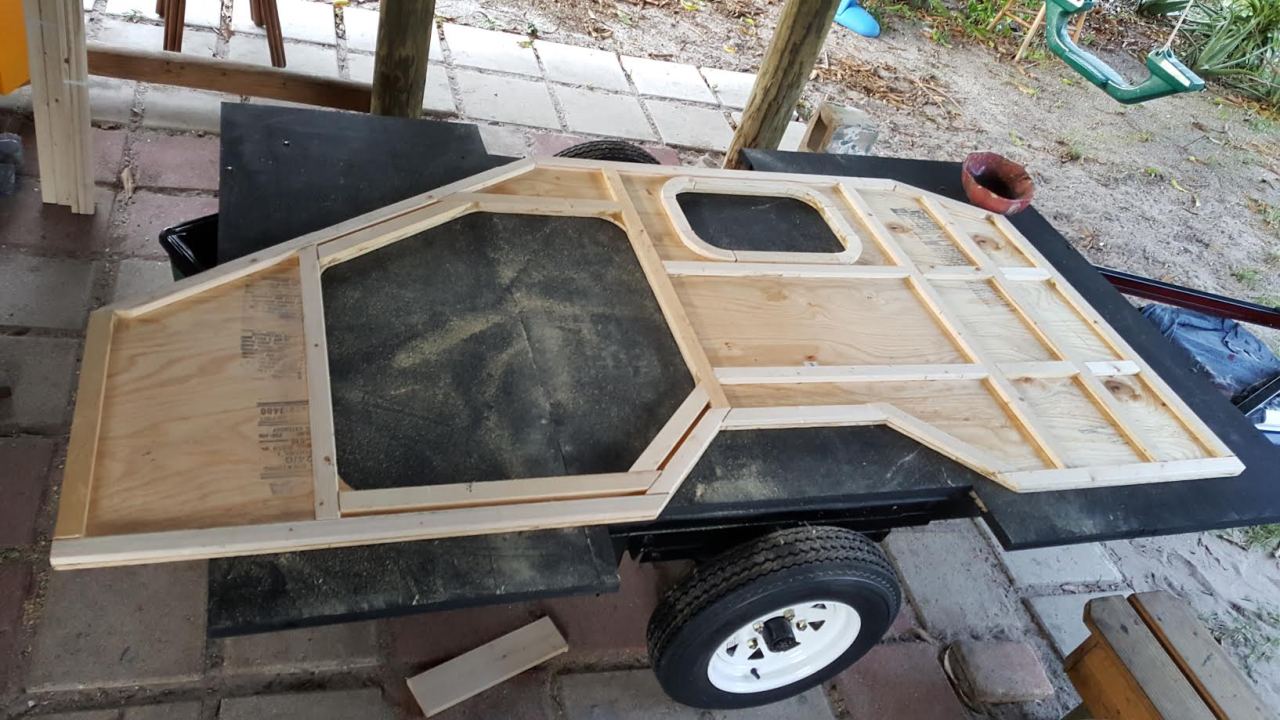
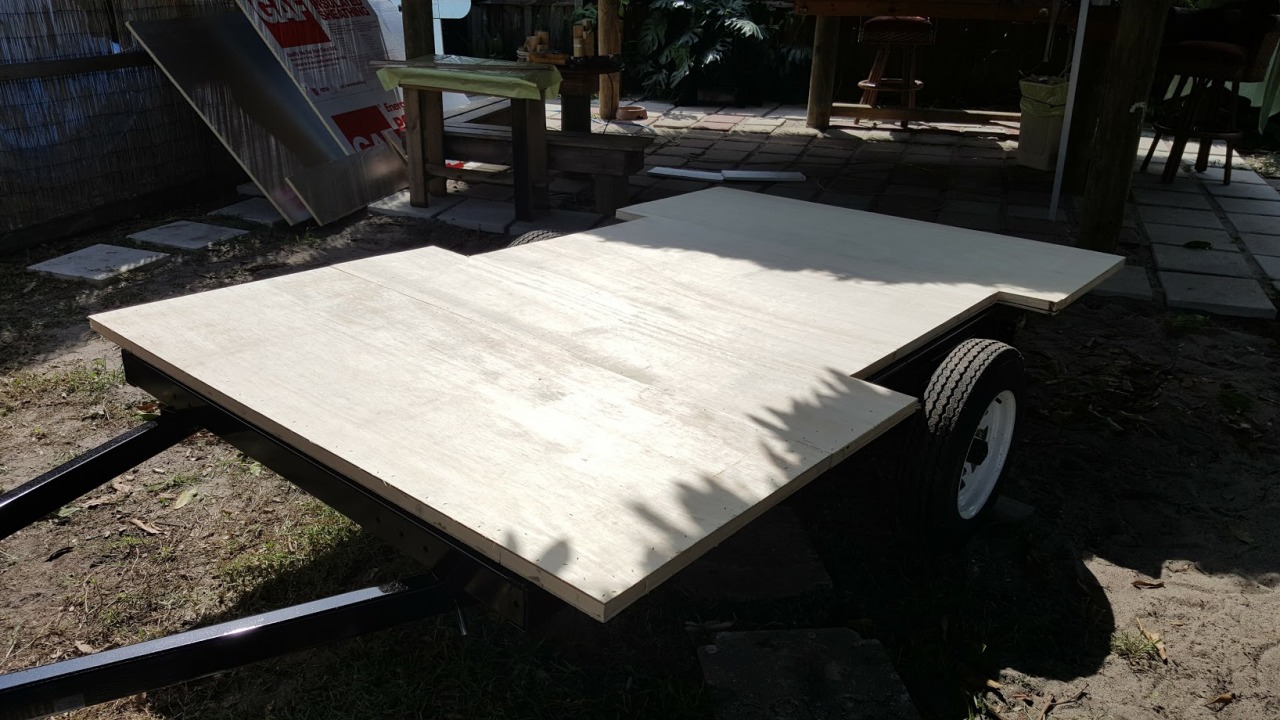
Yesterday I forgot to take any pictures, much like today. Saturday I managed to get my floor built, and painted the trailer with black epoxy spray paint. I used 1/4 plywood for the top and bottom, and 1x4 for the internal bracing with 3/4" foam panels. I used a few screws, but most was just Loctite PL400 and finish staples, I was worried that it was too light and flimsy, but once I got it connected to the trailer it turned out to be OK I think. I couldn't have done it without the help of my wife.

Image

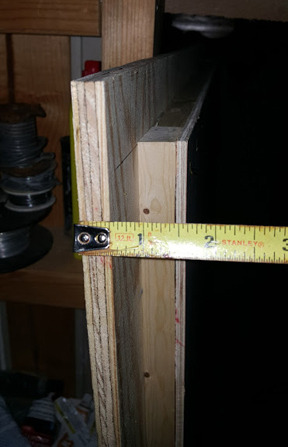
Today after taking all the weights off I used a 1" paddle bit to make reliefs for the trailer bolt heads. I then used some old yard sticks we had to fill-in the 3/16 gap between the trailer side rails and cross members. they fit perfectly. I then had to coat both sides with Olympic Maximum opaque stain & sealer since this project has no real covered work area to call home and the weather for most of the week is 30-50% chance of rain- a typical Floridian forecast. The Maximum is suppose to have a 10yr guarantee for decks and 25yrs for fences, so I'll be happy if I get 5. I know this isn't what others have used, but I hope it works for me.

Image

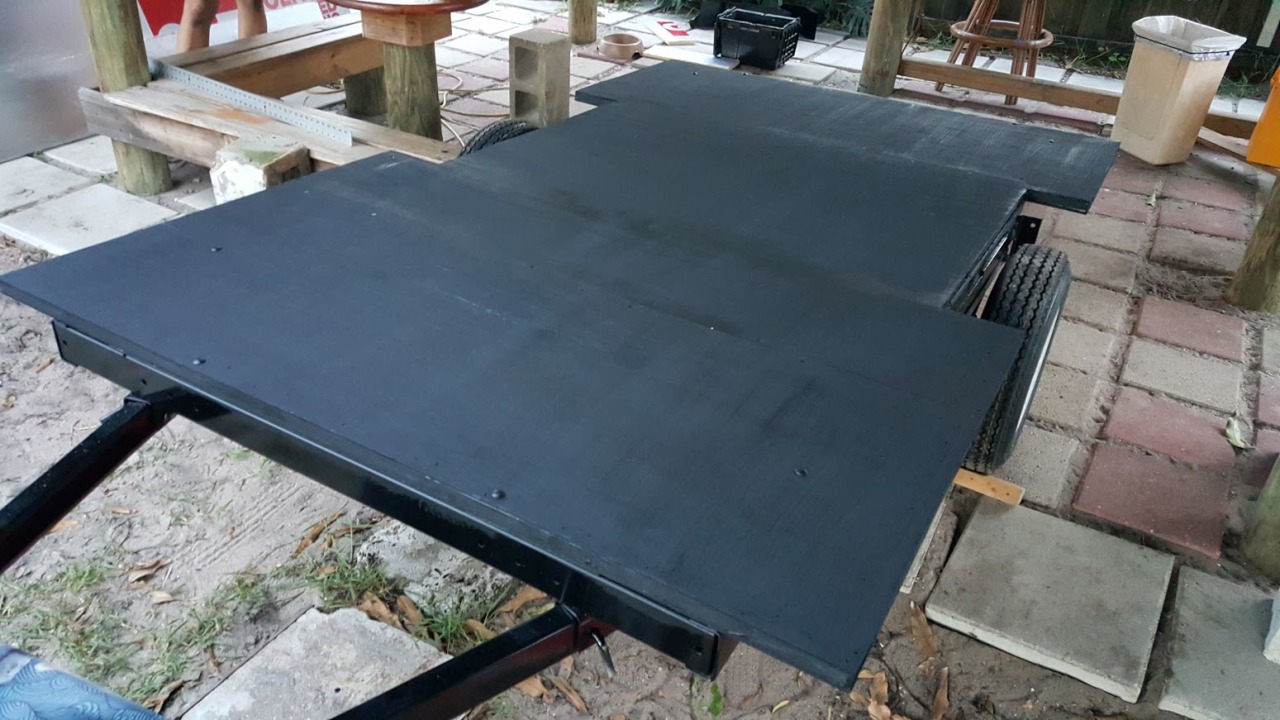
We aren't to concerned with the black color on the inside as we'll have vinyl in the galley and our bed will cover everything else. Now that I have a large "work surface" I'll start on the walls and roof panels. I won't be able to get to much till the weekend. I'm waiting on the trailer lights, as i'm still not sure if I want to use the provided brackets, or integrate the lights into the hatch.
MadMango
"Art without engineering is dreaming; Engineering without art is calculating." ~Quentin Stafford-Fraser

You can see my design planning, The Mobile Mango.
You can follow my TTT build here, The Mobile Mango
User avatar
MadMango
Teardrop Master
 
Posts: 156
Joined: Wed Aug 24, 2016 3:40 am
Location: Space Coast, FL
Top

Re: First TTT Build- The Mobile Mango

Postby MadMango » Thu Sep 29, 2016 9:31 am

I have received my roof vent w/fan, 12"x40" panorama window, two 12"x18" side slider windows, most all my components for the solar and electrical work, door hinges, folding table supports... now if the weather would just cooperate! The whole week it has been 30-60% chance of rain, and wouldn't you know it, it seems to be right over my house each evening when I get off work. I can't do a thing.

On a side note, when supporting activities outside in the FL heat and humidity, I've used a 14", 12v radiator fan connected directly to my 100w solar panel to act as a cooling station to prevent heat exhaustion and heat stroke for other people. I bought the fan for $25 on eBay, new, and just string it up under a 10'x10' canopy. It works really well since electrical radiator fans were made to move air (2,500-3,000cfm). I was wondering if any builders have replaced their vent fans with maybe a 12 or 10-inch radiator fan for increased air flow?
MadMango
"Art without engineering is dreaming; Engineering without art is calculating." ~Quentin Stafford-Fraser

You can see my design planning, The Mobile Mango.
You can follow my TTT build here, The Mobile Mango
User avatar
MadMango
Teardrop Master
 
Posts: 156
Joined: Wed Aug 24, 2016 3:40 am
Location: Space Coast, FL
Top

Re: First TTT Build- The Mobile Mango

Postby KCStudly » Fri Sep 30, 2016 10:32 am

From the extensive reading I have done here on the forums, most people have to look for ways to slow down their fans. the std 14x14 fan is meant to cover a wide range of RV/camper sizes/volumes and is usually overkill for a small TD. Some models of Fantastic and Maxxair vents have 10 speeds. Some people use PWM to slow their 3 speed fans down.
Last edited by KCStudly on Mon Oct 03, 2016 2:29 pm, edited 1 time in total.
KC
My Build: The Poet Creek Express Hybrid Foamie

Poet Creek Or Bust
Engineering the TLAR way - "That Looks About Right"
TnTTT ORIGINAL 200A LANTERN CLUB = "The 200A Gang"
Green Lantern Corpsmen
User avatar
KCStudly
Donating Member
 
Posts: 9607
Images: 8169
Joined: Mon Feb 06, 2012 10:18 pm
Location: Southeastern CT, USA
Top

Re: First TTT Build- The Mobile Mango

Postby MadMango » Sat Oct 01, 2016 6:32 pm

Today was a slow start, didn't get to do anything till 1pm. So happy to be able to use my floor on the trailer as a work surface. 5.5 hours later I have my first wall!

What took longer than I thought was making the corner parts. I used my scroll saw to make one, 3" inside radius, then used that as a template to trace out the others. I cut these from scraps of 1x4 I had from the floor build. Sorry for the mess.
Image

Wish I had a drum sander, but I made due with my deck sander, All even and trued up.
Image

I still need to glue the insulation in and skin the interior with 1/8 plywood, but I'm happy with the results. I placed another sheet of plywood on top and weighed everything down for the evening. Construction is 11/32" plywood and 1x2 strips, adhesive, and 7/8" staples. Tomorrow I might add a few screws to some critical joints. Again, sorry for the mess, I was just happy to get something major accomplished today.
Image
MadMango
"Art without engineering is dreaming; Engineering without art is calculating." ~Quentin Stafford-Fraser

You can see my design planning, The Mobile Mango.
You can follow my TTT build here, The Mobile Mango
User avatar
MadMango
Teardrop Master
 
Posts: 156
Joined: Wed Aug 24, 2016 3:40 am
Location: Space Coast, FL
Top

Re: First TTT Build- The Mobile Mango

Postby bam1028 » Sat Oct 01, 2016 8:19 pm

Looking good! I am interested to see how these fit in your build. I know the feeling about getting started late I was up this fairly early this morning but house duties have to be done first.
bam1028
Teardrop Advisor
 
Posts: 91
Images: 19
Joined: Thu May 03, 2012 9:37 pm
Location: Starr, SC
Top

Re: First TTT Build- The Mobile Mango

Postby Iain Hall » Sun Oct 02, 2016 3:53 pm

Frankly I don't think that you will need to add screws to what you call critical joints once your glue has set in fact you may find that screws into the wood weakens it. Any plywood structure gets most of its strength from the glued joins and pins and screws are really only good for ensuring good tight contact between components while the glue is setting. Once you have added your inside skin the resulting laminated panel will be extremely robust. Further as nice as your corner pieces are I would not have worried too much about the outer radius that will be concealed with in the wall. That said Your build is coming along very nicely and I like the way that you too are running your own race in the design of your Teardrop.
8)
Life is not the warm up , its the show
Image
User avatar
Iain Hall
Teardrop Advisor
 
Posts: 80
Images: 113
Joined: Mon May 26, 2014 6:03 pm
Top

Next

Return to Build Journals

Who is online

Users browsing this forum: No registered users and 2 guests