New build, a standrop....Update 11-28-17

...ask your questions in the appropriate forums BUT document your build here...preferably in a single thread...dates for updates, are appreciated....

Re: New build, a standrop....

Postby Woodbutcher » Thu Aug 03, 2017 6:51 am

S. Heisley wrote::thinking: You're definitely thinking outside the box on some of this and one can tell that a lot of thought went into it all. ...Very interesting!


Thanks Sharon. I am trying to get everything right on this one. I'm not sure how many more trailer builds I have left in me. :lol:
User avatar
Woodbutcher
Platinum Donating Member
 
Posts: 4187
Images: 45
Joined: Fri Mar 10, 2006 10:01 pm
Location: Chicago Suburbs

Re: New build, a standrop....

Postby friz » Thu Aug 03, 2017 8:20 am

This is my favorite build thread. I can't wait to see it progress.

Sent from my SM-G900V using Tapatalk
The "Sin Bin"
150133
User avatar
friz
500 Club
 
Posts: 737
Images: 2
Joined: Mon Jan 03, 2011 10:01 pm

Re: New build, a standrop....

Postby KCStudly » Fri Aug 04, 2017 11:45 am

It is always a pleasure to watch a true craftsman at work! :applause:
KC
My Build: The Poet Creek Express Hybrid Foamie

Poet Creek Or Bust
Engineering the TLAR way - "That Looks About Right"
TnTTT ORIGINAL 200A LANTERN CLUB = "The 200A Gang"
Green Lantern Corpsmen
User avatar
KCStudly
Donating Member
 
Posts: 9611
Images: 8169
Joined: Mon Feb 06, 2012 10:18 pm
Location: Southeastern CT, USA
Top

Re: New build, a standrop....

Postby Woodbutcher » Wed Aug 09, 2017 8:36 pm

Thanks guys, I am finally starting to see the end of this build. Still have to do the foot bump out.
User avatar
Woodbutcher
Platinum Donating Member
 
Posts: 4187
Images: 45
Joined: Fri Mar 10, 2006 10:01 pm
Location: Chicago Suburbs
Top

Re: New build, a standrop....

Postby Woodbutcher » Wed Aug 09, 2017 8:39 pm

Got the back buttoned up. The tail lights will be mounted on the narrow vertical side lights. The hatch frame is just sitting in the opening.

Image
User avatar
Woodbutcher
Platinum Donating Member
 
Posts: 4187
Images: 45
Joined: Fri Mar 10, 2006 10:01 pm
Location: Chicago Suburbs
Top

Re: New build, a standrop....

Postby lacustom » Wed Aug 09, 2017 9:56 pm

What are you sealing it with? Pmf , glass alum
Very nice work, I need to build another, I just don't have the time. The last one took 12 months on the calendar but probably 1 full week of work


Sent from my iPhone using Tapatalk
Lou Piscitelli
If you can dream it ,we can build it!
User avatar
lacustom
Teardrop Advisor
 
Posts: 59
Joined: Sat Apr 02, 2016 3:26 am
Location: melbourne fl
Top

Re: New build, a standrop....

Postby Woodbutcher » Thu Aug 10, 2017 7:24 am

It will be skinned with painted aluminum sheet stock, in a medium gray.
User avatar
Woodbutcher
Platinum Donating Member
 
Posts: 4187
Images: 45
Joined: Fri Mar 10, 2006 10:01 pm
Location: Chicago Suburbs
Top

Re: New build, a standrop....

Postby lacustom » Thu Aug 10, 2017 7:52 am

Woodbutcher wrote:It will be skinned with painted aluminum sheet stock, in a medium gray.


That will look great


Sent from my iPhone using Tapatalk
Lou Piscitelli
If you can dream it ,we can build it!
User avatar
lacustom
Teardrop Advisor
 
Posts: 59
Joined: Sat Apr 02, 2016 3:26 am
Location: melbourne fl
Top

Re: New build, a standrop....

Postby breb » Mon Aug 14, 2017 8:11 am

Nice build . Curious on the sheet stock your using for roof . Are you doubling 1/8" or are using 1/4" ply?
breb
Teardrop Master
 
Posts: 128
Images: 119
Joined: Sun Aug 24, 2014 8:06 am
Location: wisconsin
Top

Re: New build, a standrop....

Postby Woodbutcher » Mon Aug 14, 2017 12:15 pm

breb wrote:Nice build . Curious on the sheet stock your using for roof . Are you doubling 1/8" or are using 1/4" ply?


The roof has 1 1/2" roof spars with ridged foam insulation between. Then a skin of 1/8th inch on each side. Makes a nice firm wall and ceiling. If you scroll back a few pages you should see how I did it.
User avatar
Woodbutcher
Platinum Donating Member
 
Posts: 4187
Images: 45
Joined: Fri Mar 10, 2006 10:01 pm
Location: Chicago Suburbs
Top

Re: New build, a standrop....

Postby breb » Mon Aug 14, 2017 7:23 pm

My question was more of the roof not the inside ceiling . My build right now is 1/4 " walls in the interior and 1/8" ceiling skin and the exterior roof, well my thoughts were to double up on 1/8" material to achieve a full 1/4" . We talked about this some time ago about making that bend with 1/8 material and than a second layer over the top . But looking at your last photo. It looked like a thinner layer and I was assuming it was a 1/8" on the top .
breb
Teardrop Master
 
Posts: 128
Images: 119
Joined: Sun Aug 24, 2014 8:06 am
Location: wisconsin
Top

Re: New build, a standrop....

Postby Woodbutcher » Mon Aug 14, 2017 8:18 pm

I have in the past used 2 layers of 1/8th inch, staggering the joints. But since this will have metal on the outside I just used a single layer of 1/8th inch.
User avatar
Woodbutcher
Platinum Donating Member
 
Posts: 4187
Images: 45
Joined: Fri Mar 10, 2006 10:01 pm
Location: Chicago Suburbs
Top

Re: New build, a standrop....

Postby greygoos » Mon Aug 14, 2017 9:28 pm

Fortunately or unfortunately I have the time to read every new post. I have read all of your builds including this one and you do great work and I have seen you help many builders with advice and answers. I can say you have me sitting on the edge of my seat waiting to see how you put in the drawer or slide on the side to sleep across the width. Keep up the excellent work you do and thanks for sharing your knowledge.
greygoos
Silver Donating Member
 
Posts: 630
Joined: Sun Sep 27, 2015 6:15 am
Location: Syracuse NY
Top

Re: New build, a standrop....

Postby Kim Armstrong » Tue Aug 22, 2017 2:21 pm

Is it done yet? :thumbsup:
Kim Armstrong
Super Duper Lifetime Member
 
Posts: 209
Joined: Thu Apr 12, 2007 8:38 pm
Location: Arkansas
Top

Re: New build, a standrop....

Postby Woodbutcher » Wed Aug 23, 2017 8:36 pm

Thanks for the kind words Greygoos.


I am working as fast as I can Kim. :lol: Not done yet but into the final stretch.

I have the bed platform done. The bump out is built but required a shorter slide so I took it all out for finishing and will get the new slide next week. I'll post pictures once it is all back in.

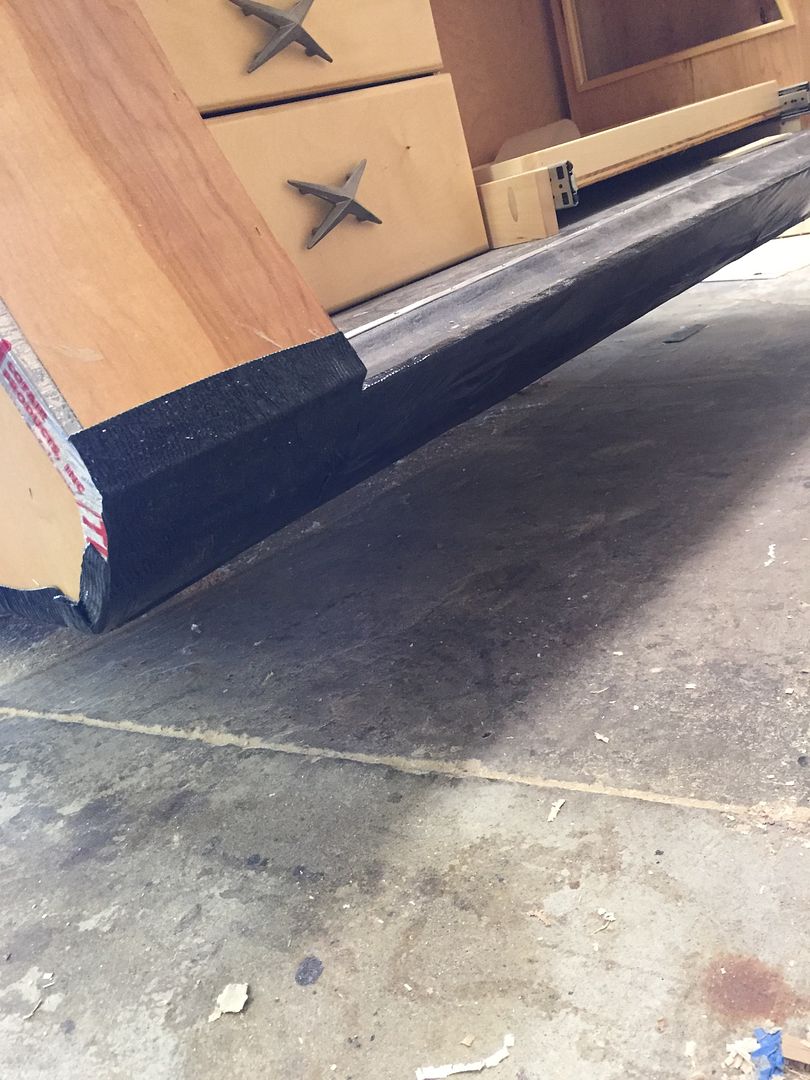
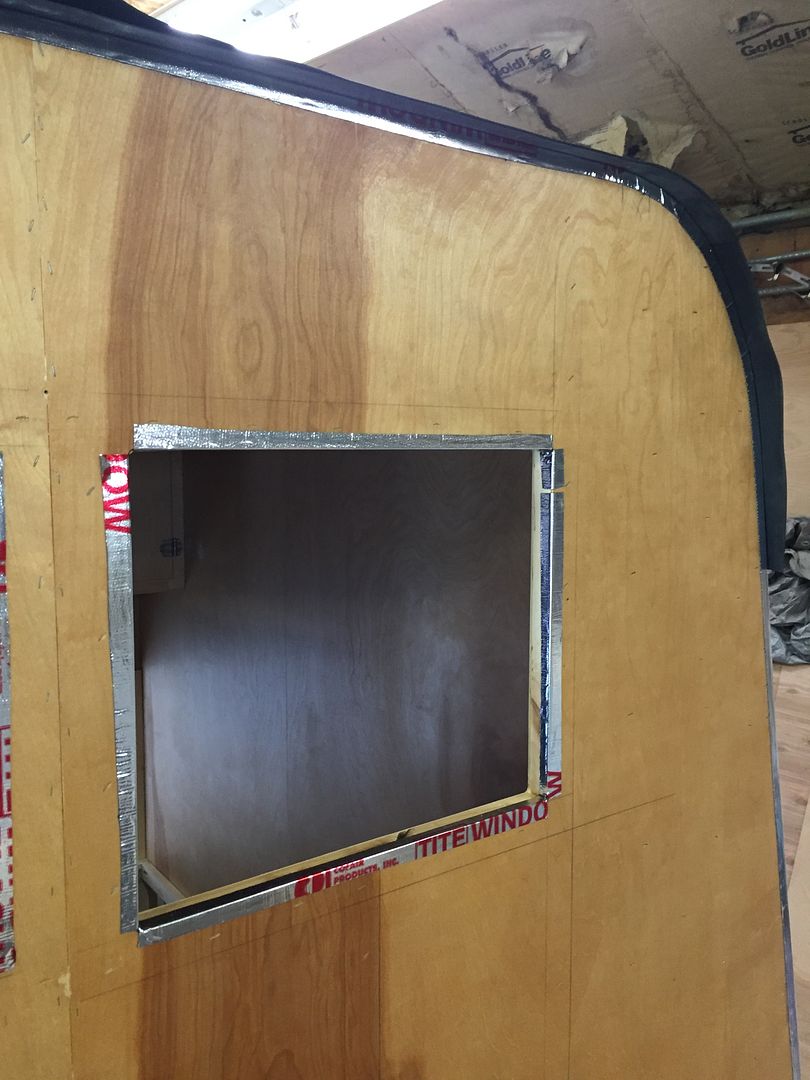
All the seams are covered with window seal. It is a sticky tar based tape that I cut and wrap all the seams, covering the exposed plywood end grain. Just a little extra protection. I put 2 coats of polyurethane on the skins first, then the tape. I want the extra water protection between the aluminum skin and the wood walls.

Image

Image

Rubber roof is on. I had to do it in 3rds because I am working alone. So I glue a section and then roll it down and then move on. Came out ok. A few small bubbles but it's above eye level so I will not worry about them.

Image

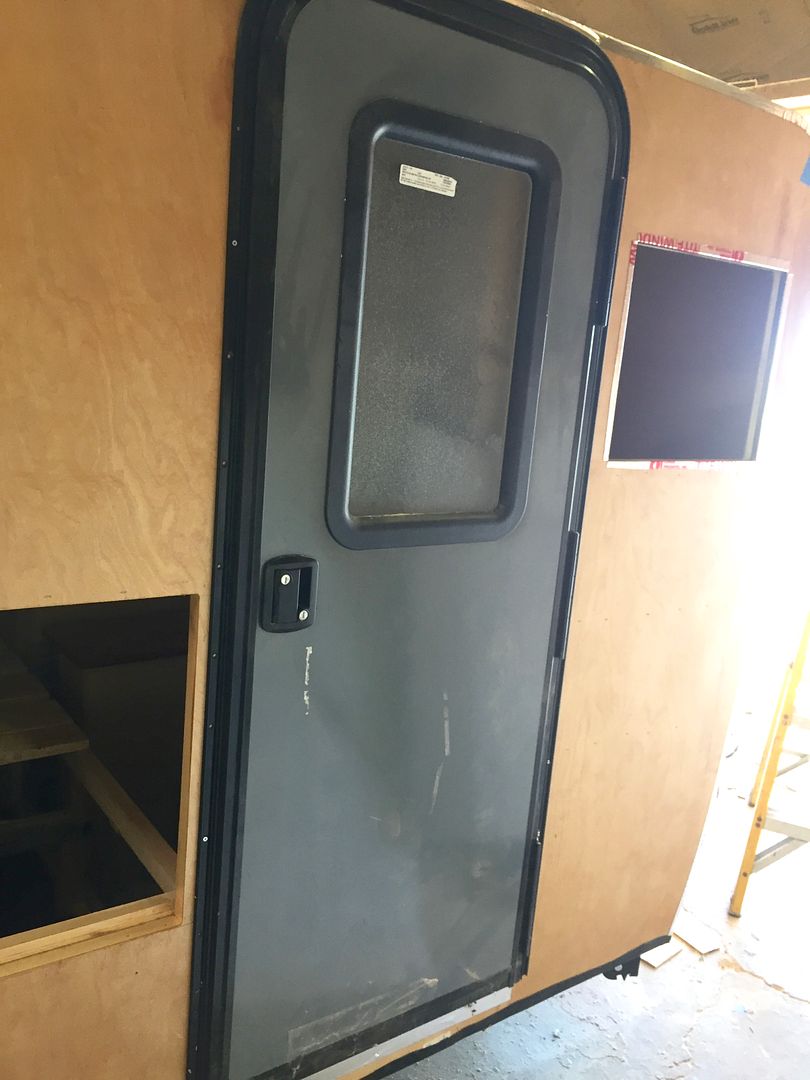
Stuck the door in, just to see what it was like to open a door and step in. Made me feel like I was getting closer to the end. :lol: The door was taller then I needed so I took it apart and shortened it about 4" . Just right now.

Image

I have a friend and master builder coming on Tuesday to help skin the outside with aluminum. Just too hard to hold 2 sheets alone. Once it's closed up to the weather I can move it out of the shop and put real tires on it. Then it will not be a Flintstone trailer anymore. :lol:
User avatar
Woodbutcher
Platinum Donating Member
 
Posts: 4187
Images: 45
Joined: Fri Mar 10, 2006 10:01 pm
Location: Chicago Suburbs
Top

PreviousNext

Return to Build Journals

Who is online

Users browsing this forum: No registered users and 43 guests