Serenity TearDrop Build

...ask your questions in the appropriate forums BUT document your build here...preferably in a single thread...dates for updates, are appreciated....

Re: Serenity TearDrop Build

Postby western traveler » Mon Aug 30, 2021 8:56 pm

tony.latham wrote:
Yep, but I never once opened the lid while doing it.


You're not alone. That's why mine sits a bit proud of the slider:

Image

I mentioned this issue in the book. Well, sorta:

Part of the challenge with this installation was the stove’s placement on the platform. If I mounted it flush with the counter, the windscreen wouldn’t clear the galley wall. If I mounted it too far out, the hatch gusset would hit it. The distance I settled on was 1-1/4” from the edge of the countertop.

I should edit, windscreen to stove lid. Like I said, I sorta addressed it. Using the right word would help...
:thinking:

Tony


Tony, you are totally off the hook with this, LOL.
Like I said I checked it at least a dozen times. I just didn’t account for the extra two inches the lid takes up when open :oops:

Garth, So true, There is a lot in this tiny space! I am very happy with it so far. Next is figuring out how to mount these latches like Tony’s tomorrow.
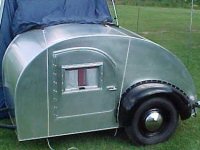
western traveler
Donating Member
 
Posts: 396
Images: 264
Joined: Wed Dec 28, 2016 6:59 am
Location: The Front Montana

Re: Serenity TearDrop Build

Postby western traveler » Mon Aug 30, 2021 9:11 pm

JoeGrz wrote:The galley looks nice. Everything looks to have come together nicely.


Thanks Joe! I was composing my message as you were posting. I wouldn’t push my bulkhead forward at all. I might have moved my vertical wall two inches to the right though ;)
western traveler
Donating Member
 
Posts: 396
Images: 264
Joined: Wed Dec 28, 2016 6:59 am
Location: The Front Montana

Re: Serenity TearDrop Build

Postby western traveler » Thu Sep 02, 2021 3:55 pm

A couple nights ago I was trying to tighten things up finishing out the galley. I had ripped a few pieces from the left over oak I had from laminating the hatch spar and capped the edges with it. I sanded things out and felt the oak was pretty boring. I noticed a jar of Trans Tint I had mixed while deciding what shade of brown I wanted on the exterior so I stained it with the medium brown I hadn’t chosen. Stepped back and thought, this looks very familiar! :thinking: :lol:
I varnished everything and knocked off for the night.

Went out to the garage yesterday at 5AM and wound up green padding and adding the second coat of varnish. Not wanting to create dust I made a trip to the city and purchased the stainless for the counter top and installed it last night.

As long as we don’t end up parked next to each other with our hatches up I feel okay about it Tony. Besides yours looks much better.

167092167091
western traveler
Donating Member
 
Posts: 396
Images: 264
Joined: Wed Dec 28, 2016 6:59 am
Location: The Front Montana
Top

Re: Serenity TearDrop Build

Postby tony.latham » Fri Sep 03, 2021 8:51 pm

Besides yours looks much better.


Not under a moonless sky. ;)

Image

I took that last night. It was a fine evening.

Image

:thumbsup:

Tony
User avatar
tony.latham
Gold Donating Member
 
Posts: 6899
Images: 17
Joined: Mon Jul 08, 2013 4:03 pm
Location: Middle of Idaho on the edge of nowhere
Top

Re: Serenity TearDrop Build

Postby western traveler » Sat Sep 04, 2021 10:57 pm

tony.latham wrote:
Besides yours looks much better.


Not under a moonless sky. ;)
It was a fine evening.

Image

:thumbsup:

Tony


Okay I’m trying to just put one foot in front of the other and scenes/moments like that are not making it any easier…

Soon I hope. Soon.
western traveler
Donating Member
 
Posts: 396
Images: 264
Joined: Wed Dec 28, 2016 6:59 am
Location: The Front Montana
Top

Re: Serenity TearDrop Build

Postby western traveler » Sun Sep 05, 2021 8:59 am

Spent a couple of days dry fitting and finally hard mounting the taillights and fenders. Waiting on black caulking from Dicor to finish it out. Also waiting on my trim wood to be returned. My first views of things coming together in the daylight. I still need to mount the 3rd brake light but decided to go with no handle on the hatch. I like the clean look of it.
Hope to start wiring the trailer lights today. I had to choose help from my friend from out of town to raise the walls or wire way back when.

167107167108167109
western traveler
Donating Member
 
Posts: 396
Images: 264
Joined: Wed Dec 28, 2016 6:59 am
Location: The Front Montana
Top

Re: Serenity TearDrop Build

Postby JoeGrz » Sun Sep 05, 2021 7:14 pm

As I have said, I love the way those fenders look and the turquoise color adds to the retro look. It is a great looking teardrop. I too opted not to put the handle on it. I am so use to reaching under the bottom of the hatch to open it that I did not see the point. Of course one day I'm sure I will reach down and stick my hand in some mud. I may reconsider then.
JoeGrz
Teardrop Master
 
Posts: 107
Joined: Thu May 28, 2020 4:24 am
Location: Panhandle of Texas
Top

Re: Serenity TearDrop Build

Postby western traveler » Mon Sep 06, 2021 8:07 am

Thanks Joe,
Also I am sure the bottom will get plenty of dirt and occasionally muddy but I figure I will be cleaning it off to keep it out of the galley anyway. I did purchase the handle if it bothers me too much.
western traveler
Donating Member
 
Posts: 396
Images: 264
Joined: Wed Dec 28, 2016 6:59 am
Location: The Front Montana
Top

Re: Serenity TearDrop Build

Postby saywhatthat » Mon Sep 06, 2021 9:04 am

I like that idea of no handles on the hatch and even if you decide to move it just put an inside release like on your car trunk. That seems like it would add a lot of security
Il suffit de le faire
fast, cheap, fiberglass/ foam stressed skin panels
viewtopic.php?f=50&t=73945

Build 4.5 by 8' using Trailtop fiberglass Components
http://tnttt.com/viewtopic.php?f=50&t=70729
User avatar
saywhatthat
500 Club
 
Posts: 501
Images: 135
Joined: Sat Jun 11, 2016 3:31 am
Top

Re: Serenity TearDrop Build

Postby cjlangellier » Mon Sep 06, 2021 9:45 am

I really love the combo of the white walls, hubcaps, fenders and turquoise against the wood walls. It looks fantastic! Super cool retro trailer. Looks like you’ll be camping before too long.
Cody - Westmont, IL

5x11 Teardrop
http://www.tnttt.com/viewtopic.php?f=50&t=73740
6x12 Cargo Trailer/Ice Shanty/Toy Hauler
http://www.tnttt.com/viewtopic.php?f=42&t=73743
User avatar
cjlangellier
Teardrop Master
 
Posts: 171
Images: 332
Joined: Fri Apr 30, 2021 3:29 am
Top

Re: Serenity TearDrop Buildt

Postby western traveler » Tue Sep 07, 2021 7:13 am

Cody,
Thanks for the kind words.
It seems everything is taking longer to complete lately though. I would like to make Glacier Park this month even for a two night shakedown but it would be in an unfinished Tear I’m sure.

@saywhattthat, I have to admit I haven’t given much thought as to how to lock the hatch if needed.
western traveler
Donating Member
 
Posts: 396
Images: 264
Joined: Wed Dec 28, 2016 6:59 am
Location: The Front Montana
Top

Re: Serenity TearDrop Build

Postby Capebuild » Wed Sep 08, 2021 4:46 am

western traveler wrote:Cody,
Thanks for the kind words.
It seems everything is taking longer to complete lately though.


Comparing that you and I started our builds around the same time, seems to me your build is moving very fast (much quicker than mine ).
Your trailer looks great!

John
"Success can be defined as moving from failure to failure without loss of enthusiasm".... Churchill

Visit my Teardrop build here: viewtopic.php?f=50&t=73779
User avatar
Capebuild
Donating Member
 
Posts: 754
Images: 129
Joined: Sun Jan 31, 2021 6:50 am
Location: Massachusetts
Top

Re: Serenity TearDrop Build

Postby western traveler » Thu Sep 09, 2021 7:15 am

Capebuild wrote:
western traveler wrote:Cody,
Thanks for the kind words.
It seems everything is taking longer to complete lately though.


Comparing that you and I started our builds around the same time, seems to me your build is moving very fast (much quicker than mine ).
Your trailer looks great!

John


Thanks John but there is no comparison between the two builds other than they are home built. Your attention to detail is impressive! I love your solution for the fridge tray!
western traveler
Donating Member
 
Posts: 396
Images: 264
Joined: Wed Dec 28, 2016 6:59 am
Location: The Front Montana
Top

Re: Serenity TearDrop Build

Postby western traveler » Sat Sep 11, 2021 8:21 am

I wish I could get my Crystal ball back from repair. I’ve been distracted a bit with a few trips to the city for simple things like the correct length screws etc.

I did get the overhead lights taken care of. I think they produce 4 different colors and come with a remote (will I ever use it?). Also a timer to turn themselves off.

After trying to figure out a way to mount the curtains to these Challenger doors I decided Tom and Shelly viewtopic.php?f=50&t=70278&start=675#p1278835 had the best answer and I secured them with Velcro. Also by adding a few tabs in different locations they can be adjusted for different configurations.

Working on the gauge and switch mounting in the galley right now. I would like to get it at least roughed in before I need to leave for a week. I wish it was going with me…
167166167165167164
western traveler
Donating Member
 
Posts: 396
Images: 264
Joined: Wed Dec 28, 2016 6:59 am
Location: The Front Montana
Top

Re: Serenity TearDrop Build

Postby western traveler » Sun Sep 12, 2021 9:39 pm

I managed to get a bit of the wiring in the galley “panel” done yesterday but suddenly reconsidered how I was going to bring 110 into the space. I had planned on drilling through the wall and mounting a NOCO AC port plug but suddenly my heart wasn’t into it. I just don’t want any more holes in the outer shell. Going to think about it more. I am considering just bringing an extension cord up through the bottom of the hatch into the space to connect with the GFI cord I purchased. I think there might be enough space between the hatch and floor that the cord would just be pressed into the rubber gasket.

Today I cleaned up the trailer wiring and pigtail and mounted the junction box. I wanted to be able to access it easily if needed and this is where it ended up. I then mounted the Buyers Products tongue box. I vacillated over a polished Diamond plate one or this and decided to do the stainless galley counter top and save here. I cut out a wooden floor for it as well. I was thinking how in the heck am I going to follow the multiple curves when suddenly “Dawn broke over Marblehead!” I placed it down on the ply and marked the outside. Gawd sometimes I am slowwww…

167183
western traveler
Donating Member
 
Posts: 396
Images: 264
Joined: Wed Dec 28, 2016 6:59 am
Location: The Front Montana
Top

PreviousNext

Return to Build Journals

Who is online

Users browsing this forum: No registered users and 25 guests