The Poet Creek Express - Foamie Hybrid

Canvas covered foamies (Thrifty Alternatives...)

Moderator: eaglesdare

Re: The Poet Creek Express - Foamie Hybrid

Postby KCStudly » Sun Nov 16, 2014 9:41 pm

WOI, There are no limitations accept for those that we place upon ourselves.

Yeah, your build ended up heavy, but it has the features and character that you put into it, so it is uniquely yours; and it is campable. It is what you made it. :thumbsup:

This isn't rocket science. Sure, I have access to tools and a general knowledge of how to use them, but I'm no master craftsman and am learning a lot as I go, too. Time is a big factor as well. If you want something to come out the way you picture it, it might not happen on the first try, or it might take a little more effort in the beginning to see that it does. I have a lot of time in on my build getting it how I want it. If I didn't fuss so much or set challenging design goals, the result would not be as refined as I am hoping to achieve.

I blame many of the top notch builders here for their inspiring builds! When I first started lurking here, 2bits was still finishing up his LT, aggie Tom was deep into the Silver Beetle, Planovet had barely finished his Little Swiss, and Doug Hodder... well, he's in a category all of his own. TPCE has its warts here and there, but the level of fit and finish was at least inspired by these notable builds and others.

Having the interwebs and being able to learn so much from the experience of other people here has been a huge factor in knowing how to avoid mistakes, and pick methods and arrangements that (hopefully) will work best in use.

Hey Tony, Thank you for the inspiration! Since the season is so short there, it leaves plenty of time for building! I know last year was not typical, but what would you say is the typical snow pack depth for an average season? If you know...
KC
My Build: The Poet Creek Express Hybrid Foamie

Poet Creek Or Bust
Engineering the TLAR way - "That Looks About Right"
TnTTT ORIGINAL 200A LANTERN CLUB = "The 200A Gang"
Green Lantern Corpsmen
User avatar
KCStudly
Donating Member
 
Posts: 9611
Images: 8169
Joined: Mon Feb 06, 2012 10:18 pm
Location: Southeastern CT, USA

Re: The Poet Creek Express - Foamie Hybrid

Postby tony.latham » Sun Nov 16, 2014 10:19 pm

Hey Tony, Thank you for the inspiration! Since the season is so short there, it leaves plenty of time for building! I know last year was not typical, but what would you say is the typical snow pack depth for an average season? If you know...


Sheeeeesh... Here's a precise, objective answer: a lot. For a bit more refined answer you can eyeball this Snotel Site: http://www.wcc.nrcs.usda.gov/nwcc/site?sitenum=650 at Mountain Meadows. It's about ten miles west of Poet Creek Campground. I see that on March 1st last year there was 73 inches. And that is a lot of snow.

T
User avatar
tony.latham
Gold Donating Member
 
Posts: 6899
Images: 17
Joined: Mon Jul 08, 2013 4:03 pm
Location: Middle of Idaho on the edge of nowhere

Re: The Poet Creek Express - Foamie Hybrid

Postby KCStudly » Sun Nov 16, 2014 10:37 pm

Cool. :thumbsup:

Looks like 7 inches at the moment.

We had a dusting the other morning and there are still a couple of patches here and there in the shady spots up on the hill at Mecca.

Winter is here.
KC
My Build: The Poet Creek Express Hybrid Foamie

Poet Creek Or Bust
Engineering the TLAR way - "That Looks About Right"
TnTTT ORIGINAL 200A LANTERN CLUB = "The 200A Gang"
Green Lantern Corpsmen
User avatar
KCStudly
Donating Member
 
Posts: 9611
Images: 8169
Joined: Mon Feb 06, 2012 10:18 pm
Location: Southeastern CT, USA
Top

Re: The Poet Creek Express - Foamie Hybrid

Postby KCStudly » Fri Nov 21, 2014 11:42 pm

I have been distracted by cold weather and narrow thinking.

Hung up on the process and not thinking logically.

Back a few days ago I glued the bits that I had cut off of the tops of the front wall foam on either side of the locker on to the lower edges of the first two pieces of ceiling foam, shown here with the two outside edges butted together for the picture op. The one on the right (the curb side) is shown as glued, while the one on the left (street side) has been cut down leaving a sliver to match up with the rock guard blocking installed previously.
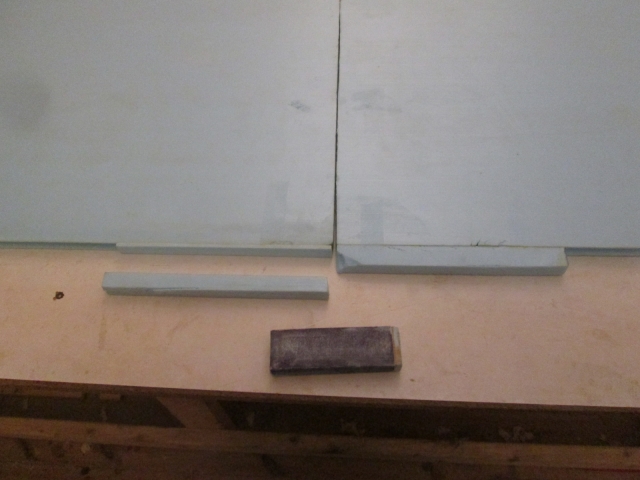
Image

Here is a dry fit after sanding the edge until I got a good fit.
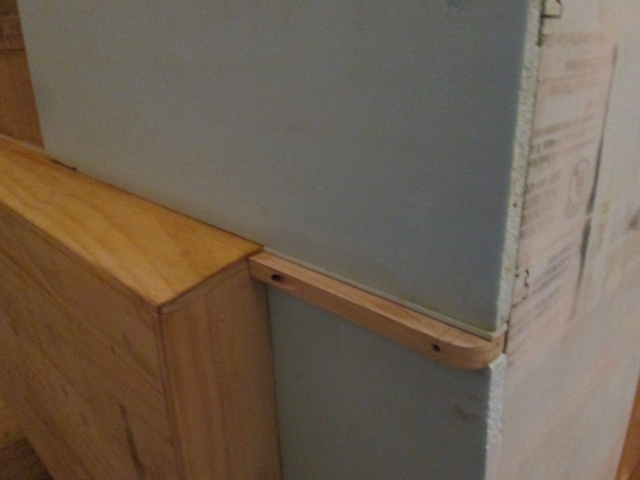
Image

It was at about this time that I realized it probably would have been much less work and time to have just squirted some GS in the gap, trimmed the excess and been done with it. Narrow minded thinking No. 1.

Now it got cold. I am really opposed to hauling my TB2, and PL, and GS, and poly, and paint, and wood filler, and epoxy, and etc., etc. home, and to the car, and into work (so it doesn’t freeze in my car during the day) and up to the loft and repeat every day. It’s hard to predict which products I may want for each session, or what the temperatures will be (i.e. which products will be an option for me to use). So I finally got it in my head that I would build a “hot box” or warming cabinet. Nothing too complicated, just a cabinet with a shelf that would fit a couple of one gallon cans, my glue bottles and a few smaller items with a 40w incandescent lamp to provide some heat. Maybe use some extra foam to insulate it, and practice my skinning technique by gluing some bed sheets on the outside.

Talked about my plans with Karl (he suggested that I just use an ice chest cooler, or build something that could be used in the build later… I briefly considered turning my cooler slide tray into a built in custom cooler), and the guys at work (Larry also, had independently suggested using a cooler), but I wanted something that would hold all of my stuff neatly w/o having to rummage thru each time I was trying to reach for something.

So I went and bought a couple of 1x10’s to build the cabinet (needs to hold some weight), and a 2x8 1 inch thk sheet of Fomular 250 (pink, the 1 inch matching some stuff that came as packaging for Karl’s new 3 phase panel giving me enough foam to cover all sides and only buying one sheet). I also got a metal octagonal box, simple ceiling fixture, cord grip connector, associated jam nut, and 2 pack of bulbs. I even salvaged the plug and zip cord off of the shop radio that got fried by Karl’s electrical troubles.

Karl again pondered if there wasn’t some way that I could put the effort into something that could be used later, but I had the plan in my head already and the materials in hand.

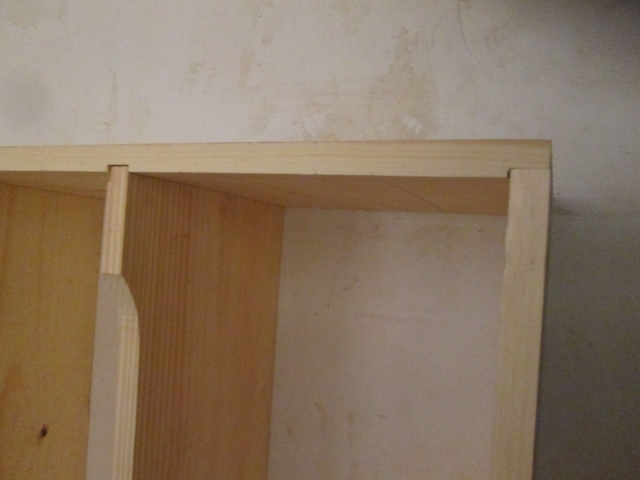
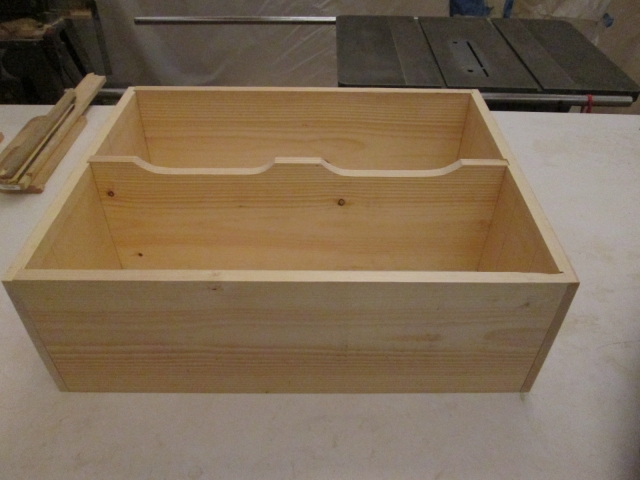
Spent an evening cutting, rabbeting, dadoing and dry fitting the box. This is the back side. I used the band saw to cut a pair of slots that would allow the air to circulate between the lower and upper shelves.
Image
Image


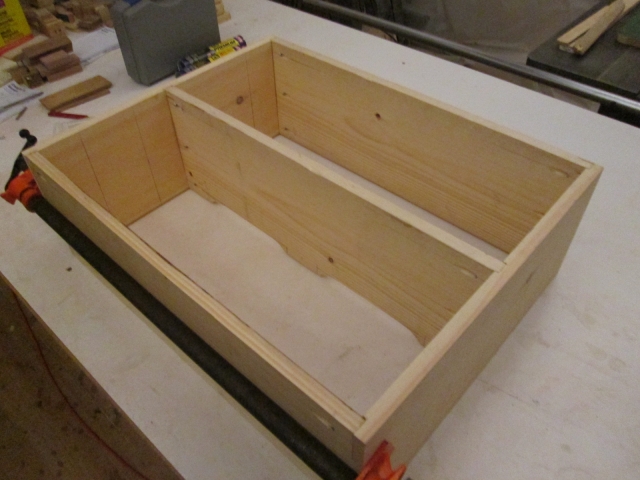
The next night I ripped the middle shelf down to allow for the thickness of the back and rabbeted the back edges so that the rear panel (some scrap melamine) would fit recessed/flush. Drilled 3 pocket holes in the underside of each end of each shelf, then glued the shelf section up with PL (only 45 deg F in the loft at that point, so not TB2). Glued and screwed.
Image

I had considered putting the middle shelf up higher, but decided there was no need to store the rectangular mineral oil can in there (in fact that would be more of a fire hazard) so just centered the shelf to fit round gallon paint and poly cans.

On the ride home I realized that the one gallon plastic jugs of TB2 are taller than the metal paint cans and probably wouldn’t fit standing up. Doh. Trying to decide if I should stay the course or make a change, Karl’s words kept ringing in my ears, “sure would be nice if you could build something that can be used later in the build”.

Later at home that night it struck me. It was right there in front of… almost on the tip of… my... tongue... box. I should be building my foam walled tongue box. The tongue box would easily contain all of my goodies, and it needs to have a hole in it for shore power and solar charging connections anyway, so easy to pass the lamp cord thru. I was hung up on the cooler aspect of building an insulated box. I didn’t even remember the tongue box because I had put that off mentally until the cabin is fitted to the trailer, when I can make sure the box is built streamlined to the front locker bump out. End of narrow minded adventure No. 2, almost.

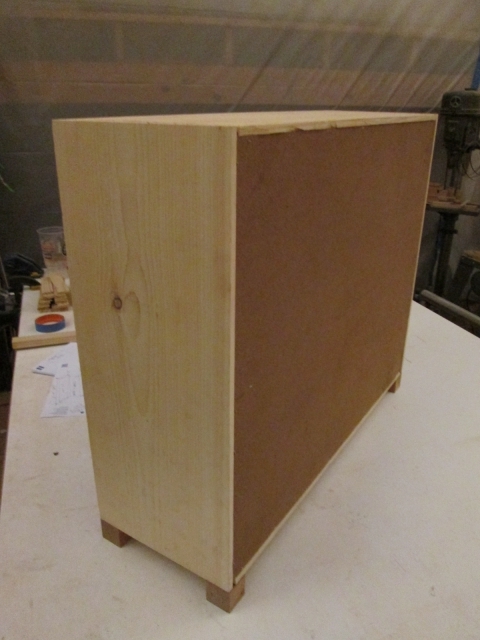
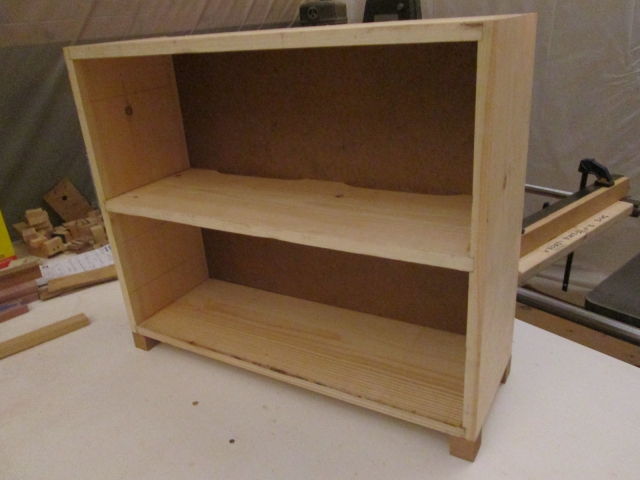
So tonight I at least finished the shelf so that it had a back on it and some feet, rather than it being a total waste.
Image
Image
Not my best work, but sturdy and functional; I’ll probably load it with stuff that has been laying on the floor off the end of the bench next to my other supply shelf.

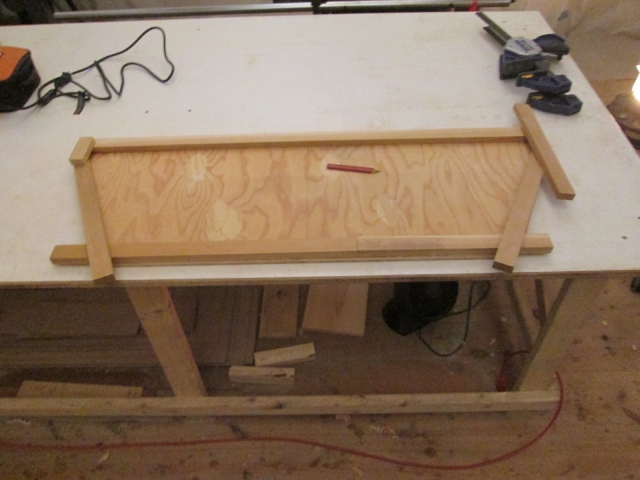
That done I decided to start building the tongue box (TB). I had to modify the original 1/2 inch ply floor piece that I made way back when in order to accommodate the locker bump out and keep the TB from getting too close to the trailer jack handle. That took a rip on the table saw. The locker came out about 3/8 inch narrower than the original plan for the TB, so I had to nip a touch off each side of the rear section; used the powered miter saw.

The lid of the box will be sloped in a continuation of the shed angle on the locker, so I did some careful measuring, allowing for the air gap between the two. Decided if I err on the short side a little; the TB can be shimmed up, if need be, to suit the line of the locker. If all else fails when everything comes together and I just can’t get things to line up the way I want, I can modify or rebuild later.

Rounded the front corners of the TB floor piece and started scrounging thru my cedar 1x2 drops to see what I could piece together for the top rim/lid sealing surface.
Image

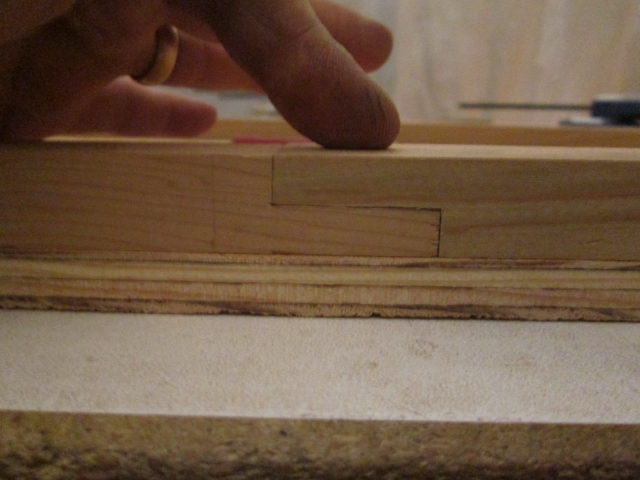
The rear piece was exactly the length needed, but was thicker than 1x and had to be ripped to 3/4 inch. I didn’t have a piece long enough for the front, so routed a half lap to join two shorter pieces. Worth the effort to me to be able to use the lighter weight and rot resistance of the cedar.
Image

Disregard the temptation to make the top lip frame match the floor of the box. Because of the slope it will need to be a little longer front to back (the hypotenuse plus enough to plane the edges plumb). I was just using the floor of the box as an approximation for selecting the stock.

Tomorrow is supposed to be the beginning of a small warming trend, so I should be able to glue stuff. :thumbsup:
Last edited by KCStudly on Thu Mar 31, 2022 11:36 am, edited 2 times in total.
KC
My Build: The Poet Creek Express Hybrid Foamie

Poet Creek Or Bust
Engineering the TLAR way - "That Looks About Right"
TnTTT ORIGINAL 200A LANTERN CLUB = "The 200A Gang"
Green Lantern Corpsmen
User avatar
KCStudly
Donating Member
 
Posts: 9611
Images: 8169
Joined: Mon Feb 06, 2012 10:18 pm
Location: Southeastern CT, USA
Top

Re: The Poet Creek Express - Foamie Hybrid

Postby dales133 » Sun Nov 23, 2014 5:38 am

Still following along mate looking good as usual.
Seen on the news the weather over there.....brrrrrrŕ. ...been 31 - 33C here recently
User avatar
dales133
4000 Club
4000 Club
 
Posts: 4605
Images: 1
Joined: Mon Oct 13, 2014 5:26 pm
Top

Re: The Poet Creek Express - Foamie Hybrid

Postby KCStudly » Sun Nov 23, 2014 9:48 am

Thanks Dale, I worked on cutting foam and forming the sides of the box yesterday, but haven't had time to write it up. Hope to get the back of the box cut and all of it glued today.

:thumbsup:
KC
My Build: The Poet Creek Express Hybrid Foamie

Poet Creek Or Bust
Engineering the TLAR way - "That Looks About Right"
TnTTT ORIGINAL 200A LANTERN CLUB = "The 200A Gang"
Green Lantern Corpsmen
User avatar
KCStudly
Donating Member
 
Posts: 9611
Images: 8169
Joined: Mon Feb 06, 2012 10:18 pm
Location: Southeastern CT, USA
Top

Re: The Poet Creek Express - Foamie Hybrid

Postby KCStudly » Sun Nov 23, 2014 10:48 pm

Tongue box build up.

After resizing the floor of the TB and easing the corners, I used the sliding square to gauge off a line 1 inch from all of the edges; and the compass to bisect the front and side corners. This went a long way toward setting saw blade angles and determining the tip to tip and inside corner measurements for cutting the foam panels.
Image
Image
Image

The plywood floor had a bit of a bow in it, so I screwed a couple of 2x3’s to the bottom as temporary stretchers. I may add a couple of smaller permanent cleats later.
Image
Image

Next I harvested the foam from the shipping container Karl donated, but that stuff was pretty beaten up. One of the larger pieces was still in okay shape, but had a couple of sizeable dents, and a little wave pattern along about 1/3 of the face on one side. I opted to use this for the back where it would not tend to show and I wouldn’t have to worry about working it over enough to be presentable. The back wanted to be just slightly over 24 inches tall, so rather than adding a sliver, I cut away some of the damaged area and used a 6 inch wide piece to extend it back to the needed size. I used the tape hinge method to glue the panel up with PL Premium. Again, not too worried about having to sand the joint smooth; the harder PL would make this tricky.
Image

I used the bevel gauge (a nice Rosewood and brass handle tool made by Crown that Yvette’s father had gifted me… he was a talented wood worker and furniture maker/hobbyist) to transfer the shed angle from the front locker onto the floor of the TB. By drawing a line across from the front to back width of the floor at this angle and comparing that to a perpendicular line, it gave me the difference in height between the front and the back directly w/o having to do any math. I was able to bevel the rear and miter the short side pieces that are perpendicular with the rear directly to this angle, but the angled side pieces that follow the angle of the A-frame tongue could be a little harder to figure… so I didn’t. I used the layout on the floor to measure the inside edge to inside edge and cut the beveled edges to this width. Then I matched one edge, the taller rear edge to the narrow side piece height on its front edge. Then I matched the front edge of this angled side panel to the rear edge of the beveled top of the front panel, and struck a line between the two marks. This turned out really close when I taped it all together for a dry fit up.
Image

The back still needed to be cut to final width at this point.
Image

To adjust the tops of the angled sides I clamped some guide blocks on ‘connecting the dots’ and used that as a hard edge to trim to.
Image
Image

I want the angled top of the box to be all one plane (flat and fair) so that the top rim frame lays flat and has a good glue bond. To check progress I flipped the dry assembly over and checked it against the flat surface of the bench.
Image
Image
There’s a little gap under the rear corner on one side, but not too bad.

Then I could not resist the urge to mock it up in place, still w/o the back panel.
Image
Image
Image

In this last one, shot straight on, you can see how the shed angle of the locker carries right thru the TB.
Image

Today I cut the rear panel to width, dry fit it with tape then splayed the whole thing open on the bench. (Didn’t get any further than that because the weather was decent and I had to take the opportunity to do leaf removal at the house, one of the dandy fall clean up chores we get here in the northeast.

Before I close this up and make it harder to work on, I need to figure out a few things. I want to build a false floor, or partial false floor that will cover the battery, charger, circuit panel and solar controller (that I will remount from the portable panels). Also, the battery will need to be vented in such a way to prevent moisture intrusion, and I need to select the bulkhead fittings for the shore power and solar panel connections. Many of these things will need blocking. I am also considering following GPW’s lead and using chipboard as a lining to toughen the inside prior to skinning with bed sheets. If so, I will apply the chipboard in the flat before gluing the corners up.
KC
My Build: The Poet Creek Express Hybrid Foamie

Poet Creek Or Bust
Engineering the TLAR way - "That Looks About Right"
TnTTT ORIGINAL 200A LANTERN CLUB = "The 200A Gang"
Green Lantern Corpsmen
User avatar
KCStudly
Donating Member
 
Posts: 9611
Images: 8169
Joined: Mon Feb 06, 2012 10:18 pm
Location: Southeastern CT, USA
Top

Re: The Poet Creek Express - Foamie Hybrid

Postby GPW » Mon Nov 24, 2014 7:56 am

Well, That’s coming out Nice !!! :thumbsup: 8)
There’s no place like Foam !
User avatar
GPW
Gold Donating Member
 
Posts: 14911
Images: 546
Joined: Thu Feb 09, 2006 7:58 pm
Location: New Orleans
Top

Re: The Poet Creek Express - Foamie Hybrid

Postby KCStudly » Mon Nov 24, 2014 2:49 pm

Thanks GPW. :thumbsup:
KC
My Build: The Poet Creek Express Hybrid Foamie

Poet Creek Or Bust
Engineering the TLAR way - "That Looks About Right"
TnTTT ORIGINAL 200A LANTERN CLUB = "The 200A Gang"
Green Lantern Corpsmen
User avatar
KCStudly
Donating Member
 
Posts: 9611
Images: 8169
Joined: Mon Feb 06, 2012 10:18 pm
Location: Southeastern CT, USA
Top

Re: The Poet Creek Express - Foamie Hybrid

Postby KCStudly » Fri Nov 28, 2014 12:00 am

Yesterday I went by the West Marine store and picked up some things for the tongue box/battery compartment. There is a marine spec battery tie down; a 120V/15A shore power charging connector with rubber cap; a Perko through hull connector for the solar panel leads; and a 4 inch round stainless steel louvered vent cover.
Image

The louver will be located on the back of the TB and I will make a baffle to go between the louver and the battery space to help keep moisture out.

I spent the rest of the evening contemplating possible arrangements trying to determine where I will need blocking and what would offer the best accessibility w/o killing storage space.

I didn’t like any of the options that involved having the fuse panel mounted vertically; that just didn’t seem to offer easy access or full visibility unless I put it high up further toward the middle of the rear panel. If I were to make the box hatch lower in the front (more like a curved galley hatch) that would open up the front of the box improving visibility to the rear of the box, but I like the simplicity of the flat hatch lid and the fact that it will be fully out of the way when opened and leaning back.

I considered making a board to mount the fuse panel flat over the battery, which I liked because it would make the panel much more accessible, but I didn’t like the idea of having to keep all of the connections flexible so that the board could be shifted out of the way to service the battery. Also, I have been struggling mentally with the less preferred practice of keeping the battery charger and fuse panel in the same compartment as the battery (let alone concerns about moisture coming thru the vent).

So, despite the fact that it complicates the build quite a bit, I think I have decided on a better design in the end. This next pic depicts a mock up. The plan is to partition off a corner of the TB for a separate battery compartment that is accessible thru a hatch on the lower side of the box. By making the battery compartment just high enough for the battery and to lift the leads and hold down clamp, there will be a natural and permanent shelf on the inside of the TB to mount the fuse panel, charge controller and battery tender; and they will be separated from the battery. This will also make it much easier to vent the battery compartment w/o worrying about moisture. The whole battery compartment can be glassed, I can put vent/drain holes directly into the floor of the box (in addition to the higher mounted louvered vent) and I won’t have to worry about making the access door seal water tight. Imagine this mocked up center divider only being a couple of inches taller that the battery and a solid ledge over the battery. The access door would be on the left, as viewed, and the access door, being only a little taller than the battery, would be hinged at the front corner (bottom left in pic).
Image

Like I said, it adds some complication, but it solves a lot of things and, IMO, is a better design solution. Now I just have to work out all of the details.

We had two Thanksgiving dinners today. First was at the in laws. Stuffed mushroom appetizer, Turkey, a quiche casserole, buttery mashed potato casserole, stuffing, corn, Rene’s pork pie, Meme’s dinner rolls, carrots, turnips, Key Lime pie, lemon sponge pie, chocolate covered peanut butter bars (think Reese’s PB cups), candy corn and more.

Later was at mom’s and Bill’s.
Starters included fig jam with goat cheese on gluten free baguette points.
Image

And bleu cheese stuffed dates wrapped in pancetta with a honey balsamic vinegar drizzle.
Image

Things got serious when we moved to the dinning table.
Image

There was roasted turkey.
Image

Cornbread stuffing and dressing (plus a gluten free version not show).
Image
Image

Cranberry orange relish and mom made gravy from the pan drippings.
Image

Twice baked sweet potatoes with a dab of something creamy (probably more goat cheese) and crumbled bacon.
Image

Roasted carrots, parsnips and onions (?) with a parsley, thyme and chopped green olive topping.
Image

Green beans topped with sautéed Cipollini onions and mushrooms (made a really nice mushroom au jus in the bottom of the dish!)
Image

And cranberry sauce.
Image
There was also the traditional canned cranberry jelly.

It all made a really delicious plate with some Graber olives.
Image

For dessert mom whipped some cream and we had my favorite, mom’s pecan pie.
Image

Also on tap was a pumpkin pie that my sister made, and another pecan pie, both on gluten free crusts.

It was all very good!

I hope you all have had a very nice thanksgiving!!! :thumbsup:
KC
My Build: The Poet Creek Express Hybrid Foamie

Poet Creek Or Bust
Engineering the TLAR way - "That Looks About Right"
TnTTT ORIGINAL 200A LANTERN CLUB = "The 200A Gang"
Green Lantern Corpsmen
User avatar
KCStudly
Donating Member
 
Posts: 9611
Images: 8169
Joined: Mon Feb 06, 2012 10:18 pm
Location: Southeastern CT, USA
Top

Re: The Poet Creek Express - Foamie Hybrid

Postby dales133 » Fri Nov 28, 2014 2:51 am

Looks like an amazing spread ... I'm a real foodie but other than American bbq witch I consider myself better than average at, most of the rest of it is as foreign as Mongolian given I've never eaten it...I'd hope I get the opertunity at an even similar spread to your mums at thanks giving!
It's usually around 35-40 c here at Xmas so it's alot of prawns, cold cuts and sh**
Did I mention I loathe Xmas. Busy at work.busy at home.not enough money or not enough time... my least favorite day off
Last edited by dales133 on Fri Nov 28, 2014 5:00 pm, edited 1 time in total.
User avatar
dales133
4000 Club
4000 Club
 
Posts: 4605
Images: 1
Joined: Mon Oct 13, 2014 5:26 pm
Top

Re: The Poet Creek Express - Foamie Hybrid

Postby ghcoe » Fri Nov 28, 2014 1:01 pm

I knew I was going to see this when I clicked on this thread..... :thumbsup:
George.

Gorrilla Glue, Great Stuff and Gripper. The three G's of foamie construction.

My build viewtopic.php?t=54099
Working with flashing for foamie construction viewtopic.php?f=55&t=60303
Making a hot wire http://tnttt.com/viewtopic.php?f=55&t=55323
User avatar
ghcoe
1000 Club
1000 Club
 
Posts: 1943
Joined: Fri Dec 11, 2009 11:20 pm
Location: SW Idaho
Top

Re: The Poet Creek Express - Foamie Hybrid

Postby S. Heisley » Fri Nov 28, 2014 8:14 pm

I think I'm going to move to your neck o' the woods and beg for leftovers. :beautiful:
User avatar
S. Heisley
Super Lifetime Member
 
Posts: 8772
Images: 495
Joined: Mon Sep 17, 2007 10:02 am
Location: No. California
Top

Re: The Poet Creek Express - Foamie Hybrid

Postby KCStudly » Fri Nov 28, 2014 11:36 pm

Mom always puts on a good spread! I'm sure she appreciates the kind words as much as I appreciate her efforts making every occasion special. Way to go mom! :thumbsup:

Now for today's exploits, building as I go.

The 1x10 drops I had left over from the shelf unit weren’t quite wide enough for the top of the battery compartment (the “electronics ledge”) so I biscuit joined a couple together into a blank to be ripped down again later. It has been a while since I used the biscuit joiner last.
Image

Clamped it up with some strips to protect the edges from the clamps and parked it in front of the heater.
Image

Next, since the battery hold down tray has a raised lip around it, there was no reason not to add a rim along the outside of the battery compartment. This will help stiffen the edge of the TB floor and will give some added thickness for the battery compartment door. Here I have ripped the stock to the same 1 inch width as the foam, have formed a mitered half lap joint at the rear corner, and am dry fitting. The rough edge will be trimmed later.
Image

Here it is after trimming to length and gluing up.
Image

Next up I started making the jambs. Ripped some scrap 2x3 down to 1x1-1/2 actual then angle ripped the front jamb to match the front corner of the box. Just dry fitting here.
Image

Before finishing the tops of these to join with the ledge, I ripped and cut the ledge to shape. It may seem like a big piece of wood, but I want to be able to sink screws anywhere I want for both the electrical components and any wire training items (such as ‘P’ clips, zip tie anchors and/or loom track).
Image

The ledge will primarily be supported by the jambs and the 1 inch foam divider between the battery compartment and the main part of the TB. However, I also allowed for a 1/4 inch dado in the front and rear panels of the TB. You can kind of see that here at the rear by comparing the edge of the ledge with the pencil line representing the inside edge of the foam on the floor of the TB beyond.
Image

Next I flipped the floor over and used the top bearing flush cutter to trim the rim, matching the rounded corners of the floor.
Image

The half lap in the rim came out pretty tasty, if I do say.
Image

I used the same techniques as previously to mark and round over the front corner of the front jamb.
Image

Here, after notching the tops of the jambs for the ledge, I have glued and Kregg screwed them down into the rim. The ledge is just dry fit for now, with the far edge being propped up by a quick clamp.
Image
Image

Before I get too much further I will need to drill the vent and mounting holes in the floor of the box. Tomorrow I will likely work on the blocking piece for the shore connections, the foam for the divider/ledge support, and possibly start modifying the box foam to suit these changes.
KC
My Build: The Poet Creek Express Hybrid Foamie

Poet Creek Or Bust
Engineering the TLAR way - "That Looks About Right"
TnTTT ORIGINAL 200A LANTERN CLUB = "The 200A Gang"
Green Lantern Corpsmen
User avatar
KCStudly
Donating Member
 
Posts: 9611
Images: 8169
Joined: Mon Feb 06, 2012 10:18 pm
Location: Southeastern CT, USA
Top

Re: The Poet Creek Express - Foamie Hybrid

Postby ChasCABQ » Sat Nov 29, 2014 10:53 am

Wow, I love your attention to detail and envy your tool collection. I like your tag: "That looks about right" engineering...
Build journal: http://www.tnttt.com/viewtopic.php?t=61303
In 2016, I received a kidney transplant, finished my teardrop, and took it on the road! In 2017 I sold it and am back to car camping.
Thanks to all forum members who provided advice about my build and posted info to help me get started.
User avatar
ChasCABQ
Donating Member
 
Posts: 95
Images: 18
Joined: Sat Sep 27, 2014 3:54 pm
Location: Albuquerque, NM
Top

PreviousNext

Return to Foamies

Who is online

Users browsing this forum: No registered users and 12 guests