The Poet Creek Express - Foamie Hybrid

Canvas covered foamies (Thrifty Alternatives...)

Moderator: eaglesdare

Re: The Poet Creek Express - Foamie Hybrid

Postby Atomic77 » Thu Nov 19, 2015 7:15 am

Looking really good!

About that edge... I only cut it off if it's in an area I'm going to sand and finish. Otherwise I leave it alone. With carbon fiber especially because that strand is Kevlar. Really nice work and I think you're almost having fun!
Michael

"The Strength is in the Sum of the Parts..."

The Astroliner

Follow The Astroliner Blog Here!

Check out our YouTube video
User avatar
Atomic77
1000 Club
1000 Club
 
Posts: 1463
Images: 309
Joined: Tue Oct 08, 2013 5:29 pm
Location: Fort Wayne Indiana

Re: The Poet Creek Express - Foamie Hybrid

Postby KCStudly » Thu Nov 19, 2015 8:36 am

Thanks Michael. I am starting to get comfortable with it.

As usual, I will self critique; not because I am a Debby Downer, but because I am always looking for improvement. I am second guessing my decision to stagger the top edge like that; it may have been better to let it run long, then trim and sand back to the radius. That way the area the hinge will land on would be flatter. Not a big deal, but I may have to sand more, body work or bed the hinge into something to get it to lay flat. Also, when I got done adding the filler along the edge of the rim cap I had a little left over that I scraped off; I could have used that little bit to fill a small notch around the wire pull hole where the fillet didn't quite fill in around the foam plug, or to fill that little bare spot on the inside corner of the rim cap, but forgot about those in the moment and wasted it instead.

At the end of the layup I did remember to use the last little bit of wet to put a couple of small swatches of cloth on the rim inside corner, and it didn't seem to need the filler to lay down, but it would have been a little nicer with it. Minute details.

Karl keeps scoffing at me for trying to perfect the back and bottom of the TB, and I keep insisting that it is all for the greater good, so that when I get to the hatch and cabin there are much fewer "issues" and everything goes smoothly (pun implied?).
KC
My Build: The Poet Creek Express Hybrid Foamie

Poet Creek Or Bust
Engineering the TLAR way - "That Looks About Right"
TnTTT ORIGINAL 200A LANTERN CLUB = "The 200A Gang"
Green Lantern Corpsmen
User avatar
KCStudly
Donating Member
 
Posts: 9616
Images: 8169
Joined: Mon Feb 06, 2012 10:18 pm
Location: Southeastern CT, USA

Re: The Poet Creek Express - Foamie Hybrid

Postby Atomic77 » Thu Nov 19, 2015 8:55 am

KCStudly wrote:Thanks Michael. I am starting to get comfortable with it.

As usual, I will self critique; not because I am a Debby Downer, but because I am always looking for improvement. I am second guessing my decision to stagger the top edge like that; it may have been better to let it run long, then trim and sand back to the radius. That way the area the hinge will land on would be flatter. Not a big deal, but I may have to sand more, body work or bed the hinge into something to get it to lay flat. Also, when I got done adding the filler along the edge of the rim cap I had a little left over that I scraped off; I could have used that little bit to fill a small notch around the wire pull hole where the fillet didn't quite fill in around the foam plug, or to fill that little bare spot on the inside corner of the rim cap, but forgot about those in the moment and wasted it instead.

At the end of the layup I did remember to use the last little bit of wet to put a couple of small swatches of cloth on the rim inside corner, and it didn't seem to need the filler to lay down, but it would have been a little nicer with it. Minute details.

Karl keeps scoffing at me for trying to perfect the back and bottom of the TB, and I keep insisting that it is all for the greater good, so that when I get to the hatch and cabin there are much fewer "issues" and everything goes smoothly (pun implied?).

I agree. I probably would have let it run long and then trim but oh well whatever works. You learn as you go. It's a process. I've been doing it for a while now and I seem to learn something new all the time that's a good thing. Here's a little trick for you, if you're doing a dry lay up and you have an area like a corner that's difficult to get it to lay down use a little bit of 3m super 77 just lightly on its surface first. You'll get a perfect fit that stays down. Now, you will have to use some extra care to squeegee the epoxy through the cloth to be sure it went below, but this is something we do on irregular surfaces with a lot of luck. Something else I came up with when using this procedure, if I can't get it squeegee or spreader into the area I take a chip brush and cut the bristles down by at least two thirds. Leaving one third of the bristle sticking up. Now you have a brush that will also work as a squeegee and I almost literally scrub the epoxy down through the cloth to get it to the surface. It works real nice on the race boat and it is a time proven method.
Michael

"The Strength is in the Sum of the Parts..."

The Astroliner

Follow The Astroliner Blog Here!

Check out our YouTube video
User avatar
Atomic77
1000 Club
1000 Club
 
Posts: 1463
Images: 309
Joined: Tue Oct 08, 2013 5:29 pm
Location: Fort Wayne Indiana
Top

Re: The Poet Creek Express - Foamie Hybrid

Postby KCStudly » Thu Nov 19, 2015 9:17 am

Keep those tips and tricks coming! The 3M 77 is not compatible with the raw foam (...tho there is less and less of that exposed on the TB now...), but I suppose it would be okay with a minimal mist coat (like the primer guide coats).

The cut down brush sounds like a good idea for certain jobs, but I have a trick I like to use that works better with the full bristles. Sometimes when you are dabbing/poking near an edge with the tips of the bristles trying to push a little more wet in, it will tack and actually lift the edge of the cloth up. What I do is lay the brush over on the sides of the bristles and twist it in a rolling motion. This puts down more wet and keeps the edge from lifting (similar to using the slotted roller). The rolling action doesn't tend to lift or shift the weave compared to the dabbing or scraping action.

Karl noted that the slot roller did a really good job of going over the radius corners and sticking the cloth down without pushing a bulge or disturbing the fibers. I'll probably use that tool more going forward, especially on the larger panels.
KC
My Build: The Poet Creek Express Hybrid Foamie

Poet Creek Or Bust
Engineering the TLAR way - "That Looks About Right"
TnTTT ORIGINAL 200A LANTERN CLUB = "The 200A Gang"
Green Lantern Corpsmen
User avatar
KCStudly
Donating Member
 
Posts: 9616
Images: 8169
Joined: Mon Feb 06, 2012 10:18 pm
Location: Southeastern CT, USA
Top

Re: The Poet Creek Express - Foamie Hybrid

Postby Atomic77 » Thu Nov 19, 2015 9:24 am

KCStudly wrote:Keep those tips and tricks coming! The 3M 77 is not compatible with the raw foam (...tho there is less and less of that exposed on the TB now...), but I suppose it would be okay with a minimal mist coat (like the primer guide coats).

The cut down brush sounds like a good idea for certain jobs, but I have a trick I like to use that works better with the full bristles. Sometimes when you are dabbing/poking near an edge with the tips of the bristles trying to push a little more wet in, it will tack and actually lift the edge of the cloth up. What I do is lay the brush over on the sides of the bristles and twist it in a rolling motion. This puts down more wet and keeps the edge from lifting (similar to using the slotted roller). The rolling action doesn't tend to lift or shift the weave compared to the dabbing or scraping action.

Karl noted that the slot roller did a really good job of going over the radius corners and sticking the cloth down without pushing a bulge or disturbing the fibers. I'll probably use that tool more going forward, especially on the larger panels.

I use the roller a lot on wet lay ups. Forgot about your foam. The foam we use at the race shop is compatible with most everything.
Michael

"The Strength is in the Sum of the Parts..."

The Astroliner

Follow The Astroliner Blog Here!

Check out our YouTube video
User avatar
Atomic77
1000 Club
1000 Club
 
Posts: 1463
Images: 309
Joined: Tue Oct 08, 2013 5:29 pm
Location: Fort Wayne Indiana
Top

Re: The Poet Creek Express - Foamie Hybrid

Postby KCStudly » Fri Nov 20, 2015 1:52 pm

Well, I’ve “painted” myself into a corner, so to speak… sort of. I’ll explain in a minute.

The layup on the TB back went exceedingly well. Here I have trimmed out the battery box vent and the overlap at the side and bottom; and ran some sand paper around to smooth the cut edges back.
Image

Same thing at the rear battery box drain/vent hole.
Image

Here’s that little corner patch on the inside of the rim that I mentioned; almost can’t even see it (the small depression that looks sort of like a x-mas tree shape) :D .
Image

The strings that flopped out over the stiffening rib cleaned up; and the street side rear corner (upper left in photo) trimmed and sanded back to the radius.
Image

While I had the camera out I took a shot of the divots I had mentioned in the wire pull hole. They look like cat’s ears where the filleting filler was held away from my temporary foam plug by the loose stretch wrap I had used to mask it. This is not a cosmetic issue at all, but I want to make sure whatever sealer I use later will conform nicely, so at some point I will add a little more “thick” to these nooks; and I still need to go around to all of the holes and edges with some “wet” to seal up any missed raw edges of wood.
Image

I resigned to increasing all (to be) glassed radii to a minimum 1/4 inch; so I ran the router around the inside edge of the battery box to increase it from the 1/8 inch radius that I had given it previously.
Image
Image

Rather than try to trim out this opening and fold the excess cloth around all four edges, I am now planning to do the lower rim and back post using strips of bias cloth, leaving just the top and forward edge for the big front and side (all one) layup.

Okay, about that painted into a corner reference. On the two rear vertical corners of the TB the former 1/8 inch round overs transition down along the top rim corners to foam, to the battery box jamb on the curb side and finally to the bottom ply corners. I purposely left these crisp before glassing the back so that the edges of the cured cloth would be, presumably, easier to trim flush and not have a lump/seam as there would have been if I had wrapped the rear cloth onto the sides. Now I want to radius these corners over neatly so that the front/sides layup can wrap around the corner gently.

We have already well proven that trying to sand soft foam and harder stuff together results in removing too much foam and not enough hard stuff. We have also established that the router guide rollers don’t like to follow the soft foam well; at least not for a heavy handed Sasquatch like me, but maybe the guide roller would follow the hard glass side of the corner okay and cut both the edge of the glass and the foam with the shoe running on the foam.

When in doubt, test. I took that spackle/epoxy test piece I had done, clamped it flush to the edge of the bench to give a little more stability to the router shoe and ran it. The results were a little shaky. You can see how it seemed to start okay, and then tapered away, and it looks more like a chamfer than a radius.
Image
Image

I’m not exactly sure what happened, maybe the foam moved away from the edge of the bench? I plan on doing another test using the detachable guide fence that came with the router along the foam side, but ran out of time this session. Maybe rounding the corner over before the first layup would have been better.

I also considered doing a flox thickened epoxy corner where you leave the corner sharp; cut a triangle wedge of foam away from the backside of the first layup; sand the back side of the resulting glass lip; fill the triangle with thick; glass over it; and trim the second layup sharp to the first one. Having the bead of hard flox in the corner gives the layups something solid to bond to and protects the corner from splitting open. But I think I will save that for another time.

Not sure if I will make it out to the loft tonight (Friday), but if I do you will hear about it here!
KC
My Build: The Poet Creek Express Hybrid Foamie

Poet Creek Or Bust
Engineering the TLAR way - "That Looks About Right"
TnTTT ORIGINAL 200A LANTERN CLUB = "The 200A Gang"
Green Lantern Corpsmen
User avatar
KCStudly
Donating Member
 
Posts: 9616
Images: 8169
Joined: Mon Feb 06, 2012 10:18 pm
Location: Southeastern CT, USA
Top

Re: The Poet Creek Express - Foamie Hybrid

Postby KCStudly » Mon Nov 23, 2015 12:31 am

I did make it out to the shop on Friday for a couple of hours, so let’s get caught up.

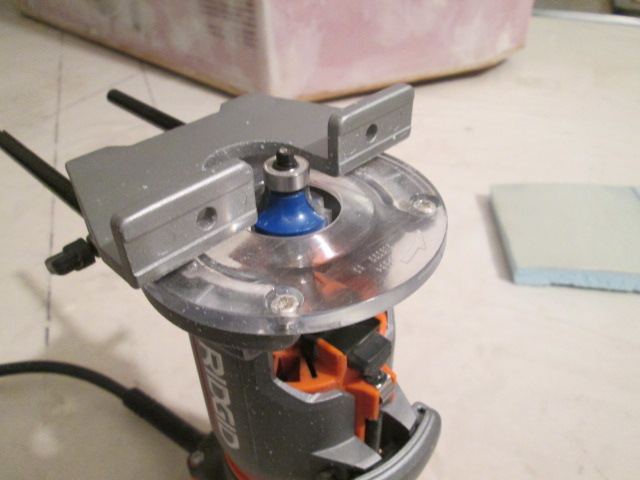
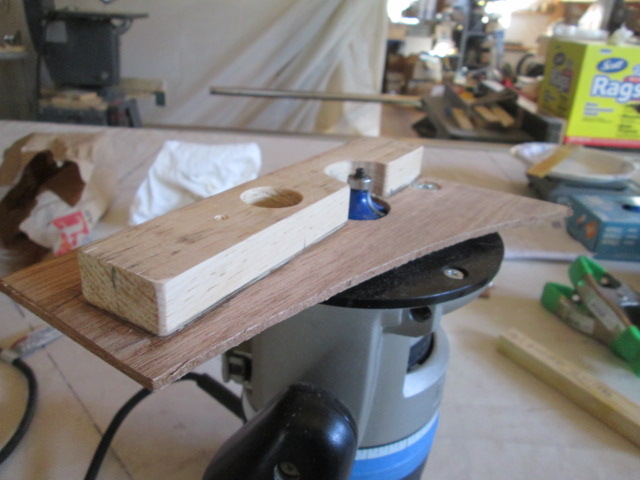
Here’s that trim router setup with the guide fence.
Image

I sanded the test piece back square again and ran the router putting the shoe on the glass side and the fence along the foam edge. It worked much better.
Image

However, when I tried it on the real deal it didn’t take a full cut.
Image

Still not sure what was going on here, perhaps the glass has a little wave to it keeping the router shoe “average” above the local, or maybe the corner isn’t exactly 90 deg (although I didn’t check it and don’t think that is it). No matter, the next logical thing to do is to step up to the 3/8 round over bit.

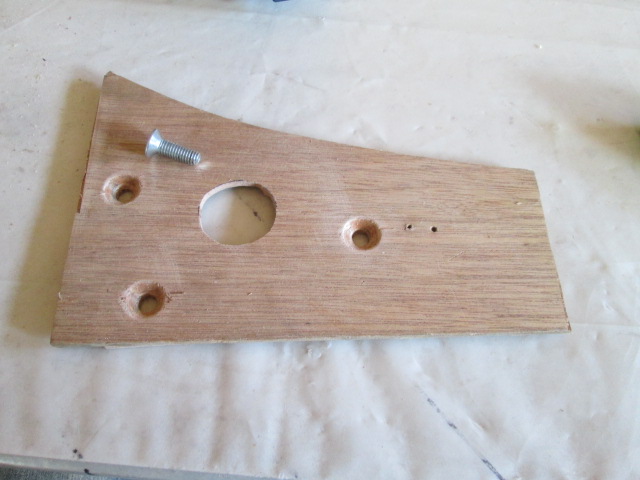
Unfortunately, the 3/8 bit won’t fit in the handy trim router because the outside diameter of the cutter is too big for the opening in the base plate, and I don’t have a guide fence for the larger routers. After looking thru all of my router jigs I found a small makeshift circle cutting jig that already fit the base of the 1/4 inch Ryobi.

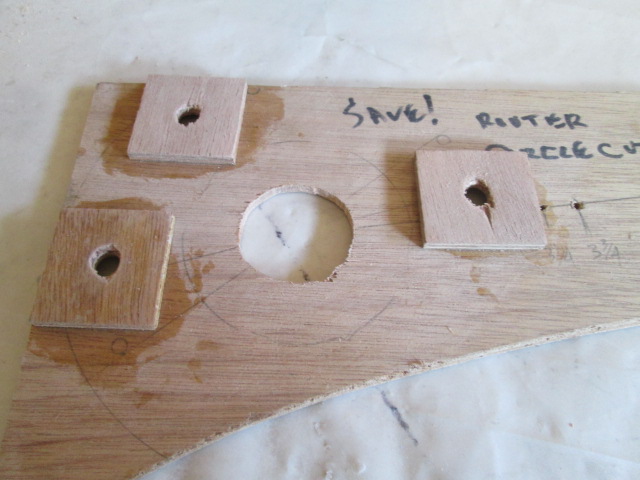
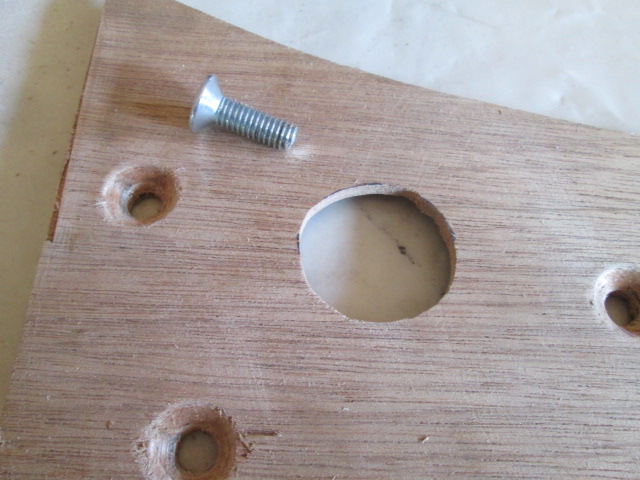
The flat head screw heads stuck up above the face of the 5mm luan. I didn’t want to wallow out the holes by countersinking thru the thickness of the ply, so I added some of the leftover wooden washers to the back side. I also had to open up the clearance hole for the bit, which I did crudely on the jigsaw table.
Image

Once that was done, Saturday morning I could open up the holes and countersink them deeper.
Image
Image

This gave me a base to attach a fence to. That required some crafty positioning and an extra hole to maintain access to the base screws. Once I had it figured out I used another straight piece of wood to align the reference surface of the fence to the roller.
Image

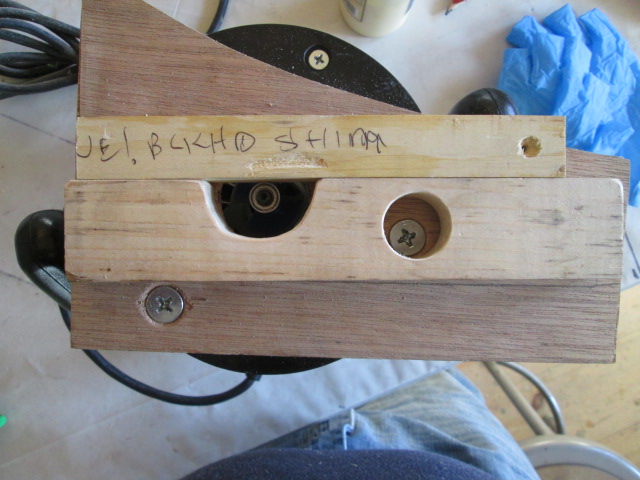
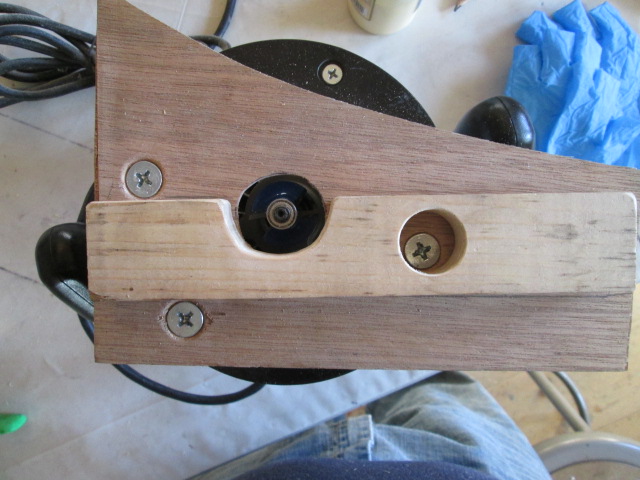
Then I glued the fence down with a couple of spring clamps at the edges to hold it. I wanted to use this right away so I left the clamps on, unscrewed the jig, flipped it over and sank a couple of FH screws thru to pin the fence to the ply.

From there it was back on the router to confirm the roller alignment and get to work.
Image
Image

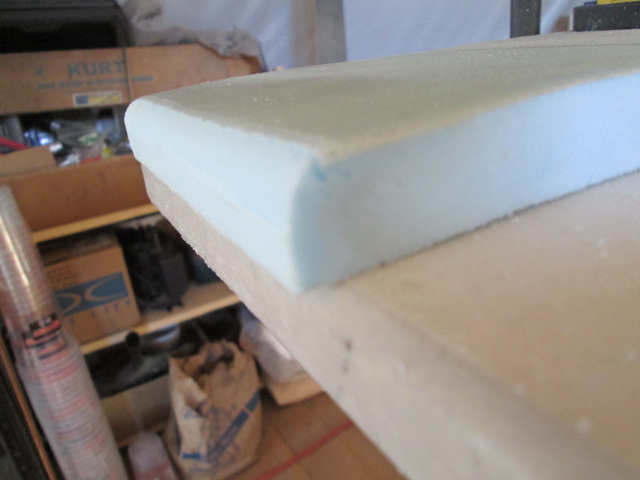
Back to the test piece for a nice fat round over.
Image

Back to the real deal and the resulting cuts ended up just like I had intended in the first place.
Image
Image

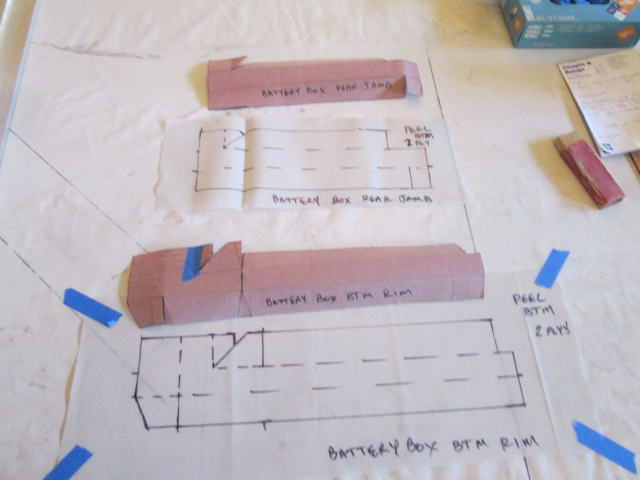
That got me back to glass prep. Whipped up a couple of patterns for the bias strips for the jamb and sill of the battery box. First pic is both, second pic is just the rear jamb.
Image
Image

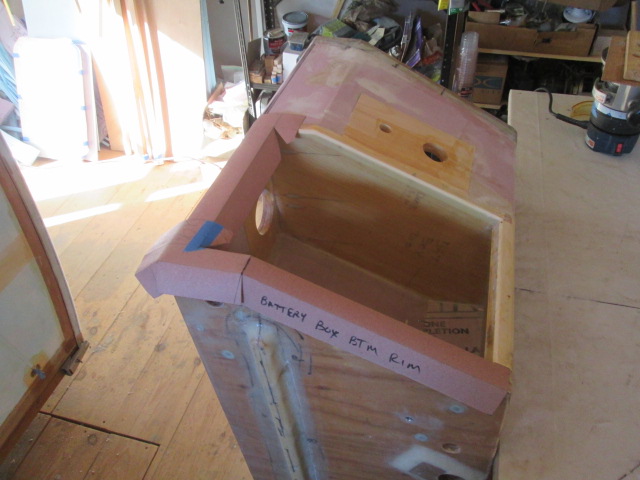
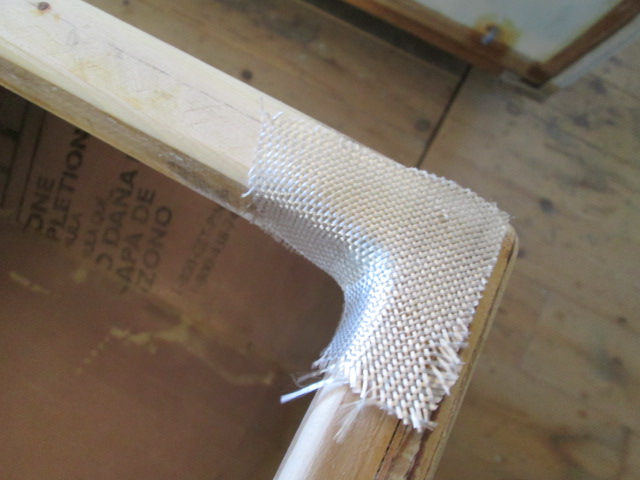
Getting smarter now, for the inside corners of the battery box opening I went into my bag of scrap glass bits and pieces and pulled out some bias bits to cut these corner fillers from. That way if the relief cuts and darts in the main layup don’t cover it all these will.
Image
Image

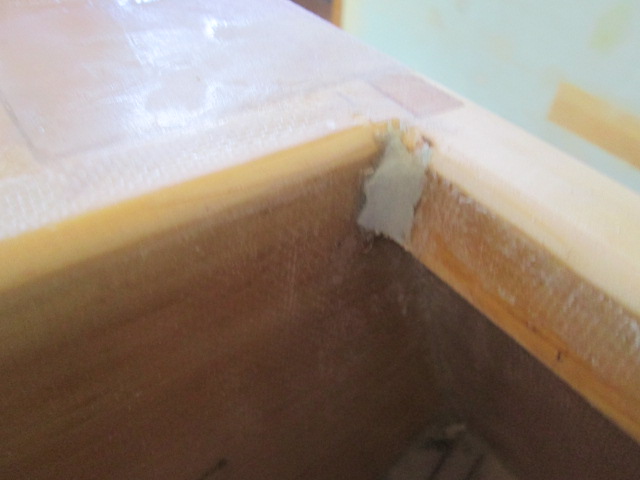
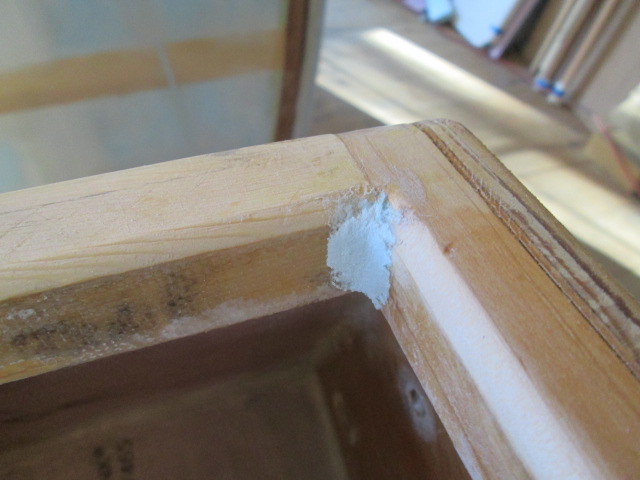
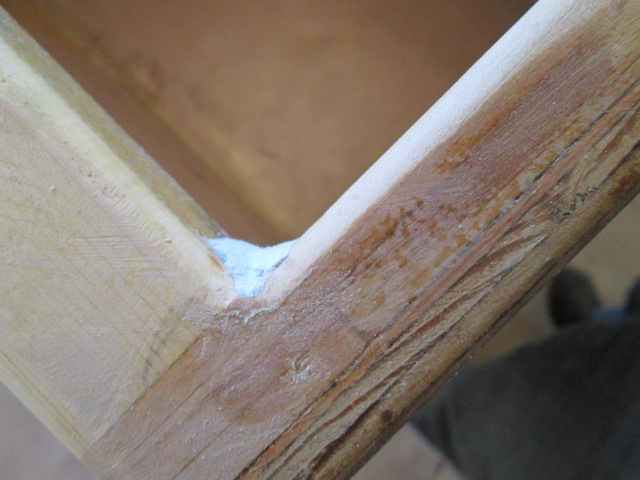
That was still a pretty sharp corner, so I decided to hot glue some foam wedges in. Then just a little work with the small hand sanding block. Nothing too fancy, but it will get the job done.
Image
Image
Image
Image

The bias corners dry fit much better now; much more likely to lay down with no bubbles.
Image

Prepared the plastic to PMPP the battery box rim pieces. I had a piece of plastic that was the perfect size for one of these, so I went with it, only to realize after the fact that I could have saved a little waste if I had paired these up along a common cut line into one wet out. The glass and epoxy cost a lot more than the plastic sheet and should have had the priority. Oh well, next time.
Image

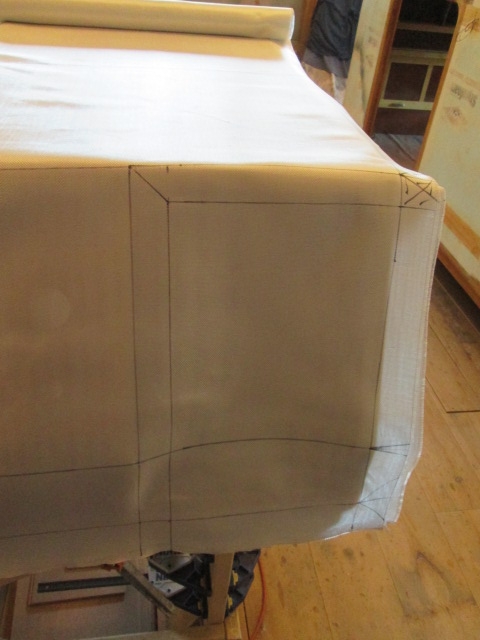
Next step was to add reference lines on the big front/sides cloth for the cutout for the battery box. After laying that out on the bench I rolled the prepped cloth back up and unrolled it again over the box to get a better idea of where I would have to trim and/or add darts.
Image
Image
Image

Here in the northeast we have a lot of greenery, including deciduous trees. They are lovely, providing shade in the summer and glorious colors in the fall. But then you have to do something with all of those leaves after they drop, otherwise they will kill your lawn and you won’t have to mow in the summer (!?!). Anyway, having worked for a debris removal equipment manufacturing company we have learned that using power equipment to do these types of chores is much quicker and less blister producing than hand raking. We have used hand held blowers, push blowers, backpack blowers and Karl’s big zero turn mower, but this year Karl got a Cyclone Rake to attach to the zero turn. Since he is always very generous and helps with our yard, I gave him a hand Saturday afternoon putting it together. Then after he did his large yard in just a few hours, we loaded it up on the trailer to do mine Sunday morning. It worked out great. With the long hose/wand attachment we were even able to suck the leaves up from under the boat and down around by the garage where the tractor would not otherwise be able to reach. I have no affiliation with this company, but I can tell you we were both very impressed with the quality and engineering that had gone into it, and it performed very well.

After doing that and getting cleaned back up, I headed out to the shop to help Karl unload, then set straight into the final layup on the tongue box.

In handling the box it has been virtually impossible to avoid minor dents and dings. That and the slight step at the rim layup meant I would at least be adding some “thick” to start. Also, some of those little spots we got doing the back of the box did turn out to be “dry” spots (I’m thinking small dents where the cloth bridged across, despite being pushed down with the roller… remember that I didn’t bother fully smoothing the rear of the box because it will not be seen). Anyway, this helped me decide to try a dry on wet layup. I figured I would have Karl help me lay the cloth neatly onto the wet, that it would go okay that way, trimming excess and the battery box opening on the fly, and would give me a better feel for if I wanted to use this technique for the hatch and cabin.

This would be a pretty big layup and I had some concerns for how I would be able reach it all to do the thick fill around the top rim, do the three panels (five if you count the front and each of the side facets individually), the battery box rim, and wrap them all under the bottom at the same time. So I walked thru the different positions in a dry run. I would do the battery box rim and a small patch inside the battery box first with the TB standing on end on the floor. Then I wrapped a pair of the cedar 4x4’s in stretch wrap to hold the box up off the bench on its back enough to tuck the flap under onto the bottom. I’d set the box on its back with the rim toward the edge of the bench first so that I could add the thick fairing; turn it around so that the bottom was out; wet out the surfaces; place the cloth (easier said than done, near disaster… Karl had gone inside hours ago), then proceed with the wet out. To get the last flaps wrapped from the sides to the back I would flip the box up with the top rim resting on the plastic wrapped 4x4’s. I figured out the resin requirements for each panel, wrote those down for reference and got down to business.

Other than the difficulty getting the first ply of cloth into position (I had originally tried to position both plies as one, but when I missed on the first attempt I pulled the top ply off… which was still dry… and concentrated on getting the first ply to lay down first), everything went pretty much as planned and I worked steadily along for about 4 hours mixing and spreading epoxy. On the horizontal surfaces I used the credit card to spread, dragging excess over the corners onto the slanted and vertical surfaces (cardboard on floor to catch drips). On the slanted and vertical surfaces I used Michael’s cut down bristle chip brush trick to daub it on from the mixing cup and poke, poke, poke it into the weave. The stiffer bristles of the cut down brush really did work better pushing the epoxy in, and it still worked okay wetting out the foam beforehand, too.

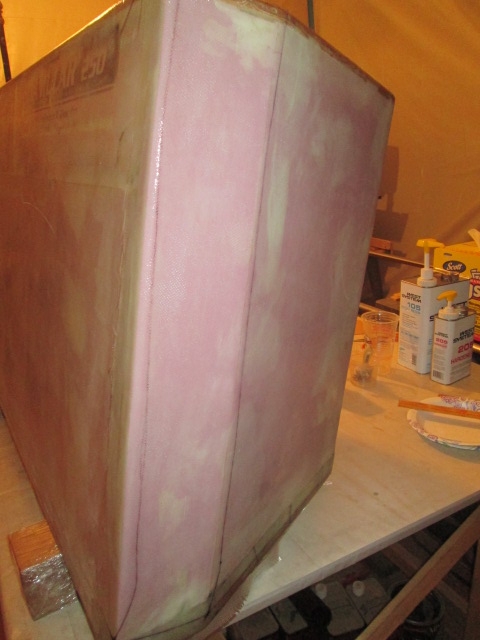
Here are the after pics with the box resting upside down on its rim. I let the top (bottom in pics) of the cloth run long, wetting it out up into the start of the rim radius. I will trim this off and sand the edge to blend it back in after the cure. I have found that to be the neatest way to avoid a ridge or uneven seam.

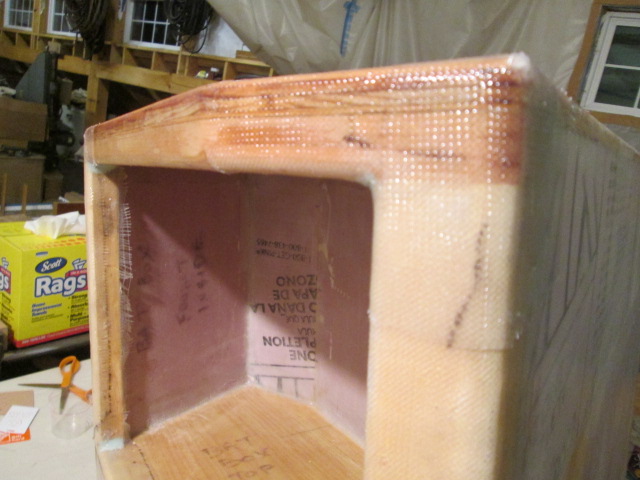
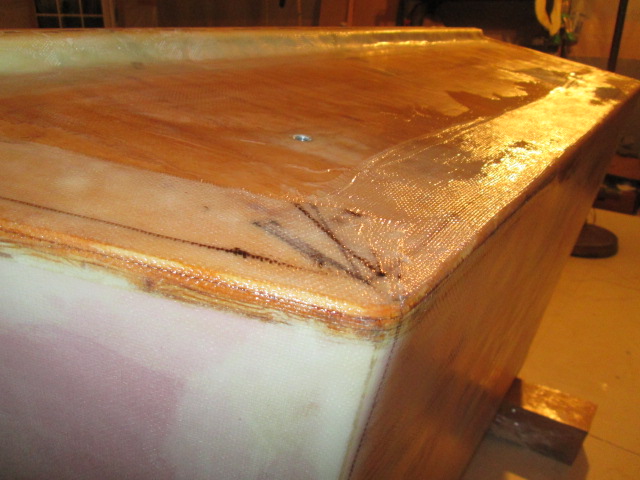
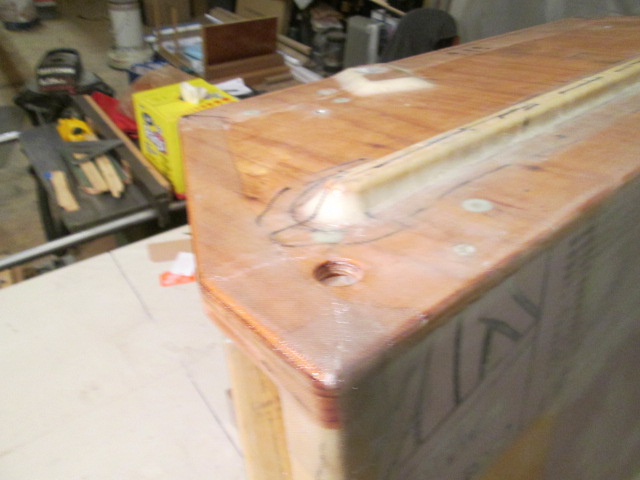
The curb side with battery box.
Image

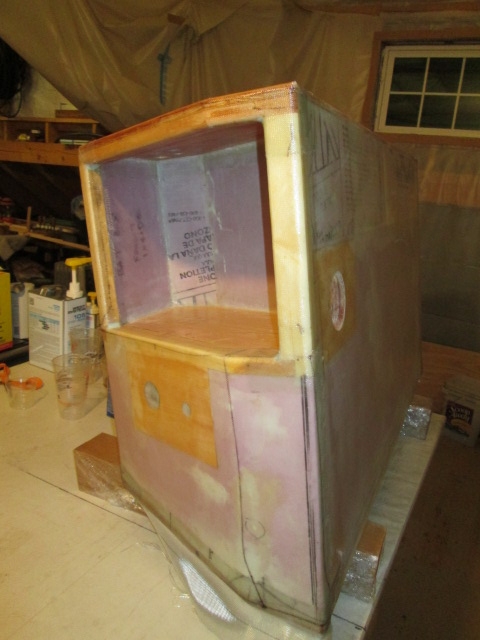
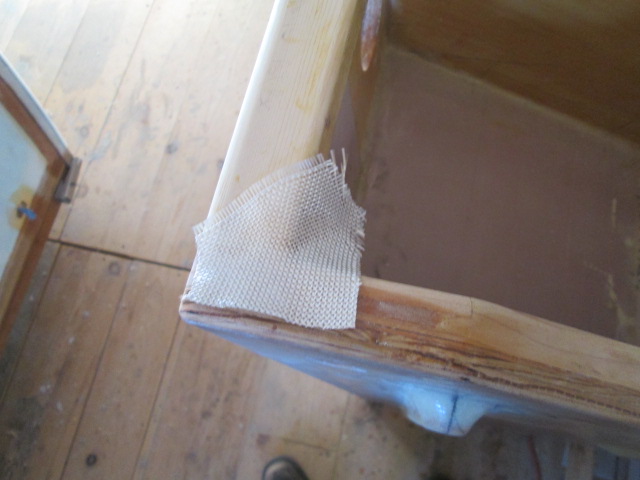
Battery box sill and rear corner.
Image

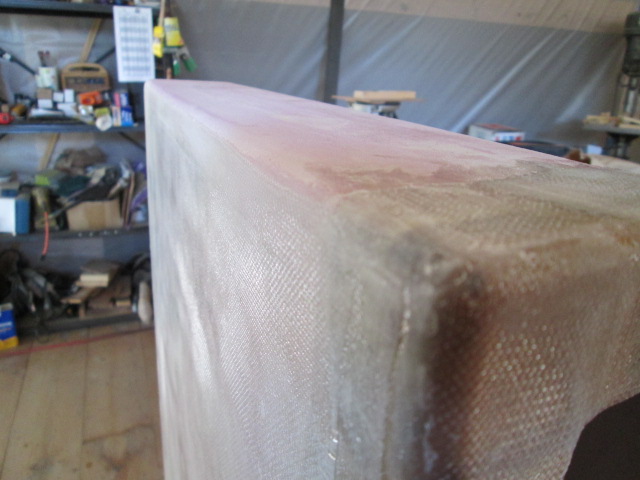
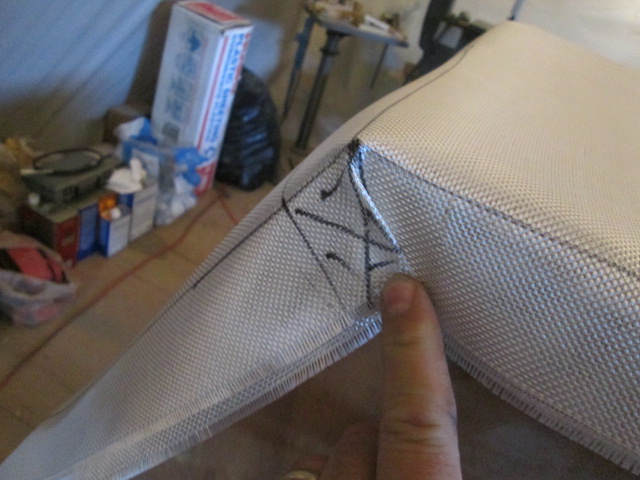
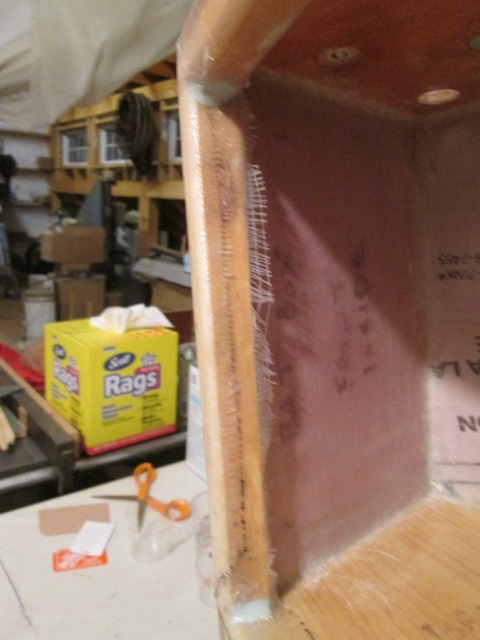
The flap that wrapped into the front jamb of the battery box got a little funky. You can see how the second ply pulled up short of reaching the inside edge, and how that inside edge was too sharp for the first ply to wrap all the way inside, but it covered the exposed wood and can be trimmed off flush later.
Image

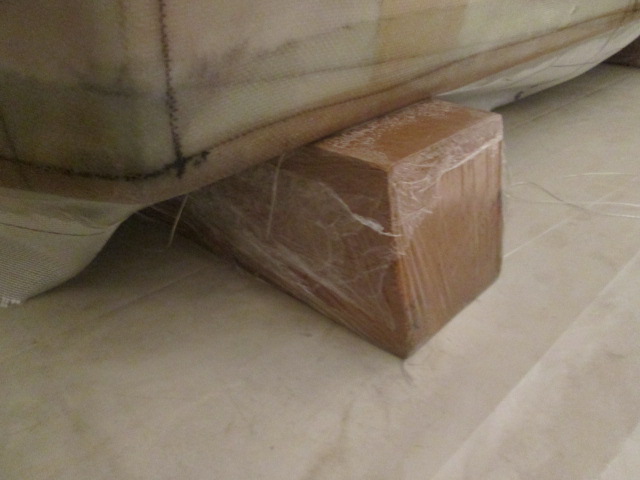
Here at the front on the top rim (down in pic) you can see the 4x4 wrapped in stretch wrap. When I rolled the box onto its rim I made sure to slide it back so that the extra cloth pulled tight underneath and didn’t bunch up or lift. By propping it up this way and limiting the surface area of wet in contact with the plastic I hope it will all come apart easily later, not to mention that this gave me room to let the final back wrap at the sides dangle down until I was ready to fold and stick it.
Image

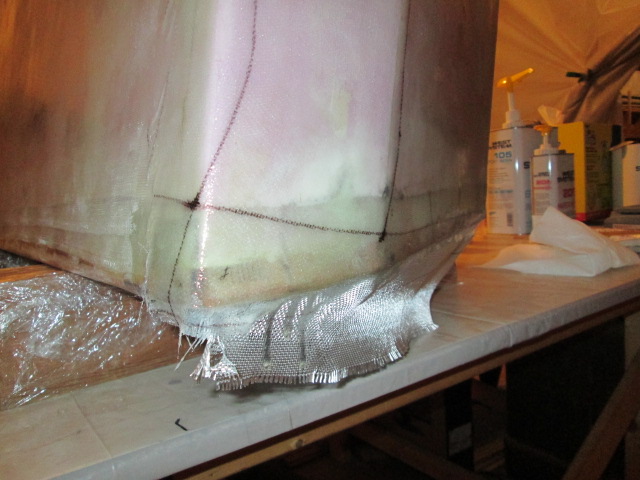
The flaps along the bottom edges ended up a little longer than I had intended, but it was easier just to lay it down than it would have been to try to cut a neat line as I went. This laid around the wire pull hole easily and covered the little spot where I had sanded the fillet thru to the spacer ply. I’ll trim the hole out again after the cure.
Image

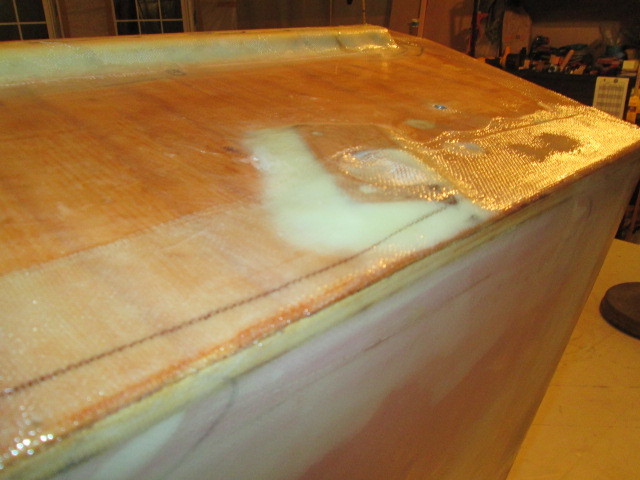
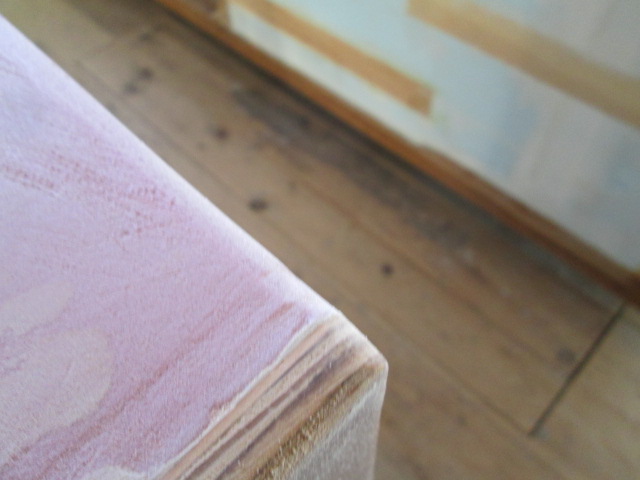
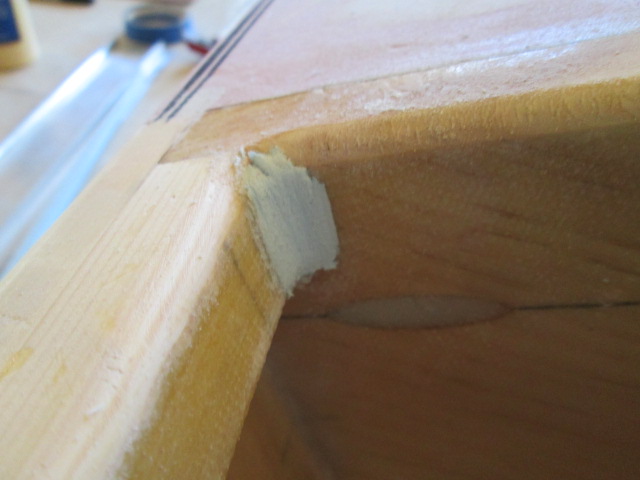
The lap at the corner went nicely.
Image

Wetting the foam first seemed to eliminate the small bubbles, or maybe it was the extra time spent fairing the front foam first.
Image

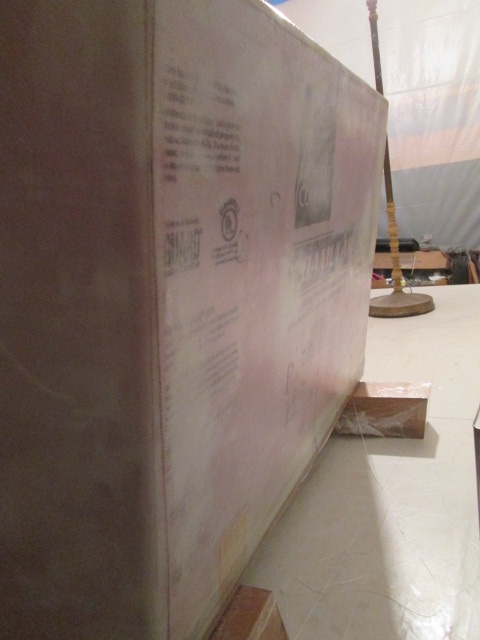
The street side (still upside down).
Image

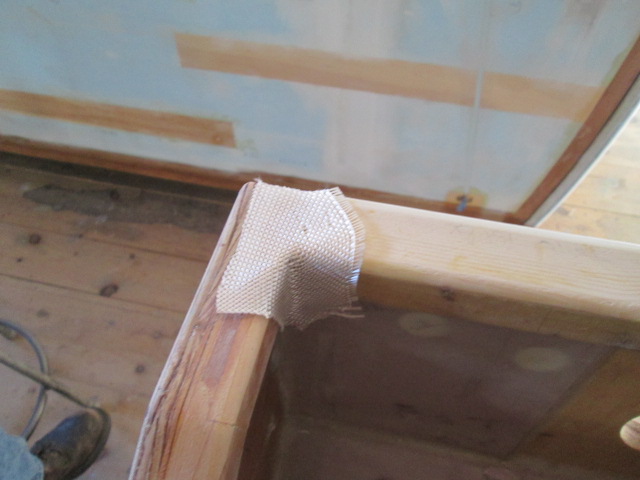
The top of the street side rear corner. My reference lines didn’t line up perfectly everywhere, ...this method is nowhere near as tidy as the PMPP method… but I had plenty of excess cloth around the perimeter that it didn’t create a problem. I know letting the fibers warp like this isn’t the best for panel strength, but I’m mostly concerned with puncture resistance, so let’s not over engineer things, okay? :lol: :lol: :lol:
Image

Curb side back corner wrapped (sorry, blurry pic).
Image

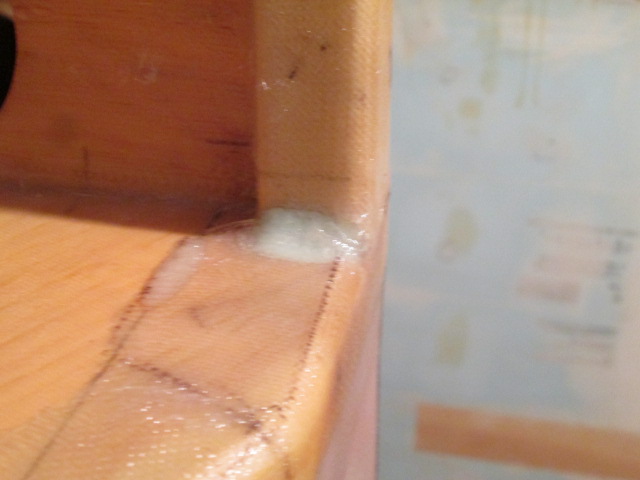
The little foam corner fillers and bias patches at the battery box opening worked great. Also note how you can still see the pencil line center mark for the flox filled Kregg screw hole under the much earlier layup inside of the battery box.
Image

All in all I think it went very well. Hopefully everything will set up the way I left it without too many fixes needed.
Last edited by KCStudly on Mon Jan 18, 2016 10:17 pm, edited 1 time in total.
KC
My Build: The Poet Creek Express Hybrid Foamie

Poet Creek Or Bust
Engineering the TLAR way - "That Looks About Right"
TnTTT ORIGINAL 200A LANTERN CLUB = "The 200A Gang"
Green Lantern Corpsmen
User avatar
KCStudly
Donating Member
 
Posts: 9616
Images: 8169
Joined: Mon Feb 06, 2012 10:18 pm
Location: Southeastern CT, USA
Top

Re: The Poet Creek Express - Foamie Hybrid

Postby S. Heisley » Mon Nov 23, 2015 7:10 pm

All I can say is .....WOW! :applause:
User avatar
S. Heisley
Super Lifetime Member
 
Posts: 8774
Images: 495
Joined: Mon Sep 17, 2007 10:02 am
Location: No. California
Top

Re: The Poet Creek Express - Foamie Hybrid

Postby OP827 » Tue Nov 24, 2015 2:30 am

Moving forward nicely! :thumbsup:
User avatar
OP827
Donating Member
 
Posts: 1561
Images: 405
Joined: Fri Apr 25, 2014 7:27 pm
Location: Bruce County Ontario
Top

Re: The Poet Creek Express - Foamie Hybrid

Postby dales133 » Tue Nov 24, 2015 3:55 am

Verry sharp ma man verry sharp indeed
Youve definatly got the hang of it
User avatar
dales133
4000 Club
4000 Club
 
Posts: 4605
Images: 1
Joined: Mon Oct 13, 2014 5:26 pm
Top

Re: The Poet Creek Express - Foamie Hybrid

Postby KCStudly » Tue Nov 24, 2015 8:14 am

Thank you lady and gentlemen.

I have been having some difficulty with my WiFi connection at home, but will post up the "after" pictures when I get that sorted out. My little net pad may also be overloaded with picture files, too, so I'll have to dump those off to external storage.

Reader's digest version, trimming and sanding to the radius edge was definitely better than staggering the edges of the cloth attempting to feather the lap seam (as per Michael's advice). With the epoxy still a little "green" (not set super hard yet) sanding tends to clog the paper a bit, but goes quickly. Other than going back and making sure that all of the penetrations are fully sealed, and re-"potting" the battery hold down thread inserts, I think the major glass work is done on the TB.

That first gallon can of epoxy is getting pretty light; will have to restock. Karl seemed to be pretty impressed that I haven't had large amounts of unused wet going to waste. Seems to be that calculating out the batch sizes based on cloth area is a big help. Sure, I have had to mix up small little extra batches here and there for filler, surface wetting and to fill in those last little dry bits, but it is better to have a target in mind than it is to mix blindly.

On last thing, I have been letting my beard get a little shaggy lately and last night when I self tested my respirator I could sense a little leakage thru my beard, so I went home and trimmed things up. I may end up having to remove my beard along the jaw line and tighten up under my chin so that I can get a reliable seal between rubber and skin. I have mentioned this before, but will cover it again: each time you don your respirator you are supposed to do a self fit check. By squeezing or covering the filter cartridges and drawing in gently, and then by covering the exhaust port and exhaling gently you should not sense any leakage.

Okay, I think it's time to move on to the hatch!
KC
My Build: The Poet Creek Express Hybrid Foamie

Poet Creek Or Bust
Engineering the TLAR way - "That Looks About Right"
TnTTT ORIGINAL 200A LANTERN CLUB = "The 200A Gang"
Green Lantern Corpsmen
User avatar
KCStudly
Donating Member
 
Posts: 9616
Images: 8169
Joined: Mon Feb 06, 2012 10:18 pm
Location: Southeastern CT, USA
Top

Re: The Poet Creek Express - Foamie Hybrid

Postby Atomic77 » Tue Nov 24, 2015 8:47 am

Nice milestone KC! You've come a long way in a short time with the glass. Nice work.
Michael

"The Strength is in the Sum of the Parts..."

The Astroliner

Follow The Astroliner Blog Here!

Check out our YouTube video
User avatar
Atomic77
1000 Club
1000 Club
 
Posts: 1463
Images: 309
Joined: Tue Oct 08, 2013 5:29 pm
Location: Fort Wayne Indiana
Top

Re: The Poet Creek Express - Foamie Hybrid

Postby KCStudly » Tue Nov 24, 2015 9:31 am

Thanks Atomic. I really do appreciate you (and all others) looking over my shoulder and offering all of the great advice. Whether I choose to follow it or not is another thing, but as so many people have learned, this forum is a great collaborative resource. How could one not avail themselves of the brain trust that has developed here?

Now, do you have any advice for a most basic prep and simple paint product? I'm thinking something that I can roll on vs. spray. Karl is pushing for no prep and going straight to primer and paint; let the weave show. I'm not so sure that my glass work would stand up to that much scrutiny, but I think he is afraid that I will end up in "body shop hell" if I go with epoxy fairing filler and get the long board back out again.
KC
My Build: The Poet Creek Express Hybrid Foamie

Poet Creek Or Bust
Engineering the TLAR way - "That Looks About Right"
TnTTT ORIGINAL 200A LANTERN CLUB = "The 200A Gang"
Green Lantern Corpsmen
User avatar
KCStudly
Donating Member
 
Posts: 9616
Images: 8169
Joined: Mon Feb 06, 2012 10:18 pm
Location: Southeastern CT, USA
Top

Re: The Poet Creek Express - Foamie Hybrid

Postby Atomic77 » Tue Nov 24, 2015 11:09 am

KCStudly wrote:Thanks Atomic. I really do appreciate you (and all others) looking over my shoulder and offering all of the great advice. Whether I choose to follow it or not is another thing, but as so many people have learned, this forum is a great collaborative resource. How could one not avail themselves of the brain trust that has developed here?

Now, do you have any advice for a most basic prep and simple paint product? I'm thinking something that I can roll on vs. spray. Karl is pushing for no prep and going straight to primer and paint; let the weave show. I'm not so sure that my glass work would stand up to that much scrutiny, but I think he is afraid that I will end up in "body shop hell" if I go with epoxy fairing filler and get the long board back out again.

Yes KC I have the solution to that problem. It's the product that I just used to spray over the seams on my project. The guys in the boat world have been telling me about it for a while and I just had the opportunity to use it and it is fantastic. You will have to spray it, I don't know of any products that you can roll on... it seems like anytime I've been involved with something like that it turned into a mess. Better to just do it right from the start. This product sprays on very thick so you need a gun with a 2.0 tip. You can buy them at Harbor Freight or online for 30 to 40 bucks, pretty cheap actually. You spray it on just like primer it even looks like primer but the build is thick enough to cover your weave. Come back with a palm sander and flatten it out with some 220 or 320. Then primer and paint. It's amazing. It's called U-Pol Reface. Amazing stuff and well worth it. And no bodywork hell.
Michael

"The Strength is in the Sum of the Parts..."

The Astroliner

Follow The Astroliner Blog Here!

Check out our YouTube video
User avatar
Atomic77
1000 Club
1000 Club
 
Posts: 1463
Images: 309
Joined: Tue Oct 08, 2013 5:29 pm
Location: Fort Wayne Indiana
Top

Re: The Poet Creek Express - Foamie Hybrid

Postby KCStudly » Tue Nov 24, 2015 12:36 pm

I looked that up and it said it was okay over polyester or metal, but didn't mention epoxy. :thinking:
KC
My Build: The Poet Creek Express Hybrid Foamie

Poet Creek Or Bust
Engineering the TLAR way - "That Looks About Right"
TnTTT ORIGINAL 200A LANTERN CLUB = "The 200A Gang"
Green Lantern Corpsmen
User avatar
KCStudly
Donating Member
 
Posts: 9616
Images: 8169
Joined: Mon Feb 06, 2012 10:18 pm
Location: Southeastern CT, USA
Top

PreviousNext

Return to Foamies

Who is online

Users browsing this forum: No registered users and 15 guests