Page 285 of 298

Re: The Poet Creek Express - Foamie Hybrid

PostPosted: Thu Feb 22, 2018 7:44 am
by Ned B
Yay! Good to hear!


Sent from my iPhone using Tapatalk

Re: The Poet Creek Express - Foamie Hybrid

PostPosted: Sat Feb 24, 2018 11:16 pm
by KCStudly
I’m back at it! Thanks to my BIF’s (best internet friends) for the continued encouragement and patience during the building lull.

So I like to keep a supply of bottled water in the loft… had to lug a case up today to resupply… so that I can stay hydrated while I work. And I figure, why not get the donated fridge/freezer up and working, that way I can have nice cold water to drink and cool myself down.

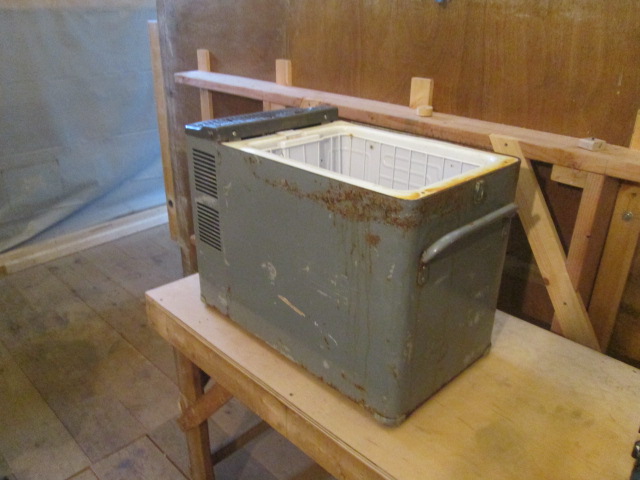
Let’s get started on this thing. It’s an older ARB 12/120v fridge/freezer. Looks like it has been painted over, so there are no brand or model number markings that I can see. Rough guess from approximate dimensions of the tub is that it is in the 38 to 40 liter size. Its a little taller than my ice chest cooler, and I don’t think it will fit under the edge rail of the galley counter the way I have built it so far. That’s okay, though, as many people like to have their coolers/fridges in the TV so that refreshments are available on day trips away from camp, and I think that is what I will do with this, especially considering how heavy it is even empty; I don’t want to add that extra weight to the “tail of the dog”.

Here it is.
Image
Image

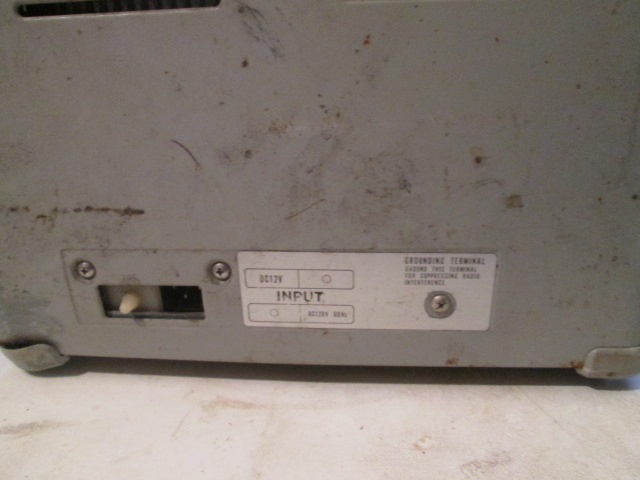
There’s a little plastic slider that only lets you plug in the 120v or 12v power cords one at a time.
Image

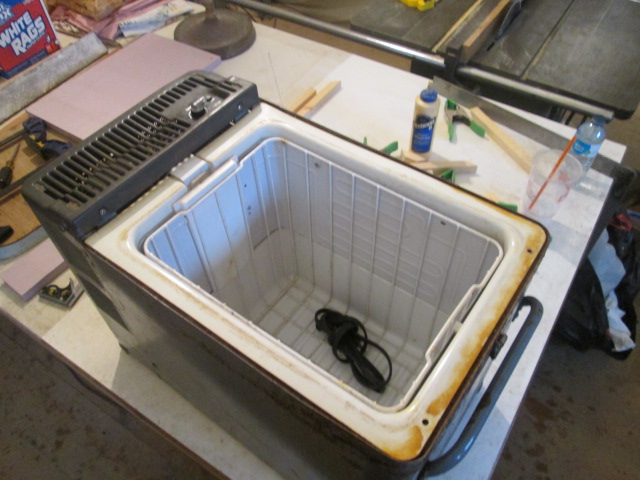
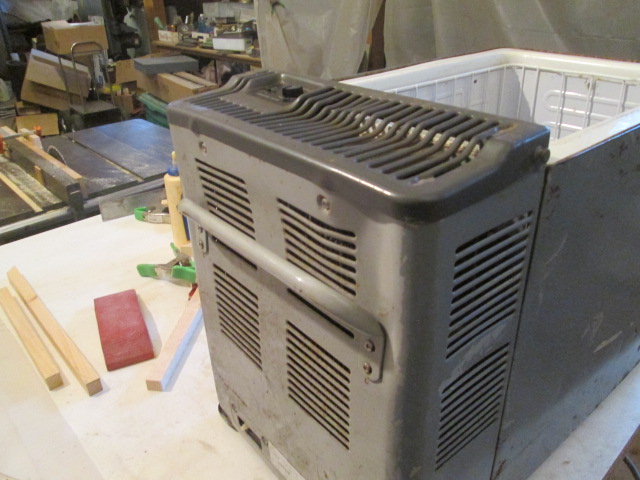
She’s a little rough around the edges. The on/off switch seems to be permanently stuck “on” (better than “off”), and there is some moderate sheet metal warping from excessive force on the rear handle torquing in at the top (maybe she was dropped on her handle at some point or took a hard slide in the back of someones p/u truck?).
Image

Near the front corners there is flaky rust through on each side…
Image

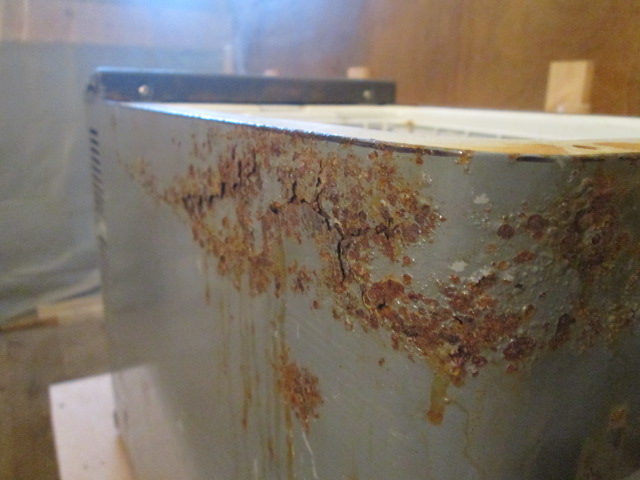
… but she works fine and was free, so I’m gonna make a new lid for her, spruce her up a little, and put her to work.

The hinge pins, more like buttons, have a ‘T’-shaped profile that allows the slotted tabs, or leafs, on the sides of the lid to be retained, pivot up, or be lifted off. Image
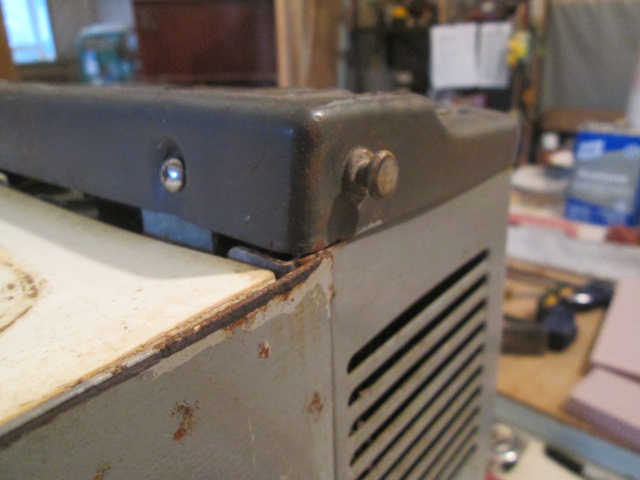
This will become clearer later when I get to that point, as I plan to replicate this feature on the new lid.

To start the lid build I selected a leftover piece of the 5mm Okoume marine ply for the base of the main panel. I probably could have started right off with just a foam core, but I wanted something rigid and stable to build up on so that I can maintain relatively “crisp” edges, and I would need some hard points for the hinge tabs to attach to also. The sheet metal sides of the fridge bulge out somewhat unevenly from the handle damage, and I decided against taking it apart and trying to body hammer all of the damaged areas out. I figured this would take me down a “rabbit hole”, creating a huge and unwanted side track, and quite possibly result in a permanently inoperable pile of parts. Instead I cut the blank slightly oversize on three sides, laid it on top and traced around. From there I trimmed close to the line on the vertical bandsaw, and used a combination of the Surform rasp and hand sanding blocks to shape up, smoothing the edges to the line.
Image
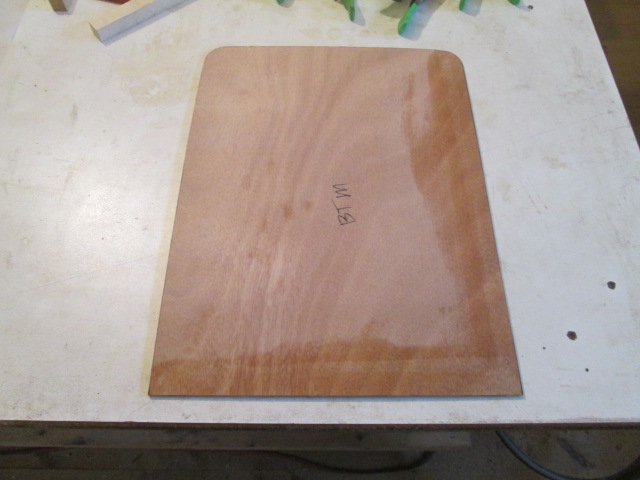
Note the ‘BTM’ (bottom) marking and wet edges on two sides.

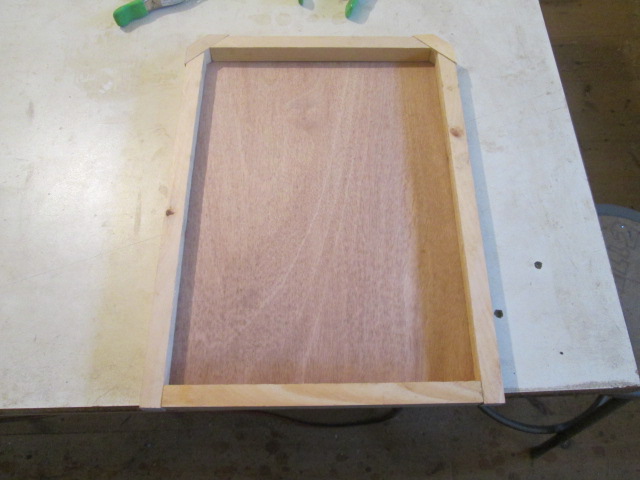
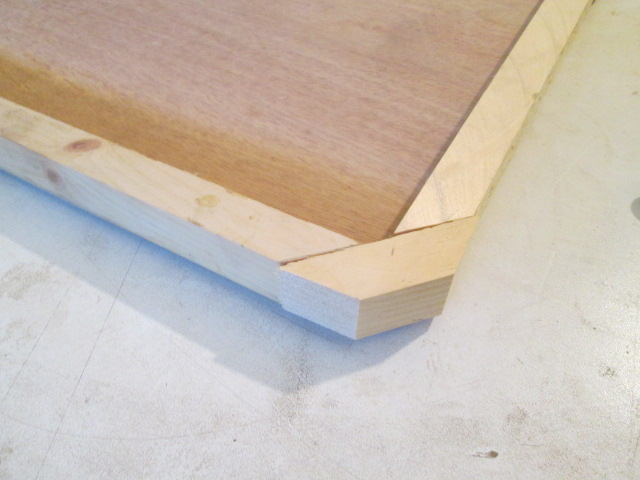
From there I ripped a scrap piece of the pine Karl and I had used for the shop ceiling (rough one side, about 7/8 thk) to match the thickness of 1 inch thk foam. This put the combined height with the 5 mm ply right about the same as the control panel sheet metal. This will allow me to router a nice sturdy uniform radius all around the top outside edge of the lid for the fiberglass cloth to roll over. Here is a mock-up starting to form the edge frame. The front mitered corners (top in 1st pic below, close up in 2nd pic) follow the rounded corners of the ply and will be routed back flush to the ply using a flush cutting bit later.
Image
Image

I decided not to bother with pocket screws, brad nails or anything but glue to assemble. I didn’t want to over complicate this and didn’t want to risk hitting metal with the round over bit. So I’m feeling a little out of place in the shop and rusty with all of the techniques and mistake avoidance habits that I had developed so well previously, having been out of it for so long… and it showed up today.

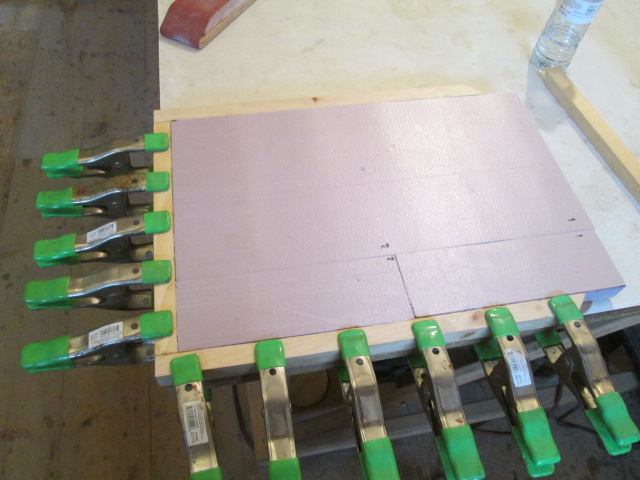
When I went to glue the first two frame pieces on, using the corner of the work bench to clamp to, I had it to the point seen here… when I realized that the ‘BTM’ label was staring me in the face. DOH!
Image

Thankfully the glue hadn’t taken hold yet and I was able to quickly pull the clamps, pull the two frame pieces off of the ply w/o damage, and wipe what I could of the glue off with a damp rag. The above pic was take 2. Thankfully I was just using TB2 at this stage, and not epoxy.

I couldn’t just call the bottom the top because the sides of the fridge bulge out differently and the lid wouldn’t have fit flush.

I didn’t have a piece of 1 inch thk foam wide enough to do the infill in one piece, and the piece I did have had some damaged sections that I needed to work around, but I was able to get enough out of it by cutting out three pieces, so at least it was all the same exact thickness. Shown here just being dry fit.
Image

I got a little bit further than what is shown here, but was having some trouble with my camera. Seems as though the “replay” button is sticking… after being knocked around in my lunch box in its soft case all this time… turning itself on repeatedly. No wonder the battery was dead.

Anyway, once the foam is glued to the panel I will wrap the frame around the other two sides and prep for the FG/Epoxy skin. I will probably do the bottom edge like I did the door openings on the camper, using a filled epoxy fillet to maintain a sharper corner than what the weave can contour to. The original lid also had a bump in on the underside that kind of acted like a registration for the gasket seal. That will add complication for trying to get the cloth to conform, so I think I will do some test fitting and see how well it works with just the flat bottom before I commit to that detail.

Felt good to be back in the game.

Re: The Poet Creek Express - Foamie Hybrid

PostPosted: Sun Feb 25, 2018 5:29 am
by GPW
GLAD you’re back at it !!! :thumbsup: 8)

Re: The Poet Creek Express - Foamie Hybrid

PostPosted: Sun Feb 25, 2018 11:12 am
by ghcoe
:thumbsup:

Re: The Poet Creek Express - Foamie Hybrid

PostPosted: Sun Feb 25, 2018 7:51 pm
by dales133
Good to see your back on track and I hadn't been the only slacker
Three years in for me but I've given myself until may to get It capable.
Went to the bosses yesterday and he's got this in his shed.
Thought it might interest a military vechile buff like yourself.
Another guy I work with is in the process of buying a duckImage

Sent from my SM-N950F using Tapatalk

Re: The Poet Creek Express - Foamie Hybrid

PostPosted: Sun Feb 25, 2018 9:09 pm
by KCStudly
Sweet! Thanks again to all for all of the support. :D

Re: The Poet Creek Express - Foamie Hybrid

PostPosted: Sun Feb 25, 2018 10:19 pm
by KCStudly
I have an acquaintance, a friend, that has never been to the nitro drags, and it has been a long time since I have been myself, so I have been trying to organize a trip for a few of us to Epping NH this July; just after the 4th. {Unfortunately historic Englishtown NJ is no longer on the schedule, perhaps due to the shut down area being too short(?).}

Anyway, Karl kind of threw this down as a challenge to get the camper done ("Are you planning on taking the camper?")... even tho I can't imagine it being done by then... it would certainly be a nice goal, and fits within the parameters for why I am building a camper in the first place. Obviously the main goal still remains Poet Creek, but this was a smooth ploy to motivate me and I will be taking it seriously. If not as a realistic goal, then as a carrot to keep things moving along.

Hmm, done in 4 months? Conceivable, not impossible, but would take a very concerted effort. Let's see how things ramp back up and whether it comes to fruition.

Re: The Poet Creek Express - Foamie Hybrid

PostPosted: Mon Feb 26, 2018 7:50 pm
by ghcoe
dales133 wrote:Good to see your back on track and I hadn't been the only slacker
Three years in for me but I've given myself until may to get It capable.
Went to the bosses yesterday and he's got this in his shed.
Thought it might interest a military vechile buff like yourself.
Another guy I work with is in the process of buying a duckImage

Sent from my SM-N950F using Tapatalk


Now how did a Schwimmwagen get to Australia? One of my favorite German vehicles and probably the only VW besides a karmann ghia IV that I like, Oh and maybe the Thing also.... :thumbsup:

Re: The Poet Creek Express - Foamie Hybrid

PostPosted: Mon Feb 26, 2018 8:29 pm
by dales133
ghcoe wrote:
dales133 wrote:Good to see your back on track and I hadn't been the only slacker
Three years in for me but I've given myself until may to get It capable.
Went to the bosses yesterday and he's got this in his shed.
Thought it might interest a military vechile buff like yourself.
Another guy I work with is in the process of buying a duckImage

Sent from my SM-N950F using Tapatalk


Now how did a Schwimmwagen get to Australia? One of my favorite German vehicles and probably the only VW besides a karmann ghia IV that I like, Oh and maybe the Thing also....
He's an avid collector.
He just sold a country buggy recently.
This old girls just gone to the auctions.
He's cashing in on a few while the markets goodImage

Sent from my SM-N950F using Tapatalk

Re: The Poet Creek Express - Foamie Hybrid

PostPosted: Mon Feb 26, 2018 10:59 pm
by Atomic77
Glad to see you back in the saddle Brotherman. I think it's a great idea to take her on a few dry runs when she's done, prior to PC. Our goal is Valley Field Quebec in July, with a couple short shake downs, prior. But like you, that's not a lot of time! Good luck, you can do this!

Sent from my SM-N950U using Tapatalk

Re: The Poet Creek Express - Foamie Hybrid

PostPosted: Mon Feb 26, 2018 11:49 pm
by KCStudly
I'd say I'll race ya' but those big turbines you wield would just kick my ass, so... regardless of who gets there first, let's just hoist a cold one toward each other and be thankful that we got there in the end. :worship: :lol: :D

Amen brotherman.

Re: The Poet Creek Express - Foamie Hybrid

PostPosted: Tue Feb 27, 2018 8:00 am
by Atomic77
KCStudly wrote:I'd say I'll race ya' but those big turbines you wield would just kick my ass, so... regardless of who gets there first, let's just hoist a cold one toward each other and be thankful that we got there in the end. :worship: :D

Amen brotherman.
Absolutely! It's been a journey for sure! One of these days, the builds will be finished and we'll be sitting around the campfire talking about new adventures!

Sent from my SM-N950U using Tapatalk

Re: The Poet Creek Express - Foamie Hybrid

PostPosted: Tue Mar 06, 2018 9:35 am
by KCStudly
I did a little more on the fridge lid on Friday, but the temps here are still too cold for epoxy; it was about 45 deg F all day. (We had a light dusting of snow yesterday and are expecting more again tonight.)

So I just used TB2 to laminate the foam down to the panel and get the rest of the rim frame attached to the other two corners. Took one picture of gravity and spring clamps hiding most of the part; which didn't seem to be worth downloading from the balky camera. (Maybe next time I will see how my new action camera does for still shots?)

I waffled around a bit trying to decide what I could do while the glue dried, but being as it was too cold for epoxy, and I wanted to give the foam-to-wood glue-up plenty of time (especially in the cold), I didn't get much further.

I surveyed the aft street side of the camper again from my little staging (camper box still laying on the curb side) and decided to try and fill a relatively large area that feels like an air bubble. It's about the diameter of a coffee cup that pushes down and springs back under sanding pressure. Drilled two small holes the size of my syringe tip, one fill and one vent, but didn't mix any epoxy yet.

Need some consistently warmer weather, above 50 deg F, to get back into epoxy work.

Re: The Poet Creek Express - Foamie Hybrid

PostPosted: Tue Mar 06, 2018 10:18 am
by ELM
Progress is progress even if it's just a little bit. When you fill that bubble or void will you let it bulge out and then sand it smooth or press it in and then fill the outer part with body filler.

Re: The Poet Creek Express - Foamie Hybrid

PostPosted: Tue Mar 06, 2018 7:05 pm
by KCStudly
Thanks, ELM. I have a piece of 1/2 inch ply (flat) that is larger than the spot and fits in a zip bag (release layer). I will inject under the skin, place the bagged plywood over the spot leaving the vent hole uncovered, and weight it slightly. Hopefully this will bring the weave level to the surrounding surface with only the vent hole squeeze out to clean up.