The Poet Creek Express - Foamie Hybrid

Canvas covered foamies (Thrifty Alternatives...)

Moderator: eaglesdare

Re: Poet Creek Express - Frame & Swivel Coupler Fab Progress

Postby KCStudly » Sun Feb 26, 2012 5:52 am

Had a full day of trailer work today, lots of progress. Uploaded 4 plus pages of pics!!!

Snapped a new pic of the swivel coupler goodies (ooooooh, shiny bronze bushings) and bag of pronged thread inserts (to be used in cabin floor for hidden bolting to trailer frame) received from brown truck yesterday...
Image

Up and out, java and a bagel on the fly to here to return the std coupler....
Image

Also looked to see if they had any plain draw bar stock, or an inexpensive finished draw bar that I could cut to use for my swivel draw bar. Had thought about using solid 2 x 2 bar, as seen on other draw bars, but when I saw that a bunch of the class III (5000 lb.) hitches were made from SQ Tube slightly less than 1/4 inch thk, I decided to just use some of the 2 x 2 x 3/16 tube that I have left over from the tongue frame and front xmbr. A little out of sequence, but here's the draw bar blank I cut later. The end to be welded was descaled on the Bader belt sander. It will also get a close tolerance hole for the Reese tamperproof locking hitch pin that I already have for towing my small boat.
Image

Then pilgramage to Fab Mecca (Metal Werks Shop), we woke up to about an inch or so of wet slushy snow Friday for a little surprise during the morning commute. Mostly gone now.
Image

Got organized bringing in all my new goodies and laying out the latest plan prints. Quick mock up of prototype pintle shaft and bronze bushings...
Image

When I measured the mounting pattern off of the std coupler for the tongue jack I must have been a 16th off on the location of the big hole for the jack cylinder. And when I was making it I just went right ahead and worked to my measurements, rather than cutting the big hole first, going out to my car to get the jack, and templating the bolt hole pattern to make sure everything was good. Needed to use this
Image
the electric die grinder with a rotary file to nip a little fish mouth in each of the two rear bolt slots of the tongue jack.

Clamped the jack mounting plate (made yesterday in previous post) to the bench to check fit.
Image
All better now. (The callout on the prints has been changed to specify templating the bolt pattern.)

Then out front to Karl's old shop, the 3 season front porch, to grab that extra stick of 2x2x1/8 wall SQ TB. Tons of steel have passed through this little door over the years leading up to building the big barn. (Technically the barn is classified by building and zoning as a "shed"...building permit guy, "You gonna put animals in that barn?" Karl, "Nope." Permit guy, "Then it's a shed.") Biggest damn shed I've ever seen! People, it's a barn.

Old shop.
Image

Inside old shop.
Image
Image
The metal framework pieces attahched along the left wall support the under bench steel storage rack, the bench top, and the upper shelf braces (planks now removed) all the way down to the concrete floor. The upper shelf used to be loaded up with all of Karl's cased power tools. The two big steel plates (that are now the castered layout tables in the big barn) were mounted on a square tube frame base that used to be in front of the windows on the right. The milling machine and lathe were down at the other end. It was long and narrow, but very well thought out. Ideal shop for making architectural decorative hand railings. Bigger stuff was done right out in front of the door in the previous pic.

Back to the barn and cutting the rear xmbr to length.
Image

Karl was all too happy to donate this drop piece of 2-3/8 round bar (center), in mild steel, for the redo of the swivel coupler pintle shaft and front xmber bushing sleeve. No 2 inch dia bar means a little more turning and waste, but the Fryer CNC lathe at work will just laugh a menacing laugh, boo-wah-ha-ha-ha and start spitting out chips.
Image
Also notice the bars with holes in the background. Karl recently got a great deal on a whole auction lot of brand new precision machine track and gear rack. He is planning to make a CNC plasma cutting table that may also be able to be configured as a router table. (Although he has a plasma cutter, he currently farms out his CNC plasma and laser cutting work.) There is way more track and gear rack than he can use, so any surplus will be put back up for sale later.

We decided to keep knocking off the smaller bits and swivel coupler parts. It is all progress and this way we don't have the large trailer frame in our way just yet. We went through my list of bits and pieces that needed to be fabricated for the swivel coupler, the short piece of 2x3x3/16 rectangular tube for the tongue front xmber where the swivel pintle shaft goes, a couple of stray closure plates for tube ends, etc. Karl had some bits on hand and jumped right on the cellie for the rest.

Half an hour later, after working on some of the above, we jump in the car and run up the road a short hop to Mid City Steel....
Image

Which is located just up the way from the kiln works where my wife Yvette throws potery for a hobby.
This mug...
Image
...has a mug of it's own. One of her more whimsical pieces.
Image

Here's what we got for steel today...
Image

1 ft of 2 x 2 SQ Bar (need 4 inches) $15
1 ft of 2 x 3 x 3/16 Rect Tube (need 6-1/2 inches) $6
2 ft of 1/2 x 2 Flat Bar (need about 16 inches) $7, sub total $28

Previous steel order for main rails, xmbrs, and tongue;
24 ft of 2 x 2 x 3/16 Sq Tube, $73
24 ft of 2 x 2 x 1/8 Sq Tube, $52
20 ft of 2 x 2 x 1/8 angle (later swapped for 1-1/2 x 1-1/2 x 1/8), $23, subtotal $148
Total cash outlay for raw steel, not including scrounged items and at Karl's frequent flyer pricing with no mark up to me, $176.

Did I mention how greatful I am to have such a good friend in Karl? There is no way I could acheive the results I'm acheiveing, in the short time that it has taken me thus far, without his help and support.

Back at the barn I asked Karl where I could find a utility knife to cut the wrapper off of the steel bundle. He directs me to this...
Image
Crocodile Dundee, "Now that's a utility knife." Old chef's knife that Karl picked up at a yard sale. Fairly abused.

I start to get organized, jotting cut lengths onto steel with a soap stone, and Karl started cutting. He's so quick that before you know it I'm done noodling and he's done cutting. Some of the results...
Image

The 1/2 x 2 flat bar chunks will become the clevis', or yokes, for the swivel coupler U-joint. The short piece of 5/8 Rnd Bar will be the U-joint pin. Here's an isometric view of the U-Joint (picture taken of hard copy of the plan).
Image

The pintle shaft will have a 3/4 inch nipple, or spigot, turned on the front end. (The alloy prototype of the pintle shaft was just left long for chucking and we didn't bother adding this feature before abandoning the alloy). This spigot will pilot and align into a hole in the back of the clevis yoke, ensuring a nice accurate central axis and giving a place for a plug weld in the hub of the yoke, in addition to the full circle weld on the back side. So Karl used the iron worker to punch the big hole in the half inch thick blank (seen in above pic). The force of punching such a big hole in such a short work piece put quite a curl into it; perhaps 1/8 inch in 2-1/2 length. So Karl used the brake press feature on the back of the iron worker, with some big blocks of steel used as flat mandrels to squash it back flat again. I was deburring parts on the Bader belt sander at the time and missed the photo op, but you can see the yellow square opening in the center of the iron worker frame in this older pic. I believe Karl said it had 16000 lbs of force.
Image

The U-Joint will have the bronze sleeve bushings (shown earlier) pressed in. It will have a double nutted 5/8 grade 5 bolt with safety retaining pin at the hitch draw bar end (that can be removed for easier coupling to the TV, not sure what to do about theft securety yet) and a fixed pin at the swivel pintle shaft end that will be retained by welded keeper collars or buttons. Karl went to work drilling out some 1-1/4 Rnd Bar to the pin size of 5/8 inch for the pin keepers.

Pic of Karl's lathe.
Image
(Notice the raised steel craddle that it is sitting on. This allows him to move it around with his fork truck, pallet jack or Allis Chalmers tractor equiped with forks in lieu of loader bucket. A lot of his heavy machinery is mounted this way. This gives him maximum flexibilty with his shop configuration. He can, has, and will reconfigure the whole shop to suit specific large jobs that call for processing large quantities of materials with the most efficiency.)

1-1/4 Rnd Bar, for pin keepers, chucked in lathe...
Image

Center drilling keeper stock in lathe...
Image
Note recirculating coolant (copper tube by cutter).

I had Karl touch off on the end with a larger drill bit to give a little weld prep and a little deeper weld penetration when the keepers are welded to the pin at assembly, before parting each of them off on the cut off saw. Mock up of pin and keepers shown here...
Image

Meanwhile, I was laying out and miter cutting the box tubing for the little front xmbr where the swivel pintle shaft mounts.

First miter cut...
Image

Second miter cut...
Image

Mitered xmbr tube blank with (now abandoned alloy, to be replaced with mild steel) swivel pintle sleeve blank...
Image

Karl just recently moved the lathe and milling machine from the old shop to the barn, so all of his tooling was still packed in boxes.
Image

Looking for the 2 inch slugger bit and holder found 2 inch twist bit...
Image
Nope.

Ah, there it is. Setting up the slugger bit...
Image

Close up of slugger bit...
Image
A bit more accurate than a wobbly tin hole saw, ya think? The pointy pin in the center allows you to align precisely to your prick punch marks and is spring loaded to eject the slug automaticly.

Karl's milling machine...
Image

Swivel xmbr blank on parallels in mill vise...
Image

No pics of the slugger cutting, I was manning the coolant squeeze bottle and it went thru so much faster than a hole saw, throwing chips madly, that I had no time to take a pic. Also seem to have lost both still photos showing the near side hole with slug, and the follow up far side hole while still in the mill, but here is a shot of the xmbr on the plans with the (now abandoned alloy to be replaced with mild steel) blank for the swivel pintle shaft bushing sleeve that will be welded into this hole.
Image

At some point we jumped in the car and went up the road a piece to the Hadlyme Country Store (deli and bakery) to grab a sandwich for lunch...
Image
Image

A stones through away is the Hadlyme Ferry slip, a small cable guided state run ferry that crosses the Connecticut River during summer months, located near Gillette's Castle (famous actor who played Sherlock Holmes, IIRC on Broadway), and historic Goodspeed Opera House. We pulled up to the river and ate lunch.
Image
Image

Mmmm, chicken salad with cranberries, walnuts, provalone, lettuce and chipped dill pickles on a fresh baked soft hard roll (not on diet plan!!!)...
Image
(Gratuitous food porn.)

Back to Fab Mecca where we used the 2 x 2 Sq Bar x 4 inch long blank for the U-Joint, two of the 1/8 thk cap plates for the short pintle shaft xmbr (same thickness as the flanges on the bronze bushings that will be pressed into the ears of the yokes from the inside), and a couple of 0.010 thk shims made from aluminum flashing (clearance allowance) as a spacer. This all got clamped to the corner of the bench with the clevis yoke parts "square to the world" for welding. I had thought we might be able to form the clevis yokes in the iron worker, but it doesn't have the capacity and accuracy would have been more difficult, so we opted to build up the yokes using "cabinet corner" joints and full penetration welds.

Karl was pretty antsy to weld this up, and I was tempted to let him do it (critical welds, and all), but I also want to "own" this project for myself. As much help as I am getting from him, I still want to be able to say that, "I built it". If we were going to MIG weld this, no question, Karl would have gotten the nod. MIG welding can be deceiving because it goes so fast, it takes a keen eye and proper positioning to make sure that you can see the puddle the whole time so that you can make sure that you are "walking the puddle" and not just bridging over the root seam. We definitely wanted good penetration on that root pass so that there would be no voids in the full penetration weld (i.e. joint will be welded solid 100/ct thru the whole joint), so we decided to TIG weld the root (first pass). With TIG welding it is a bit slower than MIG, and the torch is lighter and easier to manipulate, so it is easier to keep an eye on the puddle. Plus with TIG you are in constant control of the heat range using a throttle like foot pedal, whereas with MIG you set the heat range in advance and have no real way to change it during a pass.

Once we decided to use the TIG and set that all up, it didn't make any sense to switch to the MIG for the fill in work, and that turned out to be a good decision.

Karl and I staged an impromptu contest that I had no chance of winning. He would TIG the root on one side, I would do the other side, and we would compare.
Image
Here's Karl's root weld. Note the shiny color (silver, gold, blue and rainbow showing good heat control w/o overheating) how consitent in width it is, the beautiful "stack of nickels" row of puddles, and good penetration on both sides w/o undercutting. Perfect!!! I guess it's a "guy thing" to appreciate a fine weld like a fine wine. :wine:
This is the $25 bottle of Merlot with heavy foil seal and cork that grew on a tree.
Image

And here's mine. Wholly acceptable. Not quite as consitent in width, slightly gray in color showing a bit more heat for good penetration (not too hot tho, so okay), decent "nickels", no undercutting. A fine weld, wholly acceptable... but not perfect. This is the $10-$15 bottle of Pinot or Shiraz with the rubber cork and thin foil or mylar seal.
Image
(Sorry close up photo of my weld came out blurry...just the photo, not the weld!)

If your welds look like the cheap bagged wine in a cardboard box (not the newer ones that are starting to get a little better, so I am told), or worse, I highly suggest that you get a qualified welder to make your critical welds.

Here are some obligatory arc flash pics of me welding the multiple fill and cap passes. (Remember that it is not safe to look at the weld flash with the naked eye, which is why television and movie shots of welding always bug me...uninformed viewers might think it is okay to stare at the pretty blue light, but you will risk damage and blindness if you do. Camera does not reproduce the UV so it is safe, I believe.)
Image
Image
Image
Note the torch lead/cooling lines draped around my shoulders so that I don't have to support the whole weight of the lead with my wrist (TIG welding 101).
Image

And here it is after 3 or 4 sticks of 3/32 wire and more passes than I bothered to keep track of.
Image
See the little gap at the spacer shim that has opened up?
Image
In this pic you can see how all of the flat bar edges have been sanded clean on the Bader to remove any scale that might contaminate the weld. I made several extra passes past where I felt that it was structurally adequate, just to make sure that there is enough to allow sanding back to a nice smooth, stress riserless rounded surface (mostly for appearance sake, to be done later).

Interesting to note that the welder was set at close to 200 amps (if using full pedal), that the first passes were made at about 2/3 to 3/4 pedal, and that by the time I was finishing up, there was so much latent heat in the piece that I was only using about 1/8 to 1/4 pedal. Not easy to do with MIG, but intuitive for an experienced TIG welder. Also, even though this was clamped, the force of the shrinking filler metal (as it cools it shrinks) was enough to pull the clamp open leaving the yoke ears out of parallel by about 1/32 inch over their length. Karl squished it back in the iron worker. Then when we measured it we found that the yoke ears had actually sucked towards each other by about 15 thou, so we will be facing the insides of the ears slightly in the milling machine to get the dimensions back. The inside corners of the yoke ear to hub joint will be welded with a single TIG bead to fuse any remaining root opening and prevent any stress risers (to be done later). Also, the outside corners on the tips of the yoke ears will be machined round using a rotary table on the milling machine, so that it can articulate further.

And here's the small front xmbr mocked up with the semi finished alloy prototype pintle shaft, heavy nut (used as a thread gage, will use slotted nut with cotter pin at final assembly), and rough finish clevis.
Image

Back home again to be greeted by Magdalene...
Image

And Saphron...
Image

Tomorrow I will take the day off from building; few small chores to do around the house, rest, and early super out with family to celebrate my Mother's birthday.

Night.
Last edited by KCStudly on Tue Dec 25, 2012 12:21 am, edited 6 times in total.
KC
My Build: The Poet Creek Express Hybrid Foamie

Poet Creek Or Bust
Engineering the TLAR way - "That Looks About Right"
TnTTT ORIGINAL 200A LANTERN CLUB = "The 200A Gang"
Green Lantern Corpsmen
User avatar
KCStudly
Donating Member
 
Posts: 9611
Images: 8169
Joined: Mon Feb 06, 2012 10:18 pm
Location: Southeastern CT, USA

Re: Poet Creek Express - Frame & Swivel Coupler Fab Progress

Postby GPW » Sun Feb 26, 2012 6:48 am

KC, Thanks for the pics and the great narrative ... 8) 8) 8) :thumbsup:
There’s no place like Foam !
User avatar
GPW
Gold Donating Member
 
Posts: 14911
Images: 546
Joined: Thu Feb 09, 2006 7:58 pm
Location: New Orleans

Re: Poet Creek Express - Frame & Swivel Coupler Fab Progress

Postby eaglesdare » Sun Feb 26, 2012 7:33 am

sorry, i wasn't here yesterday. took hubby over to richmond to see the off broadway musical the lion king. i don't see any spam around, but i am back, so let me know if you see it. again sorry.
Louella
May the foam be with you.
User avatar
eaglesdare
Donating Member
 
Posts: 3168
Images: 13
Joined: Tue Aug 26, 2008 7:06 pm
Top

Re: Poet Creek Express - Frame & Swivel Coupler Fab Progress

Postby GPW » Sun Feb 26, 2012 8:23 am

Eagle ,no worries, seems it mysteriously vanished due to higher Authority ... 8) It was a bit “racy” for this Family crew... :shock:
There’s no place like Foam !
User avatar
GPW
Gold Donating Member
 
Posts: 14911
Images: 546
Joined: Thu Feb 09, 2006 7:58 pm
Location: New Orleans
Top

Re: Poet Creek Express - Frame & Swivel Coupler Fab Progress

Postby KCStudly » Sun Feb 26, 2012 3:07 pm

Thanks for watch dogging on the spam, GPW, and for the supportive comments. I hope others are enjoying this, too! :)

I am so excited to be working on this project, and so looking forward to returning to Poet Creek that I am not getting much sleep these days. Was up ALLLLL night downloading/resizing/uploading/composing/editing/reviewing/editing and posting! In fact it is cutting into my TnTTT browsing time. :lol:

I guess you could say that I am driven by this process. I want to put on a good show for all of those pioneers that have come before me and shown the way! :thumbsup:

Hope you had a good time at the show, Eagle. There's always something about a live production that you just can't get with a movie/television or youboob.

I will see if I can get Dave Z. to work on the replacement pintle shaft and sleeve insert after work on Monday. Should have something more to post by Wednesday, if not sooner.
KC
My Build: The Poet Creek Express Hybrid Foamie

Poet Creek Or Bust
Engineering the TLAR way - "That Looks About Right"
TnTTT ORIGINAL 200A LANTERN CLUB = "The 200A Gang"
Green Lantern Corpsmen
User avatar
KCStudly
Donating Member
 
Posts: 9611
Images: 8169
Joined: Mon Feb 06, 2012 10:18 pm
Location: Southeastern CT, USA
Top

Re: Poet Creek Express - Frame & Swivel Coupler Fab Progress

Postby eaglesdare » Mon Feb 27, 2012 8:07 am

i am enjoying this build also! i just don't comment too much because you really are technical, and all who know me knows i don't do technical very well. :lol:

loved your 'soft hard roll' sandwich. i am from jersey and i grew up on hard rolls. i think those are a northern bread because i have yet to find hard rolls anyway south. folks don't even know what i mean when asking. nothing better than a hard roll with your chili, or pork roll sandwich on hard rolls. oh this is killing me, the memories :cry:

you are right there is something special about seeing a live performance on stage. i must be getting soft in my old age though, i have been wanting to see this show for so long now, ordered these tickets many months ago (so long ago i almost forgot i had them). but within about 2 minutes of the opening scene i was :cry: like a baby! i guess the reality of being there and that music and the performance itself was just too much for me. loved it though. :D

alright i will let you get back to your build thread, don't want gpw rolling his eyes at me again. :wine:
Louella
May the foam be with you.
User avatar
eaglesdare
Donating Member
 
Posts: 3168
Images: 13
Joined: Tue Aug 26, 2008 7:06 pm
Top

Re: Poet Creek Express - Frame & Swivel Coupler Fab Progress

Postby GPW » Mon Feb 27, 2012 8:26 am

It’s just really NICE to see what you can do with Really Good tools/machinery , and possessing the knowledge to use them ... :applause: Advancing the “state of the art” ... trailer wise ... 8)
There’s no place like Foam !
User avatar
GPW
Gold Donating Member
 
Posts: 14911
Images: 546
Joined: Thu Feb 09, 2006 7:58 pm
Location: New Orleans
Top

Re: Poet Creek Express - Frame & Swivel Coupler Fab Progress

Postby KCStudly » Mon Feb 27, 2012 5:55 pm

Design work, I can do.

Steel work, I can do.

Carpentry work...er...carpentry work? Well, we will see. I am afraid that I have not done much in the way of finish carpentry. Made a big hassock for in front of the couch (but that got covered with fabric and a cushion). Made a nice little spice cabinet for my mother (but one of the doors was not precisely aligned when I installed the hinges). Made a nice firewood box for next to the fire place in our living room, which came out nice with a deep purple stain (but it’s a bit banged up now from throwing firewood into it). Raised the flat roof on my 8x12 wood & lawn equipment shed in to a salt box style (so that the sticks would fall off and not allow snow/ice/water to dam up and rot the roof), but that was mostly framing with only a few trim boards, not really cabinet grade stuff. I started to build a built in computer desk in a nook in the front (spare) bedroom, but that project has not been completed. :oops:

When we get to the cabin I think you will realize that I am just an average teardrop builder.

I do hope that the trailer construction is at least informative to anyone who does have the proper skills to build their own, and for those who are considering having a custom trailer built. If I do decide to offer up the detailed plans, I hope it gives people an appreciation of what is involved to have a trailer like this built. Mind you at least half of the work I have done so far is related to the off road swivel coupler, and that is an “up” option on the plans. The std 50 deg coupler can be substituted quite easily. The rounded front of the main frame rail is just for aesthetics and could be omitted if trying to minimize cost, time to build, or skills/tools needed.

Karl suggested that I should just make two of the swivel couplers and offer one for sale. That way I could cover the cost of the materials to make mine (about $76 for the bushings & hardware…well, that’s including the floor thread inserts, too…and $28 in steel that we could not scrounge), but I’m not in this to make money (he’s self employed for a reason, his brain just works that way as he was exposed to the entrepreneurial mind set from an early age), and it would definitely take more time. I suggested that, after the design is stress tested and proven in use, then he could offer them for sale, but I cautioned him that they would have to be competitively priced in order to attract buyers away from the other established makers on the market. He thought for a minute about all of the work we were doing just to build one, and decided that the only way it would make sense would be a group purchase…and then he thought some more and probably realized that there will still be many more hours in it before we are done, sooooo, maybe not, after all. I don’t know. If there is a real interest, then maybe I can talk him into it. But I’m getting ahead of myself. Let’s get this one done, get some load and miles on it, and then we can think about helping other people.

On a couple of occasions Karl has said, "I wish I was building one of these. I should build one of these." And I said, "So you think you want to do some camping?" And he says, "No, but this is going to be fun!" Yup! 8) :D 8) :D 8)

Still trying to come up with a more elegant and secure method for the removable U-joint pin.
KC
My Build: The Poet Creek Express Hybrid Foamie

Poet Creek Or Bust
Engineering the TLAR way - "That Looks About Right"
TnTTT ORIGINAL 200A LANTERN CLUB = "The 200A Gang"
Green Lantern Corpsmen
User avatar
KCStudly
Donating Member
 
Posts: 9611
Images: 8169
Joined: Mon Feb 06, 2012 10:18 pm
Location: Southeastern CT, USA
Top

Re: Poet Creek Express - Frame & Swivel Coupler Fab Progress

Postby GPW » Tue Feb 28, 2012 9:27 am

Best test /try out the one you made and see how you like it before going into “imagination" ... :thinking:

I also suffer the effect ... "self employed for a reason, his brain just works that way” ... :frightened: ... :lol: Endless possibilities :thinking: ... finite time and resources... :R
With recurring exposure to these “self-employed types” , it can only result in some heavy “Industrial/manufacturing ” thinking ... Today trailers, tomorrow the World !!!! :o


KC , I’think you’ll be Outstanding for the simple kind of wood working needed around here ... No Problamo’ !!!! :thumbsup:
There’s no place like Foam !
User avatar
GPW
Gold Donating Member
 
Posts: 14911
Images: 546
Joined: Thu Feb 09, 2006 7:58 pm
Location: New Orleans
Top

Re: Poet Creek Express - Frame & Swivel Coupler Fab Progress

Postby KCStudly » Wed Feb 29, 2012 12:08 am

Thanks, GPW. I am game to do it. There will be saw dust in this thread! :twisted: 
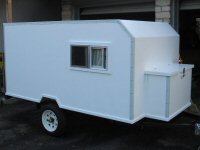
It won't be long now.

Dave Z. started machining the new swivel pintle this evening after work. Started by roughing down the shaft and cutting the threads. Once he has the thread major diameter cut to size, he touches off on the end of the shaft and sets the x zero, then he touches off on the diameter and sets the y zero, then he runs the cutter down to the undercut area near the shoulder and sets the tool path end. Then he runs the threading subroutine and the CNC makes several passes to cut the thread. Each pass the 60 deg pointed cutter is fed into the work at a 60 deg angle so that the cutter is only cutting one face of the thread at any given moment, thus giving the chip a place to escape (if the cutter was advanced straight into the work it would be trying to make a chip on both faces of the cutter at the same time, and the chips would collide, making a rougher cut, at least that is my understanding). So on the first attempt Dave set the thread routine to go dead bang on, but that resulted in a loose fit with the test nut. So he parted that end off and started fresh. On the second attempt he left the major diameter 0.010 large and snuck up on the final cut 0.0005 at a time. The final thread came out perfect over the first 3/4 of its length and just started to tighten up when approaching the shoulder in the last 1/4 of the threaded section. I can live with that. If needed I can lap the thread in that area with a little lapping compound on a spare nut, but it might not matter with the big washer in place. Dave's experience is that depending on how accurately he touches off on the y axis (which is done by eye and sound...if the cutter sings a little it is touching like a reed) the best fit will be 2-3 thou past where the CNC thinks the "ideal" path of the last cut will be. He figured he touched off a little deep on the first try, and that's why it came up small. On the second try, sure enough, the final pass was .0025 deeper than indicated. He said the difference between a good fitting nut and a loose fit can be very small. Somtimes just repeating the same cycle of cuts again, with no added depth indicated, can make a big difference, even when the threading routine repeats the same path twice at the end of a cycle to account for spring back. As technical as the CNC machine is, it is still the operator and his experience that make the finished result come out good or bad.

Between the shoulder where the nut clamps the big fixturing washer to the shaft and where the threads are on the shaft, there is a small area with no threads where the shaft diameter is the same as the thread root diameter. This allows there to be a radius between this undercut and the shoulder where the washer seats. The radius is to prevent a concentration of stress that would occur if this was made into a sharp corner. This radius is very important, even tho it is small, because it significantly reduces the chance of the shaft snapping off at this corner (that would be bad... very bad :o ). Basically it allows the lines of stress to wrap around the corner more gracefully, rather than pile up (think about it aerodynamicly...rounded is smooth and gradual, square is rough and tumble).

Same thing at the big shoulder where the pintle shaft will thrust against the flange of the bushing, there will be a radius there, too. If necessary, I will turn a small chamfer into the ID of the bushing at that end so that the bushing does not bind on this radius.

Well, I see I have written too much with no pictures, and lots of technical details...again :R :? :R :? :R

Oh, yeah. Almost forgot. My Sprint To Spring weight loss team is down another 12 lbs this week (I lost 4 lbs!!!), so we are looking really good for the prize money. If so, there is no question, this thing will get a made to order axle with brakes.

I have heard a lot of the off road guys talk about using XJ Jeep or Chevy S10/GMC Sonoma leaf springs because they are longer and more flexy (softer riding) than standard trailer springs. Does anybody know what these have for spring rates, and how many of the leafs out of the pack are typically used? Will post this question in the Off Road section, too.
KC
My Build: The Poet Creek Express Hybrid Foamie

Poet Creek Or Bust
Engineering the TLAR way - "That Looks About Right"
TnTTT ORIGINAL 200A LANTERN CLUB = "The 200A Gang"
Green Lantern Corpsmen
User avatar
KCStudly
Donating Member
 
Posts: 9611
Images: 8169
Joined: Mon Feb 06, 2012 10:18 pm
Location: Southeastern CT, USA
Top

Re: Poet Creek Express - Frame & Swivel Coupler Fab Progress

Postby BC Dave » Thu Mar 01, 2012 1:14 am

... waow ... nice shop.

Its nice to see an expert at work and to see the work and tools involved for one connection.

It reminds me of my grandfather who was a custom injection mold maker; he did lots of metal cutting; did eveything by hand ... untill he retiered at 65; he worked hard and sometimes 7 days a week to meet deadlines; lots of overtime ... I always enjoyed going into the engineering shop he worked in and into his basement shop. I learn lots from him; he was a humble and great man.
User avatar
BC Dave
Teardrop Master
 
Posts: 247
Images: 13
Joined: Sat Oct 31, 2009 12:32 am
Location: BC, Canada
Top

Re: Poet Creek Express - Frame & Swivel Coupler Fab Progress

Postby Shadow Catcher » Thu Mar 01, 2012 7:31 am

OK I gotta ask, why reinvent the wheel? There are a number of off road trailer hitches i.e. http://www.campertrailers.org/couplings.htm that are well thought out and probably less expensive than all of the machining work... The OZ hitch http://ozhitch.com appears to be one of the best because of its ease of coupling. One of the problems with coupling and uncoupling is the difficulty in aligning the the ends.
User avatar
Shadow Catcher
Donating Member
 
Posts: 5993
Images: 234
Joined: Sat Apr 11, 2009 8:26 pm
Location: Metamora, OH
Top

Re: Poet Creek Express - Frame & Swivel Coupler Fab Progress

Postby GPW » Thu Mar 01, 2012 7:53 am

SC , I think it’s really a matter of “Design Exercise” ... Engineers do this for Fun !!! My FIL (RIP) was an Engineer and had a marked propensity for “reinventing" many things .... his way ... Just another Mental challenge for those that already have “the Knack “ ... http://www.youtube.com/watch?v=CmYDgncMhXw
There’s no place like Foam !
User avatar
GPW
Gold Donating Member
 
Posts: 14911
Images: 546
Joined: Thu Feb 09, 2006 7:58 pm
Location: New Orleans
Top

Re: Poet Creek Express - Frame & Swivel Coupler Fab Progress

Postby Shadow Catcher » Thu Mar 01, 2012 11:48 am

GPW I am not an engineer but was exposed to them most of my working career and I noted the propensity you mention. I also noted the lack of forethought in designing things that, could not be worked on or missed what I consider the most obvious design flaws. Two examples, I was doing a penetrant test on one of the Space Shuttles front landing gear pieces and it had a key way in it and radiating from each corner of this key way was a crack, I had to give the sharp corner = stress riser lecture to an engineer and pointing out you have to have a radius corner or this will surely happen. When I was working for North Star Steel the head on the 600,000lb tensile testing machine cracked and failed, the cause a sharp corner. and when they shipped me with a 100lb magnetic particle testing machine to the company Tinius Olsen in Pennsylvania I again had to give the sharp corners = cracks lecture.
I am interested in a product doing its job flawlessly and I appreciate an elegant design. I also like to learn from others mistakes (I make enough of my own and don't need others mistakes).
User avatar
Shadow Catcher
Donating Member
 
Posts: 5993
Images: 234
Joined: Sat Apr 11, 2009 8:26 pm
Location: Metamora, OH
Top

Re: Poet Creek Express - Frame & Swivel Coupler Fab Progress

Postby pete42 » Thu Mar 01, 2012 10:30 pm

KC you have brought back memories of my working days 41 years in a maintenance department
lots of mills, drills and sometimes thrills TIG MIG and of course good old stick welders
I designed and built many many machines when I felt I needed help I ask others I could
use all the machines but being an electrician I let the welders do the welding.
The airplane I was building had aluminum wing plates so they could be removed if needed
the bushings and their matching holes were 5 degree included angle way over my head so I had the machinist make them for me.
I think the biggest thing I miss about working is playing with all the toys.
keep up the good work.

why buy when you can build................it's fun!!!!!!!!!!
User avatar
pete42
Super Lifetime Member
 
Posts: 2203
Images: 13
Joined: Sat Nov 07, 2009 11:52 am
Location: SouthWest Ohio
Top

PreviousNext

Return to Foamies

Who is online

Users browsing this forum: No registered users and 28 guests