The Poet Creek Express - Foamie Hybrid

Canvas covered foamies (Thrifty Alternatives...)

Moderator: eaglesdare

Re: The Poet Creek Express - Foamie Hybrid

Postby KCStudly » Tue Jun 18, 2013 11:17 am

That's just it, RandyG, the line didn't come down. The tree branch laid on it and it just kept arcing out (the tree creating a dead short to ground). I was amazed that the wire didn't just liquefy and drop to the ground.

b'Whop-whaup-whaup. Sounded like Frankenstein’s lab amplified.

Not sure about the thread count. I'm just happy that people seem to be enjoying it and that I am able to contribute back to the community. Thanks. It is a nice little shot for the ego; keeps me encouraged and makes it easier to justify putting all of the time into the build. I've been known to let myself off the hook on projects in the past, but not this time. :no:
KC
My Build: The Poet Creek Express Hybrid Foamie

Poet Creek Or Bust
Engineering the TLAR way - "That Looks About Right"
TnTTT ORIGINAL 200A LANTERN CLUB = "The 200A Gang"
Green Lantern Corpsmen
User avatar
KCStudly
Donating Member
 
Posts: 9611
Images: 8169
Joined: Mon Feb 06, 2012 10:18 pm
Location: Southeastern CT, USA

Re: The Poet Creek Express - Foamie Hybrid

Postby GPW » Tue Jun 18, 2013 11:41 am

Still say you need to make a “book" of this ... You have all the text and pics ... Might as well make a few extra coins while you’re doing this eh ??? :thinking:
There’s no place like Foam !
User avatar
GPW
Gold Donating Member
 
Posts: 14911
Images: 546
Joined: Thu Feb 09, 2006 7:58 pm
Location: New Orleans

Re: The Poet Creek Express - Foamie Hybrid

Postby Wolffarmer » Tue Jun 18, 2013 11:54 am

Way way back in high school when I was irrigating on the farm I started up out big pump. A 300 HP, maybe even a 350. It was a big sucker. I hit the start button and it started up and about 15 sec. later the panel box/pump started to buzz so I went to shut it off and when my finger was about 6 inches from the off button the panel box blew. It blew the doors open and luckily it was a box that did not have the buttons on the door. I have seen those but they where rare and not made at all now I bet. So I at least was not standing in front of it as it spit fire and molten mettle about 20 feet away starting weeds on fire. The power lines from the service pole to the power companies transformers danced and touched and even though they where insulated there some some arcing there also. Or it might have been the power companies fuses blowing out. Idaho Power had to come out and put new fuses in and reset all of theirs in about a 5 mile radius. They said that should not have happened. You should have seen me doing the "Whoop WHOOP WHOOP" dance.
:lol:
Nothing like high voltage+high amperage for some excitement.

Oh, your build is looking good also.

Randy
"these guys must be afraid of the dark"
User avatar
Wolffarmer
Donating Member
 
Posts: 4612
Images: 309
Joined: Wed May 02, 2007 1:32 pm
Location: Idaho Rupert
Top

Re: The Poet Creek Express - Foamie Hybrid

Postby KCStudly » Tue Jun 18, 2013 2:38 pm

Wolffarmer wrote:Nothing like high voltage+high amperage for some excitement.

Fireworks in June is okay by me.

Wolffarmer wrote:Oh, your build is looking good also.

Thank you, kindly.
:D
KC
My Build: The Poet Creek Express Hybrid Foamie

Poet Creek Or Bust
Engineering the TLAR way - "That Looks About Right"
TnTTT ORIGINAL 200A LANTERN CLUB = "The 200A Gang"
Green Lantern Corpsmen
User avatar
KCStudly
Donating Member
 
Posts: 9611
Images: 8169
Joined: Mon Feb 06, 2012 10:18 pm
Location: Southeastern CT, USA
Top

Re: The Poet Creek Express - Foamie Hybrid

Postby KCStudly » Wed Jun 19, 2013 11:36 pm

The train kept a rollin’.

Started by finishing up the street side door latch hole cut outs. I must have changed my sequence and did both rough cuts before routing out the main latch body hole, because when I went to route it out the bottom bearing fell into the bolt hole. :thinking: The little scallop is not a big deal and will easily be covered by the latch flange. I ended up just trimming the rest of that area with a chisel. Then I went back to the curbside door and filed the clearance notches just a bit more allowing for the canvas and paint to come later. This is actually the curb side door again, but they are both similar.
Image

When I used the rotary broach (slugger bit) to cut the pilot hole in the skin for the street side light switch recess, I created a boo-boo. The slugger bit has a spring assisted center arbor that centers the bit and ejects the slug. You have to push down some just to get it to compress and drill. Well when the hole was completed the force that I was using to compress the spring caused me to push the broach straight thru the foam poking a hole straight thru the out surface of the wall. Even gouged the underside of the floor (work table) with a couple of nicks (I knew there was a good reason for working on the underside instead of the good side). The floor was no big deal, just laid on a couple of dabs of TB2 to seal it back up. Decided that the best repair for the hole would be to try GS spray foam. First I got set up with some acetone to clean the straw and nipple on the spray can (so that I can use some more later).
Image
Note that the acetone does in fact melt the foam rather impressively. Thanks Wobbly for that tip; worked a charm.

Next I taped a small piece of the freezer paper to the outside face of the wall.
Image

Then I masked off the inside panel around the switch recess to protect from any foam drips or accidents.
Image
Then I squirted a dab down in the hole and cleaned up the spray straw with the acetone (rubber gloves, yes).

I dinked around with the doors a bit more, then started to lay out the CNC templates to cut the final profile on the street side wall.
Image

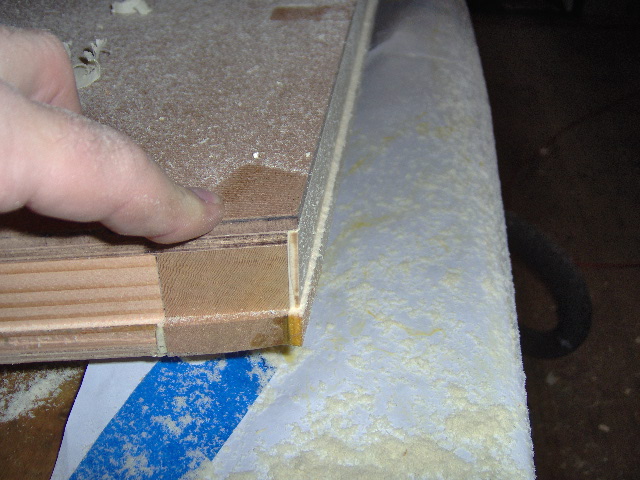
The laminated galley edge piece had so much spring in it when I clamped and glued it in that it pulled the tail end of the wall sill up almost 1/8 inch, running back to zero at the bulkhead side blocking. Here you can see the sill on the bottom, the galley skin sticking off about 1/16th, and the template bottom sticking off about 1/8th (the bottom of the wall is to the right).
Image

Karl and I had discussed that this probably would have no effect on anything too important and the floor would likely wing up to match. Then the trailer frame would wing up when the cabin gets bolted to it. I just couldn’t stand that thought, so I flushed the skin off to the sill…
Image

… ripped and re-sawed a slat of pine (didn’t have a big enough scrap of cedar), and glued that to the bottom rear section of the wall.
Image
Now I can set the template in place and when I route the upper profile I can come around onto the bottom and shave the excess part of the shim back flat (a lot easier than trying to make and glue on a tapered shim). The little square scraps of ply were just used as large washers to help spread the load from the temporary drywall screws used to clamp the shim on.

The train kept a rollin’.
KC
My Build: The Poet Creek Express Hybrid Foamie

Poet Creek Or Bust
Engineering the TLAR way - "That Looks About Right"
TnTTT ORIGINAL 200A LANTERN CLUB = "The 200A Gang"
Green Lantern Corpsmen
User avatar
KCStudly
Donating Member
 
Posts: 9611
Images: 8169
Joined: Mon Feb 06, 2012 10:18 pm
Location: Southeastern CT, USA
Top

Re: The Poet Creek Express - Foamie Hybrid

Postby GPW » Thu Jun 20, 2013 6:27 am

KC, are you going to pre-cover the outside panels and then assemble ?
There’s no place like Foam !
User avatar
GPW
Gold Donating Member
 
Posts: 14911
Images: 546
Joined: Thu Feb 09, 2006 7:58 pm
Location: New Orleans
Top

Re: The Poet Creek Express - Foamie Hybrid

Postby KCStudly » Thu Jun 20, 2013 6:59 am

I wasn't going to at first because of the reports of warping when doing one side, only, in the flat, but after handling the walls a bit with the inner skins on I think I might be changing my mind on that.

I will at least do the edge work around the doors, etc. first. Might use a lighter fabric (yard sale bed linen) to do the edge trim. Still haven't worked out the exact details on how I will terminate the edges on the doors. In fact, I think I may have screwed up my sequence. At one point I had intended to wrap the doors first and then apply the inner skin to cap off the part of the fabric that was wrapped around to the inside. Kind of hard to un-ring that bell now. :( :shock: :? :lol: :D
KC
My Build: The Poet Creek Express Hybrid Foamie

Poet Creek Or Bust
Engineering the TLAR way - "That Looks About Right"
TnTTT ORIGINAL 200A LANTERN CLUB = "The 200A Gang"
Green Lantern Corpsmen
User avatar
KCStudly
Donating Member
 
Posts: 9611
Images: 8169
Joined: Mon Feb 06, 2012 10:18 pm
Location: Southeastern CT, USA
Top

Re: The Poet Creek Express - Foamie Hybrid

Postby GPW » Thu Jun 20, 2013 10:42 am

Much easier to cover panels when Flat ... the absolute Worst is inside overhead .. :?
There’s no place like Foam !
User avatar
GPW
Gold Donating Member
 
Posts: 14911
Images: 546
Joined: Thu Feb 09, 2006 7:58 pm
Location: New Orleans
Top

Re: The Poet Creek Express - Foamie Hybrid

Postby Wobbly Wheels » Thu Jun 20, 2013 12:42 pm

Glad to hear the acetone trick worked for you.
It's amazing how little you actually use in a squeeze bottle. It's also nice to know that, if you knock it over, it won't spill and trash your work...which is looking great BTW.
I'll have to look up how to use a broach, that's new to me.

GPW wrote:...the absolute Worst is inside overhead...


Ugh...no fun.
User avatar
Wobbly Wheels
Donating Member
 
Posts: 1080
Joined: Tue Mar 15, 2011 9:51 am
Top

Re: The Poet Creek Express - Foamie Hybrid

Postby KCStudly » Thu Jun 20, 2013 1:53 pm

Blair-Equipment-11090N-Rotabroach-Cutter
WW, it's pretty basic. It's just a small slugger bit set. The broaches, or cutters, screw onto the drill arbor. The spring loaded center pin helps you align it to a pin prick mark (just like a center drill in a hole saw works for alignment except the pin doesn't poke thru... in wood you don't even need a pilot hole or prick punch, a pencil mark will do). At the end of the cut the spring ejects the slug.

Great for putting holes in sheet metal. Makes a nice clean hole in thin ply, too... if you are able to back it up with a piece of scrap.

Thanks for the kudos. :D
KC
My Build: The Poet Creek Express Hybrid Foamie

Poet Creek Or Bust
Engineering the TLAR way - "That Looks About Right"
TnTTT ORIGINAL 200A LANTERN CLUB = "The 200A Gang"
Green Lantern Corpsmen
User avatar
KCStudly
Donating Member
 
Posts: 9611
Images: 8169
Joined: Mon Feb 06, 2012 10:18 pm
Location: Southeastern CT, USA
Top

Re: The Poet Creek Express - Foamie Hybrid

Postby KCStudly » Thu Jun 20, 2013 10:25 pm

It was a great night to be in the shop. Cool and dry weather. Tonight’s work clearly laid out and ready to start. I got a lot done in the 3 hrs. or so that I put in.

First I pulled the clamps and screws out of the street side galley wall shim and shaved it down flush to the inside panel using the little matchbox plane and 220 grit on the small block.

Then I set the galley CNC template using a couple of temporary cleats in the bulkhead dado to butt the template up against.
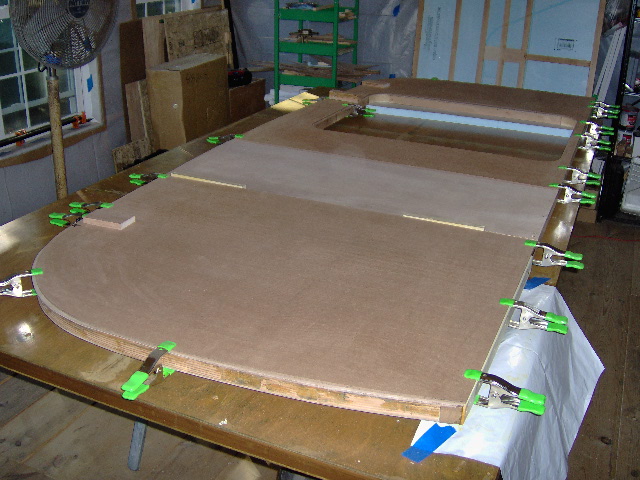
Image
The blocks sitting on top are just larger visual cues where my marks are signaling me to stop before I get to the inverted curve (wrong) parts of the templates.

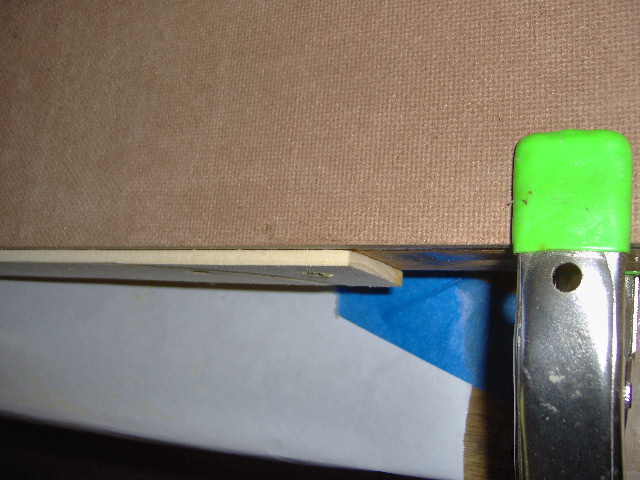
Here is a close up of the galley shim (bottom of wall is to the right). Note how the template overlaps the shim by about half at the rear…
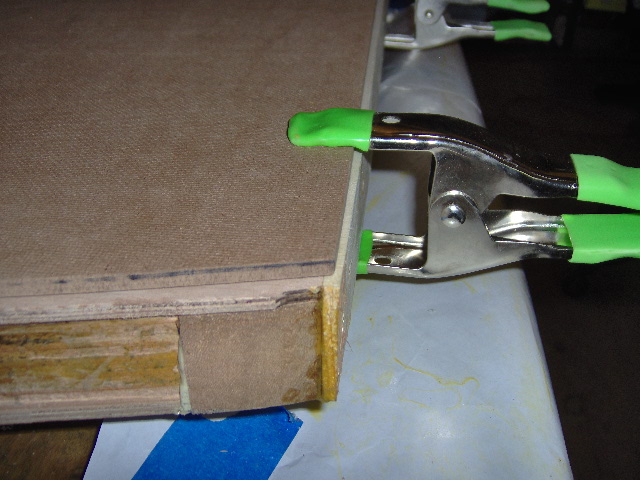
Image

… and not at all at the front under the bulkhead blocking (not visible in pic).
Image

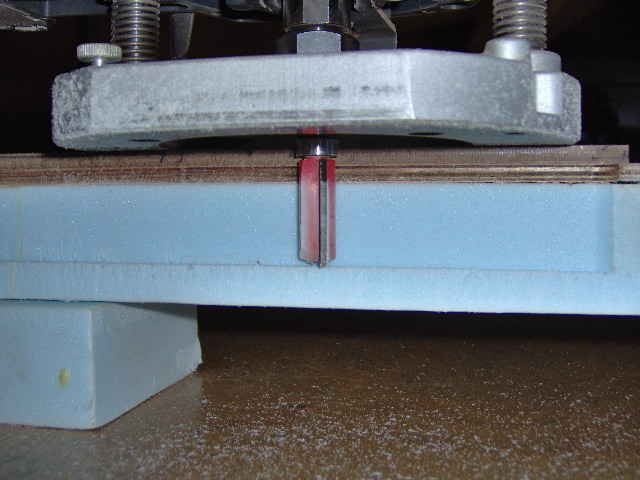
I started routing at the lower front and worked my way up the wall to the point where the small front radius transitions to the low crown radius of the main roof. Here you can see that my top bearing bit does not reach the whole thickness of the wall in one go.
Image
That’s okay, I have a plan. The ceiling skins were cut 1 inch shorter than the outside cabin width for two reasons: (1) it allowed me to optimize the marine ply cutting schedule and saved me a sheet, and (2) by holding the ceiling panel in from the outer edge of the foam I can seal any areas of the edge that aren’t covered up by variations in this little excess ledge. Where the excess ledge is strong, I’ll just sand it down flush to the top of the ceiling skin before applying the roof foam, and where it is thin I will squirt some GS in the groove and sand that flush to the wall face. I’m hoping that this will give a softer edge so that the plywood seam does not telegraph thru the canvas.

Here you can see where I have routed the tight front radius and stopped (bottom of pic) leaving the main crown to be done by repositioning the middle template (shown in its rightful position up on the other side of the door, top of wall is to the right in this pic… the front template has already been removed).
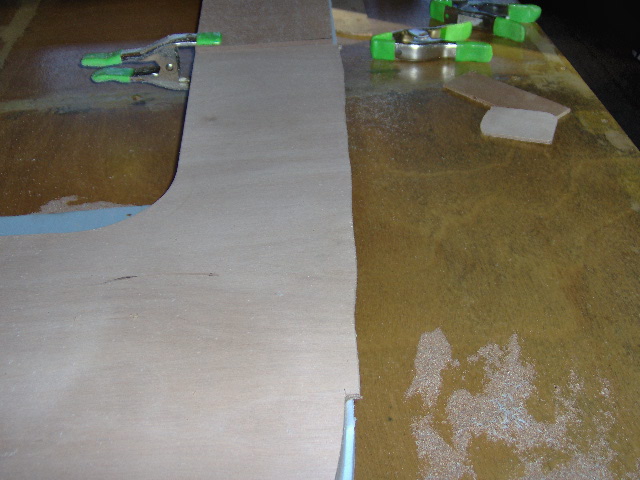
Image

Here the top of the wall is to the left and you can see where I started on the sharpie marks indicating the top of the hatch big radius and worked my way down the hatch. Note how the template runs the wrong way on top compared to the rough cut.
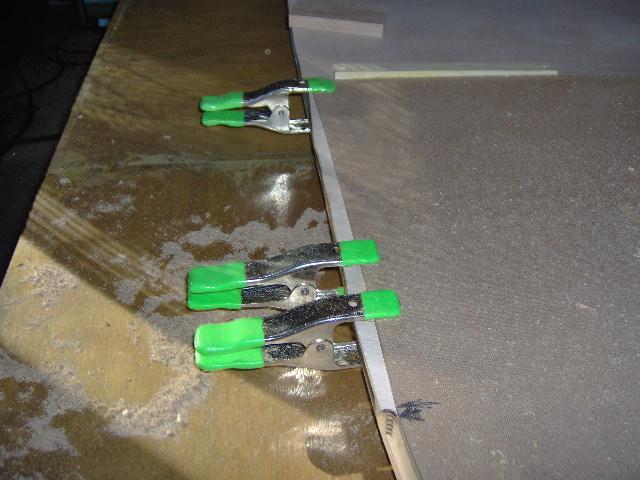
Image
The alignment cleat is more visible here.
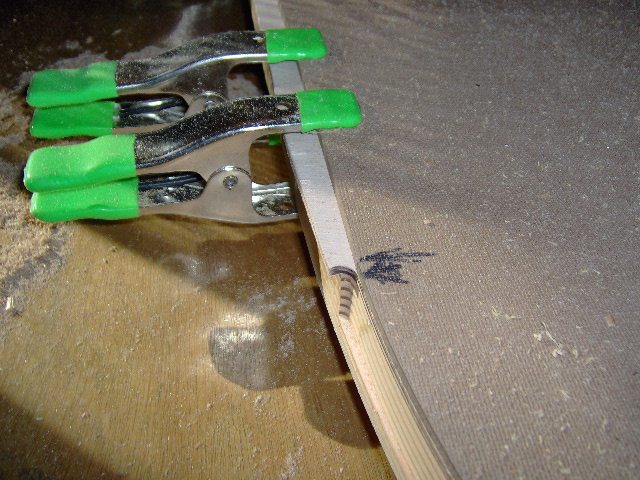
Image
You can see how I hop scotched the spring clamps around (used scrap backer pieces of the thin ply to keep the clamps from denting the outer surface of the wall foam where necessary).

Here is a shot looking up along the sill were I have routed along the lower curve of the galley rear (bottom of pic) and back up to flush off the shim.
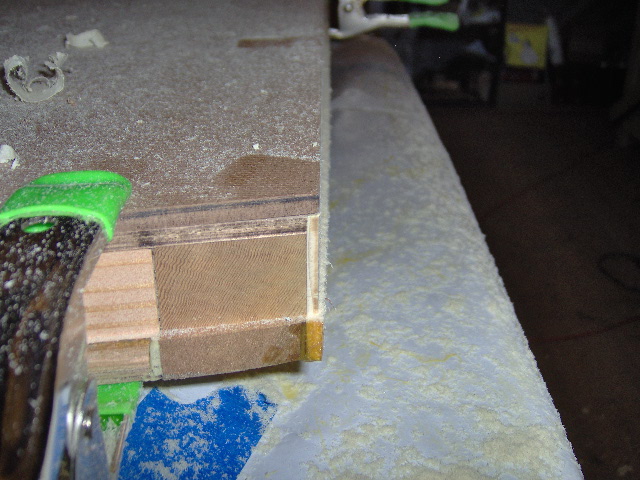
Image
Image
A little further along I will flip the wall over and trim the rest of the sill and hard galley wall edge using the bottom bearing bit to follow this cut from the other side. Also note the nice tight grain of the cedar.

Somewhere in there I also trimmed the middle top to the properly crowned middle template. Next I repositioned the middle template making it flush to the transition point at the front small radius and the previously cut middle section, bridging the bad section of the front template.

Then I went back the other way using the middle template to bridge the gap where it was short to the tangent point of the rear template, shown here before cutting.
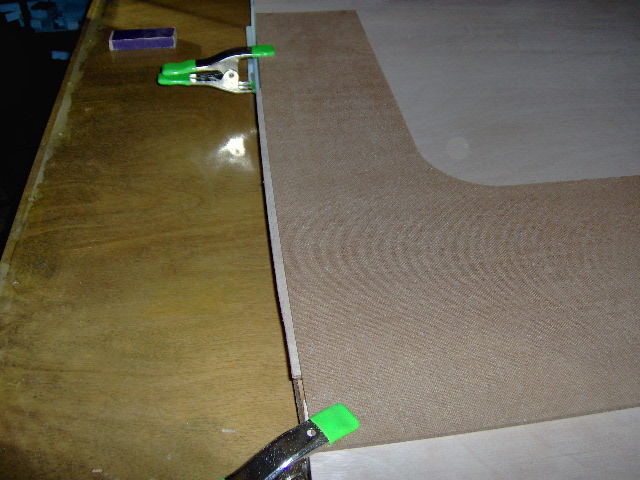
Image

About this time Karl and Simon came for a visit, so I knocked off from running the router and switched my attention to the light switch hole fix. That way I could visit for a bit and still keep working. I was going to try and shave the little mushroom of excess GS out with a chisel, but I couldn’t get the angle needed with it down in the hole, so I just sliced it several times like a hardboiled egg slicer and chipped the slivers out.
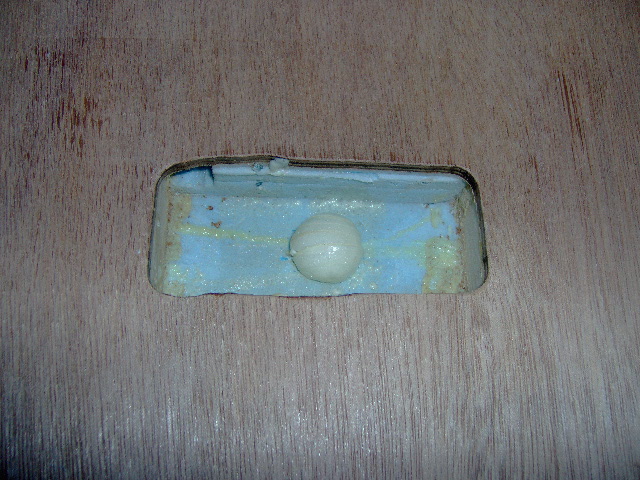
Image

After Karl and Simon cut out, I finished the previous router cut and repositioned the middle template again to bridge the bad section at the top of the rear template. In this next pic the top of the wall is down and the top radius of the galley is to the lower right.
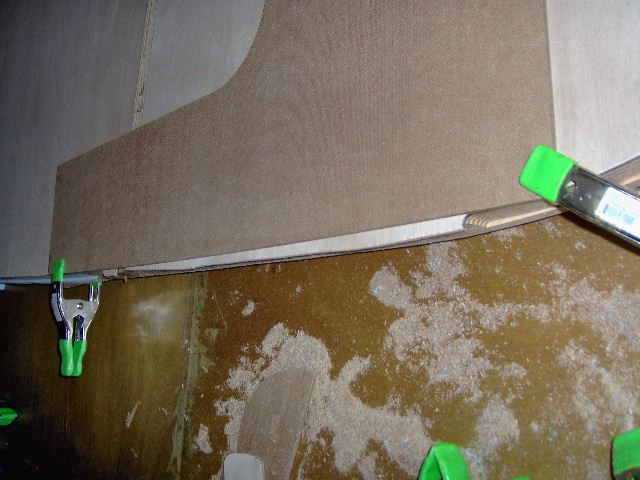
Image

Before flipping the wall over so that the outside face was up, I did a little clean up. This helps protect the foam from getting scratched up by and/or having sawdust ground into it.

Pulled the mask off of the light switch hole fix, shaved the small bulge with a razor blade, and hit it with a quick scuff using 220 grit.
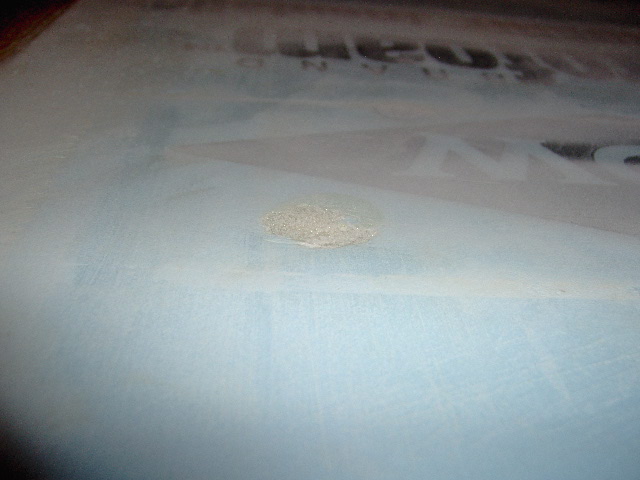
Image
After a final round of spackle it will disappear.

Here’s the galley sill shim after flushing off from the other side.
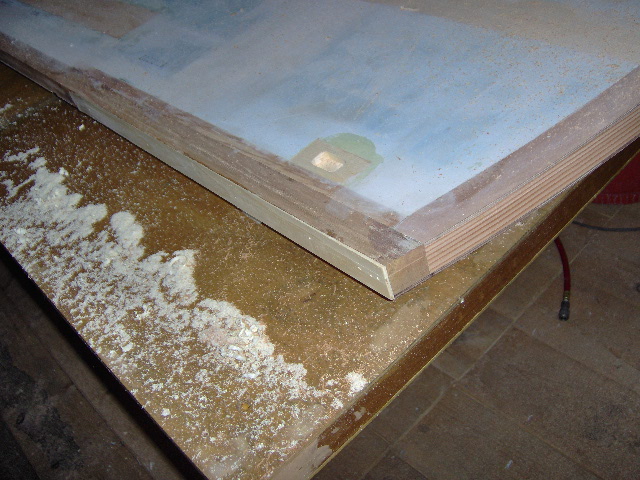
Image
Like I said, 1/8 inch to nothing.

I hope you have been able to follow and understand what I am trying to describe. In the end, as expected, the issues with the CNC templates and laminated wall edge caused a bit more work, but the accuracy of the templates and the smooth edge provided ended up making the job go relatively easy. Despite having the inverted curves, the tangent points were accurate and useful in doing the layout and positioning; and despite the middle template being narrow, the crown was accurate and got the job done. Now I just have to do it again on the other wall.

Do yourself a favor and take a minute or two to clean up after yourself, put your tools in their proper place so that you can work more efficiently the next time.
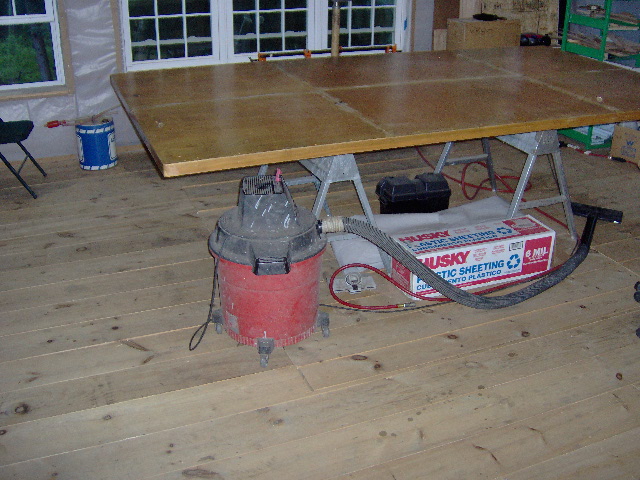
Image

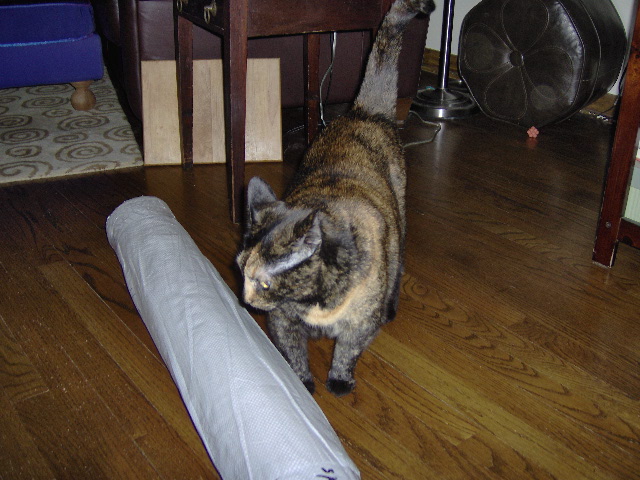
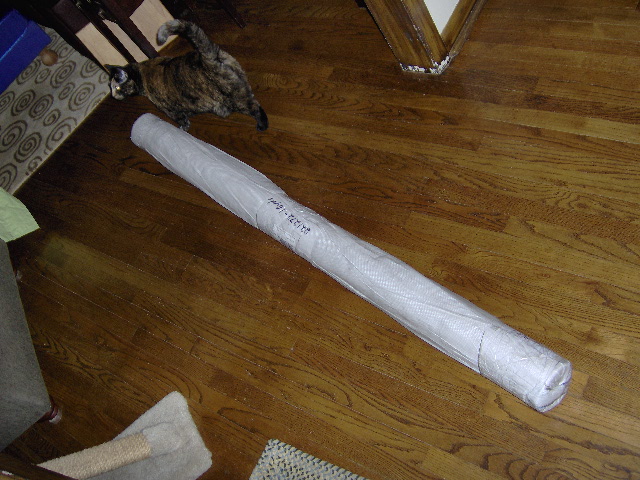
Sat down in front of the fan for a minute or two before heading home to find my roll of canvas being inspected by Maggie.
Image
Image

And a good night kiss from Rocky.
Image
KC
My Build: The Poet Creek Express Hybrid Foamie

Poet Creek Or Bust
Engineering the TLAR way - "That Looks About Right"
TnTTT ORIGINAL 200A LANTERN CLUB = "The 200A Gang"
Green Lantern Corpsmen
User avatar
KCStudly
Donating Member
 
Posts: 9611
Images: 8169
Joined: Mon Feb 06, 2012 10:18 pm
Location: Southeastern CT, USA
Top

Re: The Poet Creek Express - Foamie Hybrid

Postby GPW » Fri Jun 21, 2013 5:41 am

Canvas ... cool , and it came rolled up and not folded !!! :thumbsup: ;) 8)


QUOTE: “ Do yourself a favor and take a minute or two to clean up after yourself, put your tools in their proper place so that you can work more efficiently the next time. “

Great advice , Thanks KC ... my Studio was a total Wreck , during the rain we took the time to clean and organize inside and it was a Good Thing for my mental health .... So much Easier working in a Clean shop ... :thumbsup: Looked so good after that, went outside and cleaned up too .. :D
There’s no place like Foam !
User avatar
GPW
Gold Donating Member
 
Posts: 14911
Images: 546
Joined: Thu Feb 09, 2006 7:58 pm
Location: New Orleans
Top

Re: The Poet Creek Express - Foamie Hybrid

Postby KCStudly » Fri Jun 21, 2013 6:35 am

Yeah, IIRC the shipping comments at Big Duck said that generally 15 yds and less get folded and above that amount gets rolled. At first I figured I needed a bit less than 15 yds so I put in the online order remarks box that I would prefer rolled to folded, then I went back and changed the qty to 16 yds (just to be on the safe side usage wise). Now I'm thinking that I probably should have gotten a couple more yards to do the doors separately (can't wrap both the jamb and door with the same piece). I'll wait and see. I was generous with my estimates and there will be extra; I hope I can get the tongue box, too (didn't specifically account for that, just fudged some extra feet here and there rounding everything off to yds.).
Last edited by KCStudly on Fri Jun 21, 2013 8:43 am, edited 1 time in total.
KC
My Build: The Poet Creek Express Hybrid Foamie

Poet Creek Or Bust
Engineering the TLAR way - "That Looks About Right"
TnTTT ORIGINAL 200A LANTERN CLUB = "The 200A Gang"
Green Lantern Corpsmen
User avatar
KCStudly
Donating Member
 
Posts: 9611
Images: 8169
Joined: Mon Feb 06, 2012 10:18 pm
Location: Southeastern CT, USA
Top

Re: The Poet Creek Express - Foamie Hybrid

Postby GPW » Fri Jun 21, 2013 6:47 am

I just guesstimated mine ... Got 20 yds. #8 ... I was hoping to have a little left over to paint on. Good thing , we can always get more :thumbsup: ... those were pretty Good prices , reasonable shipping too ... Are you going to use the glue trick for cutting the edges?
There’s no place like Foam !
User avatar
GPW
Gold Donating Member
 
Posts: 14911
Images: 546
Joined: Thu Feb 09, 2006 7:58 pm
Location: New Orleans
Top

Re: The Poet Creek Express - Foamie Hybrid

Postby KCStudly » Fri Jun 21, 2013 8:45 am

GPW wrote:Are you going to use the glue trick for cutting the edges?


Yes. It makes sense to me, and you can't argue with the results. (I forget who to attribute that tip to... think it was a canvas covered wood build... the one with the basement maybe?).
KC
My Build: The Poet Creek Express Hybrid Foamie

Poet Creek Or Bust
Engineering the TLAR way - "That Looks About Right"
TnTTT ORIGINAL 200A LANTERN CLUB = "The 200A Gang"
Green Lantern Corpsmen
User avatar
KCStudly
Donating Member
 
Posts: 9611
Images: 8169
Joined: Mon Feb 06, 2012 10:18 pm
Location: Southeastern CT, USA
Top

PreviousNext

Return to Foamies

Who is online

Users browsing this forum: No registered users and 14 guests