The Poet Creek Express - Foamie Hybrid

Canvas covered foamies (Thrifty Alternatives...)

Moderator: eaglesdare

Re: The Poet Creek Express - Foamie Hybrid

Postby GPW » Fri Jun 28, 2013 5:59 am

Support your teardropper merchants :thumbsup: ... They always seem to have the “right stuff” , unlike the general trailer sites where you have to wade through tons of things you don’t need ... ;) Keep it in the “Family” ... :D
There’s no place like Foam !
User avatar
GPW
Gold Donating Member
 
Posts: 14911
Images: 546
Joined: Thu Feb 09, 2006 7:58 pm
Location: New Orleans

Re: The Poet Creek Express - Foamie Hybrid

Postby couponjnp » Fri Jun 28, 2013 2:00 pm

Hi KC,

Amazing level of details. :thumbsup: Keep it up.

JNP
couponjnp
Teardrop Advisor
 
Posts: 50
Images: 18
Joined: Tue Jun 19, 2012 2:41 pm
Location: Port Moody, BC, Canada

Re: The Poet Creek Express - Foamie Hybrid

Postby KCStudly » Fri Jun 28, 2013 10:54 pm

Thanks JNP, here's some more to ponder.

The door seal package arrived from McMaster and I didn’t even open the box. Called and made arrangements to have the 3/8 bulb version of the edge trim seal (PN 1120A311) sent out, then after work I sent the 5/8 bulb stuff back. No restocking fee (not sure if that is normal policy, or because they use caller ID and I called from work). Although I should see a small refund due to the lower cost of the smaller seal, I did have to pay 3x shipping (original order, return, and second order). My bad for not doing the research up front.

Out to Mecca, I removed the clamps from the curbside door seal flange, and jumped right in gluing the toe boards onto the toe board shims.
Image
Image
Image

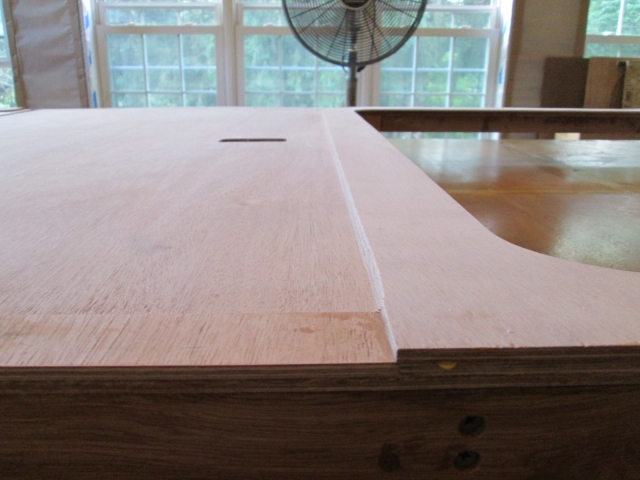
Then I looked to see what I could do to improve the flange to shim alignment (the result of my glue up oopsy). By shifting the blade of the matchbox plane all the way to one side I was able to take a pretty close shave of just the shim, bringing it back to flush with the flange.
Image

I was able to wrap just three sides of my small wooden sanding block with sand paper, leaving the side against the wall skin uncovered, and that allowed me to sand the edge of the shim/flange without causing a gouge in the wall skin next to the flange.

Did a bunch of hand sanding where all the masking tape had been and where the spring clamps made slight discolorations in the face of the flange and toe boards. I also carefully sanded a radius around the edge of the flange that was now exposed, and along the tops of the toe boards.

Sat down in the chair in front of the fan for a minute; high 80’s temp, high 70’s humidity… and I forgot to bring shorts and sandals to change out of my work jeans and boots. This was the view and I’m feeling pretty good about it.
Image

Now recall that I had made the hatch rib template working from a full scale composite of prints off of the plan, whereas the wall profiles were cut using the CNC templates that were cut from the digital format of the plan, so I thought it would be a good idea to double check the rib template against the wall. It fits pretty damn close overall… Image

… and at the top…
Image

… and at the bottom…
Image

… but is about an 1/8 inch shy in the tighter arc at the upper rear.
Image

Considered cutting the walls again to match the ribs (but then the profile would not be “pure” to my design. Also thought about refitting the rib template to the walls then using that to trim the ribs to match, but then there are downstream ramifications (I would lose some material at the bottom and would have to make that back up where the lower edge of the hatch will meet the back edge of the floor.

Need to ponder the possible correction options… I don’t want to warp the inner hatch skin, nor cause issues with the seal not getting compressed properly, and I need to be careful about the relationship between the hatch and hinge, and the hatch and rear floor edge, so I will sleep on that.

One more shot admiring my own work.
Image
KC
My Build: The Poet Creek Express Hybrid Foamie

Poet Creek Or Bust
Engineering the TLAR way - "That Looks About Right"
TnTTT ORIGINAL 200A LANTERN CLUB = "The 200A Gang"
Green Lantern Corpsmen
User avatar
KCStudly
Donating Member
 
Posts: 9612
Images: 8169
Joined: Mon Feb 06, 2012 10:18 pm
Location: Southeastern CT, USA
Top

Re: The Poet Creek Express - Foamie Hybrid

Postby GPW » Sat Jun 29, 2013 5:19 am

Sure looks GOOD KC!!! :applause:
There’s no place like Foam !
User avatar
GPW
Gold Donating Member
 
Posts: 14911
Images: 546
Joined: Thu Feb 09, 2006 7:58 pm
Location: New Orleans
Top

Re: The Poet Creek Express - Foamie Hybrid

Postby KCStudly » Sat Jun 29, 2013 7:17 am

Thanks Geep, I appreciate you saying that. :D
KC
My Build: The Poet Creek Express Hybrid Foamie

Poet Creek Or Bust
Engineering the TLAR way - "That Looks About Right"
TnTTT ORIGINAL 200A LANTERN CLUB = "The 200A Gang"
Green Lantern Corpsmen
User avatar
KCStudly
Donating Member
 
Posts: 9612
Images: 8169
Joined: Mon Feb 06, 2012 10:18 pm
Location: Southeastern CT, USA
Top

Re: The Poet Creek Express - Foamie Hybrid

Postby GPW » Sat Jun 29, 2013 8:23 am

Not just blowin’ smoke ... gotta’ call it as we see it ... and we see it coming together SOON ... :thumbsup:
There’s no place like Foam !
User avatar
GPW
Gold Donating Member
 
Posts: 14911
Images: 546
Joined: Thu Feb 09, 2006 7:58 pm
Location: New Orleans
Top

Re: The Poet Creek Express - Foamie Hybrid

Postby KCStudly » Sat Jun 29, 2013 8:34 pm

Thanks GPW, I'm trying to avoid any big warts that would put a tarnish on all of my hard work, so it's sort of like the snowball effect... just keeps getting bigger and bigger... train kept a rollin'. You know, pride in your work, details details details, forest for the trees, blinded by science.

Karl thinks its funny the nits that I am picking (he makes ultra quality look easy and gets paid a pretty shiny nickel for his troubles! ... I should be taking pic's of the bronze railings, gates, and gate hdwr that he has been turning out; slick). I reminded him that I still have to erect the walls, bulkhead and face frames, maybe finish out the cabinet floors and cleats (time permitting… would prefer to do this before the roof goes on), build the roof and hatch (no small feats), and cover the whole thing… mount the doors, pre-prep primer, paint and under canvas details, canvas, paint, window install, fit the latches, wiring, install lights, …and on and on.

If I can freeze some of the warts off and not have to look at them anymore, that's what I'll do. If they are going to be covered or hidden, I try not to worry about them too much (...but it would be nice to be able to avoid and/or fix those, too... it's a curse... fix the easy ones, "oh well" to the others). It's all relative to the time it takes, and in a way, the expense of the materials. I want to do justice to the materials that I have spent good “do-re-me” on. It would be kind of hard to explain 3 years of my every waking spare moment and $6k on a pile of "ssssshtuff", so I "must" do a good job. Remember this is also a tribute to my dad, and he appreciated the finer elements of design and craftsmanship, spent the time and finesse to get it right. Let's all hoist one :beer: :wine: for Wolffarmer's dad, mine, and anyone else out there that has lost a loved one and gets it.

I’m averaging 24 hrs/wk on the build and got almost another 6 in today after getting out early and getting new tires on the Ford this morning.

And now a progress report:
Got Karl to help me shuffle and flip walls. With the door flanges in I am reluctant to pick the whole wall up by the door opening like I had been doing in the past.

Back to the street side wall. Similar to the curbside so I will breeze thru these pics.

I fit the door seal flange blank to the shims, clamped it in place.
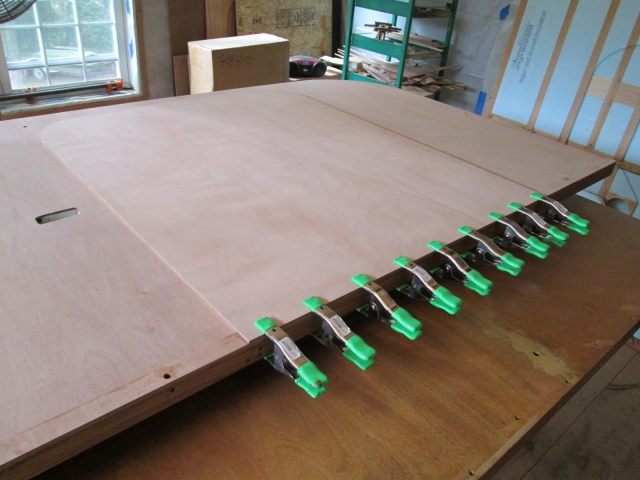
Image

Transferred the offset cut line for the edge trim seal. Image
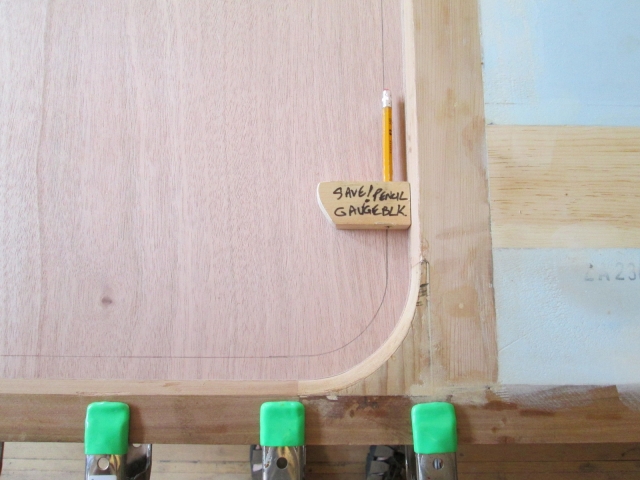
Scored the cut line using the extruded fence as a guide, then free handed the corner radii.
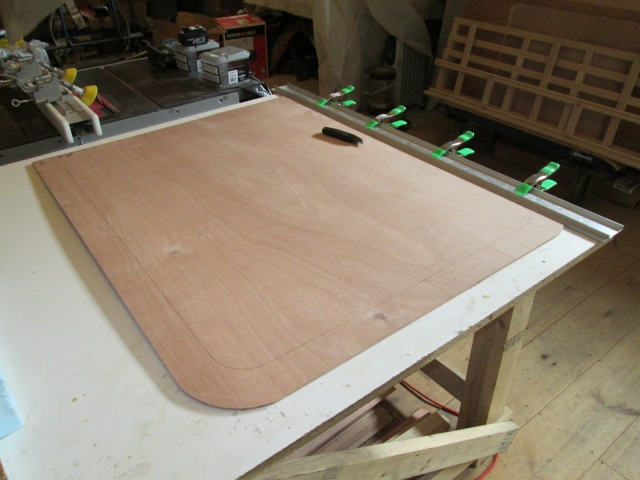
Image

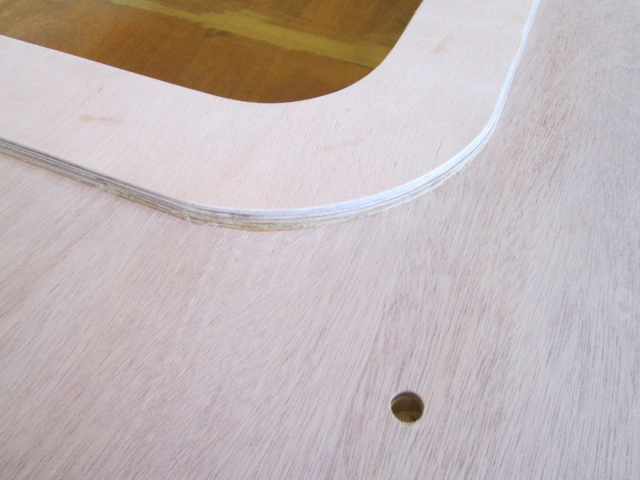
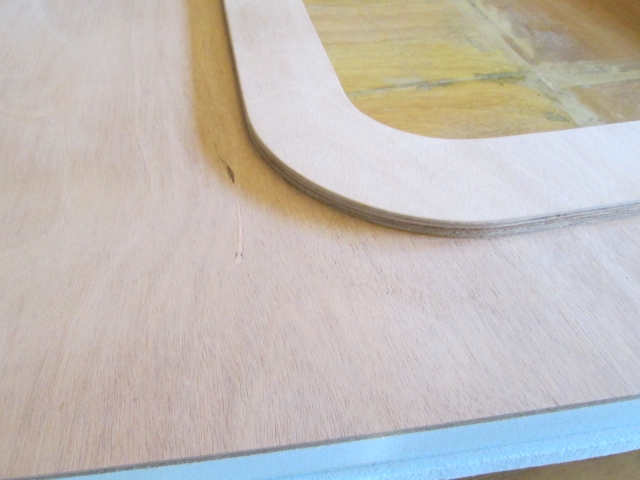
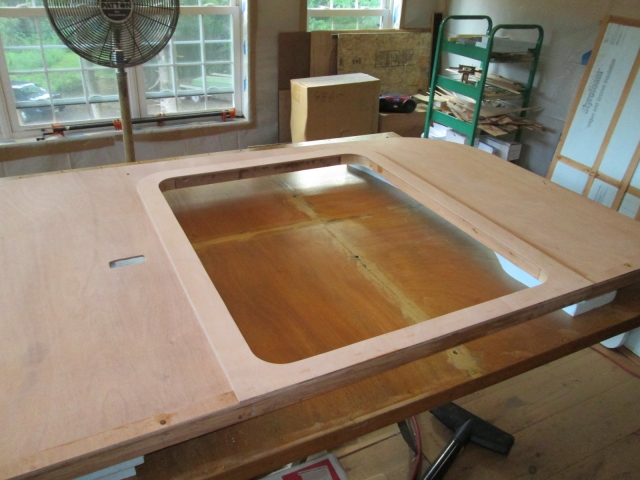
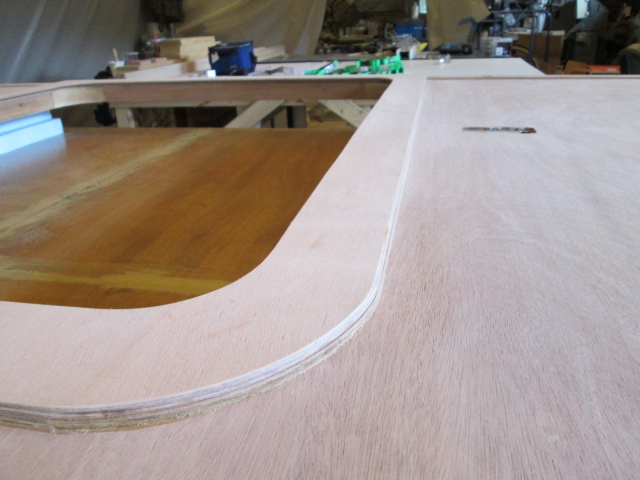
After jig sawing out the middle and a bunch of quality time with the small sanding block (truing up the cut line, rounding over both sides of the opening so the trim slides on easy w/o splintering, and rounding over the face of the cabin side edge), and making sure to put the glue on the correct face this time, I managed to get the flange glued and clamped in place.
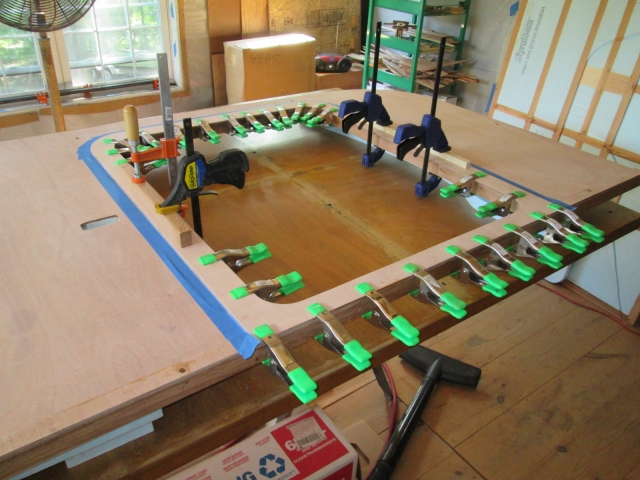
Image

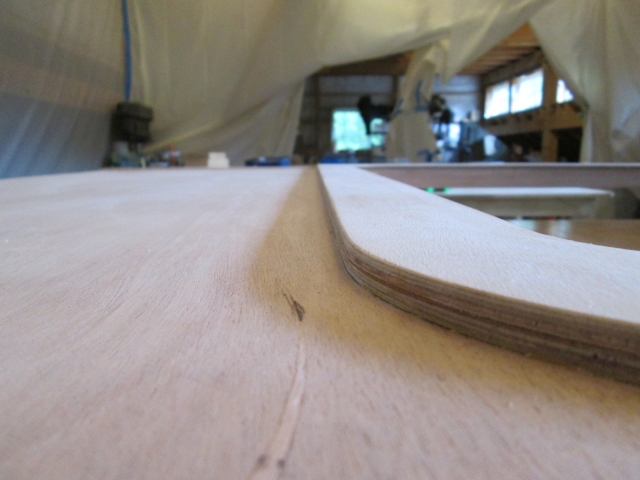
Well I got the correct side glued, but after aligning, clamping the bottom, top and sides, when I came back around to the bottom I found that it had slide off to the rear by about 1/16 inch. Double checked the top and found that it was down almost that much in the middle. I was really trying hard to avoid having brad holes to fill in the face of the flange, but there is such a “hydroplane effect” with the glue that, even with a ton of clamp force, it wants to slide around. Too far along in the glue up, will have to deal with it after. I should have shot just a couple of brads initially to hold position; I could have put them along the bottom where the Wiremold would have hidden them.

So after that cured off I spent about 1-1/2 hrs with the small matchbox plane, 3/8 chisel, and small sanding block truing things back up nice and flush.
Image
Image
Note that I did not round over where the toe board butts up to the door flange.
Image
Image
Image
Image
The patch in the foreground of the previous pic is the only one that I have found in the good side of all of the 16 sheets that were purchased. I can live with that. Also note the harem effect of the plastic drape wall having been rolled and clamped up. The wife noted that it suits the Mecca metaphor, what with the homage to the dessert nomad theme.

On the curbside wall I noticed some strafe marks that the plane made: had to sand them out. The tabs of the frog (the piece that clamps the blade) which register into the sides of the plane shoe stuck out the side just a tad and made ever so slight depressions where they rubbed on the wall skins. So I disassembled the plane and filed the tabs down so that they would not stick out the sides of the shoe no matter how the frog fits the shoe. (Sorry, forgot to take a pic.) Details.
Last edited by KCStudly on Fri Mar 18, 2022 8:59 am, edited 2 times in total.
KC
My Build: The Poet Creek Express Hybrid Foamie

Poet Creek Or Bust
Engineering the TLAR way - "That Looks About Right"
TnTTT ORIGINAL 200A LANTERN CLUB = "The 200A Gang"
Green Lantern Corpsmen
User avatar
KCStudly
Donating Member
 
Posts: 9612
Images: 8169
Joined: Mon Feb 06, 2012 10:18 pm
Location: Southeastern CT, USA
Top

Re: The Poet Creek Express - Foamie Hybrid

Postby GPW » Sun Jun 30, 2013 5:53 am

Fit and finish , it’s always the attention to the little details that make it Good ... or EXCELLENT !!! :thumbsup: 8) :D
There’s no place like Foam !
User avatar
GPW
Gold Donating Member
 
Posts: 14911
Images: 546
Joined: Thu Feb 09, 2006 7:58 pm
Location: New Orleans
Top

Re: The Poet Creek Express - Foamie Hybrid

Postby Mary C » Sun Jun 30, 2013 8:02 am

KC you are doing such a great job, I wish I had the patience and the skills and the work area you have. I would probably do mine the same way but since I don't have any of that I will have to go with put it together the best way and do it in a hurry. I cant wait to see yours in person.

Mary C. :)
User avatar
Mary C
1000 Club
1000 Club
 
Posts: 1776
Images: 473
Joined: Mon Oct 15, 2012 6:29 pm
Location: Waco, Georgia
Top

Re: The Poet Creek Express - Foamie Hybrid

Postby KCStudly » Sun Jun 30, 2013 8:51 am

Thank you Mary and GPW.

Without the "use of the hall" that Karl has afforded me there is no way that I would have been able to drag this project out so long. I would have never be able to spend time on the details. Even if I had emptied my small 2-bay garage of all my other hobbies (and junk) I'm not sure it would be happening.

Best friend ever.
Last edited by KCStudly on Fri Feb 21, 2014 8:59 pm, edited 1 time in total.
KC
My Build: The Poet Creek Express Hybrid Foamie

Poet Creek Or Bust
Engineering the TLAR way - "That Looks About Right"
TnTTT ORIGINAL 200A LANTERN CLUB = "The 200A Gang"
Green Lantern Corpsmen
User avatar
KCStudly
Donating Member
 
Posts: 9612
Images: 8169
Joined: Mon Feb 06, 2012 10:18 pm
Location: Southeastern CT, USA
Top

Re: The Poet Creek Express - Foamie Hybrid

Postby GPW » Sun Jun 30, 2013 9:17 am

Sure beats the heck outta’ working Outside , I can tell ya’ !!! :fan:
There’s no place like Foam !
User avatar
GPW
Gold Donating Member
 
Posts: 14911
Images: 546
Joined: Thu Feb 09, 2006 7:58 pm
Location: New Orleans
Top

Re: The Poet Creek Express - Foamie Hybrid

Postby KCStudly » Sun Jun 30, 2013 9:34 pm

Becky and Lance were in my neck of the woods with their tear this weekend, but unfortunately we did not manage to connect. :( We both kept busy and I am looking forward to her report on their trip to Mystic. :thumbsup:

I hope she posts lots of pics of their trip. I hear that they had a good time at the wooden boat show. (Hope she doesn’t mind me mentioning that here. :FNP )

Okay, building on and another journey to Mecca.

Karl’s handy work; $500 worth of billable labor into custom bronze gate latches.
Image

I proceeded to glue the Wiremold toe boards onto the street side wall.
Image

Next on the agenda was correcting the hatch ribs to match the wall profiles. There were slight variations in the surfaces of the ribs due to twist in the biscuit joint alignment (I have since learned how to adjust the shoe on my biscuit slot cutter). I started by fairing the joints using the small matchbox plane.
Image

By keeping the blade very sharp, and setting the depth of cut very slight, I was able to shave the relatively hardwood of the Red Grandis (BTW, I love this stuff… it is beautiful… thanks again GPW for the tip :thumbsup: ).

Then, when needed, I hit it with the small hand block and 100 grit.
Image

Then 100 grit on the RO palm sander.
Image
The purple 3M paper has a tacky back and the RO sander has a felt pad, so I patted the back of the paper in fine sawdust first to take the tack off and keep it from pulling up the felt.

Do that routine 16 times (2 joints per rib x 2 sides per rib x 4 ribs), plus sand both sides, and the inside exposed edge to remove router chatter and some slight variations from the template and there goes most of the 6 hrs that I put in today. :?

At some point I pulled the clamps and tape off of the toe boards, ran the router along the bottom of the wall sill to fair off the door flange, and knocked that all down with the 220 grit on the small block.

If I haven’t made it clear, the “small block” is a piece of 1x2 hard oak that is just the right length to take a quarter sheet of sandpaper wrapped around it, and fits nicely in the palm of my hand. It has become an extension of my arm on this project and I use it more than any other tool (see rib pic above).

After sanding the first rib down so that the router would pass neatly over the joints I aligned the bottom half or so to the street side wall, but shifted up by about 1/8 inch. This left the top half or so running wild about 1/8 to 3/16 of an inch, making up for the middle that would have been uncovered. Then I ran the router over the top part (made a few passes on the thicker parts) with the bottom bearing flush cutter to match the wall.

Here is the misalignment at the top needed to cover the wall. The loose block bridging the bulkhead dado is just a spacer to give the router something to rest on to start the cut.
Image

And here it is looking much better in the middle after the adjustment.
Image

Next I prepped the second rib, but rather than try to match it to the wall again, and risk not having it aligned to the first one, I stacked the two ribs together, aligned, clamped, and routed the second one to match the first.

Here they are both stacked up on the wall showing good alignment at the bottom…
Image

… top…
Image

… and middle.
Image

I smoothed the other two ribs off, but, at Karl’s suggestion, will match those to the curbside wall. I am pretty sure that the walls are substantially the same, having used the CNC template, but it can’t hurt to check.

Everything is fitting much better now and I am really proud at how nicely the ribs should present when finished. I need to decide how I am going to finish the Red Grandis to complement the Okoume and maple. I have Red Grandis in the hatch ribs, and am planing on using it for the light switch spacer blocks and for the pillow light mounting blocks. Maybe celebrate the red with some of that crazy raspberry colored dye that I was testing earlier? :thinking: :roll: :frightened:
KC
My Build: The Poet Creek Express Hybrid Foamie

Poet Creek Or Bust
Engineering the TLAR way - "That Looks About Right"
TnTTT ORIGINAL 200A LANTERN CLUB = "The 200A Gang"
Green Lantern Corpsmen
User avatar
KCStudly
Donating Member
 
Posts: 9612
Images: 8169
Joined: Mon Feb 06, 2012 10:18 pm
Location: Southeastern CT, USA
Top

Re: The Poet Creek Express - Foamie Hybrid

Postby GPW » Mon Jul 01, 2013 7:16 am

Dude !!! It’s looking “killer” , all the parts ... But Please prop that stuff up and give us some 3D... something to drool about ... Sorry , just anxious to see More .. 8) Getting overly excited !!!
That red grandis is Nice eh !!! Getting ready to make a guitar out of a piece of it .... seems very much like Mahogany in a way ...lots cheaper , maybe nobody knows about it yet so it’s not “poplar:lol:
There’s no place like Foam !
User avatar
GPW
Gold Donating Member
 
Posts: 14911
Images: 546
Joined: Thu Feb 09, 2006 7:58 pm
Location: New Orleans
Top

Re: The Poet Creek Express - Foamie Hybrid

Postby aggie79 » Mon Jul 01, 2013 9:17 am

GPW wrote:Dude !!! It’s looking “killer” , all the parts ... But Please prop that stuff up and give us some 3D... something to drool about ... Sorry , just anxious to see More .. 8) Getting overly excited !!!


I was going to say that makes two of us, but I know there are many more following your fine build, KC. Keep her going!
Tom (& Linda)
For build info on our former Silver Beatle teardrop:
Build Thread

93503
User avatar
aggie79
Super Duper Lifetime Member
 
Posts: 5405
Images: 686
Joined: Tue Aug 07, 2007 5:42 pm
Location: Watauga, Texas
Top

Re: The Poet Creek Express - Foamie Hybrid

Postby Wolffarmer » Mon Jul 01, 2013 10:20 am

IS IT DONE YET? IS IT DONE YET? IS IT DONE YET?

:lol: :lol:

I just came in from welding on mine for a few minutes. First time I done anything since late may. Now it is to hot to do anything.

:lol: :lol: Going to take me a long long time at this rate.

Randy
"these guys must be afraid of the dark"
User avatar
Wolffarmer
Donating Member
 
Posts: 4612
Images: 309
Joined: Wed May 02, 2007 1:32 pm
Location: Idaho Rupert
Top

PreviousNext

Return to Foamies

Who is online

Users browsing this forum: No registered users and 3 guests