Bread-loaf build thread

Canvas covered foamies (Thrifty Alternatives...)

Moderator: eaglesdare

Re: Bread-loaf build thread

Postby GPW » Sat May 30, 2015 5:44 am

That Rainy time of year .... same for us too ... :rainy:
There’s no place like Foam !
User avatar
GPW
Gold Donating Member
 
Posts: 14912
Images: 546
Joined: Thu Feb 09, 2006 7:58 pm
Location: New Orleans

Re: Bread-loaf build thread

Postby tagalong » Sat May 30, 2015 11:48 am

Looking good. Can't wait to start my build.

FYI, there are some lock nuts that are reusable called FujiLock nuts. AFAIK, they don't come in wingnut though.
Roll Tide Roll!!!
User avatar
tagalong
Teardrop Inspector
 
Posts: 6
Joined: Tue Apr 28, 2015 5:22 pm
Location: Rome, GA. USA

Re: Bread-loaf build thread

Postby Fred Trout » Sat May 30, 2015 6:32 pm

Thanks, tagalong, yeh, I waited 4 years - I could have been camping in one by now :x

More snail's rate progress:
Attachments
Prepped for fairing & sanding (passenger side).jpg
Have not decided if Foam Door is in the plan or not
Prepped for fairing & sanding (passenger side).jpg (99.04 KiB) Viewed 1058 times
Prepped for fairing & sanding (driver's side).jpg
fairing & canvas tomorrow / Monday
Prepped for fairing & sanding (driver's side).jpg (93.14 KiB) Viewed 1058 times
Bulkhead slot routed.jpg
routed 2 of 4 sides of the bulkhead dadoes
Bulkhead slot routed.jpg (178.87 KiB) Viewed 1058 times
User avatar
Fred Trout
The 300 Club
 
Posts: 396
Joined: Fri May 08, 2015 4:30 pm
Location: SW Montana
Top

Re: Bread-loaf build thread

Postby Fred Trout » Sun May 31, 2015 3:22 pm

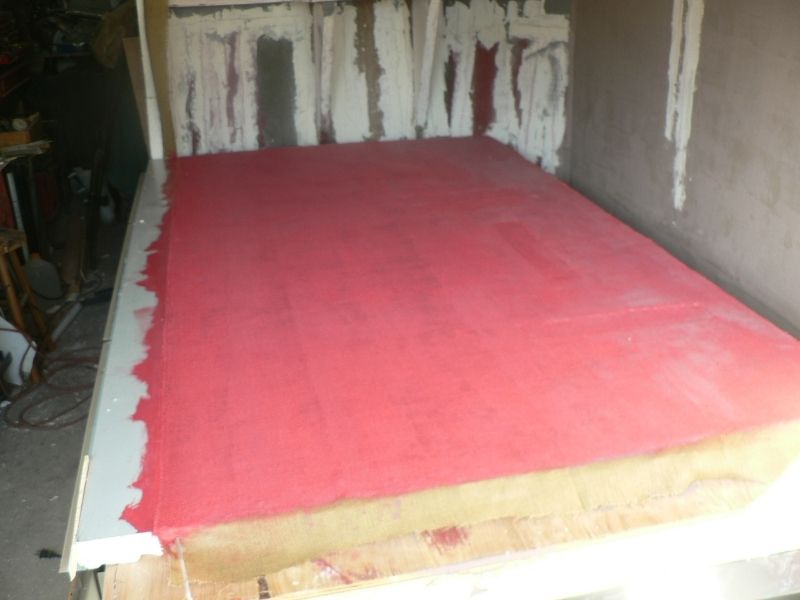
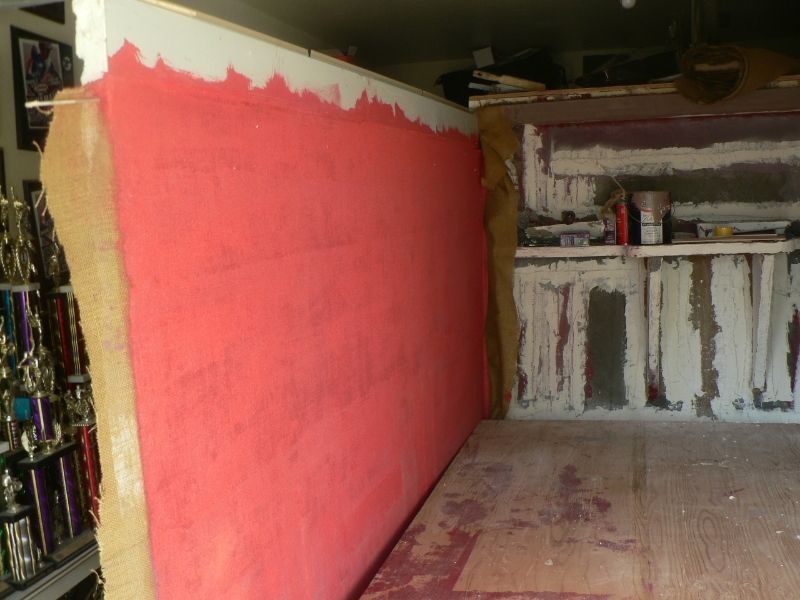
Finished canvassing the inside of the passenger side panel. Hope it sticks well. Off to use "the mix" on the OSB galley bulkhead. This was from a Harbor Freight tarp that went through the wash. I did not like how it puckered & wrinkled along the seams but it went on the foam easily enough.

Applied a thick coat of TB II to foam, unrolled the canvas on top, rubbed it smooth with my hand & plastic wallpaper thingee. Then a light spritz with a water spray bottle, applied a thick coat of TB II on top of the canvas, squeegeed the canvas smooth with the plastic wallpaper thingee, geting a nice bead of thinned glue expressed to roll along the canvas. Went over it all a few minutes later to smooth the surface all out.
Attachments
First canvas job - still fresh.jpg
First canvas job - still fresh.jpg (116.29 KiB) Viewed 1026 times
User avatar
Fred Trout
The 300 Club
 
Posts: 396
Joined: Fri May 08, 2015 4:30 pm
Location: SW Montana
Top

Re: Bread-loaf build thread

Postby KCStudly » Sun May 31, 2015 5:48 pm

Looks good. Will you trim it flush to the edges or do you plan to trim wide and wrap around the edges? If the later, what is your take on errant glue stiffening the canvas around the edge, and how will you deal with that?

This is one of my concerns, as I plan on leaving a small flap from wall to roof, and then gluing that down in a separate operation; and again from roof to wall and gluing that in a separate operation once the main canvas is secure. So whether it is better to hold the glue back from the edges a little and try to force some glue down under when folding the flap, or to go straight to the edge as evenly as possible but not making the edge too stiff that it wants to hold the canvas up when trying to wrap it over a smooth radius.
KC
My Build: The Poet Creek Express Hybrid Foamie

Poet Creek Or Bust
Engineering the TLAR way - "That Looks About Right"
TnTTT ORIGINAL 200A LANTERN CLUB = "The 200A Gang"
Green Lantern Corpsmen
User avatar
KCStudly
Donating Member
 
Posts: 9613
Images: 8169
Joined: Mon Feb 06, 2012 10:18 pm
Location: Southeastern CT, USA
Top

Re: Bread-loaf build thread

Postby dales133 » Sun May 31, 2015 6:37 pm

KCStudly wrote:Looks good. Will you trim it flush to the edges or do you plan to trim wide and wrap around the edges? If the later, what is your take on errant glue stiffening the canvas around the edge, and how will you deal with that?

This is one of my concerns, as I plan on leaving a small flap from wall to roof, and then gluing that down in a separate operation; and again from roof to wall and gluing that in a separate operation once the main canvas is secure. So whether it is better to hold the glue back from the edges a little and try to force some glue down under when folding the flap, or to go straight to the edge as evenly as possible but not making the edge too stiff that it wants to hold the canvas up when trying to wrap it over a smooth radius.

That is exactly what I was wondering.
I'd imagine the glue would make the canvas overhang difficult to deal with.
User avatar
dales133
4000 Club
4000 Club
 
Posts: 4605
Images: 1
Joined: Mon Oct 13, 2014 5:26 pm
Top

Re: Bread-loaf build thread

Postby Fred Trout » Sun May 31, 2015 7:14 pm

Good questions but I have no complete answers yet. Right now I will be happy if the canvas stays stuck to the wall. :shock:

- Once it's dry I will trim off the floor joint overlap; there is no need for that particular flap since I will be using GG & dry-wall screws to mount the wall to the floor; Still debating if I will put a corner molding or 1x2 at the foot of the wall or just leave it bare. The front canvas overlap is too small to be useful & will be trimmed off at the edge.

- will probably trim off the door opening at the wall-edge since I will be using flashing around the door (see ghcoe #1 thread) like George's foamie.

- will see if I can use the existing flaps on the top & rear to overlap those adjacent foam/panel corners. I will be sure to let you know if it works and if there are problems. I will also be canvassing the roof on the flat, so I have another chance to use a larger flap while the glue is still tacky.

- will not use any flaps to cover the 2" panel edges since there will be foam panels or flashing to be GGed/GSed/Grippered to those edges.

By the way, the Titebond II stays wet for a considerable time (30 - 60 mins) after application with the technique I used, so one could apply, assemble panels in place, and continue around the corner with no problem as far as open time for the glue. BTW, there is only a very small edge of the flap, perhaps 1/4 to 1/2 inch wide of canvas with glue in it. I suspect it will not be a huge problem although it may look like hell if it will not sit flat.
User avatar
Fred Trout
The 300 Club
 
Posts: 396
Joined: Fri May 08, 2015 4:30 pm
Location: SW Montana
Top

Re: Bread-loaf build thread

Postby Fred Trout » Sun May 31, 2015 7:32 pm

Here is an edge closeup with the best tool size for glue-up & smoothing out the canvas. I think quarter round molding would over any ugly corner issue.

Edit: I used about 1/3 - 1/2 gallon of Titebond II on this one panel. I see purchasing a couple to several gallons of Titebond II in my future - kinda spendy.
Attachments
Canvas edge and wallpaper thingee.jpg
Canvas edge and wallpaper thingee.jpg (117.18 KiB) Viewed 987 times
User avatar
Fred Trout
The 300 Club
 
Posts: 396
Joined: Fri May 08, 2015 4:30 pm
Location: SW Montana
Top

Re: Bread-loaf build thread

Postby KCStudly » Sun May 31, 2015 8:33 pm

Thanks for the added details.

For a curved roof, others have indicated that it is better to glue the main flat part of a panel first, to allow a nice clean uniform trim of the flat after the canvas is fixed. That way a reference line can be made on the trim line, it can be sized along the line with plain white glue (to prevent fraying when cut and so that it will dissolve again later), cut along the line, then be able to wrap the edge without worrying about creating wrinkles in or moving the main panel canvas as one might if trying to do it all at once.

IIRC (but am not sure) it was the Desert Moose build that first employed these techniques and resulted in a very clean canvas job.
KC
My Build: The Poet Creek Express Hybrid Foamie

Poet Creek Or Bust
Engineering the TLAR way - "That Looks About Right"
TnTTT ORIGINAL 200A LANTERN CLUB = "The 200A Gang"
Green Lantern Corpsmen
User avatar
KCStudly
Donating Member
 
Posts: 9613
Images: 8169
Joined: Mon Feb 06, 2012 10:18 pm
Location: Southeastern CT, USA
Top

Re: Bread-loaf build thread

Postby Fred Trout » Sun May 31, 2015 10:31 pm

Several people have commented on the difficulty of canvassing the interior after it's all assembled so I figure it will be better to do most of it on the flat anyway.

After lifting a couple of the edges, I think I will just trim them ALL off at the edge of the panel except the galley back. I can do the overlap thing on the later panels as I assemble the roof panels to the wall, etc. There is not all that much canvas to be utilized on any of the edges except the galley back anyway. I don't see the need to overlap any of these with this first panel and the galley back interior will not be visible unless you duck inside, so that can look like crap without anybody noticing :R

I will deal with the overlaps as I get better at doing the canvas but it was not all that hard to get smooth as long as what's underneath is smooth - jury is still out about them sticking to the primer on the foam at this point.
User avatar
Fred Trout
The 300 Club
 
Posts: 396
Joined: Fri May 08, 2015 4:30 pm
Location: SW Montana
Top

Re: Bread-loaf build thread

Postby GPW » Mon Jun 01, 2015 5:46 am

Totally agree about covering on the flat , especially the insides... so much easier, especially the overhead. . Covering is always a tricky job if you’ve never done it before. Patience is the key .

We’d like to bring up a point . In the past we’ve known crafters who get a cracked antique' finish by painting over a freshly glued (elmers) surface . Although we’ve had no problems , I really believe the best way to glue the covering down is to use a just slightly thinned glue (T2) as a base on the foam, then pressing /smoothing the dampened (spray bottle ) fabric down . (If you work on the Flat, you can thin the glue even more up to 50/50 ) Then let that dry and cure (24 hours for T2 ) , and use PRIMER on the top , not another coat of glue . Be sure the primer “sizes” (sinks in thoroughly into the fibers) the canvas properly , then you can sand and re- prime , or apply the outer paint coat (s) . I’ve been painting on canvas since 1968, and have only had one failure when putting acrylic(latex) paint over oil paint .
Note: It is very important to canvas longevity that the fibers of the canvas be THOROUGHLY saturated/encapsulated with either glue or paint to provide the maximum in waterproofing , eliminating the main chance of the dreaded Rot . Just as we’d want to thoroughly “WET” a fiberglass surface , so the same with canvas too.
We had some really THICK 18oz. canvas on the FS which really needed a “sizing coat“ first before adding the primer. 50/50 coat of glue really sinks in to the inner fibers before priming. ;)

Be aware that a wet canvas job will shrink as it dries ... so allow a little extra material and give it some time before you cut the edges... pre-washing beforehand helps , but when wet , you pull it for smoothing , and then it still shrinks back ... :roll:

For practice , you can cover a foam ice chest first ... same principle , and you end up with a nice cooler too ... :beer:
There’s no place like Foam !
User avatar
GPW
Gold Donating Member
 
Posts: 14912
Images: 546
Joined: Thu Feb 09, 2006 7:58 pm
Location: New Orleans
Top

Re: Bread-loaf build thread

Postby GPW » Mon Jun 01, 2015 6:00 am

Once you learn How to cover things , it’s really Fun . And can make all the difference between a Good looking trailer , and one that’s not so much. ;)
There’s no place like Foam !
User avatar
GPW
Gold Donating Member
 
Posts: 14912
Images: 546
Joined: Thu Feb 09, 2006 7:58 pm
Location: New Orleans
Top

Re: Bread-loaf build thread

Postby Fred Trout » Mon Jun 01, 2015 5:59 pm

I am happy to report that the TBII soaked canvas is sticking good to the gripper coated foam by in large. I missed a couple of small spots - like fingertip size near one edge that I noticed as I was trimming off the extra canvas. Best tool for removing glue soaked canvas along edge was a steak knife but scissors, bare hacksaw blade, were decent and box cutter was worse than useless. That job and doing the overlap would likely be easier before the glue hardens. No shrinking of the pre-washed HF tarp was seen at all - it stayed put everywhere.

Other side panel has now been faired - needs some sanding and it gets it's canvas coating inside tomorrow. Cut the two flat roof panels to size (48x53) and the roof dado routed. Shell assembly will start when I canvas the routed roof panel. I am looking forward to something that actually looks like a foamie :D
User avatar
Fred Trout
The 300 Club
 
Posts: 396
Joined: Fri May 08, 2015 4:30 pm
Location: SW Montana
Top

Re: Bread-loaf build thread

Postby RRJR » Mon Jun 01, 2015 9:48 pm

Fred Trout wrote:Here is an edge closeup with the best tool size for glue-up & smoothing out the canvas. I think quarter round molding would over any ugly corner issue.

Edit: I used about 1/3 - 1/2 gallon of Titebond II on this one panel. I see purchasing a couple to several gallons of Titebond II in my future - kinda spendy.


I began using Titebond ll and canvas and quickly realized the same thing. It would have cost me a small fortune to use TBll as all my foam was cut into 2' x 8' pieces before I got it and I had to glue it back into 4' x 8' sheets.

I have had great results using Great Stuff for glue and for an alternative to TBll and canvas I've been using 10oz burlap and closeout/oops paint along with several partial gallons of paint I got for free.

Image

Image

http://i1337.photobucket.com/albums/o680/rrjr69/P1150442_zpsyfjyityn.jpg
RRJR
Teardrop Builder
 
Posts: 42
Joined: Sun Nov 23, 2014 1:37 pm
Top

Re: Bread-loaf build thread

Postby Fred Trout » Mon Jun 01, 2015 11:36 pm

an alternative to TBll and canvas I've been using 10oz burlap and closeout/oops paint


Thanks for the suggestion. I love your builds and your skill and make it work techniques have taught me a lot. :applause:


Considering ....

Are you saying you use paint as the glue to hold the down the burlap ? How do you decide which paint to get ? NMMarauder tried using some paint and had to go back to fix bubbles. Around here, new primer & paint is at best almost as expensive as TBII although one brand of PVA primer would save 7-8 bux a gallon. With oops paint your selection criteria, it seems like a crap-shoot if you are going to get something that works. Experimenting with various kinds of paint would be kinda expensive by itself if it does not work and I want to get camping in this ugly loaf this summer :R

Hmmm, it seems like too much delay to and extra work to save so few bux. The long open time of the method I used has benefits - can use that to my advantage to do the roof overlaps on the interior walls when I canvas them on the flat & then immediately go to assemble the roof mode. I figure I am saving 7-10 grand by not buying a commercial product new or used , so I think I can spring for $100 :lol:

I tried to fair surfaces with GS but if you touch it while it's wet, it makes a huge mess and does not play nicely thereafter. Fortunately it's lumpies are easy to cut & sand away but it's great for filling voids. Might use it to attach the roof to the walls if I need to. I don't use all that much TBII for gluing anything but canvas - that's what takes huge amounts to do a good glue-up. I use small amounts of GG to glue the foam-edge to the wood floor & have a tiny bottle that will be all I need.

Appreciate the thought, but hopefully I will get more efficient at this and use less that way.
User avatar
Fred Trout
The 300 Club
 
Posts: 396
Joined: Fri May 08, 2015 4:30 pm
Location: SW Montana
Top

PreviousNext

Return to Foamies

Who is online

Users browsing this forum: No registered users and 37 guests