The Astroliner

...ask your questions in the appropriate forums BUT document your build here...preferably in a single thread...dates for updates, are appreciated....

Crapper Time

Postby Atomic77 » Thu Sep 18, 2014 7:58 pm

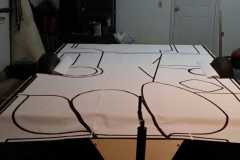
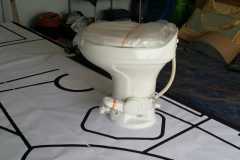
We drew out the floor plan with a CAD program and printed it to scale. By doing this we could locate exactly where the crapper needs to go. Luckily our scientific bucket method of positioning the black water tank worked out great, as the crapper has to sit directly over the hole in the tank. The alignment was great and we got lucky...er... I mean we have skills. :eyebrows2:

124413124415124416124421124457124461
Last edited by Atomic77 on Fri Sep 19, 2014 11:10 am, edited 1 time in total.
Michael

"The Strength is in the Sum of the Parts..."

The Astroliner

Follow The Astroliner Blog Here!

Check out our YouTube video
User avatar
Atomic77
1000 Club
1000 Club
 
Posts: 1463
Images: 309
Joined: Tue Oct 08, 2013 5:29 pm
Location: Fort Wayne Indiana

Wheel Tubs and Diamond Plate

Postby Atomic77 » Thu Sep 18, 2014 8:02 pm

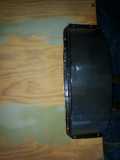
I looked everywhere for some inexpensive wheel tubs. Yeah right. I found some but they were anything but inexpensive. I thought about bending up some sheet metal, but the ones on the old Palomino were galvanized and rusted through. So I thought, I'm a boat builder. Why not just mock up some molds, wax them up and lay up some carbon fiber tubs. So I did. Not beautiful or anything, but they will be hidden, functional and ultra strong and light! Also, Carrie came up with the idea of Aluminum Diamond Plate so made a pattern and cut it to fit the tongue. Obviously from the picture you can tell she is excited about her purchase! It will also serve as a base for the tank box at some point in the future.

124433124454124456
Last edited by Atomic77 on Fri Oct 10, 2014 8:08 am, edited 2 times in total.
Michael

"The Strength is in the Sum of the Parts..."

The Astroliner

Follow The Astroliner Blog Here!

Check out our YouTube video
User avatar
Atomic77
1000 Club
1000 Club
 
Posts: 1463
Images: 309
Joined: Tue Oct 08, 2013 5:29 pm
Location: Fort Wayne Indiana

The frame is almost complete!!!

Postby Atomic77 » Thu Sep 18, 2014 8:15 pm

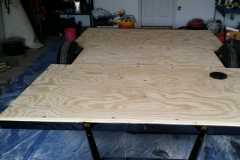
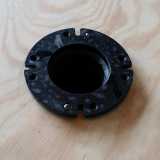
We picked out some really cool flooring and laid it down. Pretty simple installation. The Carbon Fiber wheel tubs are in place and the flange for the crapper is installed. All the tanks are functional and the Diamond Plate is down. We have installed the leveling jacks and they work really nice. Finally the frame is complete and we added our Name Plaque with our numbers. We're feeling a sense of accomplishment and we're ready to build some walls!!! At this point our build journal is completely up to date and very soon we will get the wall materials and have the plywood CNC machined to our drawings! It's getting pretty exciting now! Guess that's it for awhile! :thumbsup:


124427124425124426124424124428124430124431124432124429124453
Last edited by Atomic77 on Fri Sep 19, 2014 11:16 am, edited 1 time in total.
Michael

"The Strength is in the Sum of the Parts..."

The Astroliner

Follow The Astroliner Blog Here!

Check out our YouTube video
User avatar
Atomic77
1000 Club
1000 Club
 
Posts: 1463
Images: 309
Joined: Tue Oct 08, 2013 5:29 pm
Location: Fort Wayne Indiana
Top

Re: New Build... The Astroliner

Postby Atomic77 » Thu Sep 18, 2014 8:36 pm

Here ya go Tim... We race both boats and we just took the 1st and 2nd place podium spots in San Diego with these two boats! Thanks for asking!
Michael

124439124440
Michael

"The Strength is in the Sum of the Parts..."

The Astroliner

Follow The Astroliner Blog Here!

Check out our YouTube video
User avatar
Atomic77
1000 Club
1000 Club
 
Posts: 1463
Images: 309
Joined: Tue Oct 08, 2013 5:29 pm
Location: Fort Wayne Indiana
Top

Re: New Build... The Astroliner

Postby noseoil » Thu Sep 18, 2014 11:22 pm

Way cool pics, unlimited hydros are still fascinating to me. I still remember Bernie Little being accused of trying to corner the market on motors (before turbines were used), but that's a "few" years ago now.

Nice to have enough background in work to build a teardrop! Keep the posts coming for the build.
Build log: viewtopic.php?f=50&t=60248
The time you spend planning is more important than the time you spend building.........

137905
User avatar
noseoil
1000 Club
1000 Club
 
Posts: 1821
Images: 669
Joined: Sun Apr 27, 2014 8:46 am
Location: Raton, New Mexico, living the good life!
Top

Re: New Build... The Astroliner

Postby Atomic77 » Sat Sep 20, 2014 12:54 pm

Thank you noseoil... and you're right. It's good to have a few skills that I can put to use on a camper. It's definitely something different for me but we have high hopes of building something that is quality and functional.
Michael

"The Strength is in the Sum of the Parts..."

The Astroliner

Follow The Astroliner Blog Here!

Check out our YouTube video
User avatar
Atomic77
1000 Club
1000 Club
 
Posts: 1463
Images: 309
Joined: Tue Oct 08, 2013 5:29 pm
Location: Fort Wayne Indiana
Top

We Have Walls!

Postby Atomic77 » Fri Oct 03, 2014 11:19 pm

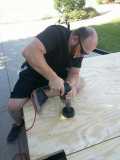
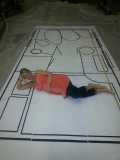
Well, maybe not walls yet, but all the material is cut and we are ready to start gluing and stapling all the pieces together! We are really excited to start building walls and seeing it begin to take shape!

124937124938124939
Michael

"The Strength is in the Sum of the Parts..."

The Astroliner

Follow The Astroliner Blog Here!

Check out our YouTube video
User avatar
Atomic77
1000 Club
1000 Club
 
Posts: 1463
Images: 309
Joined: Tue Oct 08, 2013 5:29 pm
Location: Fort Wayne Indiana
Top

Re: New Build... The Astroliner

Postby danlott » Sat Oct 04, 2014 2:35 am

You are making good progress. I like the profile and the door. Where did you find the door?

Dan
Hoplite Traveler Build thread
Image Image
Life is what happens to you while you're busy making other plans.
User avatar
danlott
Donating Member
 
Posts: 874
Images: 264
Joined: Fri Mar 06, 2009 2:18 pm
Location: Winnemucca, Nevada
Top

Re: New Build... The Astroliner

Postby Atomic77 » Sat Oct 04, 2014 6:27 am

Thank you Dan! I got the door from Little Guy Worldwide. The bad thing about the pictures is they don't reflect the size well. It's much bigger than it looks. It's 6'10" at the tallest point and 14' long.
Michael

"The Strength is in the Sum of the Parts..."

The Astroliner

Follow The Astroliner Blog Here!

Check out our YouTube video
User avatar
Atomic77
1000 Club
1000 Club
 
Posts: 1463
Images: 309
Joined: Tue Oct 08, 2013 5:29 pm
Location: Fort Wayne Indiana
Top

Re: New Build... The Astroliner

Postby Atomic77 » Mon Oct 06, 2014 8:48 pm

I really made some progress today. I got the four wall sections stitched together, all the framing pieces in place and the entire inner wall sealed. I used West Systems with thickener on all the framing pieces for the glue, then sealed everything with West Epoxy. I also glassed all the seams to tie it all together. The walls are only 1" total thickness but with it all tied together and epoxied it's really strong and i'm excited about how light it is! Ready for wall number two!

125065125064
Michael

"The Strength is in the Sum of the Parts..."

The Astroliner

Follow The Astroliner Blog Here!

Check out our YouTube video
User avatar
Atomic77
1000 Club
1000 Club
 
Posts: 1463
Images: 309
Joined: Tue Oct 08, 2013 5:29 pm
Location: Fort Wayne Indiana
Top

Re: New Build... The Astroliner

Postby danlott » Mon Oct 06, 2014 11:35 pm

So you are using 1/8 inch plywood for the walls? I used 1/4 inch for mine and the walls ended up being fairly heavy, would use 1/8 if I do it again. Maybe 1/4 outside and 1/8 inside.

Dan
Hoplite Traveler Build thread
Image Image
Life is what happens to you while you're busy making other plans.
User avatar
danlott
Donating Member
 
Posts: 874
Images: 264
Joined: Fri Mar 06, 2009 2:18 pm
Location: Winnemucca, Nevada
Top

Re: New Build... The Astroliner

Postby Atomic77 » Tue Oct 07, 2014 7:27 am

That's correct. Technically the interior and exterior walls are 3/16" and the framing is 23/32". I was told 1" walls are too thin but I'm used to building race boats that have to be light. The strength comes from the sum of the parts.
Michael

"The Strength is in the Sum of the Parts..."

The Astroliner

Follow The Astroliner Blog Here!

Check out our YouTube video
User avatar
Atomic77
1000 Club
1000 Club
 
Posts: 1463
Images: 309
Joined: Tue Oct 08, 2013 5:29 pm
Location: Fort Wayne Indiana
Top

Re: New Build... The Astroliner

Postby noseoil » Tue Oct 07, 2014 9:20 am

Same approach I'm using for my build. The 3/4" plywood "skeleton" just serves to separate the skins. The 1/8" skins direct loads across the entire panel and spread it into the frame, and then the frame transfers these loads into the other skin on the inside, where it is sent back out through the framework again in a different direction and to different places. Think of the pounding a boat at speed is taking, then think about how that localized energy is dissipated throughout the structure, to spread the loads around and absorb them elsewhere. The trailer frame, skins, deck & panels are doing the same thing, but with much smaller loads (hopefully).
Build log: viewtopic.php?f=50&t=60248
The time you spend planning is more important than the time you spend building.........

137905
User avatar
noseoil
1000 Club
1000 Club
 
Posts: 1821
Images: 669
Joined: Sun Apr 27, 2014 8:46 am
Location: Raton, New Mexico, living the good life!
Top

Re: New Build... The Astroliner

Postby Atomic77 » Tue Oct 07, 2014 10:21 am

Yep! That is the theory. I researched other builds for over a year before I took what I learned from others and my boat building experience and came up with a plan. I think the one constant with the majority of builds I looked at was they were overbuilt. And heavy. I try to think of the Piper Cub my dad built... balsa and canvas. Or a boat. ;)
Michael

"The Strength is in the Sum of the Parts..."

The Astroliner

Follow The Astroliner Blog Here!

Check out our YouTube video
User avatar
Atomic77
1000 Club
1000 Club
 
Posts: 1463
Images: 309
Joined: Tue Oct 08, 2013 5:29 pm
Location: Fort Wayne Indiana
Top

Re: New Build... The Astroliner

Postby OP827 » Tue Oct 07, 2014 9:19 pm

You do a really nice work with your build :thumbsup: . I have two questions if you could elaborate on your celotex installation details, please:
1. You have mentioned 1/2 inch foil wraped celotex for yuor floor insulation, is that expanded styrofoam with reflective mylar film?
2. Also, did you put the celotex foam insulation on top of the 5/8 plywood and then that real nice wood flooring on top of the foam?
Thanks
Oleg
User avatar
OP827
Donating Member
 
Posts: 1570
Images: 406
Joined: Fri Apr 25, 2014 7:27 pm
Location: Bruce County Ontario
Top

PreviousNext

Return to Build Journals

Who is online

Users browsing this forum: No registered users and 3 guests