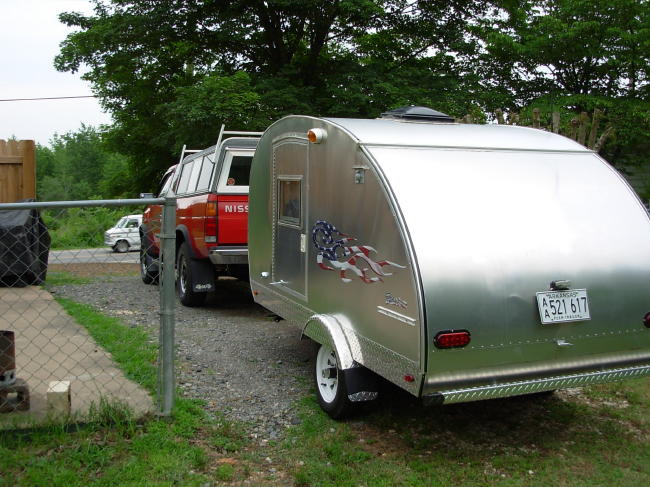
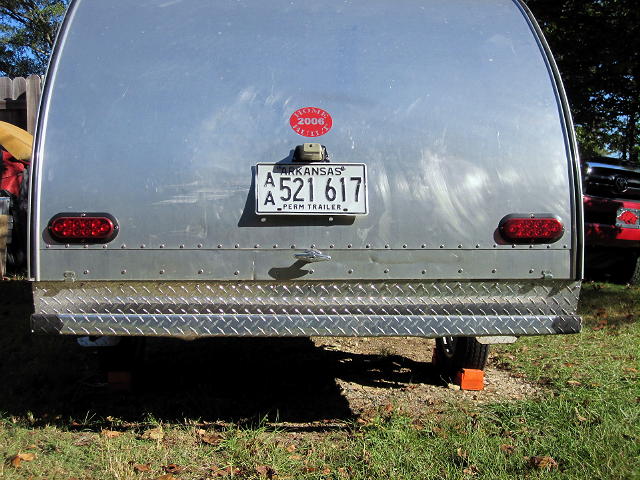
When I was building my TD in 2006 I couldn't find any aluminum sheets larger than 4x10' so I built it, planning all along to use 2 pieces for the hatch. I chose to use the narrow piece (approx 6" wide) at the bottom & it worked great. After construction of the hatch framework I covered the exterior with a double layer of 1/8" Luan. The 0.040" aluminum is 'floated' with only fastenings being the trim, the 'better than hurricane' hinge, & the screws/Adhesive/Sealer at the narrow strip joint. I'd added a 2x4 at the location of the 'T' lock mechanism & cross braces between the spars so there was plenty of support for the screws. I was very happy that I'd built it like that when I was rear ended Labor Day weekend of 2010. The damage was mainly cosmetic with minor damage to the trailer chassis, the bumper, & the lower trim piece of aluminum under the hatch. After straightening the chassis, it was a small matter to remove the narrow strip from the hatch, straighten it, reinstall, & then replace the trim strip under the hatch with another strip of 'diamond tread' which is a little heavier than the 0.040" that I used originally.
When I built the hatch I used 2 thin beads of PL adhesive/sealer between the 2 pieces of 0.040", drilled pilot holes & added the screws. After all the screws were in place, I removed each screw individually & squirted a little adhesive/sealer in the hole & replaced each screw. After the rear end collision, separating the 'joint' to straighten the narrow piece was a real bear but still better than removing the skin from the entire hatch... I didn't do a perfect job of straightening but it ain't bad & hardly noticeable unless you're lookin' for it.
Original look
collision damage
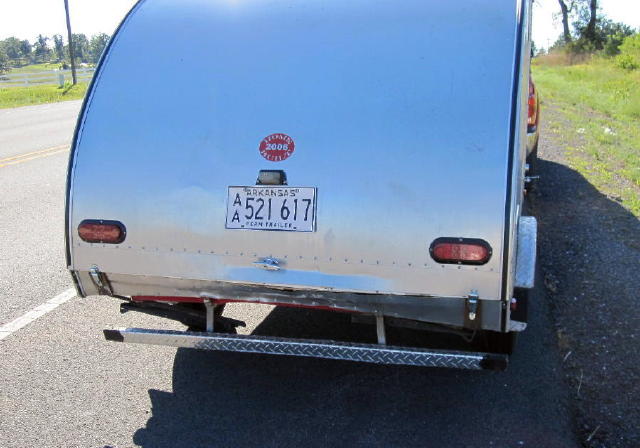
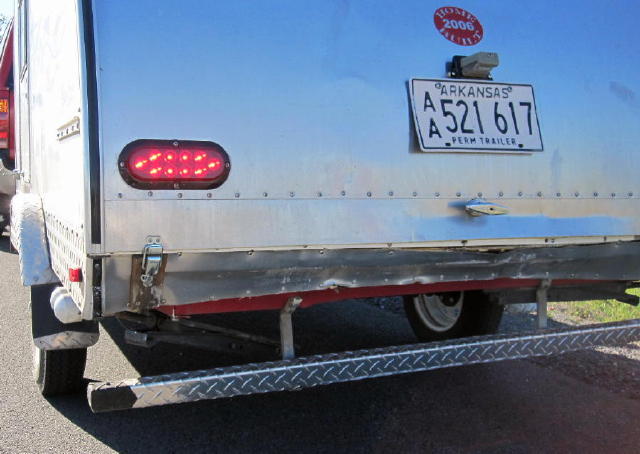
repair
 . The overall thickness of my hatch with 3/4" x 1 5/8" plywood framing and 1/8" birch ply inside and out ,is of course 1 3/4". It is basically the same shape as a Grumman 2 hatch 5' wide 53" tall around the curve. My concern is that it may put too much stress on the hatch causing it to start distorting . Any ideas would be very helpful