M116A3 Build

...ask your questions in the appropriate forums BUT document your build here...preferably in a single thread...dates for updates, are appreciated....

Re: M116A3 Build

Postby lfhoward » Wed Aug 05, 2015 8:44 pm

I picked up 8 sheets of pine plywood, 10 pine 1x3-8's, 10 pine 1x2-8's, a gallon of Titebond II, pocket hole screws, and 10 clamps. That's enough materials to get me started on the walls! :thumbsup: There will be more pics as it starts coming together!
My off-road camper build on an M116A3 military chassis:
http://www.tnttt.com/viewtopic.php?f=50&t=62581
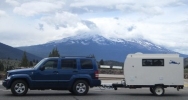
Tow vehicle: 2008 Jeep Liberty with a 4 inch lift.
User avatar
lfhoward
1000 Club
1000 Club
 
Posts: 1370
Joined: Wed Jan 22, 2014 6:10 pm
Location: Philadelphia, PA

Re: M116A3 Build

Postby S. Heisley » Wed Aug 05, 2015 9:47 pm

:SG :applause: :applause: Cheering you on! :applause:
User avatar
S. Heisley
Super Lifetime Member
 
Posts: 8813
Images: 495
Joined: Mon Sep 17, 2007 10:02 am
Location: No. California

Re: M116A3 Build

Postby lfhoward » Wed Aug 05, 2015 10:05 pm

Thanks, Sharon! :D
My off-road camper build on an M116A3 military chassis:
http://www.tnttt.com/viewtopic.php?f=50&t=62581
Tow vehicle: 2008 Jeep Liberty with a 4 inch lift.
User avatar
lfhoward
1000 Club
1000 Club
 
Posts: 1370
Joined: Wed Jan 22, 2014 6:10 pm
Location: Philadelphia, PA
Top

Re: M116A3 Build

Postby lfhoward » Wed Aug 12, 2015 9:15 pm

Started making a good amount of sawdust today. Ten, 8-foot long pine 1x3's are now in smaller pieces. I made most of the internal beams for the side walls, and drilled the ends of the boards for pocket hole screws.
My off-road camper build on an M116A3 military chassis:
http://www.tnttt.com/viewtopic.php?f=50&t=62581
Tow vehicle: 2008 Jeep Liberty with a 4 inch lift.
User avatar
lfhoward
1000 Club
1000 Club
 
Posts: 1370
Joined: Wed Jan 22, 2014 6:10 pm
Location: Philadelphia, PA
Top

Re: M116A3 Build

Postby lfhoward » Thu Aug 13, 2015 5:14 pm

Progress! Today with the help of my neighbor Tim, we got the wall skeletons up. The Kreg pocket hole jig came in super handy for this project. We also waterproofed the area where the wood contacts the metal using Silicone II weather sealer.

Image

Image

Image
Last edited by lfhoward on Sun May 13, 2018 2:47 pm, edited 2 times in total.
My off-road camper build on an M116A3 military chassis:
http://www.tnttt.com/viewtopic.php?f=50&t=62581
Tow vehicle: 2008 Jeep Liberty with a 4 inch lift.
User avatar
lfhoward
1000 Club
1000 Club
 
Posts: 1370
Joined: Wed Jan 22, 2014 6:10 pm
Location: Philadelphia, PA
Top

Re: M116A3 Build

Postby S. Heisley » Thu Aug 13, 2015 7:23 pm

:applause: The deck looks like it turned out really good! Your wood frame looks good, too. However, if you can undo and remove those sides, it's a lot easier to add the skins and insulation when the sides are laying flat. ....I don't remember seeing how you plan to wall-in your sides. :NC
User avatar
S. Heisley
Super Lifetime Member
 
Posts: 8813
Images: 495
Joined: Mon Sep 17, 2007 10:02 am
Location: No. California
Top

Re: M116A3 Build

Postby mikeschn » Thu Aug 13, 2015 7:31 pm

If the body of that trailer turns out as robust as the chassis, you've got yourself one heck of a bullet proof teardrop! :lol: :D

Mike...
The quality is remembered long after the price is forgotten, so build your teardrop with the best materials...
User avatar
mikeschn
Site Admin
 
Posts: 19202
Images: 475
Joined: Tue Apr 13, 2004 11:01 am
Location: MI
Top

Re: M116A3 Build

Postby lfhoward » Thu Aug 13, 2015 7:40 pm

Hi Sharon,
I found out that although the military trailer looks uniform and flat, it actually isn't... sort of like doing renovations on an old house. That meant I needed to build the walls in place so I could account for the trailer's bulges and dips. My blueprints were close, but there was a lot of minor modification with trimming and adding shims to make the walls straight. I wasn't sure I would be able to get everything to line up if I built it off the trailer or removed it and reinstalled later. I guess this is one of the challenges of building a teardrop on a used US Military trailer that has probably been to war vs. a red trailer kit that one can assemble and make sure is straight from the get-go! The sides are now permanently installed with silicone sealer, so I will hope my neighbor and I can figure out a good way to skin it with plywood in situ. Looking forward to Saturday!

And Mike... I hope it will be stout when it's all glued and screwed! It's going to be a 1/4 plywood sandwich over 1x3's, skinned with aluminum.
My off-road camper build on an M116A3 military chassis:
http://www.tnttt.com/viewtopic.php?f=50&t=62581
Tow vehicle: 2008 Jeep Liberty with a 4 inch lift.
User avatar
lfhoward
1000 Club
1000 Club
 
Posts: 1370
Joined: Wed Jan 22, 2014 6:10 pm
Location: Philadelphia, PA
Top

Re: M116A3 Build

Postby noseoil » Thu Aug 13, 2015 10:04 pm

You might look into the Home Delay underlayment (about 3/16" thick, I think). It's 4 X 8 sheets, usually very good veneer & water-resistant glue with very little in the way of core voids. It might save a little weight & money. You can use some PL Premium urethane adhesive & 5/8" staples to tack the side panel in place. The adhesive won't run & it's easy to put the panel in place this way. Since you will have an aluminum skin outside, it will be fine & plenty strong.

If you're doing insulation, make sure to layout the cuts with a magic marker before you skin one side of the wall. Have one person hold the sheet in place, mark from the other side & use a knife & straight edge for the cuts on a sheet of plywood or OSB. Even if you don't cut it & put it in right away, it's really fast & easy to mark it for later without having to do a bunch of tedious measuring for the cuts.

Looking good so far, I like the shape!
Build log: viewtopic.php?f=50&t=60248
The time you spend planning is more important than the time you spend building.........

137905
User avatar
noseoil
1000 Club
1000 Club
 
Posts: 1821
Images: 669
Joined: Sun Apr 27, 2014 8:46 am
Location: Raton, New Mexico, living the good life!
Top

Re: M116A3 Build

Postby S. Heisley » Fri Aug 14, 2015 12:56 am

noseoil wrote: You can use some PL Premium urethane adhesive & 5/8" staples to tack the side panel in place. The adhesive won't run & it's easy to put the panel in place this way. Since you will have an aluminum skin outside, it will be fine & plenty strong.


I'll put two cents in with what Noseoil is saying. With the walls upright, Titebond will run...a lot; and, you won't get as good of an adhesion as you would if they were flat. Since you have to work with the walls upright, it would be better to get some PL construction adhesive and use that.
User avatar
S. Heisley
Super Lifetime Member
 
Posts: 8813
Images: 495
Joined: Mon Sep 17, 2007 10:02 am
Location: No. California
Top

Re: M116A3 Build

Postby lfhoward » Sat Aug 15, 2015 6:32 pm

Thank you for the good advice, Noseoil and Sharon! I will definitely look into that tackier construction adhesive.

A little more progress today. We have a front wall frame!

Image

The front wall frame went a long way towards stabilizing the side walls. Once the rear wall frame is up, I will be able to cover it with a tarp and not worry about the wind snapping the walls from the wooden foundation on the trailer deck. It looks like I have a few more days without rain in the forecast, so the structure is safe from the elements for now!
Last edited by lfhoward on Sun May 13, 2018 2:47 pm, edited 2 times in total.
My off-road camper build on an M116A3 military chassis:
http://www.tnttt.com/viewtopic.php?f=50&t=62581
Tow vehicle: 2008 Jeep Liberty with a 4 inch lift.
User avatar
lfhoward
1000 Club
1000 Club
 
Posts: 1370
Joined: Wed Jan 22, 2014 6:10 pm
Location: Philadelphia, PA
Top

Re: M116A3 Build

Postby anon1 » Sun Aug 16, 2015 12:05 pm

I recently used the Home Depot underlayment and PL Pro to attach it to my 2x2 framing with it laying down flat.

One thing you might keep in mind is that the PL Pro is not as runny as glue and will not flatten out like glue will. After running a bead of the adhesive you might want to use a putty knife like tool and flatten&smear it out. If you leave it in a bead and then attached the panel to the framing it is likely to not smash out as much and create a little thicker wall then you had planned. Having a helper is good to work behind you as the bead goes down, as it starts to thicken up pretty quick.

I had good success by laying sheets of underlayment out good face down with factory edge to factory edge. Then putting the wall framing on top and tracing the voids onto the backside of the panels. Removed the framing, then used pieces of underlayment to glue "scabs" onto the joints between the panels where they wouldn't interfere with the framing. Applied the PL Pro to the panels in drawn out lines and set the framing back on and weighted it overnight.

The scabbed joints in the panels came out really really good with the only negative that I see is having to work with the foam insulation more to fit over the scabs.
anon1
Teardrop Advisor
 
Posts: 57
Joined: Tue Jan 28, 2014 4:38 pm
Top

Re: M116A3 Build

Postby lfhoward » Sun Aug 16, 2015 12:55 pm

Anon1, thank you for sharing your experience with PL Pro. It is good not to have to reinvent the wheel when it is time to put the exterior plywood on.

I was working outside this morning, but quit at about 1:30 because it's 95 degrees, humid, and there is an air quality alert outside. When I made a couple of cuts that were 1/2 inch short because I didn't measure the length correctly, I knew I wasn't feeling that great and It was time to pack it in. I might try again after I cool off and the temperature comes down this evening.

This morning I got most of the rear wall braces up, so the side walls are now anchored down nicely.
My off-road camper build on an M116A3 military chassis:
http://www.tnttt.com/viewtopic.php?f=50&t=62581
Tow vehicle: 2008 Jeep Liberty with a 4 inch lift.
User avatar
lfhoward
1000 Club
1000 Club
 
Posts: 1370
Joined: Wed Jan 22, 2014 6:10 pm
Location: Philadelphia, PA
Top

Re: M116A3 Build

Postby lfhoward » Sun Aug 16, 2015 7:40 pm

This afternoon I framed one of the "benches" that runs along the inside wall of the trailer (passengers side; driver's side will be built tomorrow). The bench frame is fastened and glued to the side wall plus the foundation, so the side wall skeleton is very solid now. I can shake the whole trailer on its suspension by pulling back and forth on the wall beams. This bodes well for its off-road-worthiness.
My off-road camper build on an M116A3 military chassis:
http://www.tnttt.com/viewtopic.php?f=50&t=62581
Tow vehicle: 2008 Jeep Liberty with a 4 inch lift.
User avatar
lfhoward
1000 Club
1000 Club
 
Posts: 1370
Joined: Wed Jan 22, 2014 6:10 pm
Location: Philadelphia, PA
Top

Re: M116A3 Build

Postby KCStudly » Sun Aug 16, 2015 8:40 pm

Just wait until you start skinning it.

Sum of the parts, baby. Sum of the parts. The strength of these things is all about good solid joinery and unit construction. Leave the heavy timbers for stationary construction. :thumbsup:
KC
My Build: The Poet Creek Express Hybrid Foamie

Poet Creek Or Bust
Engineering the TLAR way - "That Looks About Right"
TnTTT ORIGINAL 200A LANTERN CLUB = "The 200A Gang"
Green Lantern Corpsmen
User avatar
KCStudly
Donating Member
 
Posts: 9633
Images: 8169
Joined: Mon Feb 06, 2012 10:18 pm
Location: Southeastern CT, USA
Top

PreviousNext

Return to Build Journals

Who is online

Users browsing this forum: No registered users and 7 guests