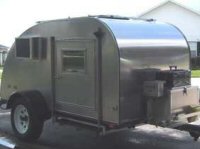
Window Install on Screw-less VHB trailer

Converting Cargo Trailers into TTTs

Window Install on Screw-less VHB trailer

Postby bartholins » Fri Oct 30, 2015 10:48 am

Hey all, I have one more question on planning my trailer build - The trailer I'm going with is the screw-less type with the panels VHB bonded... I know there's arguments both ways on whether this is a good idea or not vs screws, however, has anyone installed a window on a trailer like this that would require cutting the studs and siding? I know I could cut studs and siding at the same time and not worry about separating the panel, however, I'd like to put a 'header' to support the studs above the window which would obviously require cutting a bit more stud off than siding in order to fit the 'header' in. My only other option is to have them either frame before hand, or frame and do the window install. Thanks in advance for any thoughts or recommendations!

--Sam
bartholins
Teardrop Inspector
 
Posts: 7
Joined: Wed Oct 28, 2015 3:05 am

Re: Window Install on Screw-less VHB trailer

Postby Tomterrific » Fri Oct 30, 2015 11:50 am

This might not be a good suggestion for your windows but I framed my windows on the outside of the wall. I used 1x boards for the frame and glued them to the wall. I screwed the window flange into the frame. My walls are only 5mm thick.

Tom
Attachments
IMG_20150829_120317.jpg
You can see the window framing.
IMG_20150829_120317.jpg (109.23 KiB) Viewed 2519 times
Tomterrific
500 Club
 
Posts: 611
Images: 8
Joined: Thu Mar 26, 2015 3:18 pm
Location: Central Ohio

Re: Window Install on Screw-less VHB trailer

Postby CoventryKid » Fri Oct 30, 2015 7:07 pm

Sam:

My main concern when it came time to install my 3 windows was – where exactly do I want them? Do I add tubular headers as you are thinking and how easy is that to do – my trailer's ribs are 1" square aluminum. How to weld the rib and not affect the glued on siding was a concern. And what if I wanted to move a window in the final stages, even slightly?

When I insulated the trailer, I put 1" rigid insulation between the ribs then 5/8" plywood strips (3" wide) over each rib. I then added ½" insulation between the plywood strips. That gave me a thermal break and 1 ½" insulation.

So when it came time to install my windows, I used 3" plywood strips – 1" around the window to match the 1" alum. stud depth, and then 5/8" to overlap the 1" at each rib and at each corner. The corners ended up like a "lap" joint and the 5/8" over each rib gave me something to secure the whole "frame" to the trailer side. A combination of construction adhesive and screws has kept everything together.

Hope this helps!
Doug
Vancouver Island, BC

Image
GMC Savana Explorer Limited SE hightop conversion van
NEO NAVR 7x16 V-nose aluminum trailer now a comfortable travel trailer

Build: http://www.tusker-international.com/1-trlr-build.html
CoventryKid
Teardrop Master
 
Posts: 279
Images: 130
Joined: Mon Aug 05, 2013 3:48 pm
Location: Vancouver Island, BC
Top

Re: Window Install on Screw-less VHB trailer

Postby pirijodonny » Sat Oct 31, 2015 11:10 pm

Doug,

I have two questions for you. One about the window install and one about your bed on your build that you opted out of since you didn't need it in the end.
For cutting the opening for the window in the wall, how did you do it? The bracing seems to make sense and something I could do, but cutting the ribs and the outside wall makes me really, really nervous. As for the bed, I want to make queen bunk beds. The lower one will be a dinette that will convert to a queen bed, but the top will rise out of the way for meals and we can lower when we sleep. I started this idea when I was going to have a steel frame trailer. Now I am leaning towards an aluminum frame and I am wondering if it would support the queen bed Idea. Could you share what your plans were going to be for the bed?

Thanks,
Don
pirijodonny
Teardrop Inspector
 
Posts: 24
Images: 29
Joined: Sat Oct 17, 2015 3:42 am
Top

Re: Window Install on Screw-less VHB trailer

Postby CoventryKid » Sun Nov 01, 2015 12:27 pm

Hi Don:

Windows: Absolutely terrifying to consider screwing up even slightly!!

So I made an under-sized cardboard template that I taped to the side of the trailer. I went around the outline with a Sharpie marker. Then I put wide masking tape on the outside of the lines all the way around to protect the finish. It goes without saying I double- and triple-checked window location, level, etc., etc. before I drilled a hole and started cutting with my electric jig-saw with a fine metal blade.

The aluminum ribs were slow going through and there was quite a bit of movement in the trailer wall the more I cut. (I probably should have put in some temporary bracing across the inside of the ribs but I didn't think of that at the time.) For both large windows I had 2 ribs to cut. I only had once instance where the jigsaw jumped out of the cut and damaged the side of the trailer (3 small indentations - noticeable if I point them out). I trimmed the opening to fit the window using tin snips. I don't remember if I had to trim the studs, probably, and I would have used the jigsaw to do that.

Bed: Right from the start, we thought this idea was the way to go: http://www.doityourselfrv.com/youll-want-copy-australian-sprinter-van-conversion-get-notebook/, but numerous attempts to contact the manufacturer got us nowhere so we dropped the idea. Our trailer is 7' inside height and even with a couple of inches lost due to the insulated floor, we had more than enough room to do it.

My wife and I would still like to have a proper bed. I wonder if some of the newer ideas re suspended beds on this forum might work, but we have the upper cabinets in the living room to consider. We'd have to lower the bed to be able to access them which could be a royal pain. I'm not sure I want to tackle a major reno of the trailer at this point.

So I'm wondering if we can do something with the sofa, maybe a pullout. So far, we really haven't come up with an idea yet that we're happy with.

Hope this helps!
Doug
Vancouver Island, BC

Image
GMC Savana Explorer Limited SE hightop conversion van
NEO NAVR 7x16 V-nose aluminum trailer now a comfortable travel trailer

Build: http://www.tusker-international.com/1-trlr-build.html
CoventryKid
Teardrop Master
 
Posts: 279
Images: 130
Joined: Mon Aug 05, 2013 3:48 pm
Location: Vancouver Island, BC
Top

Re: Window Install on Screw-less VHB trailer

Postby aggie79 » Mon Nov 02, 2015 10:54 am

bartholins wrote:Hey all, I have one more question on planning my trailer build - The trailer I'm going with is the screw-less type with the panels VHB bonded... I know there's arguments both ways on whether this is a good idea or not vs screws, however, has anyone installed a window on a trailer like this that would require cutting the studs and siding? I know I could cut studs and siding at the same time and not worry about separating the panel, however, I'd like to put a 'header' to support the studs above the window which would obviously require cutting a bit more stud off than siding in order to fit the 'header' in. My only other option is to have them either frame before hand, or frame and do the window install. Thanks in advance for any thoughts or recommendations!

--Sam


Sam,

Thank you for posting this question. I don't have a CT conversion but hope to do one in the future. I too want a screw-less exterior, and in my "pre-construction planning", I've been contemplating what to do about the same situation as you asked about.

While I have a basic design in mind, it will evolve as I build, and the openings for windows, baggage compartments, etc.will probably move along with the changing design. Even if you tie down the openings, there's a pretty good chance that the factory won't place the openings in the exact location you asked for them to be. For these reasons, I've about come to the conclusion that it is probably best to cut your own openings (other than perhaps for an RV door if the manufacturer will install one for you.)

My thoughts are that there probably isn't a structural (load bearing) reason for a header if you are only going to cut one or two studs for an opening. The process I will have worked out is:

1. Layout the opening. (I will probably layout the opening about 1/8" to 1/4" all-around larger than the actual size.)
2. Cut "filler" material from the same type of material as your wall framing to frame the opening. (The thought for the filler material is to serve as a guide for cutting the opening and to provide something solid to clamp or fasten the doors and windows to.)
3. Attach the filler material using angle brackets and pop rivets or self-tapping metal screws. (With the attached skin, welding the filler material is probably not an option.)
4. Cut the opening using a jig saw or saws-all.
5. Clamp and/or fasten the window.

I'd be happy to hear your thoughts on this approach.
Tom (& Linda)
For build info on our former Silver Beatle teardrop:
Build Thread

93503
User avatar
aggie79
Super Duper Lifetime Member
 
Posts: 5405
Images: 686
Joined: Tue Aug 07, 2007 5:42 pm
Location: Watauga, Texas
Top

Re: Window Install on Screw-less VHB trailer

Postby Rainier70 » Mon Nov 02, 2015 11:19 am

If you saw, the blade needs to be very fine, and even then it is a pita to control. A lot of people use nippers or the power nippers on the siding.
User avatar
Rainier70
1000 Club
1000 Club
 
Posts: 1083
Images: 244
Joined: Wed Jan 30, 2013 4:35 am
Location: Southeast Idaho
Top

Re: Window Install on Screw-less VHB trailer

Postby CoventryKid » Mon Nov 02, 2015 12:38 pm

Tom:

I think you may find that just using angle brackets and pop rivets may be way too flimsy to keep your trailer wall rigid. The roads out there are very rough, especially I5 in the north west US.

Our tandem axle trailer rides very nicely. A single axle trailer will bounce around quite a bit more.

Just my humble opinion.
Doug
Vancouver Island, BC

Image
GMC Savana Explorer Limited SE hightop conversion van
NEO NAVR 7x16 V-nose aluminum trailer now a comfortable travel trailer

Build: http://www.tusker-international.com/1-trlr-build.html
CoventryKid
Teardrop Master
 
Posts: 279
Images: 130
Joined: Mon Aug 05, 2013 3:48 pm
Location: Vancouver Island, BC
Top

Re: Window Install on Screw-less VHB trailer

Postby aggie79 » Mon Nov 02, 2015 4:50 pm

CoventryKid wrote:Tom:

I think you may find that just using angle brackets and pop rivets may be way too flimsy to keep your trailer wall rigid. The roads out there are very rough, especially I5 in the north west US.

Our tandem axle trailer rides very nicely. A single axle trailer will bounce around quite a bit more.

Just my humble opinion.


Doug,

I went back and re-read your posts on how you did the plywood surround for your openings. It took me a little while to figure out your assembly but I now understand and like your approach. Would you mind providing some additional details about your method please?

1. I assume that, for the horizontal sections of your 1" plywood, the cut portions of the aluminum framing extend all the way to the actual opening and the 1" plywood is "filler" between the cut framing. Could you confirm that this is correct please?
2. Does your interior sheathing extend over the plywood surrounds and all the way to the opening - meaning the windows spanned aluminum sheeting, 1" framing/plywood, 5/8" plywood, and the thickness of the sheathing, or did you "hold back" the sheathing from the edges of the opening?
3. I believe you stated that you cut the aluminum sheeting and studs first and then applied the plywood surrounds. What are your thoughts on adding the surrounds first and then cutting the opening? (My thoughts are that the latter way could provide a guide and stability for the cut.)

Thank you for your insight and experiences.

Take care,
Tom
Tom (& Linda)
For build info on our former Silver Beatle teardrop:
Build Thread

93503
User avatar
aggie79
Super Duper Lifetime Member
 
Posts: 5405
Images: 686
Joined: Tue Aug 07, 2007 5:42 pm
Location: Watauga, Texas
Top

Re: Window Install on Screw-less VHB trailer

Postby CoventryKid » Mon Nov 02, 2015 7:20 pm

Tom:

Image

I just "sketched" this in MS Word, but hope it might help. Ribs are 1" square, not rect like in the dwg.

In answer to your questions:

1. Yes, the 1" ply was cut to fit snugly between the 1" ribs and extended, as in the dwg to the next full rib. The horizontal 5/8" ply tied (with const. adhesive and screws) everything together. The 1" vertical plywood fit between the horizontal and was glued and screwed. The 5/8" plywood overlapped the 1" as a lap joint. Additionally, the 5/8" plywood was screwed to each rib to tie the whole assembly together.

2. I have to confess to an error in order to answer this question honestly. When I ordered the windows I gave the mfr the wall thickness of the "finished" wall - 1" ribs, 3/8" interior plywood, so 1 3/8". Did you catch my error? The supplier even called to confirm the wall thickness. Yup - 1 3/8". Then a few days later, late one night, sound asleep, I awoke and muttered some choice words. Yeah, like "how could you be so stupid?? You forgot the 5/8" over each rib (my thermal break)!!" My wall was actually 2". So to answer your question, the plan was to have the 3/8 interior plywood come right up to the window opening, same as the outside skin. But with my error, I had to get creative. I used some 1/4" white Masonite (hardboard) to trim around the window on the inside but I was still out by 3/8". When I trimmed out the windows in the latter stages of my build, I used some MDF trim and cut the backside to accommodate the two different thicknesses.

3. This would work if you can keep the jig saw blade absolutely square to the cut so that it cuts the same sized hole both inside and outside. But in my experience, this won't happen - the blade will start to "bend" over the 1"+ distance between the 2 surfaces you are trying to cut.

Image

Hope this helps!
Doug
Vancouver Island, BC

Image
GMC Savana Explorer Limited SE hightop conversion van
NEO NAVR 7x16 V-nose aluminum trailer now a comfortable travel trailer

Build: http://www.tusker-international.com/1-trlr-build.html
CoventryKid
Teardrop Master
 
Posts: 279
Images: 130
Joined: Mon Aug 05, 2013 3:48 pm
Location: Vancouver Island, BC
Top

Re: Window Install on Screw-less VHB trailer

Postby aggie79 » Tue Nov 03, 2015 9:05 am

Thank you Doug! That helps a lot.
Tom (& Linda)
For build info on our former Silver Beatle teardrop:
Build Thread

93503
User avatar
aggie79
Super Duper Lifetime Member
 
Posts: 5405
Images: 686
Joined: Tue Aug 07, 2007 5:42 pm
Location: Watauga, Texas
Top

Re: Window Install on Screw-less VHB trailer

Postby bartholins » Wed Nov 04, 2015 10:05 am

aggie79 wrote:My thoughts are that there probably isn't a structural (load bearing) reason for a header if you are only going to cut one or two studs for an opening. The process I will have worked out is:

1. Layout the opening. (I will probably layout the opening about 1/8" to 1/4" all-around larger than the actual size.)
2. Cut "filler" material from the same type of material as your wall framing to frame the opening. (The thought for the filler material is to serve as a guide for cutting the opening and to provide something solid to clamp or fasten the doors and windows to.)
3. Attach the filler material using angle brackets and pop rivets or self-tapping metal screws. (With the attached skin, welding the filler material is probably not an option.)
4. Cut the opening using a jig saw or saws-all.
5. Clamp and/or fasten the window.

I'd be happy to hear your thoughts on this approach.


I actually was concerned with the structural as well, but then again, I generally lean towards overkill on structure. I like your process and probably would have gone that way - I hate to say it though, I wussed out and am having them frame and put in the 2 windows :(

Because of caring about structure, my thinking was :
1. Layout the opening, cut the opening, studs and all.
2. Trim enough on the top and bottom cut off studs to fit my filler header / frame (1" square tubing), try to delicately separate those 1" pieces from the skin (carefully hacksaw the VHB or something?)
3. Carefully weld the 1" in probably staying clear of the skin 1/4" or so. I think with small tack welds you could weld it w/o hosing the painted aluminum... similar to a series of tacks when putting in patch panels on cars and keeping from warping things. Probably have a kid hold a cold rag on the skin outside was well ;)

So yeah, maybe it's better I didn't try the above, heh. I'll be framing in some roof vents this way, and will let you know if I dork the skin on the roof up. Won't be for a couple months though.

Thanks a bunch to all for the ideas and info!

--Sam
bartholins
Teardrop Inspector
 
Posts: 7
Joined: Wed Oct 28, 2015 3:05 am
Top


Return to Cargo Trailer Conversions

Who is online

Users browsing this forum: No registered users and 9 guests