Modified Widget RE-build - sleeps 4 + potty

...ask your questions in the appropriate forums BUT document your build here...preferably in a single thread...dates for updates, are appreciated....

Modified Widget RE-build - sleeps 4 + potty

Postby nelsonrx » Wed Jun 15, 2016 10:16 am

I'm FINALLY getting around to posting my build and re-build pictures on this forum. Long story short, I built a modified widget about 3 years ago since my wife, 2 year old son and I wanted to take a road trip from Florida up to Maine and back. We didn't drive the entire way - we took the Amtrak Autotrain with the Tahoe and Widget up to Virginia, drove up to Maine from there, and then drove the entire way down. By the way, don't recommend taking your camper on the AutoTrain - they dinged it up to hell since they were going so dang fast on the way up.

Before I start, I really need to give a shout out to all the fine folks who helped me along the way...and by "helped me" I mean they answered a billion questions, lol. THANK YOU Andrew, SlowCowboy, Bob Henry, Rob48, WoodButcher, WarPony, and the countless others on here who exhibit true brilliance and skill for what they do.

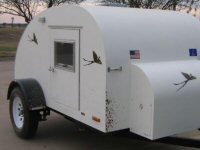
Before jumping into the rebuild, here are some pix of the original build from three years ago. Two things really stuck out that made me want to remodel it - the wheels are WAY too far forward and there's no bathroom. As far as the wheels, I didn't' want to mess with moving the axle when I originally built the widget, so I ended up with wheels almost exactly down the center-line of the camper. This led to really bad handling and I ended up having to add a stabilizer. Luckily I had an A-frame tongue on the original camper so this was an easy task. My wheels were 8 inch wheels which looked retardedly small (I won't deny...it really looks out of proportion). Anyway, here are the pix

Here's the frame. It used to be an 85' Sunlite pop up camper. Took it down to the frame.
Image
Image
Image

The walls are actually almost an inch thick - 3/4" maple veneered on the exterior side with 1/4" Cherry. This let me stagger the joints which led to incredible strength. The individual ply pieces are biscuit-joined and the overlapping Cherry plywood really holds it together. The spars are regular old 1x2 pine. I used some really bendy 1/4" "blondewood" ply from Home Depot that really made for a nice exterior roof. Used the same on the inside. In between the two layers I used some rigid 3/4" insulation and I ran all the wiring for the lights and the ceiling fan.
Image

Don't be shy - you can say it....the wheels are WAY too small and need to moved back. So, that being the main driver for my remodel, I decided this spring to do a few things.

1. Replace the axle with a Flexiride, move it back about 8 inches to be in line with Andrew's original design, and upgrade to the plan specific 13 inch wheels.

2. Add a potty - I hate having to get up in the middle of the night and freeze my arse off as I go to the bathroom

3. Finally finish the exterior trim


Here's what I've got so far as far as the remodel goes. I've added in a port-hole window to the door, ordered the axle, and have modified the main rails slightly to accommodate it. I know the biggest thing that's going to pop up is - what am I going to do with the wheel cut outs on the side walls? Well, I LOVE LOVE LOVE the look of partially hidden wheels (like in the cabin car), so I've come up with a clever solution to doing that. More on that in later build pics. As for the potty, I've built in a 24" x 30" room to house the potty which is right next to one of the bunks (which is currently set up as a crib for our newborn). Our full-size bed will run the width of the camper (74") to the left of the camper entrance, and the second bunk will run perpendicular to that just over our feet. That bunk will only be about 5'8" long, but we figure it'll take our kids a while to get to that height so we should be good to go for a while. We had an AC in the old unit on a sliding shelf that was pushed out via a lockable door, but since I added the potty room I'll have to come up with a new place for that. I may do a tongue box in the same style as the camper (cherry sides and aspen trim) and then plumb in the intake and exhaust through the front roof. Here are the pictures that I have so far. We have a camping trip in October, so I'll be finishing this up between now and then and will be posting lots of pictures.

You can see the small exit door near the bottom-left of the picture. That's where the A/C used to slide out through in the original design.
Image

This is an image from the passenger side looking into the camper. To the right is the crib (one day to be a regular bunk) and to the left running in the same plane as your line of sight is our bed.
Image
Image
Image
Image
Image

Hope you guys enjoy the pix. There will be more in the following weeks. This week I'm working on installing the axle and seeing how it looks with the new wheels.

Cheers!
nelsonrx
Teardrop Builder
 
Posts: 27
Images: 39
Joined: Sat Feb 04, 2012 12:10 am

Re: Modified Widget RE-build - sleeps 4 + potty

Postby mikeschn » Wed Jun 15, 2016 7:15 pm

Show us the new wheels... I can't stand the suspense!!!

:lol: :lol: :lol:

Mike...
The quality is remembered long after the price is forgotten, so build your teardrop with the best materials...
User avatar
mikeschn
Site Admin
 
Posts: 19202
Images: 479
Joined: Tue Apr 13, 2004 11:01 am
Location: MI

Re: Modified Widget RE-build - sleeps 4 + potty

Postby nelsonrx » Wed Jun 15, 2016 8:26 pm

LOL, sorry to leave you hanging Mike :) I actually haven't even done them yet, but here's the general plan. I'm going to have to make the wheel opening larger now since I'm going from 8 inch to 13 inch wheels. To cover the opening I'm going to make a hinged cover that, on the outside, will look as if the side panel had never been cut. Basically like a hinged door that I can flip up when I need to change the tire. I'll see if I can make a sketch tomorrow and post a pix :)
nelsonrx
Teardrop Builder
 
Posts: 27
Images: 39
Joined: Sat Feb 04, 2012 12:10 am
Top

Re: Modified Widget RE-build - sleeps 4 + potty

Postby alchemist77 » Fri Jun 17, 2016 7:07 pm

I have the same frame. I'm curious to know how much it weighs, how tall inside, and what size bed your putting in. Thanks for everything so far.

Sent from my Lenovo TAB 2 A10-70F using Tapatalk
David Campbell
KF7SFU
RaDAR
SOTA
alchemist77
Teardrop Advisor
 
Posts: 63
Images: 10
Joined: Sun Feb 26, 2012 5:16 pm
Location: Middleton Idaho
Top

Re: Modified Widget RE-build - sleeps 4 + potty

Postby nelsonrx » Mon Jun 20, 2016 9:41 am

Great questions. So far (well, before I took the original insides out from the first time I built the modified Widget), it weighed in around 1470 # - not far from the original weights that Andrew predicted in his build plans. The total outside dimensions are 76 inches wide by 120 inches long. On the inside, the tallest point in the ceiling is about 5'8" or so. My wife and kids can stand up straight, but I have to lean over a little since I'm about 5'10". We currently have a full size mattress in there for the two of us. The crib runs the width of the Widget and is about 22 inches wide, and the bunk I'm building over our feet will be about 5'8" long and 24 inches wide. You can play a little with the height of the over-feet bunk to try and maximize on the bunk length since the back curve of the camper changes as you go up and down. Then again, you also have to worry about having enough foot space when you're laying down and to make sure the bunk occupant has enough head room.

I'm going to be working on the axle a little more this week. Just need to weld in some supports since I have to increase the size of the wheel opening. Need to fire up the HH120 and do some practice beads since it's been a long time since I welded. Luckily my welds wont be on critical supports, just more of peace-of-mind supports for me. I'd never weld up anything that could critically fail.

Stay tuned!
nelsonrx
Teardrop Builder
 
Posts: 27
Images: 39
Joined: Sat Feb 04, 2012 12:10 am
Top

Re: Modified Widget RE-build - sleeps 4 + potty

Postby nelsonrx » Wed Aug 24, 2016 11:50 am

It's been a long time since I posted any update photos, so I wanted to post a few of the inside as well as get the forum welder's opinions out there about the tongue/frame. Andrew, you had so graciously emailed me your thoughts on this a while back but my email was hacked and I lost your emails, so please forgive me for bringing this up again.

Okay, so first for the tongue issues. I noticed recently that there is some micro-cracking occuring where the a-frame tongue members pass through the first cross member on the front of the trailer. The tongue itself is 1/8 " channel with returns and it actually looks just fine. What has some cracking however is the cross member which is also 1/8" channel. It's nearly impossible to see on the picture but the cracking is happening on the joint where the tongue members pass through and are welded to the cross-member. Any thoughts on fixes? I have a mobile welder on speed dial but I wanted to get opinions out there for what would be best. Simply re-weld those joints or reinforce them with additional metal somehow? At the same time I was contemplating reinforcing the tongue itself by sistering some tube to the bottom of the tongue arms (Andrew, thanks for that suggestion), even though the tongue spreadsheet gives me a rough estimate of about 150 % strength with the current setup.. Here are some pix. The first is one from afar of where the joint is located. It's where one of the two a-frame tongue members goes through the cross-member.

Image

And here is the actual joint close up. Any recommendations on reinforcing this?

Image


And now for the fun stuff - here are some pix of the inside. You can see the bunk over the feet of our full-size bed for my 4 year old and in the other pic you can see the crib for our 4 month old and the potty-room I'm adding :)

Image
Image

And working on the trim...only took me 3 years to get it started lol

Image
nelsonrx
Teardrop Builder
 
Posts: 27
Images: 39
Joined: Sat Feb 04, 2012 12:10 am
Top

Re: Modified Widget RE-build - sleeps 4 + potty

Postby KCStudly » Wed Aug 24, 2016 3:12 pm

That's going to be a very lovely camper when done. :thumbsup:

About the cracking, it looks like the xmbr is a deeper section height than the tongue and there is what looks like a flap or piece of L-shape bridging the difference. Can you sketch or describe the geometry of the joint a little better? I'm assuming that the toes (open tips of the flanges) of the tongue C face inward and of the xmbr face rearward. Also assuming that there is a separate piece of xmbr C coped to fit and welded to the inside of the webs of the tongue members(... if so, how are those welds doing?).
KC
My Build: The Poet Creek Express Hybrid Foamie

Poet Creek Or Bust
Engineering the TLAR way - "That Looks About Right"
TnTTT ORIGINAL 200A LANTERN CLUB = "The 200A Gang"
Green Lantern Corpsmen
User avatar
KCStudly
Donating Member
 
Posts: 9611
Images: 8169
Joined: Mon Feb 06, 2012 10:18 pm
Location: Southeastern CT, USA
Top

Re: Modified Widget RE-build - sleeps 4 + potty

Postby S. Heisley » Wed Aug 24, 2016 5:45 pm

:thumbsup: I like it! The beds and bathroom look to be planned out well, too.
User avatar
S. Heisley
Super Lifetime Member
 
Posts: 8772
Images: 495
Joined: Mon Sep 17, 2007 10:02 am
Location: No. California
Top

Re: Modified Widget RE-build - sleeps 4 + potty

Postby nelsonrx » Wed Aug 24, 2016 7:57 pm

Thank you for the compliments! I tell ya, I'll be ready to have it done. We actually took it up to Maine and back from Florida a couple years ago. I'll be happy to have the trim done and the tongue reinforced. :)

As for the tongue geometry, I wish I was a better artist, so I took some extra pictures just now. Here are a few more:

Here's a pic taken looking down one of the tongue arms towards the camper. This is where the tongue goes through the first xmember and continues to the main side rails. That little flap at the bottom is just a piece of flat steel that is welded to the tongue and at the bottom to the cross member. I guess it was added to provide some more attachment points. That particular piece has one continuous weld all along its bottom edge to the xmember

Image

Here's a profile shot instead of that same joint:

Image

And here is a picture from underneath the camper - the channel on the right side of the shot is the front-most xmember which is where the tongue enters through in the previous pictures. You were right about the xmember, it is channel with the open part of the "C" facing towards the back of the trailer. The tongue has "returns" (or at least that's what I've been told they are called", so it's almost closed rectangular channel minus a small sliver of metal that is missing along the length of the member.

Image

My plan (and here is where I need your advice) was to maybe have the joint where the tongue goes through the xmember re-welded. Even though the tongue should be strong enough, I was also planning to have a smaller rectangular tube stitch welded to the bottom of each tongue member all the way from the hitch to where the tongue meets the side rails under the trailer to add some strength to the tongue itself.

I've heard of "filtch" or "flitch" plates before and I wasn't sure is this was something I could add to the joint between the tongue and the xmember?
nelsonrx
Teardrop Builder
 
Posts: 27
Images: 39
Joined: Sat Feb 04, 2012 12:10 am
Top

Re: Modified Widget RE-build - sleeps 4 + potty

Postby KCStudly » Wed Aug 24, 2016 11:05 pm

Okay, I have a better idea of what's going on now. It looks like they cut the bottoms out of the xmbr to let the tongue A's nest up in, rather than cutting windows and sliding them thru. That little plate is just a poor attempt at closing the bottom flange of the xmbr back up.

You are close... a fish plate is a small patch plate that is scabbed on to add reinforcement, such as at a butt joint.

A flitch plate is a full length steel flat bar that is sandwiched in between the timbers of a beam, sometimes in multiple layers. This type of built up beam is frequently used in place of structural steel shapes, especially in wood frame construction. They are sometimes easier and more cost effective to assemble in place than a steel beam would be to install due to site restrictions. They are generally more economical where lower loads do not demand the strength and economy of a fully steel member, and/or when having the wood timber cladding as a nailer is preferred.

I would wire wheel the paint off of the crack and the surrounding area and make damn sure that the crack is only in the weld, separating the joint, and not in the web of tongue member, too. Support the chassis not by the tongue jack; cut away those filler plates; grind out the cracked weld material; re-weld; then fit new tie plates across the bottoms of the xmbr notches. Rather than trying to butt weld in the poorly fitting tie plates, I would make them a little bigger and scab them onto the underside of the xmbr with a bit of overlap.

If the crack does in fact find its way into the tongue member web, I would consider slotting the xmbr at the joint; sliding an oblong fish plate into the slot along the length of the tongue (about 5 or 6 inches long and at least as thick as the original material... leave the middle of the patch the same height as the tongue height, or just slightly less for welding, for maybe an inch or two straddling the crack, then taper the rest to blunt points about 1/2 inch tall at the front and rear... the diamond shape brings the lines of stress to the neutral midpoint of where the tongue member is being stressed avoiding "stress risers" that would just remanifest the original problem.
KC
My Build: The Poet Creek Express Hybrid Foamie

Poet Creek Or Bust
Engineering the TLAR way - "That Looks About Right"
TnTTT ORIGINAL 200A LANTERN CLUB = "The 200A Gang"
Green Lantern Corpsmen
User avatar
KCStudly
Donating Member
 
Posts: 9611
Images: 8169
Joined: Mon Feb 06, 2012 10:18 pm
Location: Southeastern CT, USA
Top

Re: Modified Widget RE-build - sleeps 4 + potty

Postby nelsonrx » Thu Aug 25, 2016 12:21 pm

Thanks for all the great info KC. I knew my terminology wasn't quite on par with what it should be :)

I went back to the camper to double check and I noticed that they actually did cut windows through the front xmember to slide the tongue through. See the pictures below. BUT (sigh), you can also see that there is a crack on the outside edge of the flanges of the xmember where each tongue arm goes through the xmember. I'm going to wire wheel the area this weekend to make sure the tongue arms are okay (which I think they are). If they are okay, would you still take out the small plates that are welded in there now and replace them or just re-weld/reinforce the flanges where they are cracking?

Image
Image

I think I understand what you're saying about adding a diamond shaped structural member under the tongue if it's cracked to focus any bending moment at the neutral point of the joint. To be honest, I was already planning to have a rectangular tube the same gauge as the tongue sistered to the bottom of the entire tongue to make it stronger (even though Andrew's spreadsheet says it should be plenty strong enough as it is). Any pros/cons to that approach?
nelsonrx
Teardrop Builder
 
Posts: 27
Images: 39
Joined: Sat Feb 04, 2012 12:10 am
Top

Re: Modified Widget RE-build - sleeps 4 + potty

Postby nelsonrx » Thu Aug 25, 2016 12:59 pm

Just thought of another thing actually...doh! If I do end up reinforcing the tongue itself, is it best to notch the metal reinforcement so that it fits around the bottom of the xmember/tongue joint OR cutout the bottom of the "window" in the xmember and leave the reinforcement metal intact? The image below will hopefully help :)

Image
nelsonrx
Teardrop Builder
 
Posts: 27
Images: 39
Joined: Sat Feb 04, 2012 12:10 am
Top

Re: Modified Widget RE-build - sleeps 4 + potty

Postby KCStudly » Thu Aug 25, 2016 1:48 pm

If you are correct about the tongue not being cracked and the calculations/spread sheet being correct, I think you are placing the blame on the wrong member.

Think about it this way, the coupler has a reaction force (the hitch ball) in the upward direction. The rear connection point of the tongue at the side rails can be taken to be a hinged joint (I know it isn't really, but the gravity forces are trying to rotate the front of the cabin down around the axle pivot, so this joint is trying to rotate around its own weld and can be considered flexible, to a degree, with the actual deflection occurring along the tongue member). So what you are left with is the front of the cabin and front xmbr trying to move down.

The way those little tie plates are they don't tie the bottom flange of the xmbr together (and they don't really add any strength to the tongue members either). Combine that with the large cutouts in the xmbr that extend too far into the bottom flange. What I think you are seeing is the xmbr trying to bow/arch downward in the middle; the tension wants to be transmitted along the bottom flange of the xmbr but it is too weak (not the tongues). The result is the crack that started at the corner of the window. This resulted in more rotation which put too much tension starting at the lowest end of the outer vertical weld, tearing it open working toward the top.

So I would like to revise my recommendation. Cut those useless tie plates out (they are only in the way of adding proper fish plates on the bottom of the xmbr spanning the area plus and inch or so on each side of what was cut out). Grind out your cracks some for a bit of weld penetration. Jack the camper up by the middle of the front xmbr and watch the cracks close up. Because the new plates will be mostly in tension when loaded and any bending will occur in the short (thickness wise) axis of the plate, they can just be rectangular shape... no need to tapper/diamond them. Re-weld the cracks, grind the bottom one flush, and weld the new tie plates on.
KC
My Build: The Poet Creek Express Hybrid Foamie

Poet Creek Or Bust
Engineering the TLAR way - "That Looks About Right"
TnTTT ORIGINAL 200A LANTERN CLUB = "The 200A Gang"
Green Lantern Corpsmen
User avatar
KCStudly
Donating Member
 
Posts: 9611
Images: 8169
Joined: Mon Feb 06, 2012 10:18 pm
Location: Southeastern CT, USA
Top

Re: Modified Widget RE-build - sleeps 4 + potty

Postby nelsonrx » Thu Aug 25, 2016 2:33 pm

Thanks again KC! Okay, gotcha. So if I'm understanding it correctly, once I remove the current tie plates I would add a rectangular fish plate over the crack on the xmember bottom flanges to "band-aid" them together and make them solid, right? Then after that, I would add new tie plates to connect the tongue members to the xmember..

Forgive me if I made it sound like I was placing any blame on the tongue itself. It's actually a separate issue. I was considering strengthening the tongue overall by sistering some rectangular tube beneath it along its entire length just as added peace-of-mind even though the calculations show it should be about 100-120% as strong as it needs to be. Interestingly, my tongue members are made from 11 gauge 2.5" x 1.5 " channel, but the flanges have returns as well, so it's almost more like a tube than a channel. The spreadsheet that Andrew has lists tube but not channel so I was trying to do the bending moment calculations and I think they come up to be enough given a 1400 # camper with a 36 inch tongue and being unbraked. The tongue/xmember joint issue was separate from that since I just noticed those cracks the other day.
nelsonrx
Teardrop Builder
 
Posts: 27
Images: 39
Joined: Sat Feb 04, 2012 12:10 am
Top

Re: Modified Widget RE-build - sleeps 4 + potty

Postby KCStudly » Thu Aug 25, 2016 3:50 pm

You actually don't want to tie the xmbr to the tongue along the athwartship direction (as the existing plates do). Because of the constant bending moment at this location you really only want to join the members along the longitudinal axis, lengthwise on the tongue. (I made this mistake myself, fully welded my tongue tubes to the front xmbr and hope that I don't come to regret it later.)

If the existing tongue members are adequate, adding doublers won't really solve anything and will just add weight. Unless you plan on increasing net weight and want to increase your margin of safety, I wouldn't bother. And even then, I would rather see you add more of a truss like strap or rod (like Bob Henry used to reinforce the extended tongue on... I believe it was... his barn build), as I think that would accomplish the same thing with less weight added; and it would be easier to fabricate and fit. (Rather than notching a big piece of tubing to fit, make a couple of post standoffs located before and after the xmbr, then run a strap or rod from a location near the front of the tongue to the front post, to the rear post, then back up to a point further back on the tongue... like the main cable stays of an upside down suspension bridge. Sometimes you see this technique being used on the top of a P/U truck bed racks to help strengthen the cantilevered section over the cab. It's the same idea that all of the newer UT's use with lighter main rails strengthened by the separation of the side top rails... it's just an open truss rather than a big old honking piece of steel.) The bending strength is in the separation of the outermost fibers where the most tension occurs, not so much what happens in between them, and you already have the compression side covered by your existing members. (Okay, someone can argue that the tongue member will see dynamic loading in both directions, flip flopping from tension to compression, but it is all relative.)

The 'C' shaped channel vs. an [ (bracket symbol) shaped channel does add rigidity in bending (beam strength) but more importantly in this case, I think it adds better resistance to bowing/twisting. Standard 'S'-shapes (the ASME/ANSI/ASTM standard name for hot rolled [ shaped steel with tapered flanges) and simple formed sheet channels (as well as angle shapes) tend to fail by twisting and/or folding into the open side when bent. By forming the tongue members into a closed 'C' shape they have gained more strength while still being able to keep a lighter gauge material. In mass production shops they will often design with a bias toward fabricated sheet metal shapes (rather than hot rolled or tube) because they can better optimize the overall material weight, yield, and fabrication process. When I worked for Giant-Vac it was often more efficient to shear, punch and form (high speed machine operations) than it would be to saw, cope, and fit; especially in a bolted application. With a vertical break press and offset dies, it is relatively easy to form these closed leg channels, whereas hot rolling closed section tubing is not something most fab shops are capable of doing. By keeping operations in house and standardizing material usage, they can optimize their cost/lb on steel and stock fewer items (i.e. a pile of this gauge sheet, a pile of that gauge sheet, and not 100 different sections shapes and wall thickness' of tube). So again, I'm thinking your problem is the joint design and not the individual member cross sections.

One more thought. If you don't see any similar damage on the curb side, I'm wondering if perhaps the damage was not caused by a single overloading event; such as jacking the frame unevenly by the front street side corner; or touching ground, or an obstacle there while underway. A jackknife might also cause this kind of damage. (Sorry, I did not go back and refresh myself on the history of your trailer/build... though am sure I have followed along in time.)

I guess it all depends on how the weight of the cabin is transferred thru the xmbr into the tongue. One could argue that the tongue is pushing up on the underside of the bulkhead so the xmbr should bow center up, not center down (i.e, putting the lower flange into compression, not tension). The cracks starting at the bottom suggest otherwise.

Are there any significant scuff marks in the paint on the underside of the street side front corner? Probably not, the cracks do look more like fatigue failure.

Grind a small V into the underside crack first, then weld it, then grind it flush so that the "band-aid" plate lays flat. If there is any access at all (which it looks like there isn't) it would be nice to also weld the top side of this crack, at least at the ends of it (an option would be to grind a bigger v-notch with a root opening and place a small backer plate on top of the lower flange (slipped in under the bottom of the tongue... there appears to be a suitable gap there) so that when you weld from underneath it all becomes one).

If you (or your welder) have the ability, you could make the "band-aid" plates out of angle (or bent plate) with the front vertical leg cut down short to pass under the tongue. Even this short vertical lip would add back a bunch of bending strength (static moment of inertia, actually) to the xmbr... just don't bother welding it to the tongue, it will likely just crack there anyway... to be expected.

On the vertical weld, outside of the tongue, try to remove as much of the original weld, w/o scarfing into the tongue, before re-welding.

I see that I have "barfed" a lot of run on thoughts here. Hope it helps you more than it confuses. I'll check back in later tonight (to proof read again) and see if it all still makes sense. :?
KC
My Build: The Poet Creek Express Hybrid Foamie

Poet Creek Or Bust
Engineering the TLAR way - "That Looks About Right"
TnTTT ORIGINAL 200A LANTERN CLUB = "The 200A Gang"
Green Lantern Corpsmen
User avatar
KCStudly
Donating Member
 
Posts: 9611
Images: 8169
Joined: Mon Feb 06, 2012 10:18 pm
Location: Southeastern CT, USA
Top

Next

Return to Build Journals

Who is online

Users browsing this forum: No registered users and 52 guests