Diamond in the Foam

Canvas covered foamies (Thrifty Alternatives...)

Moderator: eaglesdare

Re: Diamond in the Foam

Postby Shirestone » Fri Apr 09, 2021 3:34 pm

Over the past few weeks I have been working on the roof.
On the crossing joists (2 x 2) i have added a 1/8 inch strip on top of them in the center of the roof area only. My thinking is that I will slightly bend and slope the roof to the edges to prevent any excess water sitting on the roof.
Next I glued up two full sheets of xps foam and a couple of the spare pieces to make up the entire roof structure. The edges were also all cut at a 70 degree angle to match the angle of the walls.
While building the roof structure the biggest worry is will the foam and existing roof joists be enough to hold up against snow loading. I live in Canada and it will be stored outside so the snow could get quite heavy.
To help with the overall rigidity of the roof, I decided to cut some hardwood strips and then router the foam to house the strips.
The strips were then glued into the routed foam for added rigidity.
Now we shall see if the expansion of the glue pushes the strips out when it dries.
Attached is a quick video showing the embedded strips in the XPS foam with all the clamps to holding contain the strips within the routed piece while the glue dries.
If you wondering why the strips do not run the full length of the roof. The of the roof sits a little higher than the outsides so the plan is to slightly bend the foam and glue it in place to help with the rain running off. This is why I kept the strips only as long as the second last ceiling joists to allow for a bit of bend.
Not sure if this all makes sense, but maybe the video will help.
Next step is possibly adding one or two more embedded spars in the middle if need be.
Then I will cut the hole for the roof fan and finally cover the underside of the roof with canvas while it is easy to get at rather than holding up my arms for hours while inside the unit.
After this I will glue the roof on and fill any cracks....then its outside canvas time..... :frightened: :frightened: :frightened: :frightened: :frightened:
We will see how that goes.

Video Link Below:

https://youtu.be/_EyGCieX_ng
I'm not an Engineer...I just play one on TV.
User avatar
Shirestone
Teardrop Builder
 
Posts: 45
Images: 31
Joined: Fri Mar 20, 2020 5:46 am
Location: Ontario, Canada

Re: Diamond in the Foam

Postby Shirestone » Sat Apr 24, 2021 10:13 am

Been busy working on the outside of the trailer.
First was priming the outside.
Then the roof. Spent the last few weeks creating a giant roof section with the proper angle cuts and two poplar hardwood pieces running longwise (embedded in foam in the inside) in order to help provide more ridgidity to the roof. Then primed both sides and canvassed the inside. Once the inside canvas was done, I cut strips from the canvas where the roof joists are to allow the gorilla glue to stick directly to the foam and wood. I find this makes a better connection rather than on the canvas to the wood.
I also decided to add some firring strips to the roof spars that are 1/16" thick. They only go near the middle of the roof. The idea is to glue the whole structure down to the walls to create and pull down the outsides by approx 1/16" inch to allow for rain to run off. I live in Canada so hopefully this will help with melting snow run off as well.
I placed the roof on the walls and used bricks and cinder blocks to press down the roof firmly while the glue dried. I placed about four cinder blocks on the center of the roof so it gave me a good feeling of confidence when the roof structure held the weight no problem.
Once the glue dried. I trimmed and sanded the roof to match and then put fast n final spackle along the seams.
The video attached shows the completed roof with the spackle (next step is to sand the spackle) as well as the inside roof joists with the firring strips.

Its coming along. Slowly but surely.
Outside canvas is next. :o :o A little nervous about this.\
Cheers and thanks to the readers for all the info and support. :beer:


https://youtu.be/OEhy0SfoUgU
I'm not an Engineer...I just play one on TV.
User avatar
Shirestone
Teardrop Builder
 
Posts: 45
Images: 31
Joined: Fri Mar 20, 2020 5:46 am
Location: Ontario, Canada

Re: Diamond in the Foam

Postby Shirestone » Wed May 05, 2021 3:03 pm

Just finished with applying the canvas. What a chore!
My trailer is 12 feet long and I tried to acquire the biggest pieces I could so man-handling 15 x 12 sheets was a real pain.
I tried to start from the bottom and work my way up so that the pieces on top would overlap those on the bottom to help with rain flow not getting in the seams.
Speaking of seams....wow...I found it extremely hard to make the seams look nice. I'm hoping with some crafty painting and maybe some lines painted as decals along the side I can help to hide the seams a little bit.
Some tricks I learned:
1) Seams lay better when both fabrics are applied rather than applying one and waiting for it to dry and then applying the other.
2) Full tite-bond II at just the seam area seems to help it stick better.
3) The use of thumb tacks to hold areas (seams) in place during drying seems to help hold it down.
4) I did find that you should really soak the fabric well in order to get it to lay down properly ( I used a small paint roller) and went through 3 gallons on titebond II and mixed it 50/50 with water.
5) I also found that after it was dried i could use an iron to help iron out any bubbles that may have occured.
6) I also found that soaking the fabric after is was completely dried helped to smooth out bubbles as well.

Note: Cutting fabric to acheive clean seams is very difficult. Also when laying down your canvas make sure after you soak it that you don't stretch and pull it to much from a single point ...rather pull the complete side of the canvas to make it stretch only in one direction. Hope that makes sense.

Anyways....here is the next video of the canvas layed onto the shell.

https://youtu.be/K-juuE7q9Io

Hope this helps some people.

Cheers. :beer: :beer:
I'm not an Engineer...I just play one on TV.
User avatar
Shirestone
Teardrop Builder
 
Posts: 45
Images: 31
Joined: Fri Mar 20, 2020 5:46 am
Location: Ontario, Canada
Top

Re: Diamond in the Foam

Postby OP827 » Wed May 05, 2021 9:49 pm

Just found this thread. This is a very original shape and great work with XPS foam. Thanks for sharing your experience.
User avatar
OP827
Donating Member
 
Posts: 1570
Images: 406
Joined: Fri Apr 25, 2014 7:27 pm
Location: Bruce County Ontario
Top

Re: Diamond in the Foam

Postby Shirestone » Wed Jun 16, 2021 2:48 pm

The next installment....
Finished laying all the canvas...quite a chore with all the big sheets i needed.
Anyways, once that was completed I started painting the canvas.
I put on two coats of exterior primer followed by three coats of exterior paint. Painted underneath in the same manner.
Next it onto window and door installation. I had framed out the foam with 2 x 2 frames where all the windows and doors were to be placed.
I also framed out a 14" x 14" hole in the ceiling for the installation of the fantastic fan (new) which I purchased off kijiji for a really good deal. Basically half price for a new fan still unopened.
I haven't installed the fan yet as I need to roll the whole unit out of the garage as it barely fits without the fan. I will need to install and butyl the fan on a nice sunny.
I then purchased butyl-putty and installed the windows with the putty sandwiched between the outside wall and the window sill plate.

The door was the biggest challenge. I tried to tighten up the door hinge and noticed that none of the screws would hold...after much deliberation I was forced to completely put apart the door. It had a wood door frame with metal skin on the inside and outside. I pulled apart the door and noticed that the door frame was completely rotted. Next was the complete rebuild of the door frame and putting the old metal skin back onto the new frame. I covered new frame in "the mix" to help protect it from future rot. I also rebuilt the housing for the lock and had a key made for the lock as the old one was lost. Finally after all this placed the door into the frame and placed new door seal around the edges. PHEW! Lots of work but in the end it seems to be ok.

Here is a new video to date of the unit so far.
Next is some painted lines on the outside to help cover up and hide some of the seams hopefully.

https://youtu.be/V1OHfKR1wBQ

Cheers and Thanks Again for all the support. :beer: :beer:
I'm not an Engineer...I just play one on TV.
User avatar
Shirestone
Teardrop Builder
 
Posts: 45
Images: 31
Joined: Fri Mar 20, 2020 5:46 am
Location: Ontario, Canada
Top

Re: Diamond in the Foam

Postby Shirestone » Tue Jul 20, 2021 1:17 pm

Here is my next installment.
Been busy final painting, putting on stripes, fastening windows, fastening door, added a fantastic fan to ceiling.
Used butyl tape for all those and some dicor self leveller for the ceiling fan (after the butyl)
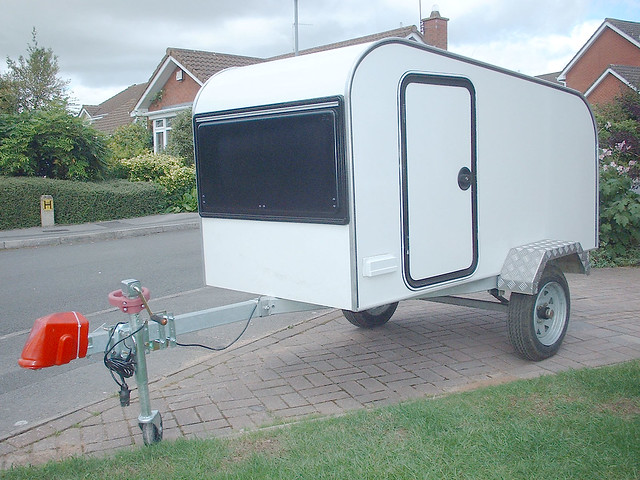
I then made a custom trailer for the whole rig to sit on.
Added the tires and jack and then placed the whole unit onto the steel frame.
I fastened it through the frame using approximately 30 1.5" lag bolts up through the bottom and into the wood framing members.
I'm hoping this should hold.
Next step...fenders, final outside lights, and final license plate mount.
Then more work inside to pretty it up a bit.
I took it for a test drive and everything seems to hold together just fine.
The metal frame weighs approx. 600 lbs while the body is around 500 so far.
See video update below.

https://youtu.be/EYEPY61JadQ

Thanks to Jhcoe for alot of questions answered. Must appreciated.

STILL LOOKING FOR A NAME!! All suggestions are welcome.


Cheers.
Thanks again to all.
I'm not an Engineer...I just play one on TV.
User avatar
Shirestone
Teardrop Builder
 
Posts: 45
Images: 31
Joined: Fri Mar 20, 2020 5:46 am
Location: Ontario, Canada
Top

Re: Diamond in the Foam

Postby Shirestone » Wed Oct 20, 2021 9:36 am

Been gone for awhile working on lighting.
Have included the video of final lighting and outside.

Almost completed the build. I do have future plans for water systems and possibly fridge but for now I am gonna try this out and go from there.
I have wired up 24VDC lighting and @$VDC fantastic fan and front lights. The idea is that I can add a future battery if required but right now it works off of a 120V external plugin.
The desk lights I got from a local store (Princess Auto) for $18 bucks each. I figure that's cheaper than purchasing from an RV place which wanted about $90 each.
Each of the front lamps also has three built in USB charging ports.

I also installed 3 way switches so you can turn off and on cabin lights from the door and the bed. I don't understand why most trailers don't have this.
The kitchen area has 120V receptacles with charging ports as well as near the headboard area which has the same. Also installed a receptacle plug near the base of the bed for future refridgerator and microwave.
I was going to purchase 120V house receptacles and wires but I found that purchasing prebuilt electrical cords and prebuilt sockets were much cheaper and all self contained to make it easy to mount without buying all the small parts and wires required.

Still have to put a trailer jack onto the unit and final fenders. Also need to add some internal steps that swing out.
I have already taken it for a bunch of test drives and found it to be very stable and solid...I was worried a bit about that throughout the build but it seems to be holding its own quite nicely.

Video Below.

https://youtu.be/CVBQdjPGiyc

After much deliberation, I am calling it "The Dragonfly".


Cheers.
I'm not an Engineer...I just play one on TV.
User avatar
Shirestone
Teardrop Builder
 
Posts: 45
Images: 31
Joined: Fri Mar 20, 2020 5:46 am
Location: Ontario, Canada
Top

Re: Diamond in the Foam

Postby Pmullen503 » Wed Oct 20, 2021 11:55 am

Very nice!
Pmullen503
1000 Club
1000 Club
 
Posts: 1158
Images: 67
Joined: Sun Nov 23, 2014 1:33 pm
Location: Fond du Lac, WI
Top

Re: Diamond in the Foam

Postby popper » Wed Oct 20, 2021 12:38 pm

I like the way the walls go out. Gives you an open feeling. Dragonfly is a good design. People don't appreciate the substance of things.
popper
Teardrop Advisor
 
Posts: 61
Joined: Mon Sep 06, 2021 2:55 am
Top

Re: Diamond in the Foam

Postby GPW » Thu Oct 21, 2021 3:21 am

WOW!!! That ’s GREAT !!!! 8) :thumbsup: :applause:
There’s no place like Foam !
User avatar
GPW
Gold Donating Member
 
Posts: 14915
Images: 546
Joined: Thu Feb 09, 2006 7:58 pm
Location: New Orleans
Top

Re: Diamond in the Foam

Postby aggie79 » Thu Oct 21, 2021 3:01 pm

GPW wrote:WOW!!! That ’s GREAT !!!! 8) :thumbsup: :applause:


I agree! :applause: :applause: :applause:
Tom (& Linda)
For build info on our former Silver Beatle teardrop:
Build Thread

93503
User avatar
aggie79
Super Duper Lifetime Member
 
Posts: 5405
Images: 686
Joined: Tue Aug 07, 2007 5:42 pm
Location: Watauga, Texas
Top

Re: Diamond in the Foam

Postby Shirestone » Wed Nov 17, 2021 4:19 pm

I had so much fun building it, that I'm inspired to sell this one and build another.
Gotta sell this one to get some more room in my driveway for another build.
Just a couple things left to do on this one that i will leave to the new owner, such as bedding, outside lights and install the jack.
Anyone interested? I'm in Waterloo, Ontario Canada. Looking at $5K-$5.5K
Cheers.
I'm not an Engineer...I just play one on TV.
User avatar
Shirestone
Teardrop Builder
 
Posts: 45
Images: 31
Joined: Fri Mar 20, 2020 5:46 am
Location: Ontario, Canada
Top

Re: Diamond in the Foam

Postby CRZ42 » Wed Nov 17, 2021 8:50 pm

A very cool build. Well done, and isn't it funny how the building bug happens. Best luck on the sales side.
CRZ42
Teardrop Builder
 
Posts: 39
Joined: Tue Aug 10, 2021 2:30 am
Location: detroit
Top

Selling Foamie

Postby Shirestone » Thu Apr 28, 2022 10:21 am

Selling my Foamie.. $4500 gets it.
Located in Ontario Canada.

https://www.youtube.com/watch?v=CVBQdjPGiyc
I'm not an Engineer...I just play one on TV.
User avatar
Shirestone
Teardrop Builder
 
Posts: 45
Images: 31
Joined: Fri Mar 20, 2020 5:46 am
Location: Ontario, Canada
Top

Previous

Return to Foamies

Who is online

Users browsing this forum: Bing [Bot], Google [Bot] and 8 guests