CAD fun - here's my design

Want to design your own teardrop or tiny travel trailer. You can do that in 2D or 3D. We keep our secrets in here!

CAD fun - here's my design

Postby jmtk » Sun Jan 15, 2006 6:13 pm

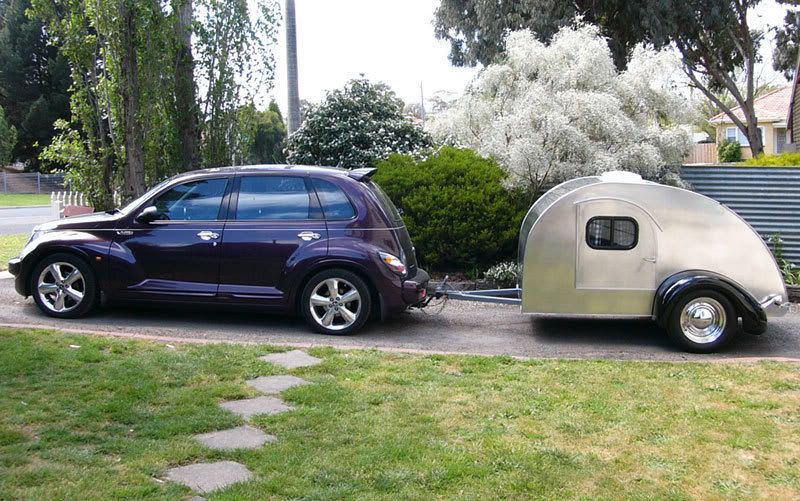
I've been busy learning Ironcad! Here are my first renderings. This one I hope will be a common scene - having just pulled up in the driveway after a fun-filled trip with our tear...

Image

This shows a cut-away view of the tear inside. It's very simple - a bunk for our 5-year old in place of cabinetry, and just shelves in the galley...

Image

Note the upper bulkhead is not skinned with wood; the green rectangles are fabric flaps that snap in place. Since we have no cabinetry, the intent is to store our clothes bags on the galley counter so we can access them from inside the tear. They'll get moved to the cabin when we want to do some cooking. There are quarter-circle shelves in the corners at the head of the trailer for keys, glasses and other small things. These renderings don't show the details like the Fantastic Fan and lights. Nor does it show the dropped footwell and table. Maybe I'll attempt that next. :D

I'm thinking the walls are 1/4" outside skin and 1/8" inside skin enclosing 3/4" framing and insulation. I like the idea of creating the framing out of 3/4" plywood and ample use of a jigsaw, as did Nitetimes and Lindsay. The roof is skinned like the walls, but with 1.5" spars and insulation. I'm planning on white Uniflex for the exterior. The whole thing sits on a custom-built 5x8 frame (done professionally).

Another thought (not shown in the renderings) is to put one or two windows in the tear front on the flat part of the profile. Would I have to worry about rocks flying up and hitting them, or would they be high enough to avoid problems?

And this one is a long shot, but I'm trying to think ahead - my son won't always be able to fit on a 5' bunk, so I'm thinking of framing in a place on one sidewall for a swing-up door that may someday accommodate a foot-sized slideout. I also think that by the time he's that tall, he may not want to be anywhere near his parents, hence just frame it in for now, since we may never actually need it.

I look forward to your comments!

Jeanette
User avatar
jmtk
Donating Member
 
Posts: 324
Images: 98
Joined: Wed Nov 09, 2005 10:44 am
Location: Utah

Postby mikeschn » Sun Jan 15, 2006 6:25 pm

Jeanette,

You've done a wonderful job. That looks really good.

I was going to send you the link to a tutorial, but now I see that wouldn't have been necessary.

You learned that quick by the way. I applaud you...

Mike...
The quality is remembered long after the price is forgotten, so build your teardrop with the best materials...
User avatar
mikeschn
Site Admin
 
Posts: 19202
Images: 479
Joined: Tue Apr 13, 2004 11:01 am
Location: MI

Postby Micro469 » Sun Jan 15, 2006 7:25 pm

so, where do you get a copy of Ironcad anyway?
John
Image
User avatar
Micro469
Super Lifetime Member
 
Posts: 3185
Images: 382
Joined: Mon Nov 07, 2005 10:46 pm
Location: Brampton,Ontario,Canada
Top

Postby mikeschn » Sun Jan 15, 2006 7:45 pm

Micro469 wrote:so, where do you get a copy of Ironcad anyway?


go to ironcad.com

http://www.ironcad.com

Mike...
The quality is remembered long after the price is forgotten, so build your teardrop with the best materials...
User avatar
mikeschn
Site Admin
 
Posts: 19202
Images: 479
Joined: Tue Apr 13, 2004 11:01 am
Location: MI
Top

Re: CAD fun - here's my design

Postby angib » Sun Jan 15, 2006 8:03 pm

jmtk wrote:so I'm thinking of framing in a place on one sidewall for a swing-up door that may someday accommodate a foot-sized slideout.

Jeanette,

George Teague has done just this for his daughter - have a look at his Compact GT.

Andrew
User avatar
angib
5000 Club
5000 Club
 
Posts: 5783
Images: 231
Joined: Fri Apr 30, 2004 2:04 pm
Location: (Olde) England
Top

Postby TomS » Sun Jan 15, 2006 8:54 pm

Jeanette,

Nice job with the CAD drawings. As I look at your drawing, some thoughts come to mind.

1. I wouldn't worry about the slide-out footwell. By the time your boy outgrows that bunk, he'll be ready for his own tent and you and the hubby will be more than ready for a little privacy. :lips:

2. Kids grow up really fast. Layout and frame your sides and roof spars to accomodate cabinets. In a few short years, the little boy will move into his "big boy" tent. With a little planning now, converting that bunk into a cabinet will be a snap.

3. I would use a shelf and a matress for the bunk instead of the hammock. I think it would be more comfortable for the boy. You'll also find the shelf very handy for those weekends when drop the little guy off at the grandparents to be spoiled rotten while the two of you have a weekend to yourselves.
Tom Swenson
[email protected]
User avatar
TomS
1000 Club
1000 Club
 
Posts: 1367
Joined: Thu Nov 18, 2004 2:06 pm
Location: Fitchburg, MA
Top

Postby Hardin Valley Magic » Sun Jan 15, 2006 9:30 pm

Jeanette, great drawings. :thumbsup:
When framing the exterior walls where the rods will be I would used a whole 2"x4" for those studs just to be safe. Also, what kind of rods are you going with to hold up the hamock?
aka Steven D.
User avatar
Hardin Valley Magic
Donating Member
 
Posts: 548
Images: 45
Joined: Wed Sep 14, 2005 9:45 pm
Location: Knoxville Tenn.
Top

Postby Steve Frederick » Sun Jan 15, 2006 9:37 pm

Jeanette, Very nice drawings! I'm jealous! I'm still trying to figure out ANY Cad program. I'm starting to get the hang of Visio.I use it for schematics at work..I do wish I could do as nice a job as you did on something fun!! :thumbsup: :applause: Oh! that design looks like a winner to me!!
Blessings, Steve
Adirondacks, Upstate New York
Building Journals
The Shop Manual's 8-years old!! Thank's everyone!
New! 'Rondack Lodge Plans!Order Here!
Image
User avatar
Steve Frederick
Custom Teardrop Builder
 
Posts: 1984
Images: 29
Joined: Thu Apr 15, 2004 5:02 pm
Location: Upstate New York, Adirondacks (Great Sacandaga Lake)
Top

Postby madjack » Sun Jan 15, 2006 11:06 pm

:thumbsup: :thumbsup: :applause: :applause: :applause: :applause: :applause: ........... 8)
...I have come to believe that, conflict resolution, through violence, is never acceptable.....................mj
User avatar
madjack
Site Admin
 
Posts: 15128
Images: 177
Joined: Thu Dec 02, 2004 5:27 pm
Location: Central Louisiana
Top

Hep With Iron CAD

Postby Dee Bee » Sun Jan 15, 2006 11:14 pm

Hi Great Work I am impressed. Especially after spending a few evenings trying to learn Iron CAD. I am having trouble Can you share any pointers in how to learn Iron CAD?

Dee Bee
Grace happens...
User avatar
Dee Bee
500 Club
 
Posts: 696
Images: 55
Joined: Fri Jun 04, 2004 9:17 pm
Location: York, PA
Top

Postby jmtk » Sun Jan 15, 2006 11:28 pm

Thanks for all the comments, guys. Mike - I appreciate the kudos from a CAD pro (at least, I sure hope you're a pro again soon! Good luck on the job hunt). Steve F - If you teach me wood-working, I'll teach you 3D computer stuff! I'm afraid to say my wood-working skills are probably worse than your computer skills. :shock: One thought I had after spinning up on Ironcad and reading about lots of people's CAD woes was to write up an "Ironcad for Idiots" thing, with just the real basics and simple teardrop examples. I don't claim to be an expert (that's Mike) but it might be a useful contribution to the forum (heaven knows I won't be imparting my wood-working knowledge! :o ) Tom - Yeah, I agree my son will probably want out of the trailer once he's >5', hence the thought of merely framing it on the off-chance we do need it. However I'm not sure we'll want cabinetry regardless (Plus, then I'd have to build them!). What you don't see in these drawings is how the cabin looks when converted for a dinette. The bunk comes off (Steve D, they're 1.25" diameter closet rods hanging on closet-rod hardware) and gets tucked against the lower bulkhead, then one half of the split mattress leans against it for the rear couch, the other half for the front couch. I toyed with the idea of a solid bunk and mattress at first, but I couldn't make it work with a rear couch. I'll try to get a model of the dinette setup next.

Thanks again for all the input!

Jeanette
User avatar
jmtk
Donating Member
 
Posts: 324
Images: 98
Joined: Wed Nov 09, 2005 10:44 am
Location: Utah
Top

Postby GeorgeTelford » Wed Jan 18, 2006 5:32 am

Hi

Another thought (not shown in the renderings) is to put one or two windows in the tear front on the flat part of the profile. Would I have to worry about rocks flying up and hitting them, or would they be high enough to avoid problems?

with a question like this I always look for a similar situation, so thinking along those lines, car and vehicle windows seem to get away with it (mostly anyways, window damage while driving is very rare)

Many caravans have windows there no probs, so I would guess from the "evidence" that a window would be OK.
User avatar
GeorgeTelford
500 Club
 
Posts: 677
Joined: Mon Jul 11, 2005 2:10 pm
Top

Postby jmtk » Sat Jan 21, 2006 4:35 pm

Here's what I hope it'll look like when converted to the dinette. The idea is to take off the bunk and associated bedding and jam it all behind the rear couch. The seat and back cushions would not actually be separate, but have cuts half-way through from the bottom to aid in folding to form the couch (an idea I gleaned from our futon)
Image
Just in case you were wondering, that's me on the right and my husband on the left. Our legs normally bend more. :D

Jeanette
User avatar
jmtk
Donating Member
 
Posts: 324
Images: 98
Joined: Wed Nov 09, 2005 10:44 am
Location: Utah
Top

Postby Steve Frederick » Sat Jan 21, 2006 4:44 pm

jmtk wrote:Image
Just in case you were wondering, that's me on the right and my husband on the left. Our legs normally bend more. :D

Jeanette

I can see that you folks get "SQUARE MEALS"!!! :rofl: :rofl: :chicken: :rofl: :rofl: :chicken:
Blessings, Steve
Adirondacks, Upstate New York
Building Journals
The Shop Manual's 8-years old!! Thank's everyone!
New! 'Rondack Lodge Plans!Order Here!
Image
User avatar
Steve Frederick
Custom Teardrop Builder
 
Posts: 1984
Images: 29
Joined: Thu Apr 15, 2004 5:02 pm
Location: Upstate New York, Adirondacks (Great Sacandaga Lake)
Top


Return to CAD secrets

Who is online

Users browsing this forum: No registered users and 4 guests