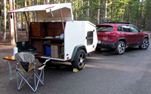
The Dog House *It's done!!!! 6/20/2015"

...ask your questions in the appropriate forums BUT document your build here...preferably in a single thread...dates for updates, are appreciated....

Postby starleen2 » Thu Nov 18, 2010 9:19 am

NICE frame :thumbsup:
User avatar
starleen2
5th Teardrop Club
 
Posts: 16272
Images: 224
Joined: Sat May 12, 2007 8:26 pm
Location: Pea Ridge ,AR

Postby jss06 » Sun Dec 12, 2010 10:11 pm

Here are the latest updates...

Making the body mounts. 2" square 3/16 steel with a 1/2 inch grade 8 bolt. This is all epoxied together and will be gorilla glued to the floor. Should be able to remove the floor without having to get to the tops of the bolts.

Image

Image

What the floor sandwich looks like. Bolt through 3/16" plate, then 1/2" plywood and finally 1/4" metal tab welded to the frame. With 10 of these, I don't think I have to worry about the body coming off the frame. :rotflmao:

Image

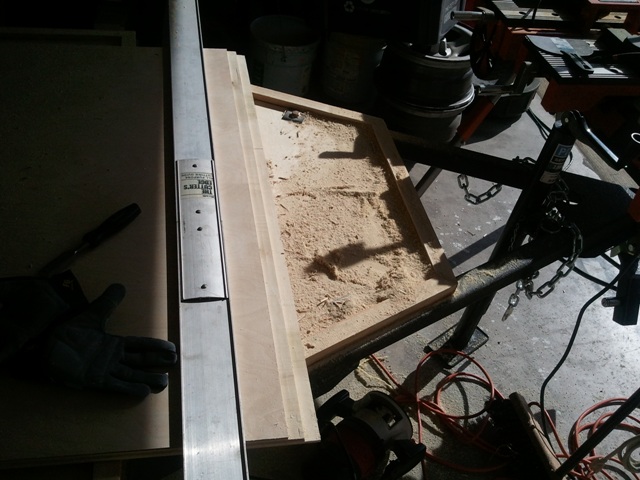
Framing the floor and making sure the eletric parts will fit. The black box is a AC/DC power distribution panel. The metal box on the left is the AC to DC power converter with built in battery charger. The bare metal bracket is a hold down for an optima Battery. I will mount this to the floor and use it to hold my Optima Blue Top battery.

Image

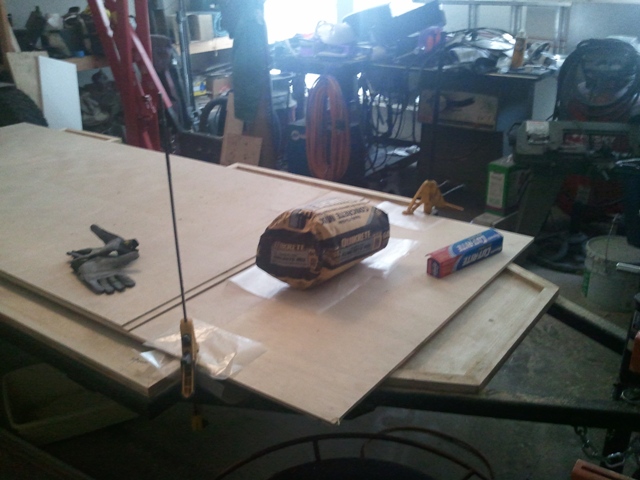
Finally, it's always nice to have the right tools for the job. My wife gave me the portable bench for christmas a couple of years ago. The compound miter saw is from interior trim and molding work in the past.

Image
Last edited by jss06 on Tue Jun 16, 2015 9:13 pm, edited 1 time in total.
User avatar
jss06
Palladium Donating Member
 
Posts: 663
Joined: Mon May 12, 2008 7:48 pm
Location: Carrollton, TX

Postby jss06 » Fri Dec 31, 2010 6:15 pm

I have been doing work slowly over the last couple of weeks. I finished the floor framing, and started on the profile for the walls.

First had to extend the walls. Used the router to create a lap joint and glued the pieces together. This gives me a wall blank that is 9 ft. 6 inches long. I only need it to be 9 ft 3 inches for my profile.

Image

nothing like a bag of old concrete to use as a press.


Image

After that all dried, I marked out the profile and modified my design slightly.

I cut out the basic profile today. Need to still cut out the door, wheel well and the hatch.

Image

Went shopping for electrical and building supplies for the trailer today. While at Home Depot I found these hinges.

Image

They are enamled gate hinges. $6 a piece including screws. Better yet they are similar enough to the design on the Wrangler to look good with it.
Last edited by jss06 on Tue Jun 16, 2015 9:14 pm, edited 1 time in total.
User avatar
jss06
Palladium Donating Member
 
Posts: 663
Joined: Mon May 12, 2008 7:48 pm
Location: Carrollton, TX
Top

Postby jss06 » Sun Jan 02, 2011 11:13 pm

Side profile is cut out.

Image
Last edited by jss06 on Tue Jun 16, 2015 9:15 pm, edited 1 time in total.
User avatar
jss06
Palladium Donating Member
 
Posts: 663
Joined: Mon May 12, 2008 7:48 pm
Location: Carrollton, TX
Top

Postby bdosborn » Sun Jan 02, 2011 11:40 pm

Looks good. The hinges match your jeep pretty good.
:thumbsup:

Bruce
2009 6.5'X11' TTT - Boxcar
All it takes is a speck of faith and a few kilowatts of sweat and grace.
Image
Boxcar Build
aVANger Build
User avatar
bdosborn
Donating Member
 
Posts: 5494
Images: 772
Joined: Wed May 05, 2004 11:10 pm
Location: CO, Littleton
Top

Postby jss06 » Sat Mar 12, 2011 11:58 pm

Finally after a couple of months waiting for the weather to warm up enough for the glue to cure properly I have made some more progress.

I finally decided on how I was going to seal the rear hatch. Had to make a failry elaborate piece to match the contours of what I wanted. This allowed me to finish up the framing of the walls.

Image

Test fitting it.

Image

With the rear glued and clamped, I was able to frame out the door opening.

Image
Image
Image
Image
Image
Image
Image
Image

I will route out the frame to match the door opening and some electrical chases tomorrow for the marker lights.

Then need to pick up the insulation and skin the interior of the walls. This way the walls are complete when they finally get mounted on the frame.
Last edited by jss06 on Tue Jun 16, 2015 9:16 pm, edited 1 time in total.
User avatar
jss06
Palladium Donating Member
 
Posts: 663
Joined: Mon May 12, 2008 7:48 pm
Location: Carrollton, TX
Top

Postby joebobsqrpants » Sun Mar 13, 2011 9:04 am

Looks awesome! Ill def be keeping an eye on this one.
joebobsqrpants
Teardrop Inspector
 
Posts: 17
Images: 18
Joined: Wed Jan 26, 2011 9:18 pm
Location: THOMASVILLE, NC
Top

Postby parnold » Sun Mar 13, 2011 10:09 am

I love your craftsmanship..

and I have workbench envy!

:thumbsup: :thumbsup:
User avatar
parnold
Donating Member
 
Posts: 2344
Images: 302
Joined: Mon Feb 08, 2010 4:49 pm
Location: Northwest New Jersey
Top

Postby jss06 » Sun Mar 13, 2011 4:02 pm

Finshed the door opening out. Need to add reinforcements in the walls to support the cabinates and galley shelf.

Image

Routed out the wiring chases for the marker lights. There will be simular cut made in the floor to keep the wiring from chafing.

Image
Image
Last edited by jss06 on Tue Jun 16, 2015 9:16 pm, edited 1 time in total.
User avatar
jss06
Palladium Donating Member
 
Posts: 663
Joined: Mon May 12, 2008 7:48 pm
Location: Carrollton, TX
Top

Postby jss06 » Sun Mar 27, 2011 9:58 pm

Okay, finally getting the walls to the point I will be able to put them up.

Installing the inserts for the hinge bolts. I am using the same thing to mount the fenders to the body.

Image
Image

Insulating the walls. Obviously the 3/4" insulation I picked up is just slightly thicker than 3/4". You can see the reinforcements that are built into the walls for the cabinate installs

Image
Image

Nothing a belt sander and a bit of time wont fix. The places it still looks like it's too thick is a result of the insulation bowing up.

Image
Image

And finally the interior skin is on. The backwall will be where the interior skin ends. This is the first wall finished. The second wall is together and drying right now.

Image

This wall weighs 51.4 lbs. currently.

At this point I need to to do some clean up on the floor then I can mount the walls.
Last edited by jss06 on Tue Jun 16, 2015 9:17 pm, edited 1 time in total.
User avatar
jss06
Palladium Donating Member
 
Posts: 663
Joined: Mon May 12, 2008 7:48 pm
Location: Carrollton, TX
Top

Postby Miriam C. » Sun Mar 27, 2011 10:16 pm

:thumbsup: :applause: 
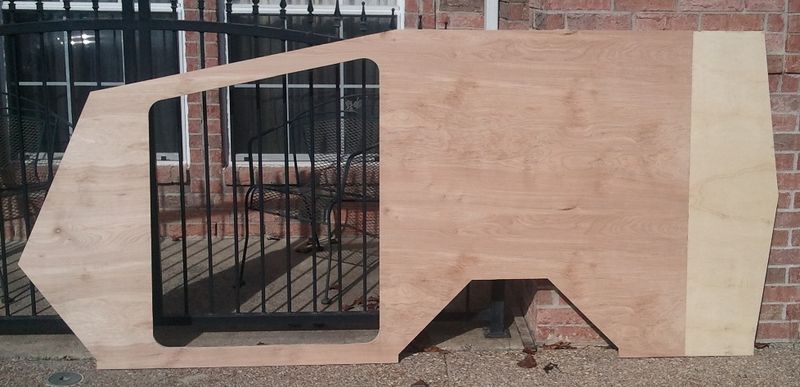
Great profile! One of the advantages of milling your own boards is you can get a true measure but you also get heavier! :thumbsup: Have fun putting up those walls.
:twisted:
“Forgiveness means giving up all hope for a better past.â€
User avatar
Miriam C.
our Aunti M
 
Posts: 19675
Images: 148
Joined: Wed Feb 15, 2006 3:14 pm
Location: Southwest MO
Top

Postby jss06 » Sat Apr 02, 2011 5:38 pm

Got to spend some more time working on the trailer today.

Wall 1 is Up.

Image
Image

Followed Quickly by wall 2.

Image
Image
Image

I could not wait to see if the fenders would cover the wheels/tires. So I put the wheel back on and temporarily mounted the fender. It fits great. The fender is a stock Jeep TJ rear fender flair. They are cheap and can be found virtually anywhere. They just require a few minor modifications and then bolt on.

Image
Image
Last edited by jss06 on Tue Jun 16, 2015 9:20 pm, edited 1 time in total.
User avatar
jss06
Palladium Donating Member
 
Posts: 663
Joined: Mon May 12, 2008 7:48 pm
Location: Carrollton, TX
Top

Postby parnold » Sat Apr 02, 2011 6:50 pm

Great idea using the fender flare! I'll have to tuck that idea away, it may come in handy sometime.

Looking good all around... Nice work!

:thumbsup: :thumbsup:
User avatar
parnold
Donating Member
 
Posts: 2344
Images: 302
Joined: Mon Feb 08, 2010 4:49 pm
Location: Northwest New Jersey
Top

Postby S. Heisley » Sat Apr 02, 2011 9:09 pm

Your trailer's profile is attractive and the fenders look great. You're doing a nice job. :thumbsup: Thanks for sharing. :applause:
User avatar
S. Heisley
Super Lifetime Member
 
Posts: 8772
Images: 495
Joined: Mon Sep 17, 2007 10:02 am
Location: No. California
Top

Postby jss06 » Mon Apr 25, 2011 8:28 pm

Been working on the intergrated tongue box. Its going slow as its fairly complex and its taking a while to work out all the angles.
User avatar
jss06
Palladium Donating Member
 
Posts: 663
Joined: Mon May 12, 2008 7:48 pm
Location: Carrollton, TX
Top

PreviousNext

Return to Build Journals

Who is online

Users browsing this forum: No registered users and 7 guests