adhesion level of myriad samples

Canvas covered foamies (Thrifty Alternatives...)

Moderator: eaglesdare

Postby Anita Rae » Tue Jun 28, 2011 11:24 am

What I don't understand is this. When I decided to remove the cloth from the side of my trailer, it did not come off easily. I had to lay the whole side on a flat surface and sit on it. Then I planted both feet on the foam and grabbed the cloth and pulled it back and worked from the edges to the middle. It did come off but I wouldn't call it easy. Did I do something different? I just dunno? Maybe I just didn't eat my Cherios that day.

Edit to add:

In the Fairy Diddle build, I put a picture of a test piece. In thay you can see how much glue I used. I put it on thick. I put a thin coat on the foam and then place the canvas on, then I acutally pour the diluted glue on and put on a glove an rub the glue into the canvas. Maybe that is the difference :QM
User avatar
Anita Rae
Donating Member
 
Posts: 104
Joined: Fri Jun 04, 2010 1:48 pm
Location: Mims, Fl

Postby Conedodger » Tue Jun 28, 2011 12:07 pm

Anita Rae: Adhesion no doubt gets better over time, the problem with Mike's tests are they were pulled off after 4 or so hours and most of these need 24 hours or longer to work at all. Cross Linked PVA glue (TB2 or 3) needs 2 weeks to fully season.

Wagondude: I use PVA and cloth to repair Display Puppets and do one layer one day and another layer the next. I found that doing it wet on wet for loads of layers took for ever to dry.

Here is one that was in bits, the PVA and cloth is inside, its 5 foot tall

Image
Conedodger
Teardrop Master
 
Posts: 129
Joined: Thu May 12, 2011 2:24 pm
Location: United Kingdom

Postby squatch » Tue Jun 28, 2011 2:05 pm

Anita as far as I'm concerned you did it the right way. On my silly little grill box experimant above I saturated the cloth. This is the same as you would do with wetting fiberglass. I brushed on straight glue on the cardboard then applied the cloth and then brushed on a slightly thined glue coat to fully saturate the cloth. This is what makes the cloth strong. In my small experience if you don't fully wet the cloth with glue the 1st time you have lost your chance. The cloth has just enough glue on it to keep from fully becoming one with the glue if you top coat the glue after it has set.

Ideally you would fully wet every layer at the same time for "oneness" but this makes drying time very long. I found the second coat would stick fine to the 1st layer as long as it was done within a day or 2. When the entire box was fully coated I sat it in the sun to dry on a windy day. This greatly enhanced the drying process. I assume this would all count even more when using the thicker camvas.

It did take a couple of weeks for my box to really get good and hard. The cardboard absorbed glue and stayed damp for a time.
User avatar
squatch
Teardrop Advisor
 
Posts: 50
Joined: Sun Jun 05, 2011 12:44 pm
Location: Md
Top

Postby Tx River Rat » Tue Jun 28, 2011 2:26 pm

Did some test you might find interesting
I was using pink foam from Home Depot 1 inch thick 6inches wide by 2 ft long

I made several samples using 6 ounce cloth and epoxy covering both sides with just one heavy coat.

After drying a couple days the test piece was very ridged and stiff

I placed both ends on a block and slowly started putting presure in the middle , I finally got enough pressure in the middle that the foam collapsed leaving both sides of the cloth attached. Pretty strong layup.
Next I did another piece , I drilled holes on four inch center after coating on both sides with cloth and epoxy. I used the small wooden skewers like you use for cooking inserted them in the holes and cut them flush, the put some wood flour epoxy mix on them.
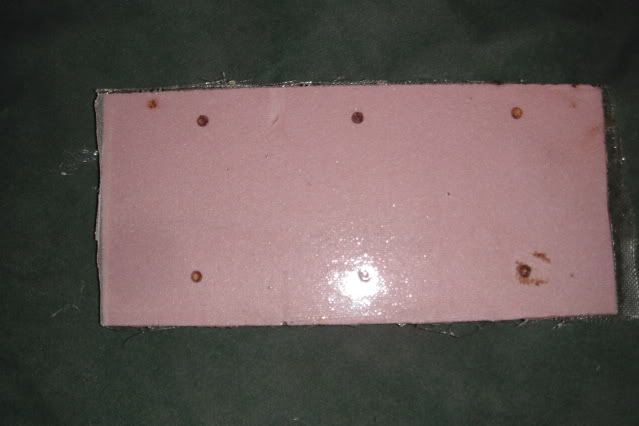
Image

After drying a couple days I tried to break it , put a ton of my weight on it , very little give ,finally took a 2+4 placed on edge between the pegs
put a lot of weight on it ,it finaly broke ,but it pulled the 6 ounce glass into before it did. You can see the foam is not deformed it snapped clean
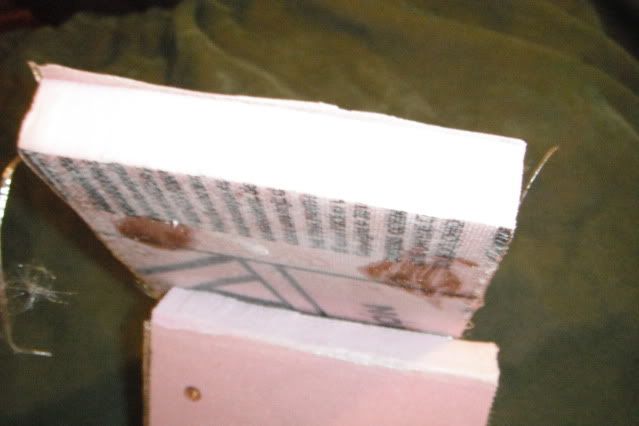
Image

On the bottom side of the top piece you can see where it tore into ,I cut the other side with a knife. This piece was really strong,now if I had glass down the edges I dont think I could break it.

I then to a framing hammer and using the same force it would take to drive a 16 boxing nail hit the same spot 30 times .

Image

I did this between the right four pegs , can you even see it, I had to roll it up on edge to see any indentions at all , the hammer was used flat just like you would drive a nail.

What I am doing with this method is tying both skins together so a hard blow is transferred not just on the outside but to both sides at once and the wood dowels make a truss. Also if you take a hard blow it keeps most of the impact and damage inside the square made by the dowel.
I think the same ideal would work with canvas covered sides.
Ron
Tx River Rat
2nd Teardrop Club
 
Posts: 514
Joined: Tue Nov 27, 2007 7:46 pm
Top

Postby mikeschn » Tue Jun 28, 2011 4:12 pm

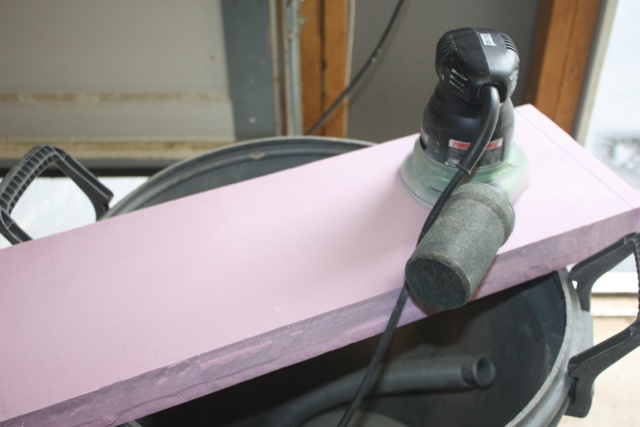
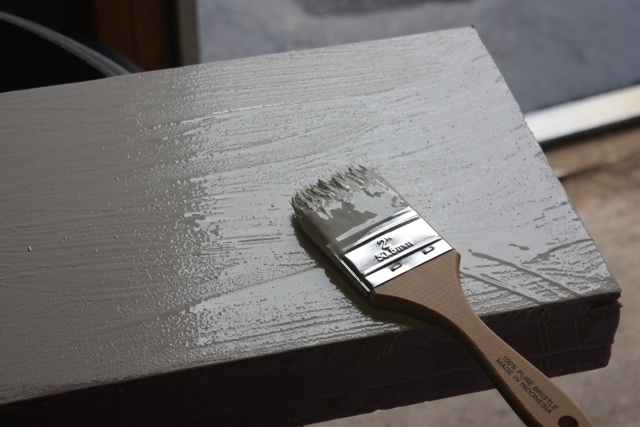
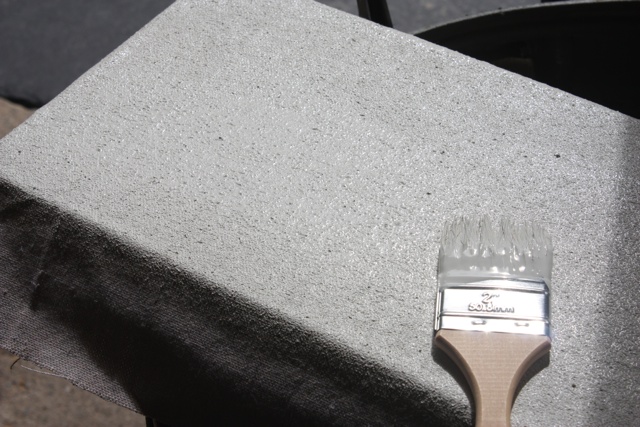
Okay, I went out and did another sample... I realized that I really like the adhesion of the exterior latex enamel on wood, but I never tried it on canvas...

So here I am doing up a sample on canvas...

Image

Image

Image

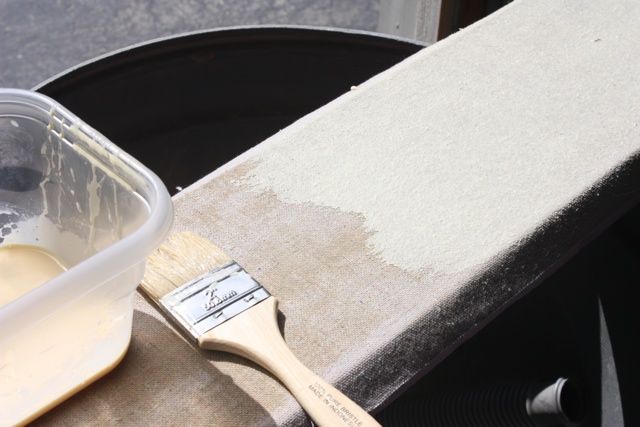
And last, but not least, here's the titebond II sample I started yesterday. I've added the thinned out titebond II to the top... I noticed that the cloth was only about 80% saturated. Maybe I should have done what Anita did, add the diluted Titebond II at the same time. I'm wondering if that will hurt the full strength glue underneath... Probably not!

Image

Anita, I will revisit my samples after they have cured a bit longer. Cone is right, the adhesion will get better. Also, the larger the surface area the harder it is to pull off, as you experinced pulling the cloth off the side of your trailer. Can I ask, why did you pull the cloth off the sides?

Mike...

P.S. Cone, Regarding the titles, use your best judgment. I would say yes!
The quality is remembered long after the price is forgotten, so build your teardrop with the best materials...
User avatar
mikeschn
Site Admin
 
Posts: 19202
Images: 475
Joined: Tue Apr 13, 2004 11:01 am
Location: MI
Top

Postby Conedodger » Tue Jun 28, 2011 4:19 pm

Tx River Rat: Thats a very interesting idea, In an earlier post I showed a similar idea using 2" strips of ply making a sort of grid, but your idea is so much easier as it can be done later.

I wonder what happens if you use TB2 and cloth. If you try it (or whoever tries it) will have to leave the TB2 to season for about 2 weeks to gain its full strength.
Conedodger
Teardrop Master
 
Posts: 129
Joined: Thu May 12, 2011 2:24 pm
Location: United Kingdom
Top

Postby Conedodger » Tue Jun 28, 2011 4:21 pm

Mike: have you had another go on your samples now they have had a few days to season?
Last edited by Conedodger on Tue Jun 28, 2011 4:58 pm, edited 1 time in total.
Conedodger
Teardrop Master
 
Posts: 129
Joined: Thu May 12, 2011 2:24 pm
Location: United Kingdom
Top

Postby mikeschn » Tue Jun 28, 2011 4:21 pm

Conedodger wrote:Thanks for testing again Mike.

I am sure you have read all i have written about the importance of it being wrapped.


Yes, of course on the wrapping. But I wanted to get a feel for the actual adhesion prior to the wrapping or the sock effect.

I didn't want to build a TTT and have it bubble up on me, either in the sun or in the wind, or even sitting out in the yard in the elements.

The second thing I was looking for was a good looking finish. And as you know by looking at the pictures, not everything looked good.

More on the second part later... dinner is calling...

Mike..
The quality is remembered long after the price is forgotten, so build your teardrop with the best materials...
User avatar
mikeschn
Site Admin
 
Posts: 19202
Images: 475
Joined: Tue Apr 13, 2004 11:01 am
Location: MI
Top

Postby mikeschn » Tue Jun 28, 2011 5:05 pm

Conedodger wrote:Mike: have you had another go on your samples now they have had a few days to season?


That sounds like a good idea. It's cool and windy, and no bright sun, so that should help with the images... The wind might be a problem with the movies though... But I'll try...

Mike...
The quality is remembered long after the price is forgotten, so build your teardrop with the best materials...
User avatar
mikeschn
Site Admin
 
Posts: 19202
Images: 475
Joined: Tue Apr 13, 2004 11:01 am
Location: MI
Top

Postby Tx River Rat » Tue Jun 28, 2011 5:12 pm

If I was using canvas I would use expanding foam or gorilla glue for the foam to wood dowel gluing.
Ron
Tx River Rat
2nd Teardrop Club
 
Posts: 514
Joined: Tue Nov 27, 2007 7:46 pm
Top

Postby mikeschn » Tue Jun 28, 2011 5:59 pm

Tx River Rat wrote:Did some test you might find interesting
I was using pink foam from Home Depot 1 inch thick 6inches wide by 2 ft long

I made several samples using 6 ounce cloth and epoxy covering both sides with just one heavy coat.

After drying a couple days the test piece was very ridged and stiff

I placed both ends on a block and slowly started putting presure in the middle , I finally got enough pressure in the middle that the foam collapsed leaving both sides of the cloth attached. Pretty strong layup.
Next I did another piece , I drilled holes on four inch center after coating on both sides with cloth and epoxy. I used the small wooden skewers like you use for cooking inserted them in the holes and cut them flush, the put some wood flour epoxy mix on them.

Image

After drying a couple days I tried to break it , put a ton of my weight on it , very little give ,finally took a 2+4 placed on edge between the pegs
put a lot of weight on it ,it finaly broke ,but it pulled the 6 ounce glass into before it did. You can see the foam is not deformed it snapped clean

Image

On the bottom side of the top piece you can see where it tore into ,I cut the other side with a knife. This piece was really strong,now if I had glass down the edges I dont think I could break it.

I then to a framing hammer and using the same force it would take to drive a 16 boxing nail hit the same spot 30 times .

Image

I did this between the right four pegs , can you even see it, I had to roll it up on edge to see any indentions at all , the hammer was used flat just like you would drive a nail.

What I am doing with this method is tying both skins together so a hard blow is transferred not just on the outside but to both sides at once and the wood dowels make a truss. Also if you take a hard blow it keeps most of the impact and damage inside the square made by the dowel.
I think the same ideal would work with canvas covered sides.
Ron

That's interesting. I was thinking about using 1" dowels, glued in with gorilla glue to increase the holding power of cloth to foam.

You've effectively done the same thing, but to increase your breaking resistance. But at the same time you increase your adhesion of cloth to foam! Thanks for sharing that with us.

Mike...
Last edited by mikeschn on Tue Jun 28, 2011 6:37 pm, edited 1 time in total.
The quality is remembered long after the price is forgotten, so build your teardrop with the best materials...
User avatar
mikeschn
Site Admin
 
Posts: 19202
Images: 475
Joined: Tue Apr 13, 2004 11:01 am
Location: MI
Top

Postby Conedodger » Tue Jun 28, 2011 6:12 pm

Also as my dear 92 year old dad said "put the dowels in a different angles so there no chance of it coming off"

If they are all straight from one skin to the other they could all move, if you put them in at different angles they act to key it all together.
Conedodger
Teardrop Master
 
Posts: 129
Joined: Thu May 12, 2011 2:24 pm
Location: United Kingdom
Top

Postby mikeschn » Tue Jun 28, 2011 6:13 pm

Now that the samples have had a chance to cure for a couple days, I tested them again.

Hopefully Cone can help me out with a youtube movie again....

Meanwhile these videos are self documented.

http://www.mikenchell.com/images/MVI_1561.MOV

http://www.mikenchell.com/images/MVI_1562.MOV

http://www.mikenchell.com/images/MVI_1563.MOV

http://www.mikenchell.com/images/MVI_1564.MOV

http://www.mikenchell.com/images/MVI_1565.MOV

http://www.mikenchell.com/images/MVI_1566.MOV

http://www.mikenchell.com/images/MVI_1567.MOV

http://www.mikenchell.com/images/MVI_1568.MOV

http://www.mikenchell.com/images/MVI_1569.MOV

http://www.mikenchell.com/images/MVI_1570.MOV

Mike...

P.S. Cone, the last two samples are in the garage curing... I'll make those movies for you tomorrow!!!
Last edited by mikeschn on Tue Jun 28, 2011 6:40 pm, edited 1 time in total.
The quality is remembered long after the price is forgotten, so build your teardrop with the best materials...
User avatar
mikeschn
Site Admin
 
Posts: 19202
Images: 475
Joined: Tue Apr 13, 2004 11:01 am
Location: MI
Top

Postby Tx River Rat » Tue Jun 28, 2011 6:33 pm

Mike
These pegs are less than 3/16 th thick so they are easy to work
Ron
Tx River Rat
2nd Teardrop Club
 
Posts: 514
Joined: Tue Nov 27, 2007 7:46 pm
Top

Postby mikeschn » Tue Jun 28, 2011 6:55 pm

So far here's what I like the looks of...

This is strictly looks... nothing to do with adhesion!

bedsheet on wood with exterior enamel

fiberglass on wood with polyester resin

canvas on foam with titebond II

Mike...
The quality is remembered long after the price is forgotten, so build your teardrop with the best materials...
User avatar
mikeschn
Site Admin
 
Posts: 19202
Images: 475
Joined: Tue Apr 13, 2004 11:01 am
Location: MI
Top

PreviousNext

Return to Foamies

Who is online

Users browsing this forum: No registered users and 1 guest