Robbie's Benroy build- Now For Sale...

...ask your questions in the appropriate forums BUT document your build here...preferably in a single thread...dates for updates, are appreciated....

Postby absolutsnwbrdr » Fri Sep 16, 2011 8:30 am

Looks good Robbie! You have a beautiful....... trailer!

Image

Keep up the good work! You're going to be camping in no time! :thumbsup:
Zach
Coming Soon...
Image Image
User avatar
absolutsnwbrdr
Donating Member
 
Posts: 2657
Images: 412
Joined: Mon Jan 25, 2010 6:10 pm
Location: Hanover, PA

Postby Robbie » Fri Sep 16, 2011 8:35 am

Ha ha! :lol:

Thanks Zach! She's a doll.
My aluminum benroy build:
viewtopic.php?t=45640
User avatar
Robbie
Teardrop Master
 
Posts: 250
Images: 86
Joined: Tue May 10, 2011 11:28 am
Location: West Jordan, UT

Postby kinto » Fri Sep 16, 2011 10:23 am

looks great robbie! :applause:

i'm in the same boat... can't wait to get mine camp-able and out there!


keep up the pace :thumbsup:


kent
:)
Is a hippopotamus just a really cool opotamus?

imay ildbay urnaljay

Image
User avatar
kinto
Gold Donating Member
 
Posts: 228
Images: 465
Joined: Tue Jul 19, 2011 10:20 am
Location: STL
Top

Postby campmaster-k » Fri Sep 16, 2011 12:43 pm

Great work Robbie. I have a question for those who build the pod independently of the trailer. How do you move it around? Even big ol Robbie cant move that thing by himself. Heck I have trouble moving one sheet of 3/4 ply by myself.

And why. what is the advantage of building them separately. I see none.
-Kirk

>TnTTT ORIGINAL 200A LANTERN CLUB

>CEO Coleman Recovery Inc.

>Nor Cal Camping Pinewood Racing Team


Build thread -

viewtopic.php?t=45307&postdays=0&postorder=asc&start=180

Check out my Pictures -

http://s1199.photobucket.com/albums/aa4 ... 0QQtppZZ24
User avatar
campmaster-k
Lifetime member
 
Posts: 3030
Images: 17
Joined: Fri Jun 17, 2011 5:02 pm
Location: Colusa, California
Top

Postby Robbie » Fri Sep 16, 2011 12:55 pm

Kirk, as for moving it around, luckily I haven't had to yet. LOL. And I've had someone helping me when heavy parts needed to be lifted. It is sitting on some temporary blocks right now. I should have the frame built within the next couple weeks and then I'll be able to mount it. When the time comes a couple pizzas and a 12 pack will get my buddies over here and we'll lift it off while someone pulls the blocks out and rolls the trailer under. It is really pretty light. I can lift one end by myself with a bad hand so 4 of us should be able to lift it no problem.

There is no advantage to building it off the trailer. If I could have I would have definitely started with the trailer first like usual. But since I didn't have the money for the trailer at the beginning but I had all the wood I decided to go this route so I could get a head start.

I'm hoping I can at least get it campable before the snow hits so I can take it out before winter, even just for a day trip. I'll run the wiring but will probably do the tongue box and battery/electronics last.

Robbie
My aluminum benroy build:
viewtopic.php?t=45640
User avatar
Robbie
Teardrop Master
 
Posts: 250
Images: 86
Joined: Tue May 10, 2011 11:28 am
Location: West Jordan, UT
Top

Postby campmaster-k » Fri Sep 16, 2011 3:01 pm

In your case there is an advantage. It keeps you building when you would have had to wait. Good work. :thumbsup:
-Kirk

>TnTTT ORIGINAL 200A LANTERN CLUB

>CEO Coleman Recovery Inc.

>Nor Cal Camping Pinewood Racing Team


Build thread -

viewtopic.php?t=45307&postdays=0&postorder=asc&start=180

Check out my Pictures -

http://s1199.photobucket.com/albums/aa4 ... 0QQtppZZ24
User avatar
campmaster-k
Lifetime member
 
Posts: 3030
Images: 17
Joined: Fri Jun 17, 2011 5:02 pm
Location: Colusa, California
Top

Postby CliffinGA » Fri Sep 16, 2011 9:59 pm

Looking good Robbie and take it easy on the arm, you don't want to over do it and then they have to go back and rebreak it! It hurts worse the second time and takes longer to heal, been there and had it done twice, yes I am hard headed :lol:
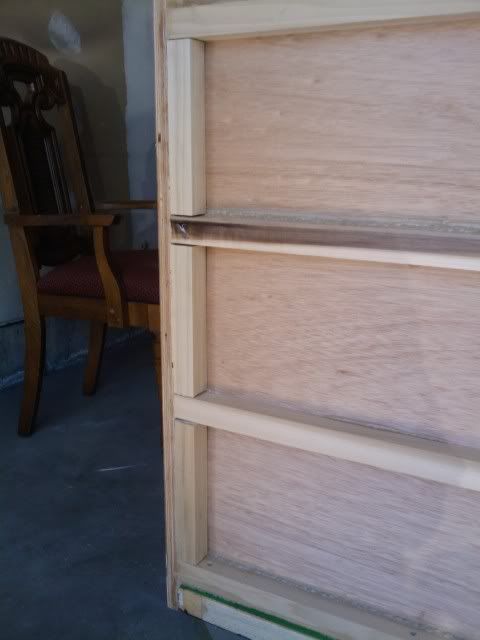
. What are you using for hinges on your doors and have you started fitting them yet?

Cliff :thumbsup:
In God we trust, shoot the rest and he will sort out!

My Build:

viewtopic.php?f=50&t=42628
User avatar
CliffinGA
1000 Club
1000 Club
 
Posts: 1499
Images: 207
Joined: Sat Nov 14, 2009 1:29 pm
Location: Jefferson, GA
Top

Postby Robbie » Fri Sep 16, 2011 10:49 pm

Ya I'm gonna be taking it easy for a while and get the less strainful work done first. As for the doors and hinges I'll be using an aluminum piano hinge from mcmaster carr. I don't have the doors cut out yet but they are sized so I just need another sheet of ply and some time on our panel saw. I'm going to focus on the inside first and then move onto the exterior with the vent, doors, windows, etc.
My aluminum benroy build:
viewtopic.php?t=45640
User avatar
Robbie
Teardrop Master
 
Posts: 250
Images: 86
Joined: Tue May 10, 2011 11:28 am
Location: West Jordan, UT
Top

Postby CliffinGA » Sat Sep 17, 2011 7:52 am

When you start on the doors start thinking about your gaps, trim and weatherstripping in relation to the door. I started messing with mine and found I had to sand the opening and the doors down more to take in the added thickness of the hinge, that part is left out of the benroy plans :lol:.

Cliff :thumbsup:
In God we trust, shoot the rest and he will sort out!

My Build:

viewtopic.php?f=50&t=42628
User avatar
CliffinGA
1000 Club
1000 Club
 
Posts: 1499
Images: 207
Joined: Sat Nov 14, 2009 1:29 pm
Location: Jefferson, GA
Top

Postby Robbie » Sat Sep 17, 2011 8:22 am

Thanks for the heads up Cliff! I'm planning on starting with a 1/4" gap for the hinge with 1/8" gap all around and go from there. I'm going to have the door jamb inside with a foam rubber weather stripping.
My aluminum benroy build:
viewtopic.php?t=45640
User avatar
Robbie
Teardrop Master
 
Posts: 250
Images: 86
Joined: Tue May 10, 2011 11:28 am
Location: West Jordan, UT
Top

Postby WildTexan » Sat Sep 17, 2011 4:51 pm

Looking real good. I used FRP for my roof as well but I didn't want a seam. I contacted a trailer repair place (i.e. Great Dane or Utility). They repair 18-wheeler trailers. I got a piece of scrap that was 8x13. They use the stuff to repair the inside of refrigerated trailers. I ended up with no seams. And they just gave the stuff to me. they just wanted it gone.
User avatar
WildTexan
Teardrop Advisor
 
Posts: 77
Images: 77
Joined: Thu Nov 18, 2010 3:33 pm
Location: Hickory Creek, TX
Top

Postby Robbie » Sun Sep 18, 2011 5:52 pm

Thanks for the info. I'll look into that for sure!

I got some more work done today. My wife finished sanding out all the spackle spots inside and I got the doors mounted on the face frame for the overhead cabinet. I just need to run a rabbet along the backside for the plexi to fit into then its time for prime and get them all mounted up! I also put a few braces between the roof spars along the roof edge to give the ends of the ceiling material more support. It really helped alot!

Image

Image

Image

Image
My aluminum benroy build:
viewtopic.php?t=45640
User avatar
Robbie
Teardrop Master
 
Posts: 250
Images: 86
Joined: Tue May 10, 2011 11:28 am
Location: West Jordan, UT
Top

Postby Robbie » Wed Sep 21, 2011 10:24 am

All of the spackling is finally done! Finally! We also got the ceiling to wall joint/gap all caulked up with painter's caulk. I had some pretty big gaps that were roughly 1/8"-1/4" wide so I used a fair amount of caulk on the inside and the outside to make sure it was sealed up nice and smooth. We got the first coat of primer on with Kilz 2 primer/sealer. It is starting to come together inside now that its all one color. I plan on doing 2 or 3 coats of primer inside with probably 3 coats of paint after that. We are probably gonna do either a light blue or yellow as the interior color cause we have a bunch of that color paint left over from house projects. :) Gotta save money where ya can! I will post up some new pics of the interior tonight once we get another coat of prime on and hopefully get the cabinet mounted!
My aluminum benroy build:
viewtopic.php?t=45640
User avatar
Robbie
Teardrop Master
 
Posts: 250
Images: 86
Joined: Tue May 10, 2011 11:28 am
Location: West Jordan, UT
Top

Postby absolutsnwbrdr » Wed Sep 21, 2011 10:32 am

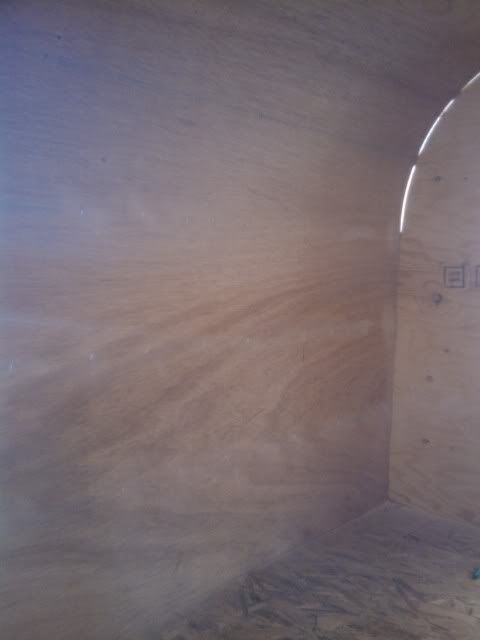
Robbie wrote:We got the first coat of primer on with Kilz 2 primer/sealer. It is starting to come together inside now that its all one color.


Its amazing how that uniformity makes it look so much different!
Zach
Coming Soon...
Image Image
User avatar
absolutsnwbrdr
Donating Member
 
Posts: 2657
Images: 412
Joined: Mon Jan 25, 2010 6:10 pm
Location: Hanover, PA
Top

Postby Robbie » Wed Sep 21, 2011 10:35 am

It totally does! And bigger! Having the bright white all over makes the space feel a little bit bigger inside, much less claustrophobic!
My aluminum benroy build:
viewtopic.php?t=45640
User avatar
Robbie
Teardrop Master
 
Posts: 250
Images: 86
Joined: Tue May 10, 2011 11:28 am
Location: West Jordan, UT
Top

PreviousNext

Return to Build Journals

Who is online

Users browsing this forum: Bing [Bot] and 43 guests