Thanks everyone. Excited isn't the word. I can hardly sleep at night thinking about the next steps. I am taking off work early this Friday afternoon to go to Annapolis and get the 1/8" 5x5 Baltic Birch for my roof. Good Lord willing I will get some good progress on that this weekend. I also did a tiny bit of framing in my galley, but it was more thinking than framing.
It seems like it's moving a lot faster now that the walls are up. I have a feeling it's going to slow right down again though when I get to the hatch.
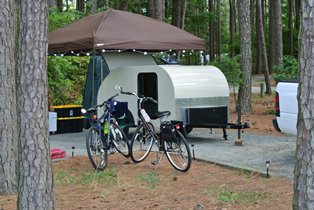
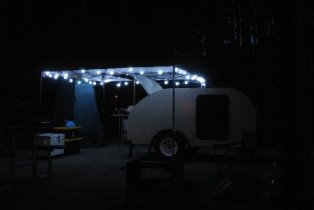
Lance and Becky's Sagwagon
Re: Lance and Becky's Sagwagon - First Road Test
![]() by Oldragbaggers » Mon May 14, 2012 6:39 pm
by Oldragbaggers » Mon May 14, 2012 6:39 pm
Life is sooooo good.........
Sail...camp....bike...repeat
Becky
Build Journal http://www.tnttt.com/viewtopic.php?f=50&t=45917
Visit our blog at http://www.oldragbaggers.com
Sail...camp....bike...repeat
Becky
Build Journal http://www.tnttt.com/viewtopic.php?f=50&t=45917
Visit our blog at http://www.oldragbaggers.com
-

Oldragbaggers - Gold Donating Member
- Posts: 1842
- Images: 331
- Joined: Mon Aug 01, 2011 9:22 pm
- Location: Essex, MD
Re: Lance and Becky's Sagwagon - First Road Test
![]() by txcamper » Wed May 16, 2012 3:50 pm
by txcamper » Wed May 16, 2012 3:50 pm
That is looking incredible, read through some of your blog as well, the attention to detail is impressive!!!
Don't be afraid of the hatch, I haven't read through your entire build yet so if you have this planned or if you have the feedback already, my apologies: I ended up adding all new (additional) cross braces for every seam on the hatch, it seems that my seams didn't line up.
Main reason for this for me - I was too time crunched for the 2+ hour round trip for me for another sheet of 1/8" birch on mine so I had to use 'what I had left' from the headliner and outer skin. If you can, try to get a full single sheet for the hatch skin, outer at least. I think that would've made my hatch assembly much easier.
All in all though, it wasn't bad. I can't imagine you'll have any issues after the job you did on those walls!
Getting the itch to build again....
6x12 low profile cargo trailer conversion - sold
5x8 Benroy style Teardrop on 4x8 Harbor Freight trailer - sold
6x12 low profile cargo trailer conversion - sold
5x8 Benroy style Teardrop on 4x8 Harbor Freight trailer - sold
-
txcamper - Teardrop Master
- Posts: 120
- Images: 129
- Joined: Wed Mar 21, 2012 12:25 am


 hatch.