Ron's 5'x9' Benroy with drop-floor for sitting upright

...ask your questions in the appropriate forums BUT document your build here...preferably in a single thread...dates for updates, are appreciated....

Ron's 5'x9' Benroy with drop-floor for sitting upright

Postby amp1ron » Sat Jun 16, 2012 7:57 pm

I started my build in October 2011 by ordering a 12' x 20' x 8' (6' high sidewalls) Rhino Shelters portable garage and setting it up in my backyard. I also ordered a 5'x'8' bolt together Northern Tool trailer on sale. The trailer turned out to be tricky to register as I had it shipped to my workplace and the company that shipped it filled out the trailer's certificate of origin with my name as "Ron Food Research LastName". Food Research is the building I work in and has a loading dock. The first DMV I went to had big problems with this. Striking out Food Research with a single line and initialing above the struck-out text with the certificate submitter's (not the notary public's initials) and going to a different DMV got me my registration with no questions.

I assembled, registered, and got the trailer inspected in the Spring and then then stopped making progress until recently when I finished learning my CAD package (MacDraft Pro) and got the basic side-view of the trailer sketched out.

I've got a Dexter Torflex 2000# axle with electric brakes and 13" wheels and tires on order that should be here Thursday. Today I picked up plywood, insulation, and 1x4 poplar for floor framing. If I don't slack off tomorrow I should be able to get the floor built.

Here's a dimensioned drawing of what I'm going to build:

Image

The dimensions of the body, trailer, axle, wheels, and tires should all be right, but the length of the a-frame tongue is probably not right.

I started with one of angib's DXF files that had a 4x8 harbor freight trailer and then got rid of almost everything except angib's 0 layer and the trailer, then redrew the trailer to match the dimensions of my Northern Tool 5x8 trailer. The 9' Benroy was drawn using Mike's tutorial on drawing a Benroy but modified to make it 9' long. The spars aren't all drawn in yet, the hatch isn't drawn in, no cabinets are drawn in and the dividing wall between the cabin and galley isn't completely drawn. The doors (two of them) will be manufactured doors, but where I show the door on the profile is probably not where I'll end up placing it. I've decided I've drawn in more than enough detail to start building.

I really wanted to make it 10' long and have a closet up front, but it looks too long when I stand up 4'x10' of foam on the trailer. 4'x9' looks OK.

Walls will be 3/4" ply framing with cutouts for insulation. 1/2" ply outside wall sheathing, two layers of 1/4" ply on roof, unsure of what the inner walls and ceiling will be sheathed with. The outer walls and roof will be fiberglassed and epoxied and then painted. I won't be fiberglassing the floor but will probably use latex paint on the bottom 1/4" layer of floor ply so it can breathe.

I'm thinking of putting in a drop-floor for sitting up on rainy days. I'll probably end up building everything else first and doing some camping in the teardrop before I build the drop-floor, but I'll frame in provisions in the floor now for adding the drop-floor later.

I had problems coming up with a way to have a drop floor box that was as deep as I wanted. I played around with a telescoping floor box but couldn't come up with a design that I thought would be easy to pull back up into travel position with serious binding issues. I ended up with an idea for a open-bottom floor box with a ledge at the bottom of the box and another, smaller box that can sit on the ledge. The smaller box would have angled sides so that it wouldn't bind in the large box and wouldn't have to be pulled absolutely straight up and dropped straight down. The smaller box can be dropped in with the open side of it down for travelling and to maximize ground clearance. It can also be dropped in with the open end up to allow for legroom while sitting up. I've got a few concerns about actually building it: 1) figuring out a seal between the two boxes that won't be damaged when dropping the smaller box in place, 2) figuring out a latch to hold the small box down in either travel or legroom positions to keep curious animals (or people) from pushing the box up and entering the trailer from below, and 3) not wanting to deal with a marvelous place for spiders to nest when the box is upside down -- pulling the box up could easily reveal a bunch of creepy-crawlies that are hanging from the box.

Here's a drawing (not to scale except for floor section):

Image

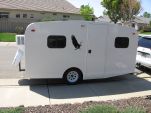
I think I've got some assembly photos of the portable garage and I'll post them soon as well as trailer floor pictures when I start building it.

I've already learned a few things: I should have had someone build me a 4'10" x 9' trailer with the axle and brakes I really wanted rather than dropping a 9' long floor on top of an 8' long trailer -- it would have been less expensive and faster. A trailer a little less than 5' wide would have worked better for roof sheathing. I would be cutting down the width of bolt-together trailer now if I hadn't already ordered a torsion axle with the brackets set up to bolt directly under the 5' wide frame.

I very much welcome any suggestions on the rest of my build. :)
amp1ron
Silver Donating Member
 
Posts: 14
Images: 18
Joined: Tue Jun 07, 2011 8:19 pm
Location: NY State Finger Lakes

Re: Ron's 5'x9' Benroy with drop-floor for sitting upright

Postby terryjones1 » Sun Jun 17, 2012 1:06 pm

amp1ron wrote:
I'm thinking of putting in a drop-floor for sitting up on rainy days. I very much welcome any suggestions on the rest of my build.


I too thought that I needed to be inside the trailer on rainy days.
I attended the Dam Gathering at Lake Shasta, California.
Most of the Teardrop Trailers had Canopys.
Many of the Canopys had sides added.
Whenever it rained, and it did, the tear drop campers hung out under their Canopys.
When I came home, I bought a Canopy.
You do not have to shut yourself inside the Teardrop on rainy days.
My TTT Garageable Standy Build Journal: viewtopic.php?f=50&t=40591
User avatar
terryjones1
Gold Donating Member
 
Posts: 266
Images: 1
Joined: Wed Aug 25, 2010 2:09 pm
Location: Lincoln, Ca

Re: Ron's 5'x9' Benroy with drop-floor for sitting upright

Postby amp1ron » Wed Jun 20, 2012 8:59 pm

terryjones1 wrote:You do not have to shut yourself inside the Teardrop on rainy days.


Terry -- Thanks for the feedback. I hear what you're saying and I'll only add the drop-down floor box after camping in it for a while and only if I feel the need for it. But I will go ahead and put framing in the floor now so that it's easy to add the drop-box later if I want it.
amp1ron
Silver Donating Member
 
Posts: 14
Images: 18
Joined: Tue Jun 07, 2011 8:19 pm
Location: NY State Finger Lakes
Top

Trailer tongue jack

Postby amp1ron » Wed Jun 20, 2012 9:20 pm

I wanted a jack that was lined up on the center axis of the trailer frame, so early this spring I fabricated a mounting bracket. It was fast to make with a jig-saw and hole-saw once I was able to find a hole-saw saw that wasn't too small or too large -- in this case a 2-3/8" hole saw.

Image

In the above photo you can also see the bolt-on handle that will let me lift the trailer tongue as long as it's not too out of balance.

The back of the bracket is stiffened with a piece of angle iron that's bolted to the plate and to the trailer tongue frame. There's also another piece of angle-iron bolted to the bottom side of the frame that lets me tie-in the jack tubing with a u-bolt to stiffen it up a little. If you look just forward of the spare tire mounting bracket (that I'll probably be getting rid of), you can see the two pieces of angle iron here with just the smallest of gaps between them:

Image

And here you can see the u-bolt that is my attempt to stiffen up the trailer jack's mounting to the a-frame so that it will hopefully not bend over if I'm moving the trailer on a jack-mounted wheel:

Image

This all seems to work well, and the one time I mounted the wheel to the bottom of the jack I could easily pull the trailer around on the floor of my portable garage. The floor is not very level or flat as it's just a thick polyethylene tarp that's sitting on now-dead lawn inside the garage, but the trailer still rolled around easily.
amp1ron
Silver Donating Member
 
Posts: 14
Images: 18
Joined: Tue Jun 07, 2011 8:19 pm
Location: NY State Finger Lakes
Top

Work done weekend of June 16

Postby amp1ron » Wed Jun 20, 2012 9:28 pm

I didn't get done with as much as I wanted this weekend. I realized that before I build and attach the floor I should really add the drop-down stabilizers I'd ordered. I mounted the stabilizers with 3/8" bolts. Each stabilizer has two mounting holes. I used the existing bolts that hold the corners of the frame together to also mount one end of each stabilizer mounting plate (I replaced the nylock nuts with new ones when I did this). I then used a transfer punch to mark the center of the additional hole for each stabilizer, drilled the holes, painted the holes with a couple of coats of rattle-can paint, and waited a few hours for the paint to be cured enough that I could install the bolts for the stabilizer jacks. Here's what I ended up with:

Image

The only other real trailer work I accomplished this weekend was buying supplies for building the floor. Here they are loaded on the trailer and sitting inside my portable garage:

Image

The materials for the floor are 1x4 poplar for floor framing, 3/4" foil-backed green foam (I'll foil-tape the edges and and dings I might make in the foil) for insulating floor, 1/2" ply for top layer of floor, 1/4" ply for road side of floor.

If you look carefully you can see two battery powered Coleman LED lanterns hanging from the ceiling and one hanging from the side wall of the garage. They give enough light to work in the garage at night with the ends closed up.

This coming weekend I'd like to build and mount the floor, but I've got a torsion axle with brakes on order that should be ready for pickup tomorrow. If the axle is here, I'll be working on mounting that this weekend and then build the floor if I still have time.
Last edited by amp1ron on Sun Jun 24, 2012 4:11 pm, edited 1 time in total.
amp1ron
Silver Donating Member
 
Posts: 14
Images: 18
Joined: Tue Jun 07, 2011 8:19 pm
Location: NY State Finger Lakes
Top

Weekend of 23 June 2012

Postby amp1ron » Sun Jun 24, 2012 4:08 pm

My axle showed up at the dealer's this week, but not the new 13" wheels and tires that go with it. The dealer is an hour and a half drive each way from me, so I'll wait for the wheels and tires before I go pick up the axle.

I didn't accomplish much this weekend. I started cutting my plywood for the floor to width and had a difficult time cutting using an aluminum edge guide with my Porter Cable 314 4-1/2" circular trim saw. The saw cuts great freehand, but was tough to use when guided by a straightedge. I finally figured out that the saw's shoe/baseplate wasn't parallel to the blade. It took me a while to figure out where on the saw's body to file off material to align the blade and shoe. I had to take apart the saw, file away a little metal, and reassemble several times before I got the blade and shoe into alignment. I also had to file a washer to thickness to fill a gap on the opposite site of the saw's body from where I'd filed off metal.

The saw's shoe is now square to the blade and the saw now cuts great when run against a straightedge.

This weekend I also made a cutting guide that clamps to the material being cut and lies right along the cut line. The cutting guide I made is constructed of 1/4" masonite and glued together with Loctite PL Premium. I hadn't used the Loctite construction adhesive before and I found it pretty easy to work with. There was a little squeeze out, but it trimmed off easily with a knife the morning after gluing up the guide. While I've made saw cutting guides in the past, I did check out this video before building this one:

http://www.youtube.com/watch?v=CH5dW-Qc ... ata_player

It's a nice 5 minute video on making and using a guide for a circular saw.
amp1ron
Silver Donating Member
 
Posts: 14
Images: 18
Joined: Tue Jun 07, 2011 8:19 pm
Location: NY State Finger Lakes
Top

Weekend of June 30th

Postby amp1ron » Sun Jul 01, 2012 9:51 pm

Last Thursday my new axle with brakes finally arrived, though the 13" wheels and tires aren't yet in. Tuesday I picked up the axle, fenders, and a pair of spare bearings and seals from KMT Service Parts in Canastota, NY. KMT is in the same location as Kristi Trailer Industries. They have a pretty impressive facility. While I was picking up my parts a couple of guys were welding up a new trailer frame -- it looked lik the frame for a CT. I really wish I'd had Kristi Trailer build me a frame and hang the axle I wanted rather than going the route I took with the Northern Tool bolt-together with changed-out axle, wheels/tires, and fenders. If I build another trailer I'll know better and have Kristi build the trailer frame for me.

In spite of the heat, this weekend I got some work accomplished this weekend. The Dexter Torflex axle mounting guide says that when mounting their axle to a frame that's C-shaped in cross-section that you should reinforce the frame at the mounting location. The axle mounts are 10" long, so I cut two 10" sections out of a cross-member. I ended up with the two 10" pieces plus two longer pieces that I'll use to extend the frame:

Image

I removed the tongue jack, flipped the frame over, removed the original axle, springs, and mounts, and leveled the frame in both directions using chunks of 4x4's, 2xWhatevers, and shims. Here's the flipped frame with the new axle sitting on it at the rough-mounting location:

Image

I used the rough rules for axle placement and decided to set it back 37.5% from the rear of the frame (actually 37.5% from the rear of where the frame will be once it's extended). I ended up moving it forward a half inch from there as that meant that one of the axle mount holes lined up perfectly with a factory hole in the frame. Here's the axle sitting on the mounting location:

Image

Here is one of those 10" pieces cut from a cross-member waiting to be used to reinforce the frame where the axle mounts will attach:

Image

Sorry for the black-on-black, but from the glare you can make out where the inserted 10" piece of cross-member is, right at the axle mount location:

Image

I drilled the frame and reinforcing piece for the axle mount, pulled it all apart and deburred the holes and repainted them, waited for the paint to dry and then put it all back together and mounted the axle using the 1/2" bolts, washers, and nuts that came with the axle. I torqued the fasteners to 80 foot pound as Dexter's install guide says to torque them to 70 to 90 foot pounds for my Dexter Torflex #9 axle.

I then mounted the original 12" wheels and tires (I'm waiting for the 13" wheels and tires I ordered to be delivered), and flipped the frame upright. Here's you can see one side of the new, mounted axle:

Image

In the above picture I've not yet drilled holes to fasten the upper side of the reinforcing piece of side-member channel inside of the main channel. I'll drill for two bolts on each reinforcing piece before the end of this weekend.

I then moved the largest section of cross-member (this trailer had 4 regular sized cross members and 1 larger size cross member) from its original centered mounting position to a location to the rear of the new axle. I had to make sure I placed the relocated cross-member far enough back that I could get a wrench inside of the closed-in areas at the axle mounts for when I need to re-torque the axle mount fasteners. I then removed the rearmost cross member, extended the frame length with the two longer pieces cut from the cross-member, drilled many new holes, repainted the new holes, and bolted it all together. By using existing holes in the main 8' length of frame and the extension pieces I ended up making the trailer 9' 3/4" long instead of the original 8'. My target had been 9', but the strength will be a little better as by going an extra 3/4" long I avoided adding some more holes, some of which would have overlapped existing holes.

Here's what I ended up with after the weekend's work, a new torsion axle with brakes and 1' 3/4" additional trailer frame length:

Image

Next up will be installing some of the trailer wiring: the 7-pin trailer cable, a frame-mounted junction box, brake wiring, and a break-away switch. Then I can finally get to the real build by making my floor.
amp1ron
Silver Donating Member
 
Posts: 14
Images: 18
Joined: Tue Jun 07, 2011 8:19 pm
Location: NY State Finger Lakes
Top

Re: Ron's 5'x9' Benroy with drop-floor for sitting upright

Postby pappaw » Mon Jul 02, 2012 11:48 am

going to be a nice trailer :thumbsup:

Cheers :beer:
Image Cheers from Granny, Pappaw, and Cocoa (the Dachshund) Image
pappaw
Teardrop Master
 
Posts: 240
Images: 14
Joined: Mon Nov 22, 2010 12:15 pm
Location: S.W.Ohio
Top

Re: Ron's 5'x9' Benroy with drop-floor for sitting upright

Postby amp1ron » Tue Jul 03, 2012 7:44 pm

pappaw wrote:going to be a nice trailer

Thanks! There's a long way to go yet, but I think I'm done with the metalwork for a while.

The 13" wheels and tires came in today and I mounted them. No pictures as I'm sure everyone knows what a wheel and tire looks like (these are the standard issue white spoke tires). During the brief time that I had one 13" and one 12" wheel/tire mounted I decided that one of the 12" wheels/tires will make a great space-saver spare. Seeing the larger tires mounted I really think they're going to look better on the trailer than the 12" combo.
amp1ron
Silver Donating Member
 
Posts: 14
Images: 18
Joined: Tue Jun 07, 2011 8:19 pm
Location: NY State Finger Lakes
Top

Re: Ron's 5'x9' Benroy with drop-floor for sitting upright

Postby amp1ron » Thu Jul 05, 2012 8:47 pm

Yesterday and today I added a trailer cable with 7-pin connector, a junction box to contain some of the wiring, and ran most of the wiring for the electric brakes.

The front edge of the jack mounting plate is notched out for the seven pin cable:
Image

I've run the 7-pin cable along one of the A-frame members. A junction box that ties the 7-pin cable to the rest of the trailer wiring is mounted at the rear end of same A-frame member. This location will end up being under the floor which will provide some protection against rain. All cables connecting to the junction box will be left long enough that in the event I need to work on the connections in the box, I can unbolt it from the frame and pull it out from under the floor and easily work on it from the side.
Image

I've added a rubber grommet to a hole in each axle mount bracket so that the brake cables running through the brackets are protected. I've run 12 gauge cable to each brake. Heat shrink tubing protected crimp-on butt connectors join the magnet wires from the brakes to the trailer side of the brake wiring. I've used commercial style electrical crimp sleeves to join the cables from the brakes on both sides with the cable that runs to the junction box at the front of the trailer. A plastic cap protects these crimp sleeves and I've added multiple coats of brush-on "electrical tape" to encapsulate the caps and wires that enter the caps.
Image
amp1ron
Silver Donating Member
 
Posts: 14
Images: 18
Joined: Tue Jun 07, 2011 8:19 pm
Location: NY State Finger Lakes
Top

Re: Ron's 5'x9' Benroy with drop-floor for sitting upright

Postby High Desert » Thu Jul 05, 2012 8:53 pm

Nice work. From the way you're going about this I guess you've spent some time around trailers before. That is some commercial grade work you're doing. Very nice indeed :thumbsup:
Shaun

"it's not the years honey, it's the mileage"
High Desert
Platinum Donating Member
 
Posts: 8780
Images: 27
Joined: Wed Apr 08, 2009 1:46 pm
Location: SW Washington state
Top

Re: Ron's 5'x9' Benroy with drop-floor for sitting upright

Postby CliffinGA » Thu Jul 05, 2012 9:04 pm

Nice job so far bud, your frame is coming along great. The canopy is a great way to expand your camping area and if your like me I don't squiggle into clothes worth a flip inside the tear.We use a canopy and side walls abnd fixit so that at night walls go up and we can change clothes and we leave our porta potty in a corner for late night emergency's. Instead of a drop floor what you'll find to be a better use is a under bed storage area. As I'm working towards the end of my build that is one of the regrets I have is I didn't work one in when I started. You can store so much in there and a lot of it you leave so when your ready to go, you just through the clothes and food in and hook up and go. Well keep up the good work and have fun.

Cliff :thumbsup:
In God we trust, shoot the rest and he will sort out!

My Build:

viewtopic.php?f=50&t=42628
User avatar
CliffinGA
1000 Club
1000 Club
 
Posts: 1499
Images: 207
Joined: Sat Nov 14, 2009 1:29 pm
Location: Jefferson, GA
Top

Re: Ron's 5'x9' Benroy with drop-floor for sitting upright

Postby amp1ron » Thu Jul 05, 2012 10:05 pm

CliffinGA wrote:Instead of a drop floor what you'll find to be a better use is a under bed storage area. As I'm working towards the end of my build that is one of the regrets I have is I didn't work one in when I started. You can store so much in there and a lot of it you leave so when your ready to go, you just through the clothes and food in and hook up and go.

Cliff -- Thanks for the encouragement! I just checked out your black hole build thread and it looks like you're building a pretty sweet trailer.

Are you talking about underfloor storage that you access from outside the cabin (a box that hangs under the trailer with a door on the side)? Or do you mean a box under a floor hatch that you roll the mattress up to get to?

CliffinGA wrote:The canopy is a great way to expand your camping area and if your like me I don't squiggle into clothes worth a flip inside the tear.

I'm planning on having some kind of canopy but hadn't thought about sidewalls. That's a good idea. Rather than an easy-up, I've been thinking of attaching a frame to the trailer itself to support at least a center pole for a canopy. The easy-ups seem heavy and large, and just a canopy or tarp and some poles would probably be lighter and more compact when stored, though then there's the issue of staking out guylines and maybe not always having ideal soil to do that in. Anyway, that issue can probably wait until my build is nearly done.
amp1ron
Silver Donating Member
 
Posts: 14
Images: 18
Joined: Tue Jun 07, 2011 8:19 pm
Location: NY State Finger Lakes
Top

Re: Ron's 5'x9' Benroy with drop-floor for sitting upright

Postby CliffinGA » Fri Jul 06, 2012 9:04 am

Ron the storage is accessed under the bed like on lil guy trailers. I've seen people use it to store clothes to electrical cords to chairs in there. Ez ups can be heavy but they're not only ones out there. We picked a Bass pro one on clearance for $50 this fall that is light and is easy for me to open myself and a set of the weights works great for holding legs down in bad soil.
In God we trust, shoot the rest and he will sort out!

My Build:

viewtopic.php?f=50&t=42628
User avatar
CliffinGA
1000 Club
1000 Club
 
Posts: 1499
Images: 207
Joined: Sat Nov 14, 2009 1:29 pm
Location: Jefferson, GA
Top

Re: Ron's 5'x9' Benroy with drop-floor for sitting upright

Postby cuyeda » Fri Jul 06, 2012 10:07 am

Nice work on the frame so far! As for the side canopy, the frame on this one utilizes attachment on the roof of the teardrop. The rest of the frame is rigid enough to stand without guy ropes, but in windy conditions you should use some type of rope, or weights (filled water bottles?). Doug Hodder has a really light weight canopy solution using fiberglass tent poles to support the top canopy. For Doug's I have to review pictures, but I believe his could be free standing as well. No matter what solution you choose, the guy ropes in windy conditions is advisable.

Image

Image
Why just dance, when you can Salsa!
Cliff & Vanessa
User avatar
cuyeda
Platinum Donating Member
 
Posts: 1924
Images: 17
Joined: Fri Sep 22, 2006 12:09 am
Location: California, Long Beach
Top

Next

Return to Build Journals

Who is online

Users browsing this forum: No registered users and 14 guests