But, I never came back and updated. So, here's an uncomfortably long post catching you up on what's been going on. If you want coffee or you're feeling a bit hungry, better take care of it now, lol.
For those who don't know, my journey started here:
https://www.tnttt.com/viewtopic.php?f=40&t=72216&p=1256315#p1256258
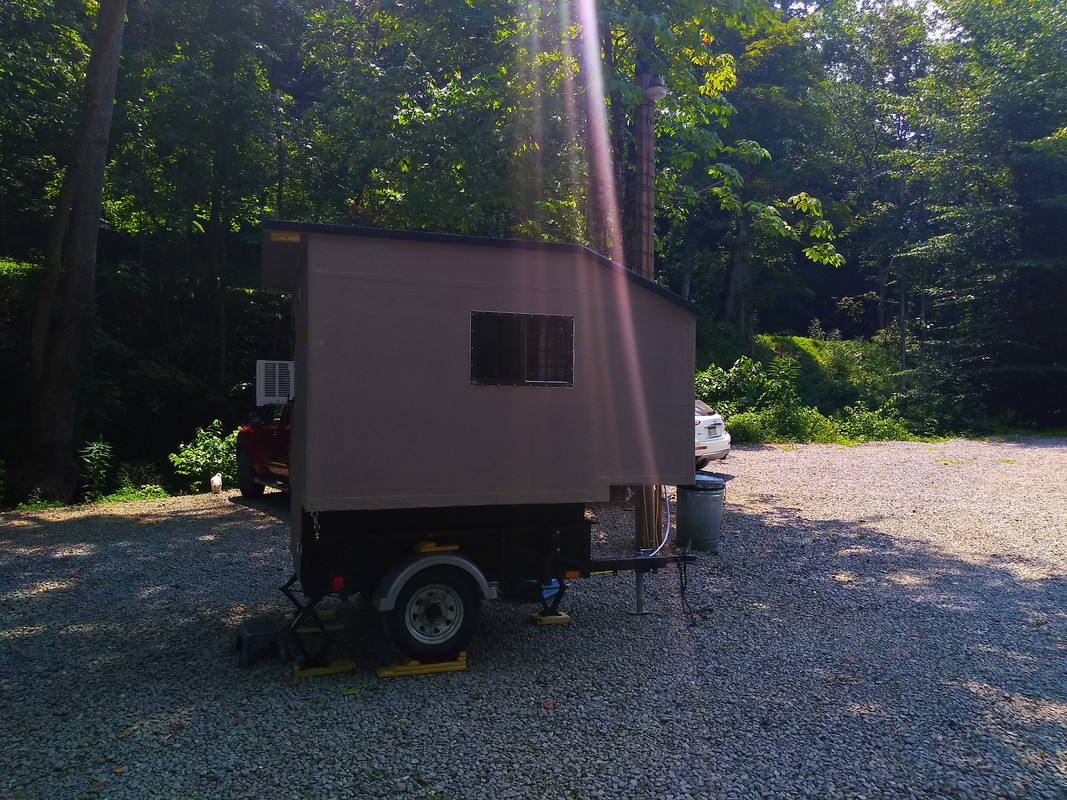
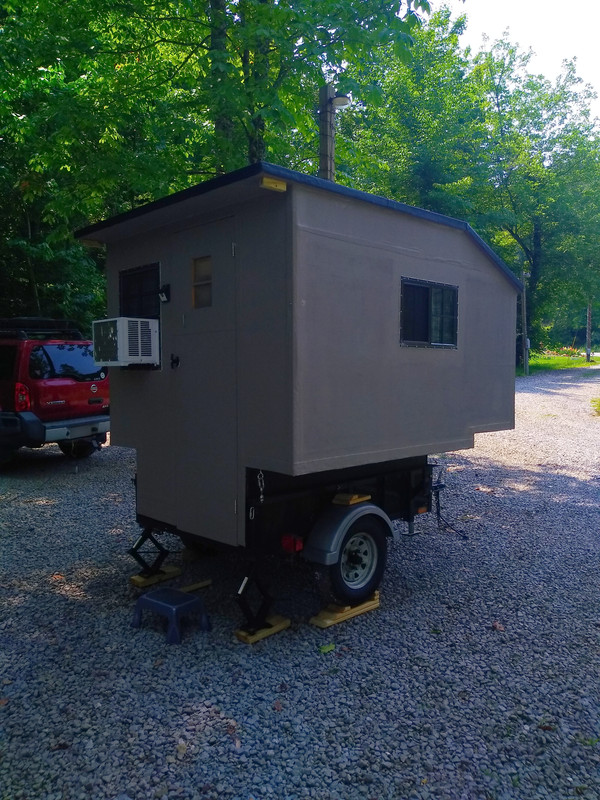
I decided to change the name from the Thing (real original, that) and call it the Trail Pod because it is a pod type camper that fits on a trailer, but also because it does have some (limited) off road capability despite being a standy.
Which is exactly what I wanted. And I have to say, I couldn't be happier with the build.
Before I begin, let me share my goals for this build.
1) I'm old and I don't want to sleep on the ground.
2) I'm old and I don't want to put up a tent.
3) I'm old and I don't want to crouch down and walk on my knuckles just to get into bed.
4) I'm old and I don't want to sleep in the rain. Plus, if it rains, I want a space sufficient that I can occupy myself and get up and move around a LITTLE should I have to stay inside for part or all of the day.
5) I'm old and cheap, so the build had to be inexpensive. I estimate I was under $2000, not including the trailer which I already had.
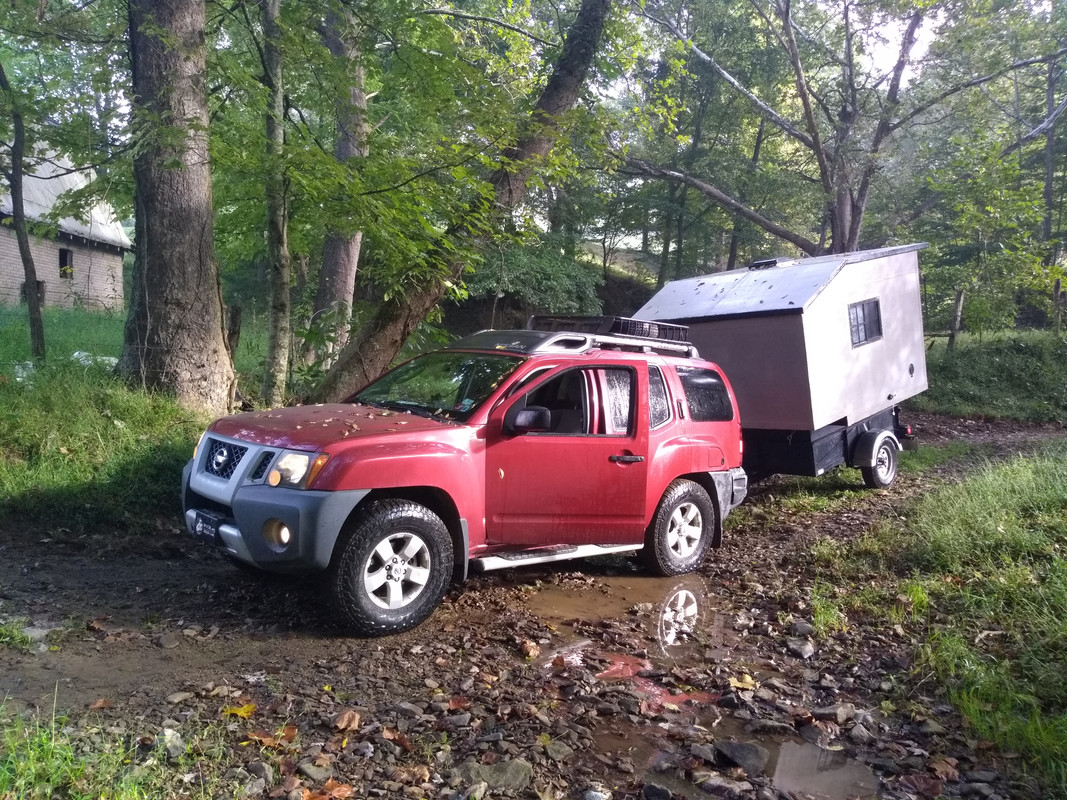
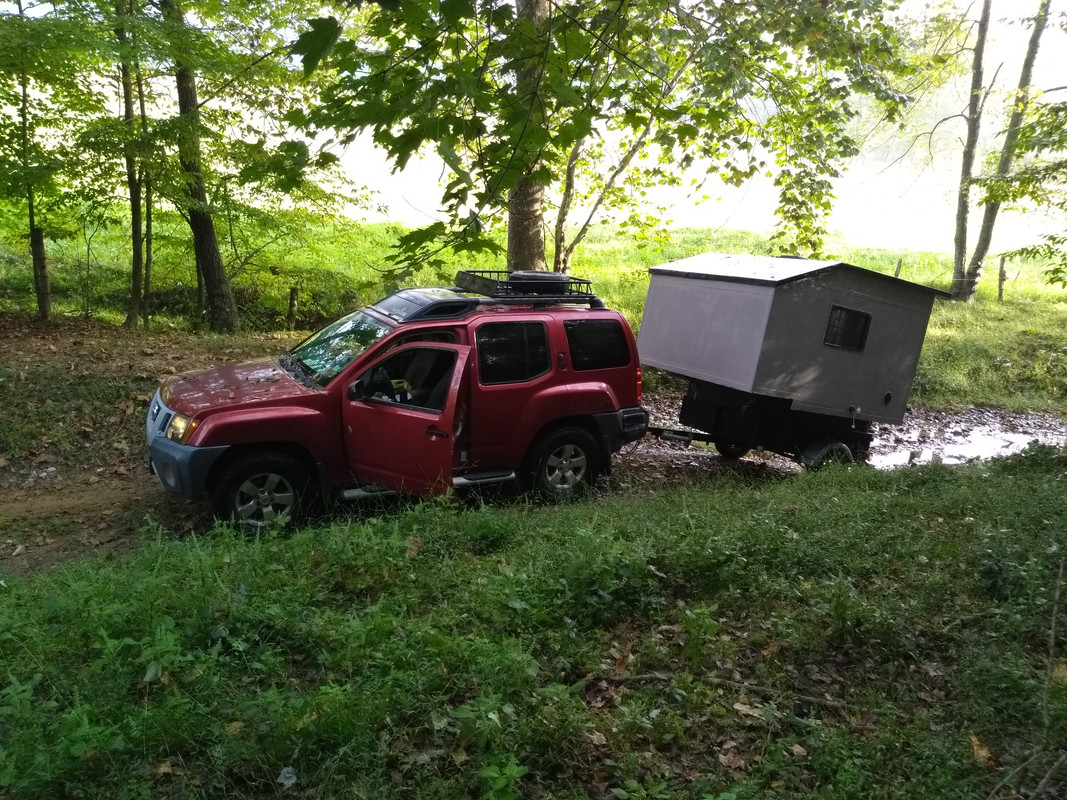
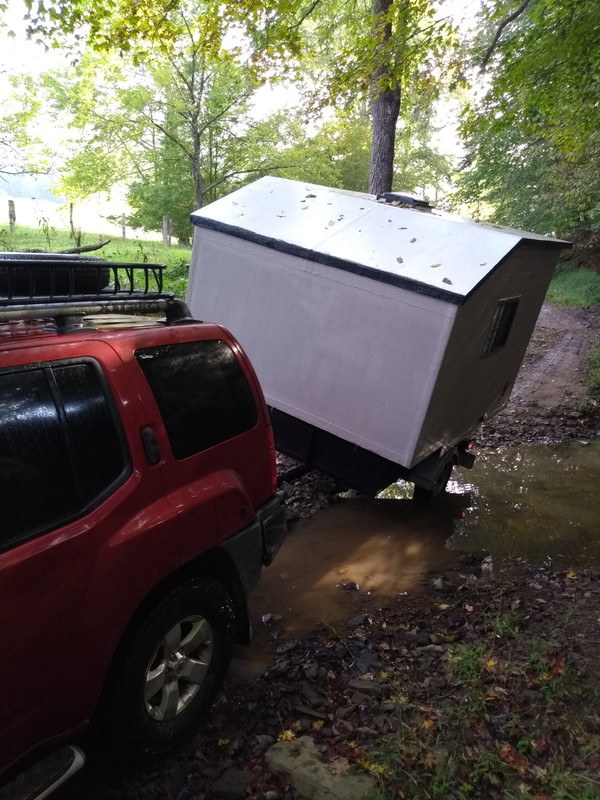
6) Capable of traversing unimproved roads, creek beds, damaged culverts, ruts, high clearance and off-camber obstacles, because I do camp there sometimes.
7) Being light enough to be pulled by an aging Xterra with an ever worsening engine tick.
8) The wifey can come along if she's so inclined (a double bed is a minimum).
9) It had to work within the 4x6 feet of floor space in my trailer.
The following were NOT among my stated goals:
1) Style. I see some of you guys building works of art on here, and they are awesome. That's not what I'm going for. Think "portable hunting cabin."
2) Having everything permanently attached to the camper (including the pod), thus increasing it's weight. For example, if I went camping now in February in the Appalachians, it would be silly to take the extra weight of an AC unit along with me, so everything...heat, air, power, and water, all had to be modular and removable.
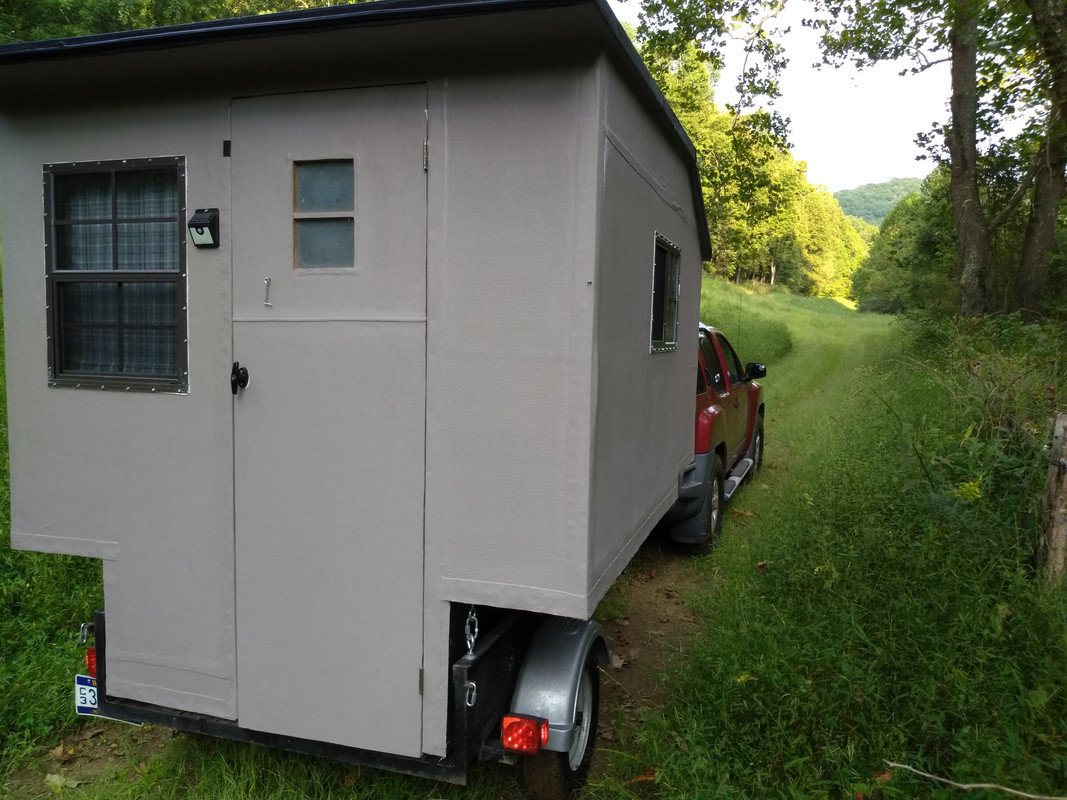
I'm going to fast forward through parts of this so as to not bore you with all of the details. The basic concept is outlined in the other thread. 2x2 framing in the "tub" part with 3/8" ply skin, covered in PMF. The upper panels were 3/8 ply over furring strips. All panels covered with Lauan on the inside and painted white with exterior latex. The panels were built separately due to space constraints and assembled off-site at a buddy's large metal building in the middle of winter. Corner joints were created with a separate piece of square stock and screws driven in at 90 degree angles.
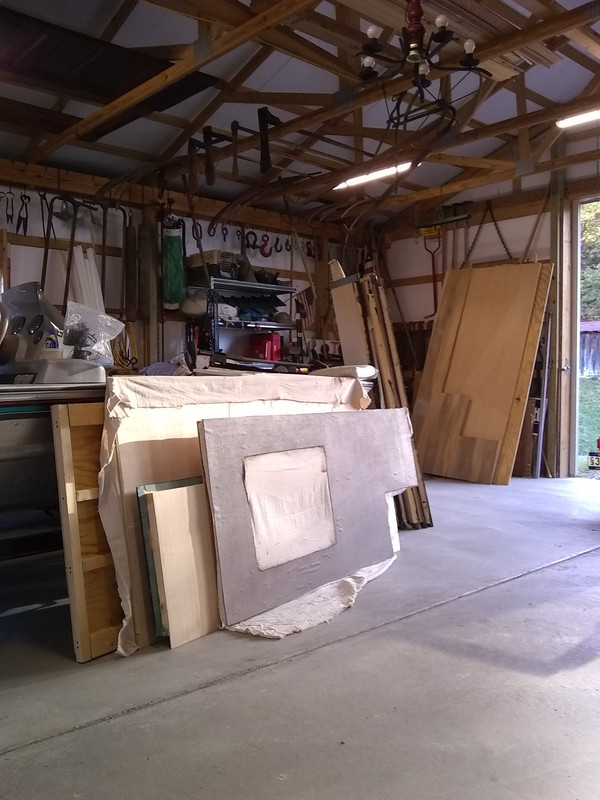
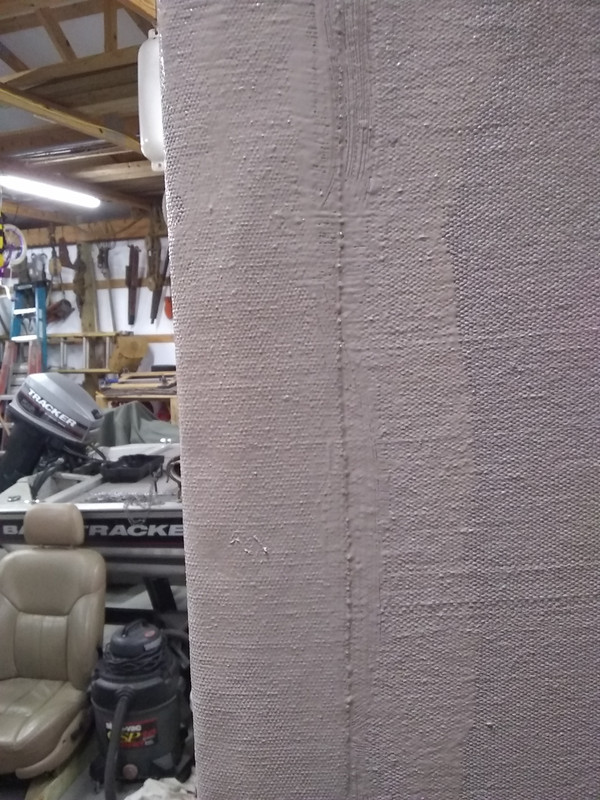
Seams were then covered with painted canvas tape, secured with PL Premium. This worked better than I ever could have imagined, and not one piece of the tape has shown any signs of peeling or coming off. I've done another coat of paint since then and everything is holding up great.
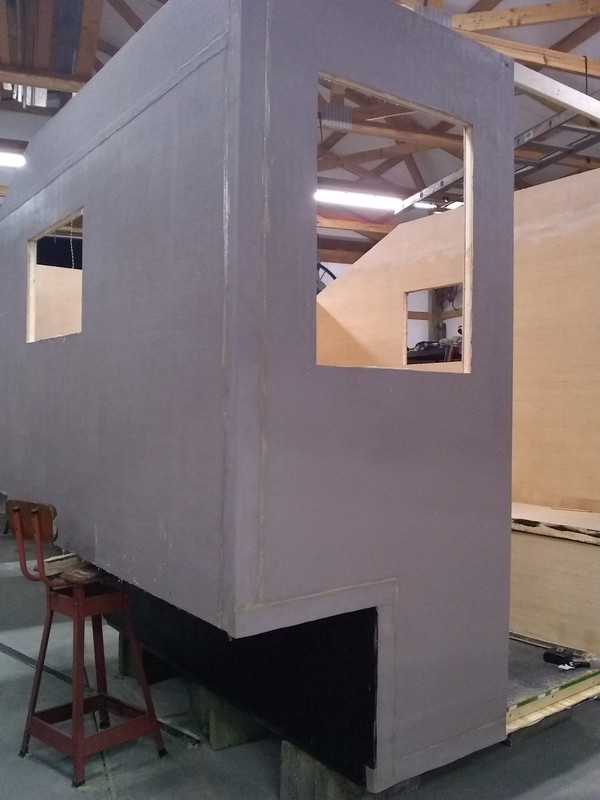
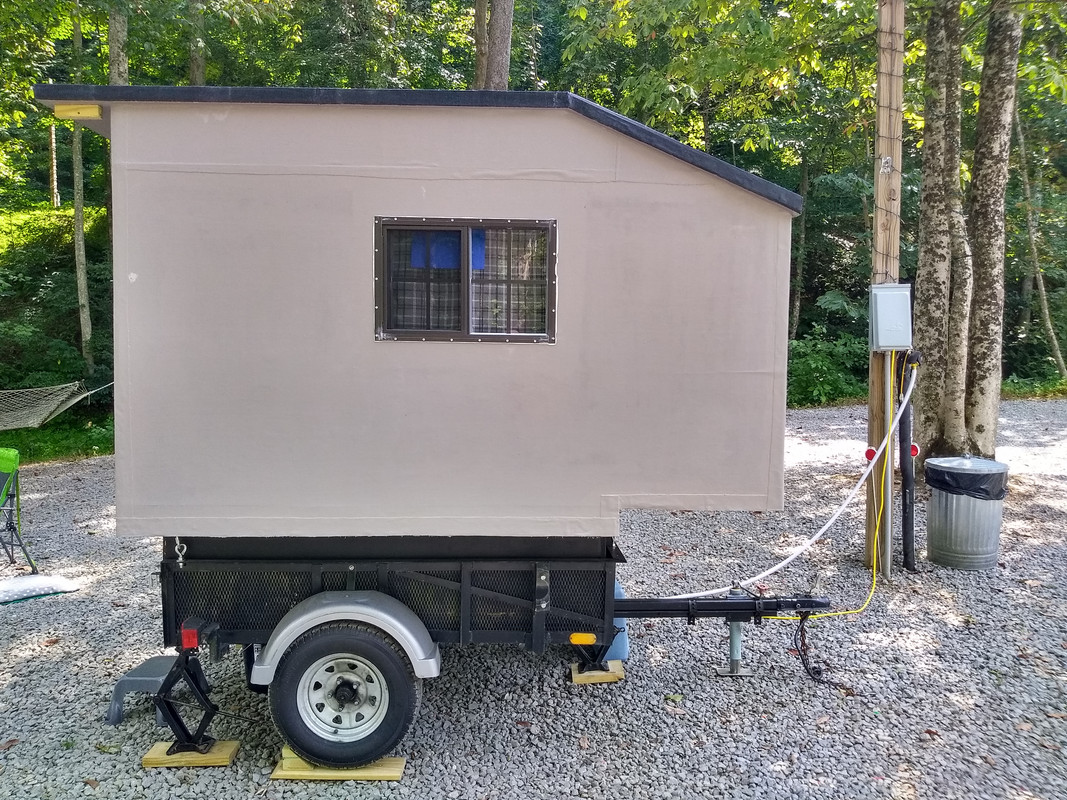
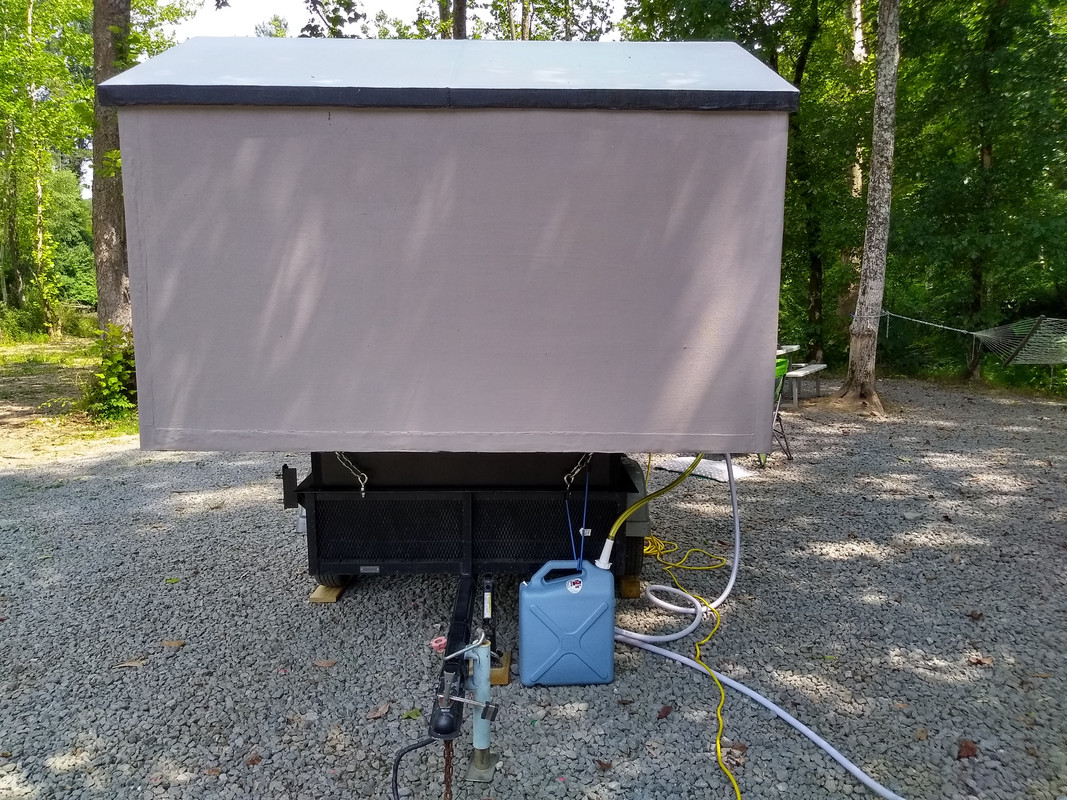
Roof is 2" with fiberglass insulation and a single roof vent/skylight, installed with lap seal. So far, in two years of storage outside, no leaks.
Windows are shed windows and are surprisingly not-drafty even in the winter. The door I made myself and recessed into the side of the camper. It is covered with PMF as well and locks from the inside and out. I deliberately cut away the threshold so it would not hold water and covered the exposed wood with more PMF.
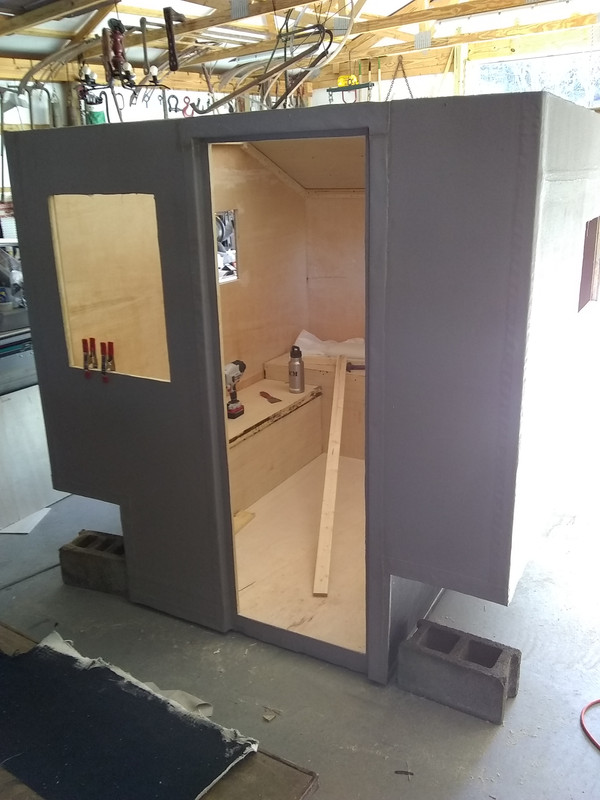
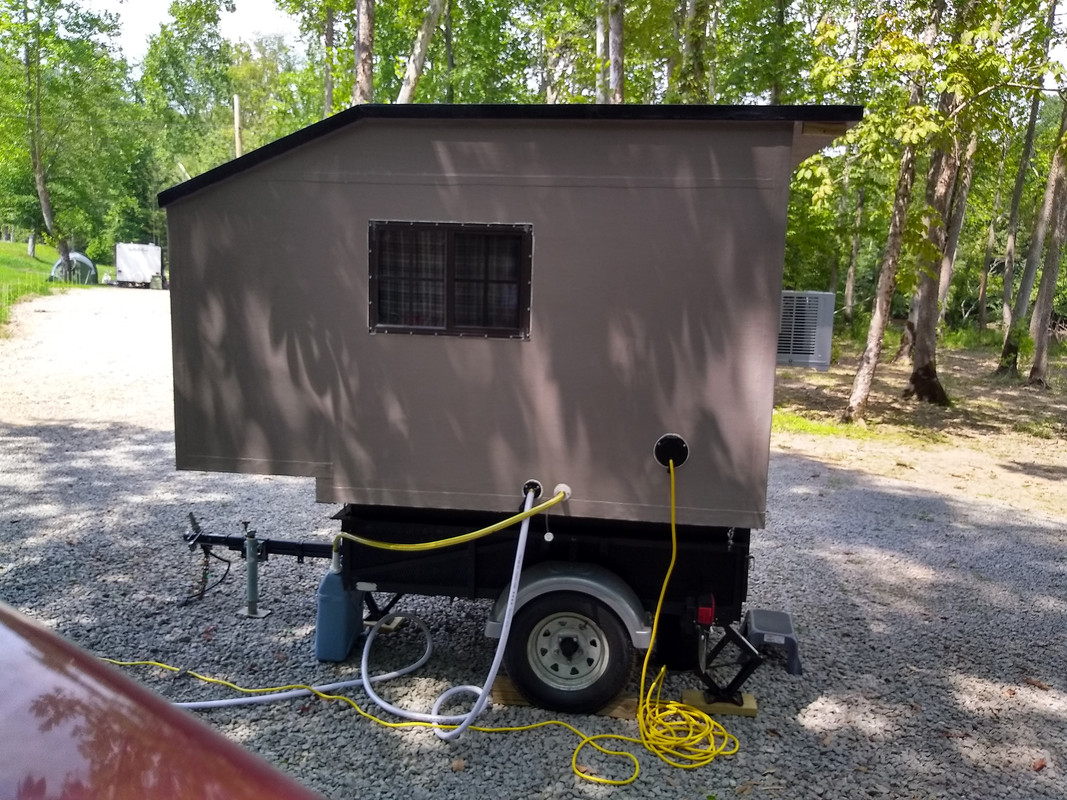
The bottom is also PMF and sits 3/4" off of the trailer bed on treated runners. This design allows air to flow under and water to drain away.
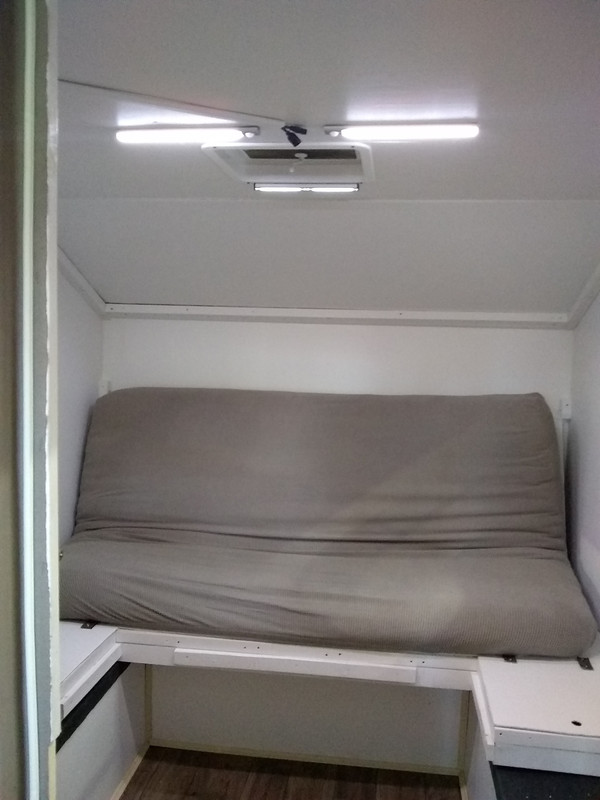
Fast forward...inside is a double-sized futon mattress on a flat platform. Fold the mattress forward, pull the strap out at the bottom of the back, and the panel angles out and stops against two blocks. That's the couch back. When it's folded up straight, the panel engages the hooks on the wall so it doesn't fall over and smash your head. The middle panel drops to the floor as a step for Short Americans (my wife) so her feet touch the floor as she sits. This was the simplest way I could do it, and since the couch back and step are both a frame covered in Lauan, it's also fairly light weight.
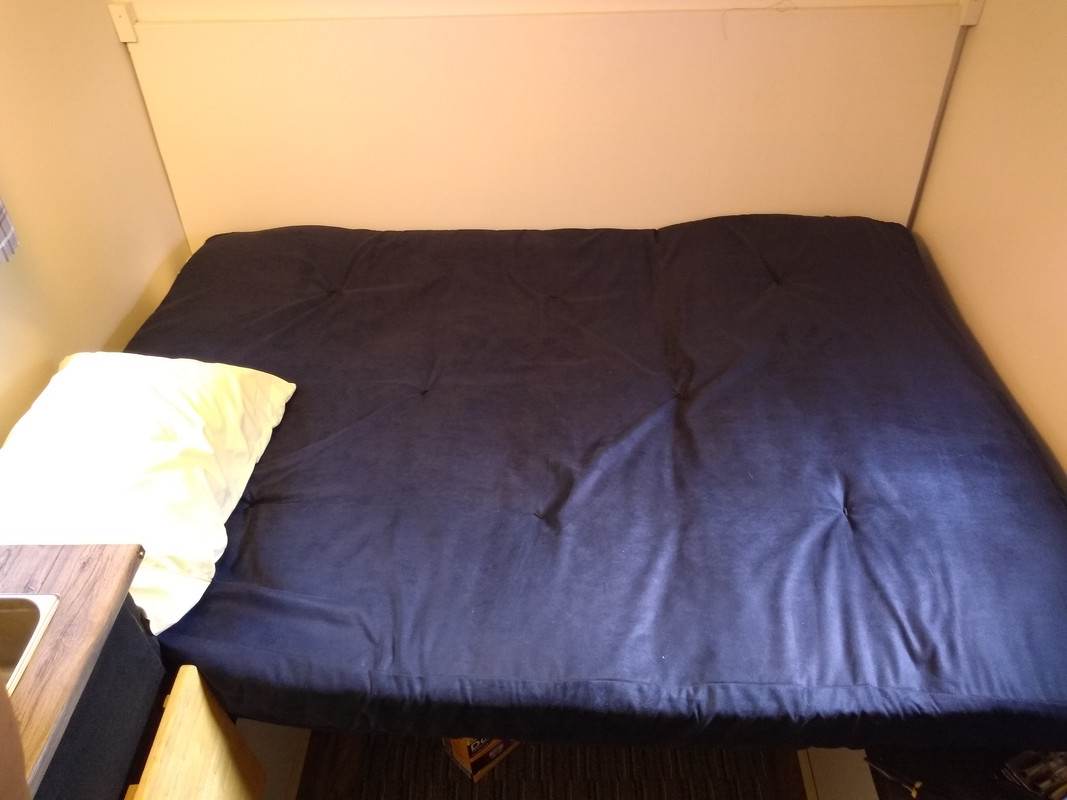
This is a pic in the "couch" position before I got a new futon mattress that wasn't rock hard...
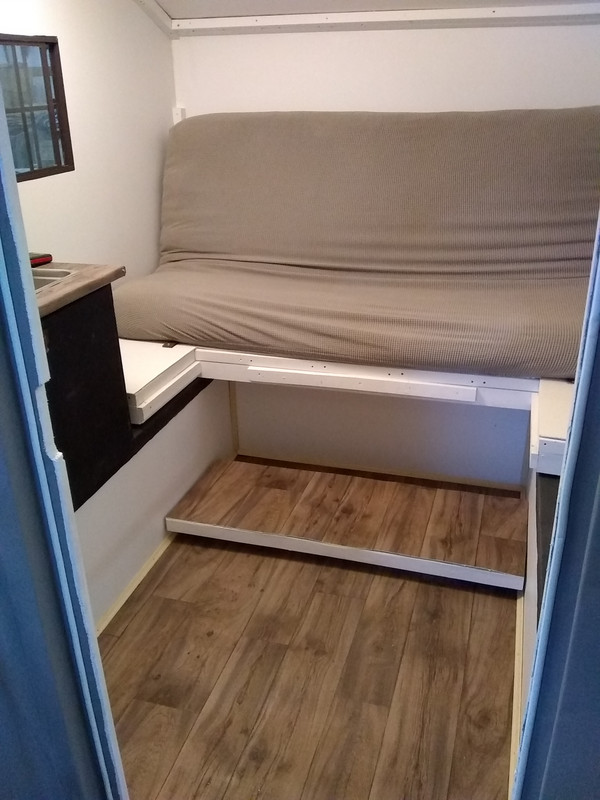
On either side of the gap where the panel was is a storage compartment. I used leather for hinges because that's what I had and it was cheap. It works great. I also used leather strapping for the cabinet door handles because that feels a lot better when you bang against them in tight quarters than something made of metal.
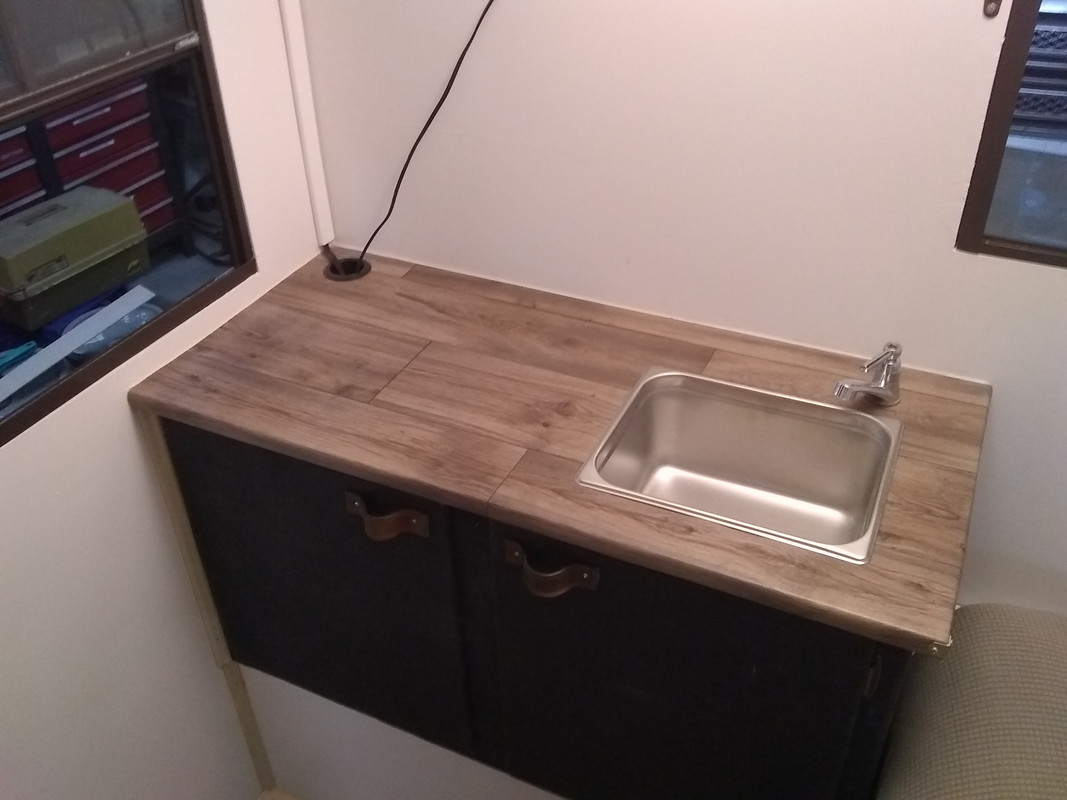
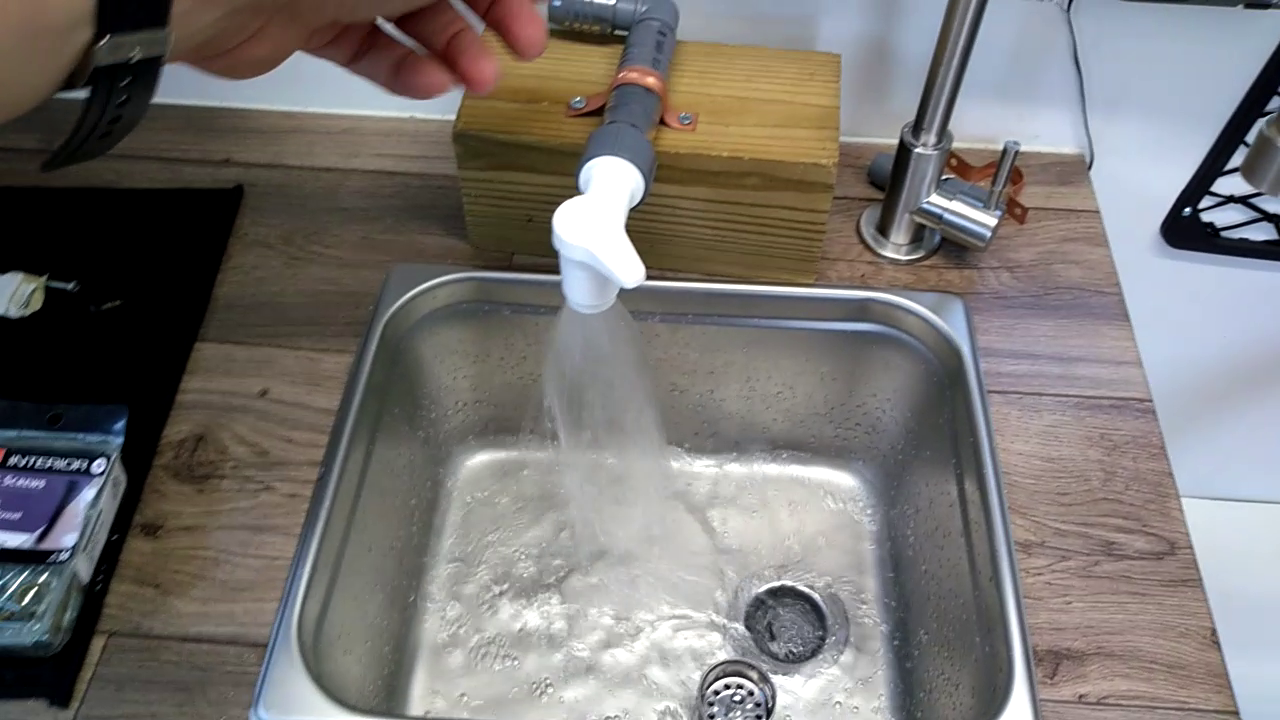
Speaking of cabinets, it's covered with painted canvas just because it looks cool. The top is covered in the same vinyl as the floor, glued, rolled under the edges and stapled into place. The sink is a buffet pan with a hole cut in the bottom for a drain. This is substantially less expensive than a dedicated RV sink. The faucet hooks up to city water, and it worked but was wholly inadequate for washing dishes so I upgraded with a gooseneck faucet I got off of Amazon.
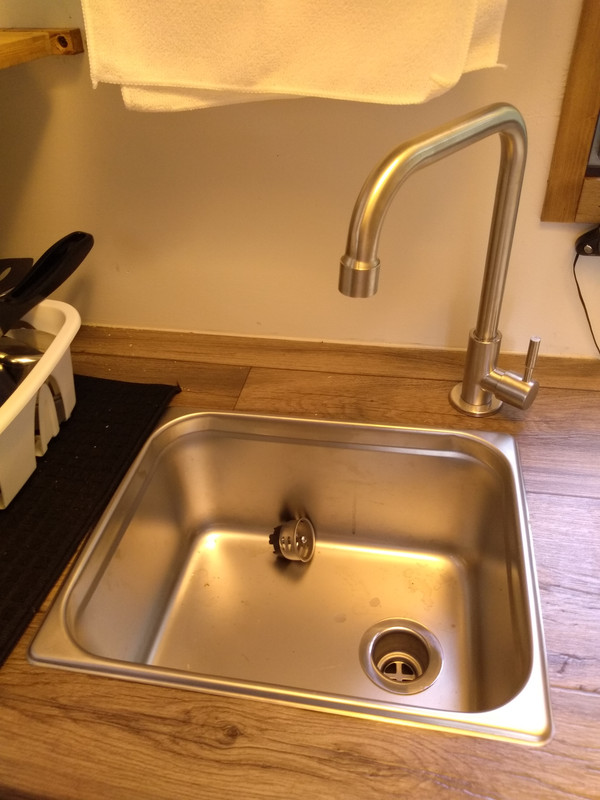
That works 100% better. The sink drains to the outside and if at a campground with sewage, I can run my drain straight into it, or I have a 5 gal jerry can that I use for that purpose.
I also have an "alternate faucet" for boondocking that I can hook to my 6 gallon Reliance water tank.
It's a gravity feed system which delivers a very nice volume of water at low pressure. This means I can press fit the connectors into the vinyl hoses temporarily without worrying too much about leaks. The threading of the larger barbed fittings just happens to match that of the little faucet on the Reliance container. Meaning, I can bring that faucet inside and mount it "temporarily" to a wooden block to hold it in place, put the Reliance tank on the roof and hook up all the hoses and just use it with my sink as I always do.
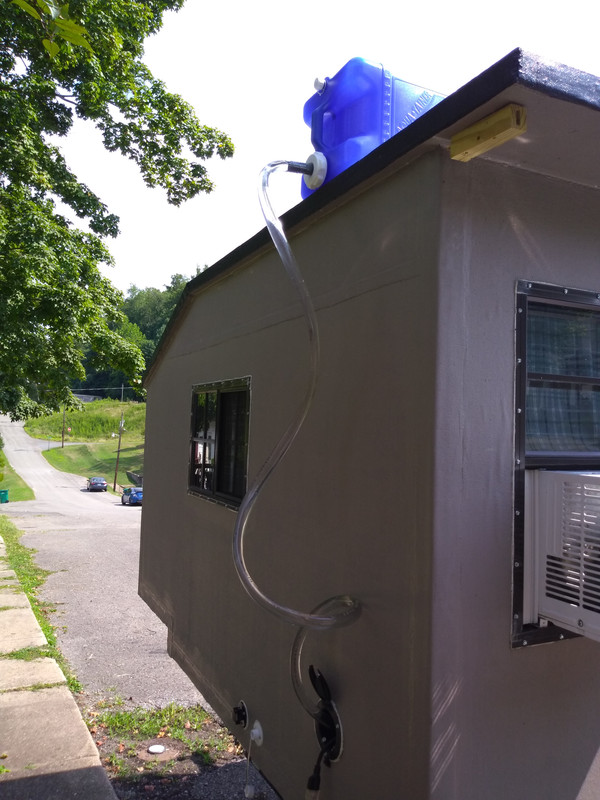
Slick as a whistle and completely removable. If I know I'll be camping where there's a water hookup, the gravity fed system stays home. Plus, I don't worry too much about leaks because there's only one joint inside the camper. It's worked great every time I've used it.
Power is 12v or 120. I have an inlet that runs to a surge protector that's mounted to the wall beside the back window. That window will fit a 5000 BTU AC unit no problem, which I can run off of 120 or my Champion 2000 watt inverter.
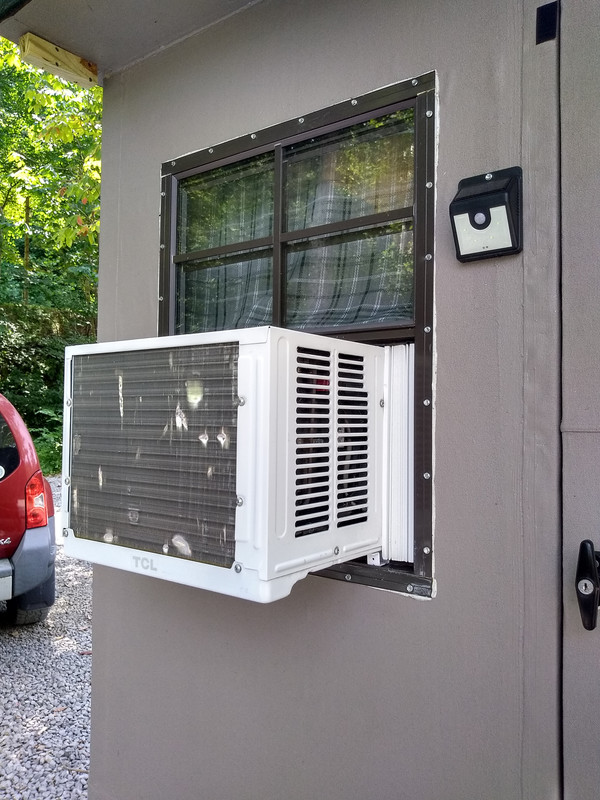
When the AC's not in use, it can be removed in 5 minutes. I always remove it before traveling anyway.
On 12v, I have a deep cycle battery in a box that has a cigarette lighter plug. I run this to a 3 way splitter and have run USB extension cords through various conduits to different places in the camper, including an outlet beside the bed. These can be used to power USB LED lights that magnet mount to the ceiling or anywhere else I can mount a metal strip, although they do have their own built-in batteries, so it's rarely necessary to keep them on charge for weekend trips. With the white interior, these lights are more than adequate to read by and they light up the whole camper quite nicely. Best part is, they can be set to motion activated, so when I'm not in the camper but want to pop in for a second, they come on automatically and turn off after I leave. They'll last for a LONG time using them for only a couple hours each evening.
Lights are eBay specials, found here: https://www.ebay.com/itm/234019511933?hash=item367ca65e7d:g:XW4AAOSw7bJgqMXs
I also have a USB power hub that plugs into the power strip, so when I'm on 120v, all of my USB outlets and extensions still work.
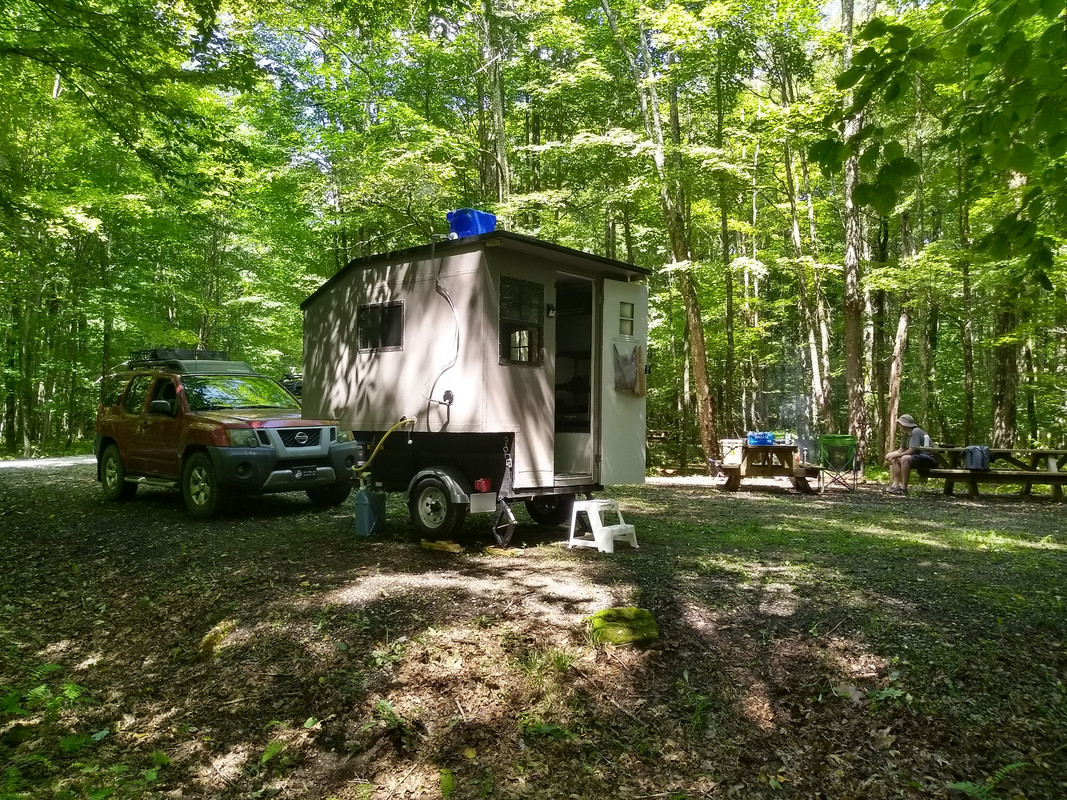
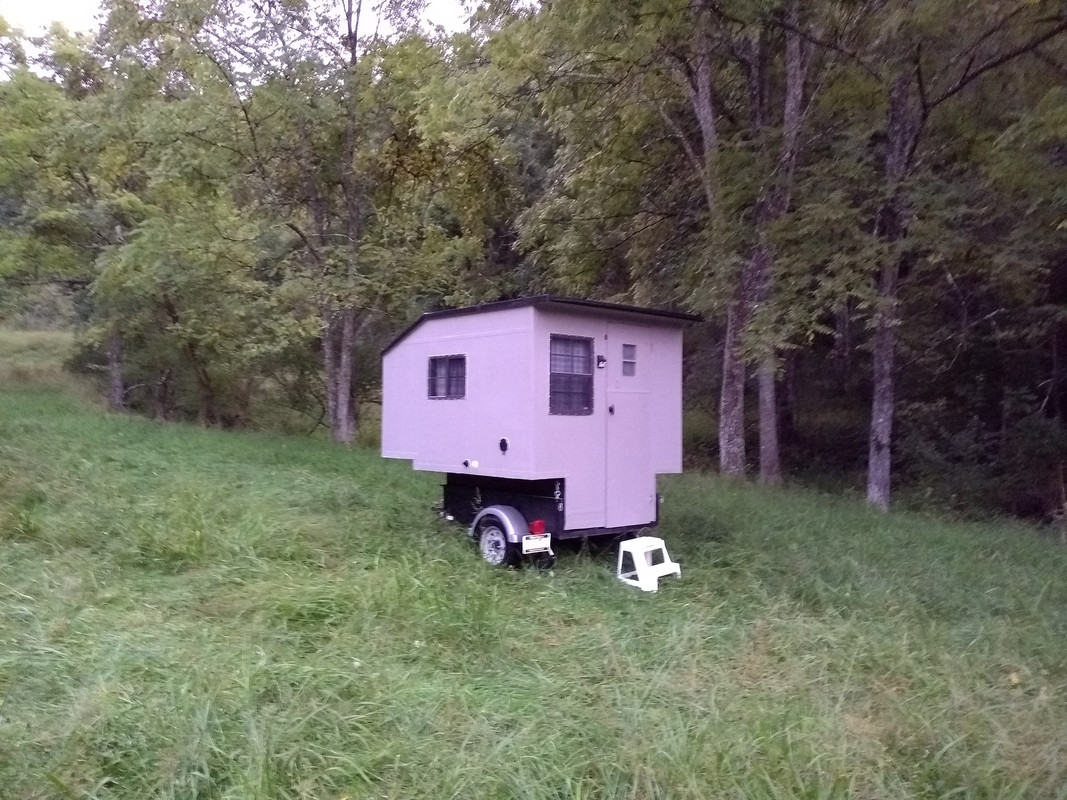
So, without further adieu, here's some pics of the outside of the camper:

And some pics from actual camping trips I've done with it:
Boondocking in the National Forest:
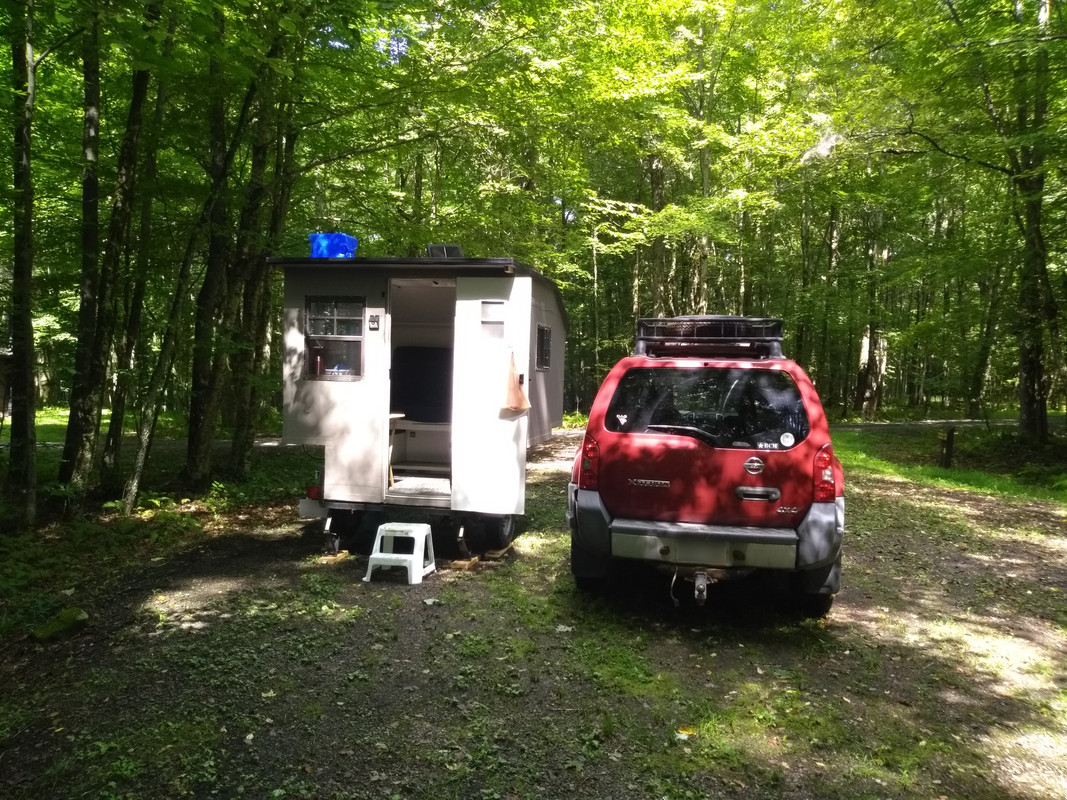
At my brother in laws farm:
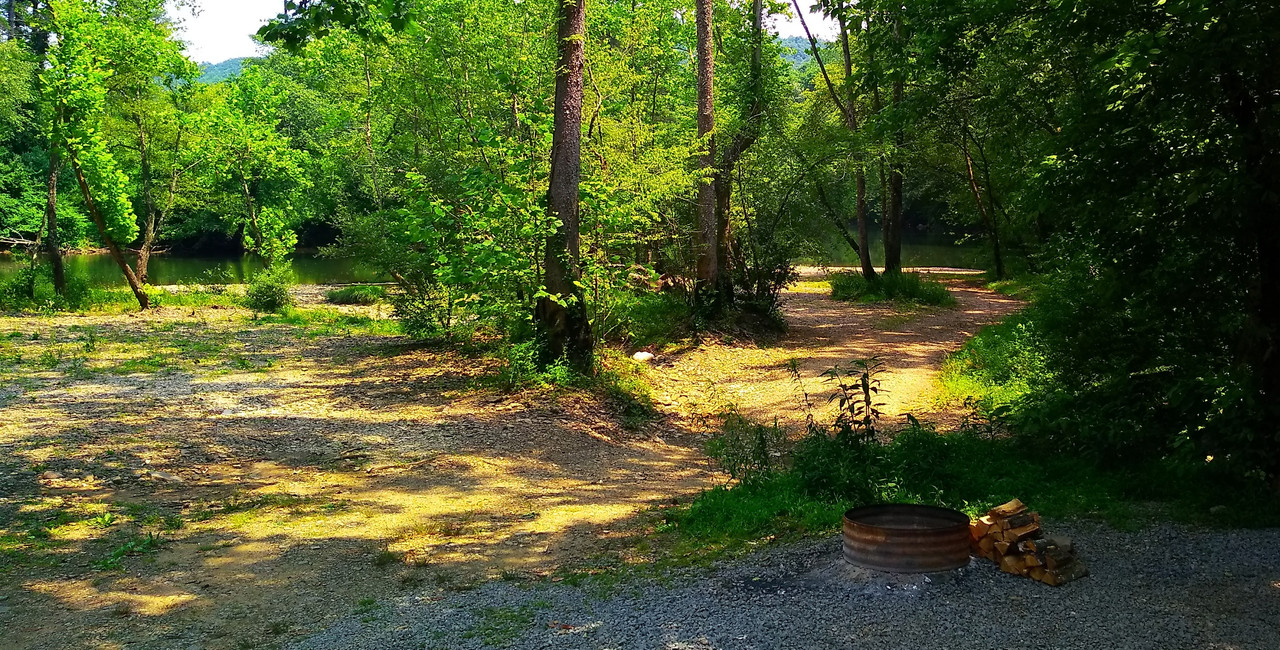
At the local campground...river is just out of sight to the right.
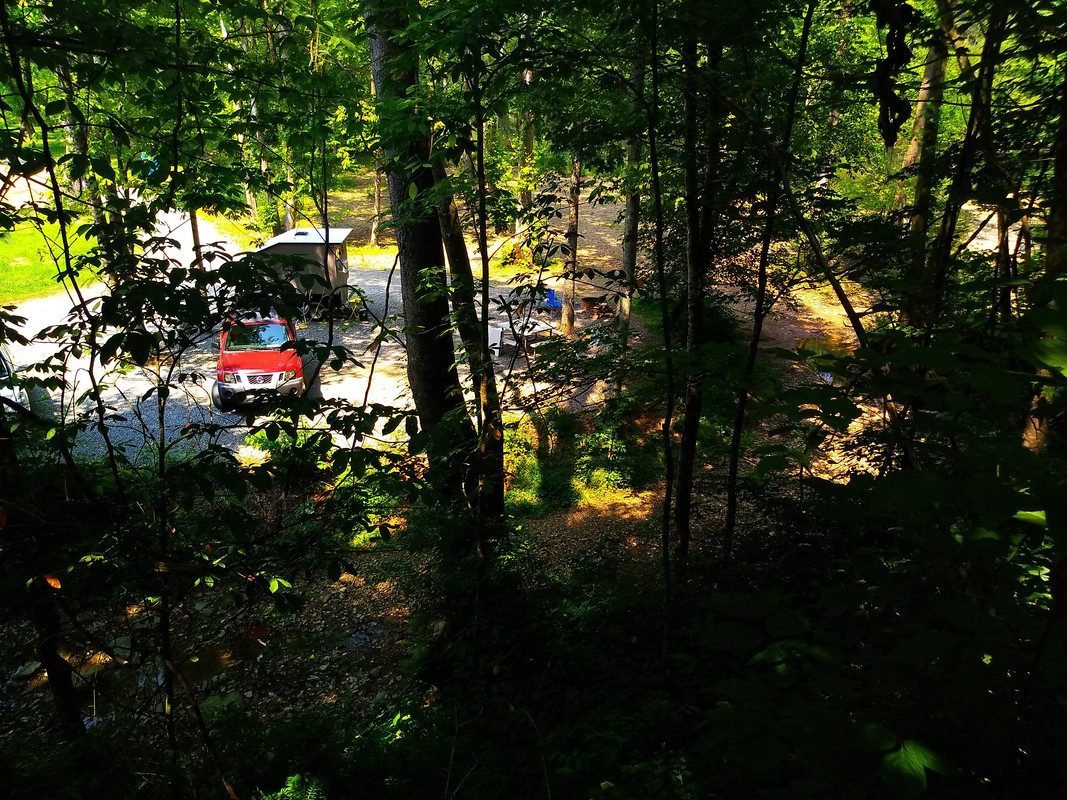
View of the river from the backdoor of the camper.
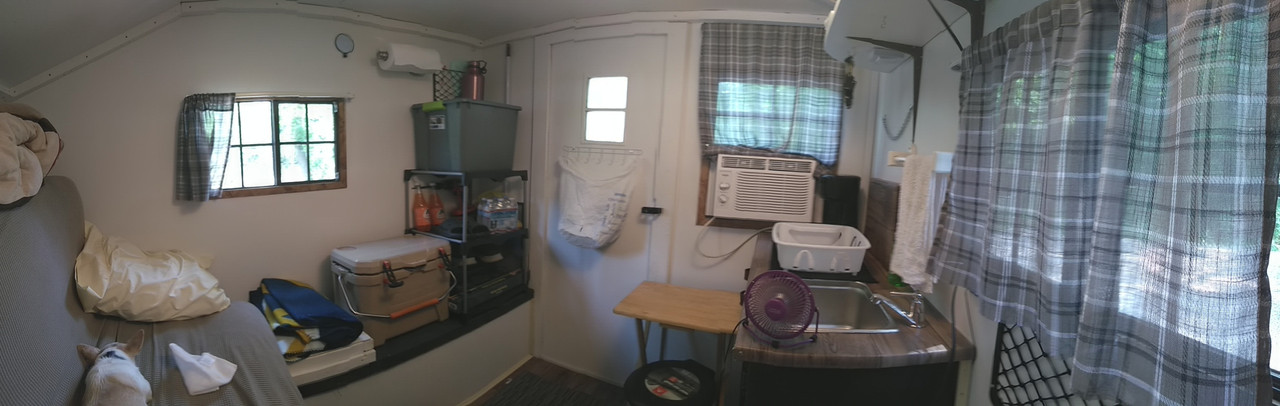
Panorama of the inside of the camper. Notice the pup on the left...lol...we both got overheated that day and sat inside soaking up the AC.
I'll try to anticipate some of your questions and answer them here.
1) How does it pull?
Not gonna lie...you know it's back there. The front is basically a 4x6 billboard and it feels like it. But, it's very well behaved overall on the highway. Some minor porpoising over big bumps, but nothing that feels even close to uncontrollable. I've pulled it on twisty two lane roads in WV and four lane highways as well. Switching from bias to radials seems to have really calmed it down. It's not stressful at all to pull, but if I'm in a hurry, I'd better leave early. I can keep up with traffic if I want, but since the Xterra already has an engine tick, 50 mph in the truck lane seems more prudent than 70 mph at 4000 RPM. The big thing is, TAKE YOUR TIME.
2) Is it top heavy?
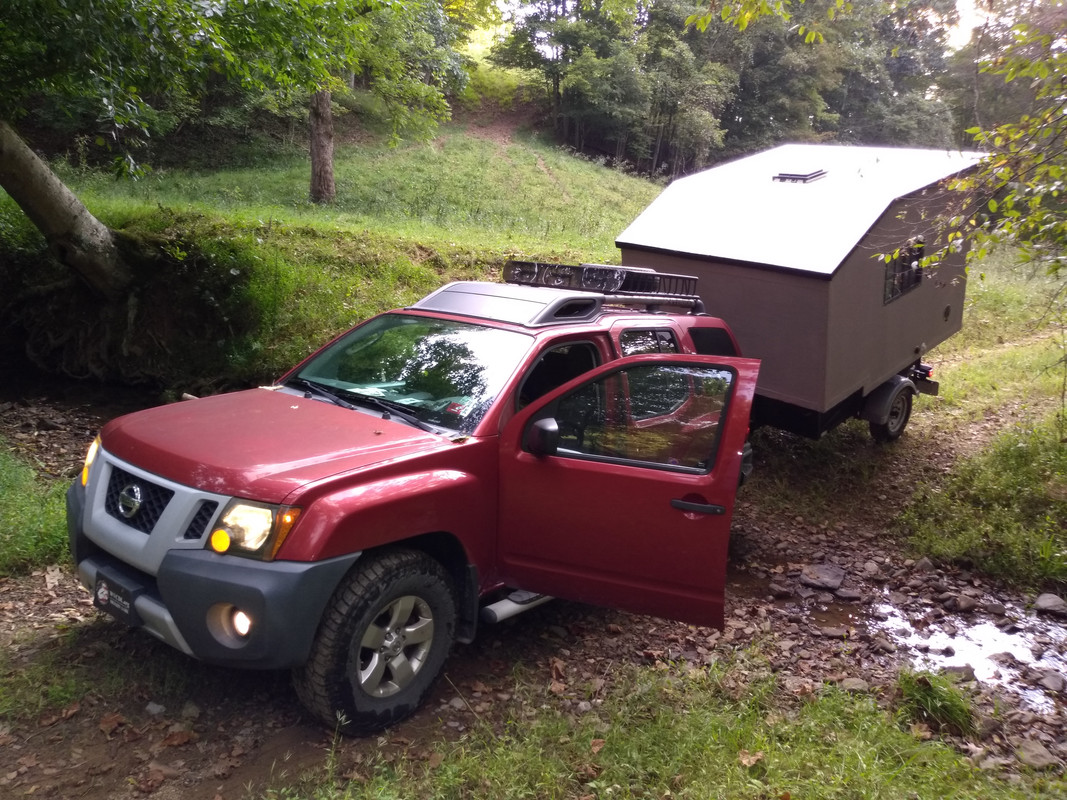
Not at all. And the first time I saw it on the trailer, I was sure I'd messed up. But, you can take this thing on some decent inclines and off-camber areas and it just goes right over them without any wobbles or tippyness. One place I camp actually has a creek for a road (lol...gotta love WV) and the camper handles that with no problem at all. See the pics:

3) How easy is it to take off the trailer?
Don't know. Haven't done it yet, LOL. Wife's especially happy about that one. Kinda got ahead of myself. I saw another poster here with an idea for making jackstands using scissor jacks and I might give that a try sometime. Until then, she's a one-piece unit.
4) How much room does it have inside?
Well, I'm a Large American...about 6' 3" and well over 250 lbs. I can stretch out in it and stand up without hitting my head. Me and the wife can both sleep in it no problem, we can both sit on the couch no problem, but something like cooking means one of you better wait outside.
5) Why a pod camper if you never take it off the trailer?
In WV, you can get a permanent trailer license which never needs to be renewed. So, no yearly registration fee. The camper itself is technically just "cargo".
6) What would you do differently?
Well, I got lazy under the front overhang and left some exposed plywood that I thought would be OK if it were just painted. That worked great until I found mushrooms growing out of it (smh). I cleaned it up good, dried the wood out in the 90 degree heat for a few days and then covered it back over with more PMF and 4 coats of paint. It hasn't given me any trouble since.
I wish I'd used The Mix on the plywood just to make it extra impervious to moisture. I'm paranoid about running a propane heater inside due to condensation. I should have read more here before starting, because I was well into the process before I figured out that I should do that.
I wish I'd have made the front overhang a little shorter and maybe extended the pod about a foot to the rear of the trailer. The weight balance is pretty far forward, which is great for stability but does cause the back of the Xterra to squat a bit. No more than I pull it, it shouldn't be a problem, though. When I'm towing, all substantial weight (AC, potable water tanks, etc) all go in the floor by the back door.
I need to weatherstrip better around the door, as what I have there now is way inadequate.
I wish I'd have thought of an easy way to demount the camper before I started building it, lol.
Any other questions, feel free to ask!