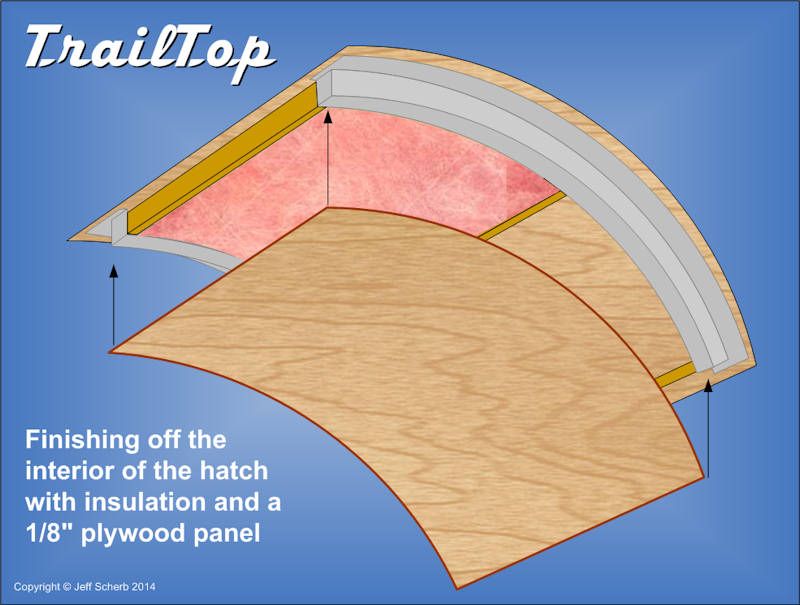
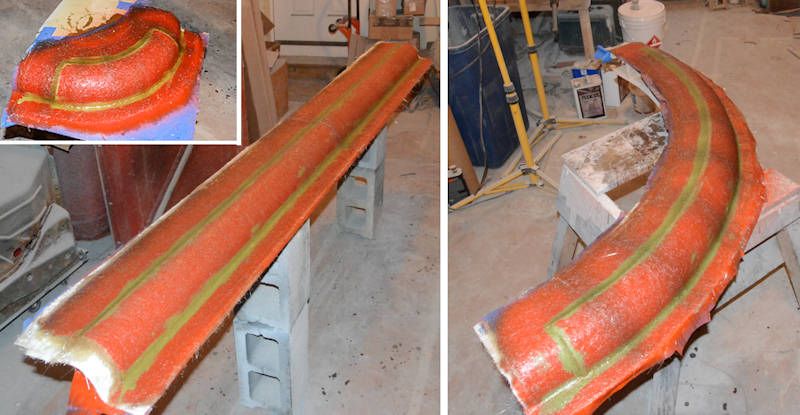
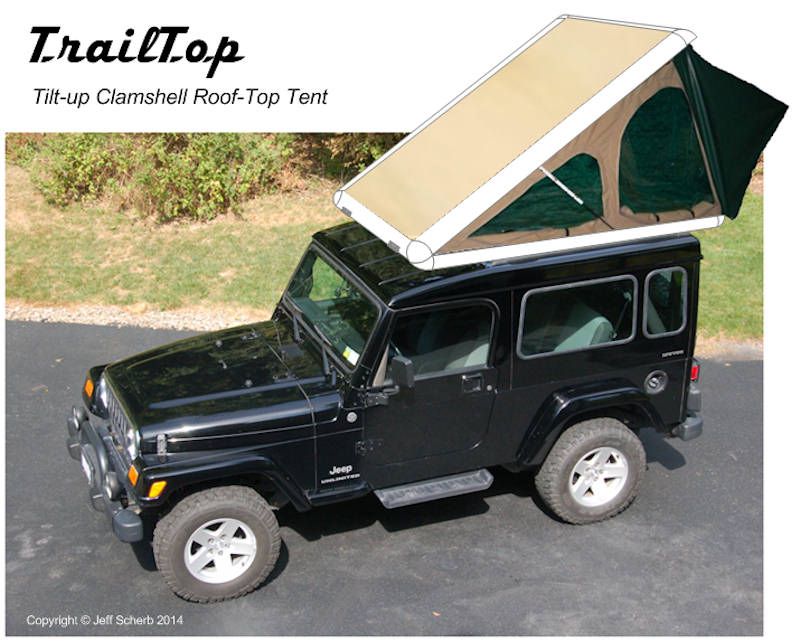
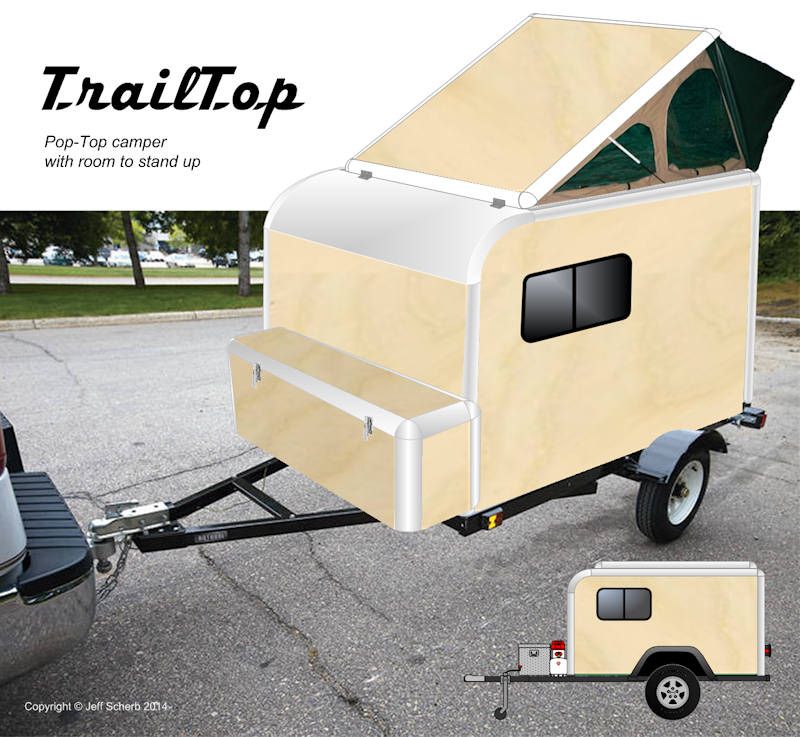
I'm showing fiberglass insulation in this drawing because it would be easier to fit to the curved interior of the hatch than styrofoam panels.
![]() by jscherb » Thu Apr 10, 2014 4:05 pm
by jscherb » Thu Apr 10, 2014 4:05 pm
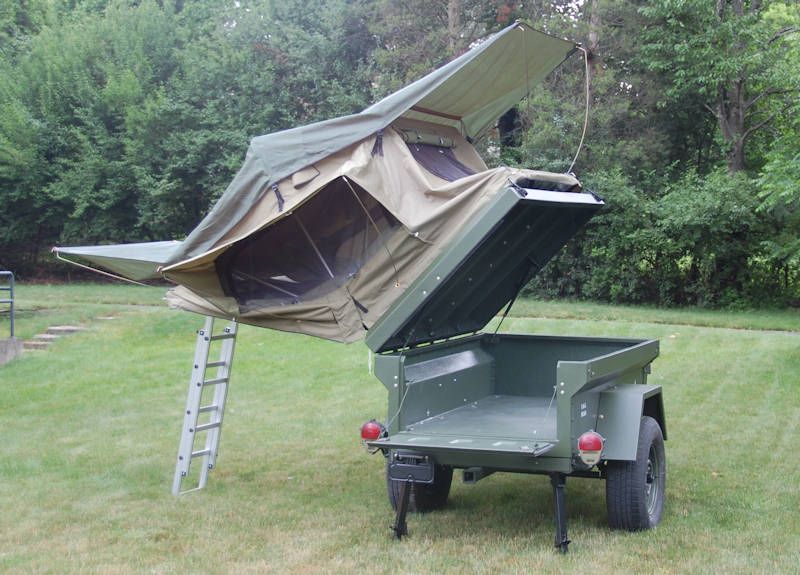
![]() by Hardryder56 » Thu Apr 10, 2014 10:08 pm
by Hardryder56 » Thu Apr 10, 2014 10:08 pm
![]() by jscherb » Sat Apr 12, 2014 7:54 am
by jscherb » Sat Apr 12, 2014 7:54 am

![]() by mallymal » Sat Apr 12, 2014 2:39 pm
by mallymal » Sat Apr 12, 2014 2:39 pm


![]() by jscherb » Sat Apr 12, 2014 4:02 pm
by jscherb » Sat Apr 12, 2014 4:02 pm
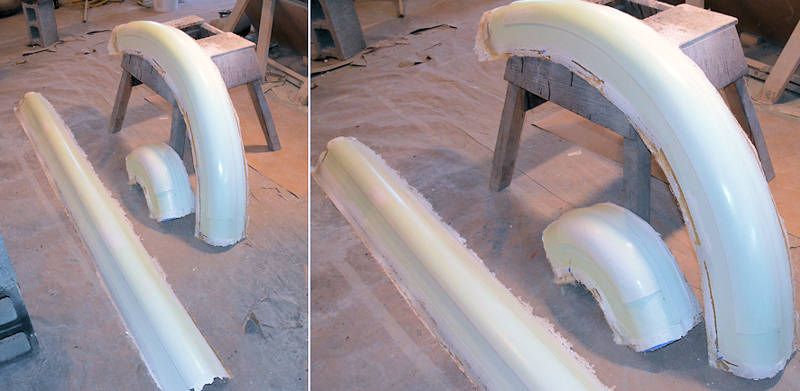
mallymal wrote:This just gets better and better....
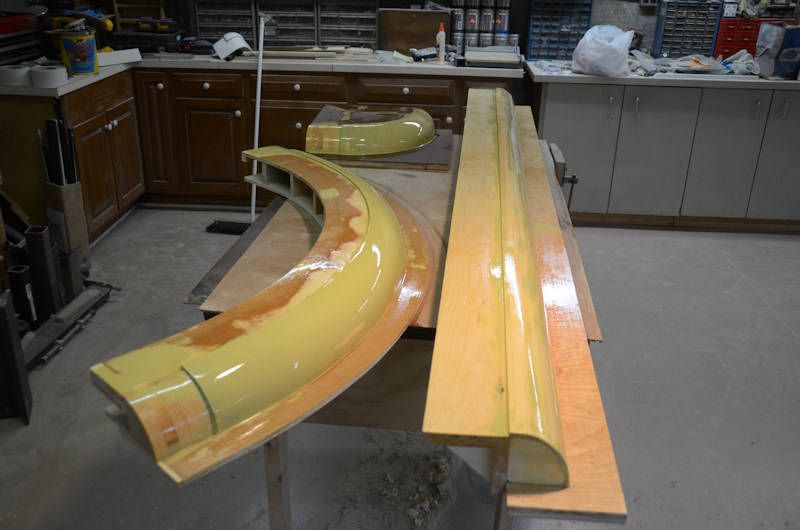
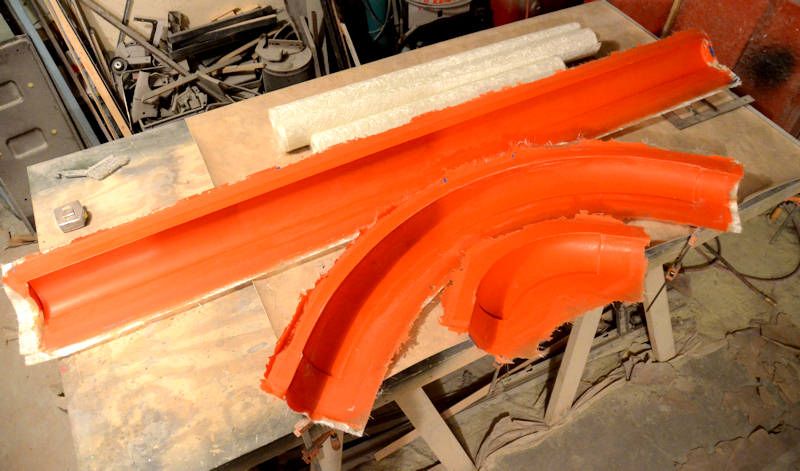
mallymal wrote:It's probably a trade secret you aren't prepared to reveal, but I can't imagine how as a "hobbyist" fibreglasser (as you call yourself) you have managed to make such perfect moulds..... The straight sections look tricky enough, but the curves... Wow
 .
.
![]() by mallymal » Sat Apr 12, 2014 4:09 pm
by mallymal » Sat Apr 12, 2014 4:09 pm
![]() by jscherb » Sun Apr 13, 2014 6:33 am
by jscherb » Sun Apr 13, 2014 6:33 am
![]() by jscherb » Sun Apr 13, 2014 12:07 pm
by jscherb » Sun Apr 13, 2014 12:07 pm
![]() by jscherb » Sun Apr 13, 2014 4:21 pm
by jscherb » Sun Apr 13, 2014 4:21 pm
![]() by djb_rh » Mon Apr 14, 2014 5:26 pm
by djb_rh » Mon Apr 14, 2014 5:26 pm

![]() by jscherb » Mon Apr 14, 2014 6:17 pm
by jscherb » Mon Apr 14, 2014 6:17 pm
djb_rh wrote:Yes, Jeff, I'm stalking you on new forums.
My question with this pop-up concept is do you have anyone lined up that can do the soft parts of this? That is to say let's assume someone steps up and wants to buy your work and make the hard parts, is there a company that could do some of these soft parts en masse? Or is that still a DIY kind of thing?
--Donnie
![]() by djb_rh » Tue Apr 15, 2014 4:00 pm
by djb_rh » Tue Apr 15, 2014 4:00 pm
jscherb wrote:I'm designing the soft parts with the idea that they could be manufactured and offered as part of the product. And yes, I have worked with a company in the past which could manufacture the parts, although I'm sure there are others. I don't expect that getting the soft parts manufactured would pose much of a problem.
I don't know at this point if a company will decide to market any of the TrailTop system, and if so, whether they'll want to market the pop-up/soft part aspects of it. We'll have to see how much interest there is in the TrailTop system in general and the pop-up parts specifically in forums like this, and then we'll have to see if any companies want to sign up to market any of it.
Shortly I plan to mold up some more TrailTop parts to build a prototype of the pop-up, and I'll be sewing prototypes of the soft parts, so stay tuned.
![]() by Hardryder56 » Wed Apr 16, 2014 6:46 pm
by Hardryder56 » Wed Apr 16, 2014 6:46 pm
![]() by Hardryder56 » Wed Apr 16, 2014 6:54 pm
by Hardryder56 » Wed Apr 16, 2014 6:54 pm

![]() by jscherb » Wed Apr 16, 2014 7:07 pm
by jscherb » Wed Apr 16, 2014 7:07 pm
Hardryder56 wrote:Donnie,
Jeff did this up for me and I think once his system goes into full scale production I will have a camper on my truck with in a couple of months
Tom

Users browsing this forum: No registered users and 6 guests