This was my criteria for an awning and what I got:
1. First I am a "side teardropper". This is where I hang out as opposed to the rear, so a lengthwise side awning is what I wanted.
2. The awning TRULY had to be an EASY ONE PERSON set up, and this definitely is.
3. Unobstructed Views. I'm not big on anything enclosed and blocking the view of what I drove so long to see in the first place.
4. The awning had to be higher than the teardrop. Unlike Canned Hams, Shastas, etc., we can't sensibly roll an awning out from the top of a low profile teardrop, at least not me. I'm 6' 4" and want to move freely underneath, and my tear is just not high enough nor long enough to equal adequate measurements for a canopy. Also, the awning needs to be high enough to clear an opened hatch.
5. NO GUY LINES... I REPEAT > NO GUY LINES.
6. Awning needs to be ATTACHED to the tear and STABLE. (In fact this is very cool, but I can drive and pull the tear with the awning attached!) Reconfiguring your view or even changing to another nearby campsite has never been easier.
7. This awning set up is adjustable in 3 ways - UP, OUT and OVER. Yep, you can adjust how high you want it, how far out from the tear you want it, and how much overhang you would like on either side.
8. Finally, it all had to quickly break down small and conveniently store in the back of the tear. I store all of my outside bulk items in the hatch of the tear and NOTHING is put inside the cabin on my bed. I ALWAYS WANT MY BED AND INTERIOR SPACE TO BE SLEEP READY.
THE KEYS:
The main key was when the company "Shelter Logic" introduced the "Shade Logic Quick Clamp Canopy" in early 2008 through Cabela's. Upon first seeing it in my catolog, I was so excited I couldn't wait for a mail order so I got in my car and drove across town to buy it at our Cabela's store in Glendale, AZ. Right away I could tell that this would work with the current set up that I had, and with one simple welding customization to the canopy frame, it was done.
So without further ado, here is my set up with explanations to follow:
Other critical keys was that I long ago had four 6.5 inch receiver tubes welded onto each corner of my tear frame (facing side out). I cannot emphasize enough how doing this very simple thing will open up countless options for you. From securely mounting tables and umbrellas, canopies and even bike racks while at a campsite. I originally did this for my set up with overlapping Autombrella's and it's why I have 2 Automobrella telescoping bars.
This was my set up before:
I have a working relationship with Automobrella and they make an awesome product, so if you're interested PM me for a forum discount. They featured this picture on their webpage for a long time and we bounced ideas around with product development for what I was trying to do. I still keep 1 Autombrella in the tear and mount it over the opposite door.
Now below is a better look at the hardware > the receiver tube, the Automobrella extending bars, and the canopy clamps. I'm quite sure people on this forum could make the telescoping bars themselves very easily. You can see the holes in the canopy clamps that allow up and down adjustments. (more below on that)
The front receiver tubes are mounted under my platform.
Here are the canopy poles attached and unopened.
Here is the one and only critical customization to the canopy frame that needs to be done. You must extend the length by about 14 inches. The Shade Logic Quick Clamp Canopy was designed to be mounted on picnic tables and bleachers and would be too low without this extension. You also want it to be high enough to clear an open hatch. I opted to add 14 inches to the canopy poles because it was the easiest way to do it. But I should warn you that poles are already the longest part and adding 14 inches will make them just under 6 feet long. For me it didn't matter because I have a 6 wide tear and the longer poles still fit perfectly in my hatch. The other option is to add 14 inches to the canopy clamps with the holes in them. You will have to drill additional holes which will be a little tedious, but the flipside is you will have 14 additional inches of height adjustability, and your longest piece will remain under 5 feet for those who would like to store this in their hatch.
You can see the weld line below where I extended the frame pole by 14 inches and how it fits inside the frame clamp:
The poles opened. Notice the holes on the end for the cross members to go through.
3 sturdy cross member poles:
Here's the underside of the awning. You can see the center cross member and how the awning material attaches with velcro over the two cross members on the end. The velcro is very strong and secure.
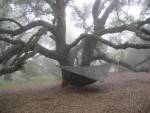
And walla folks, you got open views along with a whopping 70 square feet of shade and rain protection. This is my campsite view out in Boulevard, CA.
Hope this helps all of those that have inquired about my set up and others investigating alternatives to the traditional EZ UP. I think this could open up a whole new teardrop canopy paradigm with endless options in how people could modify it. You could even change out the awning material to a different color and pattern to suit your taste pretty easily or add a 2nd canopy on the other side.
And as far as how this holds up in the wind? I had the canopy opened for 3 days straight with the Santa Ana winds blowing with no problem. I'm very happy with it. Comments or questions welcome.
Scott G.
Link to purchase Quick Clamp Canopy: (check out the reviews too)
http://www.cabelas.com/prod-1/0056019627790a.shtml
 <<Jeep Wave


 [/img]


 Mark (& Cindi)


