De-Construction of the Inkwell

General Discussion about almost anything Teardrop or camping related

De-Construction of the Inkwell

Postby Lynn Coleman » Tue Jul 26, 2011 1:26 pm

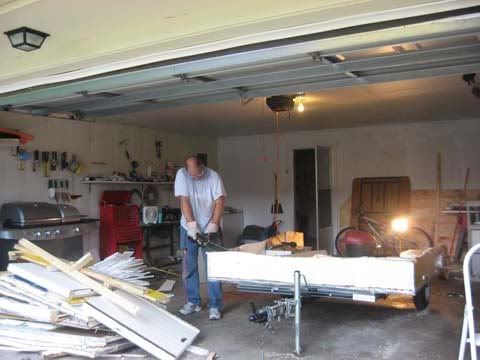
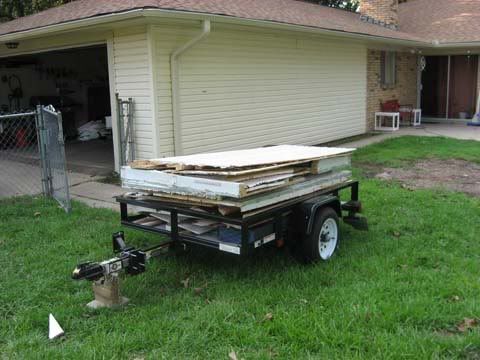
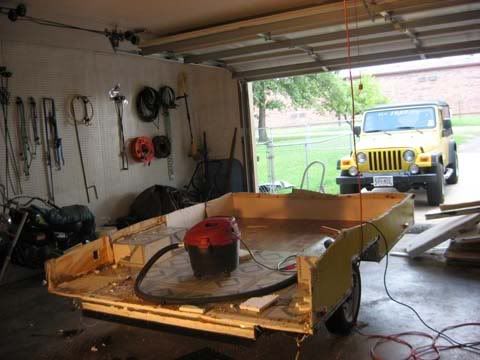
Well the time has come to take apart the Inkwell. We've had a lot of good years but being our first build we found many mistakes. The deconstruction process will begin in a few weeks. (We're still recovering from the loss of our youngest son.) Anyway, I was looking for suggestions on the best way to take apart the trailer. We are going to save the cabinet doors, ceiling trim and the windows, door and as much of the interior material as possible. We also hope to use the frame again with the next build.

Apart from a sawsall (sp?) do you have any suggestions? We screwed the sides to the floor and frame when were were building it. The frame is heavy duty aluminum and we used aluminum screws to prevent rusting.

Also were still brainstorming on the design of the new trailer which I believe will be called the Inkwell 2.

Lynn
User avatar
Lynn Coleman
Donating Member
 
Posts: 959
Images: 115
Joined: Sun Jan 14, 2007 12:28 am
Location: Florida, Keystone Heights

Postby Steve_Cox » Tue Jul 26, 2011 1:55 pm

Hi Lynn,

Nice to see you here. I think after you remove the parts you want a combination of sledge hammer and pry bar would be good deconstruction tools. Saws are good for making little pieces out of big pieces. Taking the ink well apart will be a good opportunity to learn how to make a better ink well :thumbsup:
Steve
User avatar
Steve_Cox
4000 Club
4000 Club
 
Posts: 4903
Images: 196
Joined: Sun Apr 03, 2005 8:46 am
Location: Albuquerque New Mexico

Postby bobhenry » Tue Jul 26, 2011 2:01 pm

Perhaps you can use your writers talents to describe what and where you feel the mistakes were made and the results that later became a problem.

Many could learn from your experiences and we could all share ideas as to how best to attack such a problem.
Growing older but not up !
User avatar
bobhenry
Ten Grand Club
Ten Grand Club
 
Posts: 10368
Images: 2623
Joined: Fri Feb 09, 2007 7:49 am
Location: INDIANA, LINDEN
Top

Postby Lynn Coleman » Tue Jul 26, 2011 2:07 pm

Bob some of the mistakes were:
Construction outside and the wood warped before fiberglass was applied.
Flat roof and the seams in the fiberglass on the roof led to leak
Front window was home-made, leaked around seams in the window frame and leaked down inside the front panel.
Rot happened above the rear exterior door on the rear wall it was a storage area for outdoor items that went under the bed.

For better weight distribution we feel the bed should be in the front of the trailer and the heavier items around the axle.

That's a few of the items off the top of my head.

Lynn
User avatar
Lynn Coleman
Donating Member
 
Posts: 959
Images: 115
Joined: Sun Jan 14, 2007 12:28 am
Location: Florida, Keystone Heights
Top

Postby mikeschn » Tue Jul 26, 2011 4:18 pm

Lynn,

I'd sure like to learn how to deconstruct a trailer. I have one in the backyard that is begging to be deconstructed. Short of taking a sawsall to it, I have no idea.

Mike...
The quality is remembered long after the price is forgotten, so build your teardrop with the best materials...
User avatar
mikeschn
Site Admin
 
Posts: 19202
Images: 475
Joined: Tue Apr 13, 2004 11:01 am
Location: MI
Top

Postby starleen2 » Tue Jul 26, 2011 5:00 pm

Electric Chain saw worked pretty good for me
Image
New demolition tool
Image
Kit anyone? Ready to assemble
Image
Image
User avatar
starleen2
5th Teardrop Club
 
Posts: 16272
Images: 224
Joined: Sat May 12, 2007 8:26 pm
Location: Pea Ridge ,AR
Top

deconstruction

Postby Wild Bill » Tue Jul 26, 2011 5:53 pm

Did you store it outside as well? Album shows a 2007 build so you got at least 4 camping seasons out of it. How did you seal the corners of the roof? I would rather learn from your mistakes than make them myself. I have the alum trim with the rolls of putty like the RV industry uses. I plan to have a slight bow in the roof. Was water standing on the roof? Was it painted or sided with something? Thanks for your help. Bill
Beavers are Naughty!
User avatar
Wild Bill
The 300 Club
 
Posts: 409
Images: 63
Joined: Sat Jul 07, 2007 7:01 pm
Location: Northern Illinois
Top

Postby packerz4 » Tue Jul 26, 2011 6:27 pm

so sorry to hear about the loss of your son!
~ Go Packers! ~
www.2bagalot.com
User avatar
packerz4
Donating Member
 
Posts: 605
Images: 53
Joined: Mon Mar 19, 2007 7:57 pm
Location: Elcho, WI
Top

Postby Lynn Coleman » Tue Jul 26, 2011 7:00 pm

packerz4 wrote:so sorry to hear about the loss of your son!


Thanks, we're doing fairly well but it is an incredible loss.
User avatar
Lynn Coleman
Donating Member
 
Posts: 959
Images: 115
Joined: Sun Jan 14, 2007 12:28 am
Location: Florida, Keystone Heights
Top

Re: deconstruction

Postby Lynn Coleman » Tue Jul 26, 2011 7:12 pm

Wild Bill wrote:Did you store it outside as well? Album shows a 2007 build so you got at least 4 camping seasons out of it. How did you seal the corners of the roof? I would rather learn from your mistakes than make them myself. I have the alum trim with the rolls of putty like the RV industry uses. I plan to have a slight bow in the roof. Was water standing on the roof? Was it painted or sided with something? Thanks for your help. Bill


Yes, the Inkwell was stored outside as well. We started building in Jan. 07 and we camped in it in Mar 07. The corners are not leaking they were sealed with fiberglass. Prior to the glass we layered the corners with 1/4" ply inside, 3/4" corner and 1/4" ply outside, held together with Titebond III. We clamped both sides (right and left) together and used a plane and sander to have the curve equal with each other. The roof 1/4" ply extended to the outer edge of the sides, leaving no room for water to travel down the interior of the sides or corners. As for the flat roof pooling, yes we had one spot that did and it was the first to rot through. We caught it early enough and were able to fill the rot with epoxy and repaint. We used a rubberized roof paint.

The sides were painted but here are a few of the things we did wrong. We covered the sides with fiberglass resin but we did not use the cloth. We should have. We used bondo to level out the imperfections in the the wood, which you can do but...bondo doesn't bond to wood, so the surface can't be sanded down to the wood without having the fiberglass resin on it before apply the bondo. I hope that makes sense. :shock:

The Powder Puff did many coats of epoxy and they've had no trouble with leaks or rot. They built around the same time we did.

Hope that helps.

Lynn
User avatar
Lynn Coleman
Donating Member
 
Posts: 959
Images: 115
Joined: Sun Jan 14, 2007 12:28 am
Location: Florida, Keystone Heights
Top

Postby Lynn Coleman » Tue Jul 26, 2011 7:14 pm

starleen2 wrote:Electric Chain saw worked pretty good for me


Good point. We'll be getting a new one of those soon. Paul just burned out the one we purchased the other day when a tree fell on the house. I like the idea of the chainsaw more than the sawzall.

Lynn
User avatar
Lynn Coleman
Donating Member
 
Posts: 959
Images: 115
Joined: Sun Jan 14, 2007 12:28 am
Location: Florida, Keystone Heights
Top

Postby justageorgiaguy » Wed Jul 27, 2011 8:56 am

Just watch out for nail/screw bits from the chainsaw, it would throw them a lot worse than a sawzall.
James Davidson
Photographer
http://www.jdavidsonphoto.com
User avatar
justageorgiaguy
Teardrop Advisor
 
Posts: 79
Joined: Wed Aug 04, 2010 8:50 am
Location: Cochran, GA
Top

Postby Kevin & Sandy » Wed Jul 27, 2011 9:31 am

justageorgiaguy wrote:Just watch out for nail/screw bits from the chainsaw, it would throw them a lot worse than a sawzall.


Yep, a hidden screw would be pretty hard on a chain. Get a good selection of Sawzall blades and have at it!

Also, sorry to hear about your loss, I can't imagine what you must have gone through.
User avatar
Kevin & Sandy
The 300 Club
 
Posts: 406
Images: 46
Joined: Mon Jun 22, 2009 6:58 pm
Location: Loomis, NE
Top

Postby justageorgiaguy » Wed Jul 27, 2011 9:48 am

Of course you could always remove the tires and just set it on fire, lol. Might have to rewire though.
James Davidson
Photographer
http://www.jdavidsonphoto.com
User avatar
justageorgiaguy
Teardrop Advisor
 
Posts: 79
Joined: Wed Aug 04, 2010 8:50 am
Location: Cochran, GA
Top

Postby Miriam C. » Wed Jul 27, 2011 1:49 pm

:lol: 
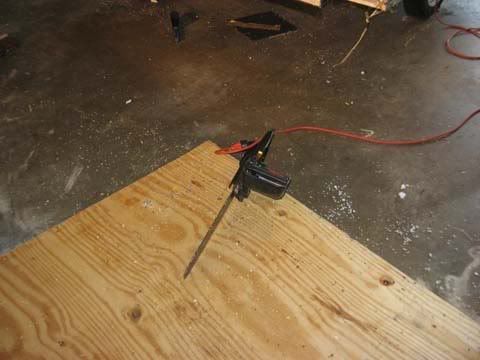
Chain saw works. Well almost. I would try a drill with a screwdriver bit attached, first! Safer and for me would have been faster! :lol: ;)
Image
“Forgiveness means giving up all hope for a better past.â€
User avatar
Miriam C.
our Aunti M
 
Posts: 19675
Images: 148
Joined: Wed Feb 15, 2006 3:14 pm
Location: Southwest MO
Top

Next

Return to General Discussion

Who is online

Users browsing this forum: Bing [Bot] and 10 guests