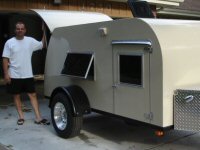
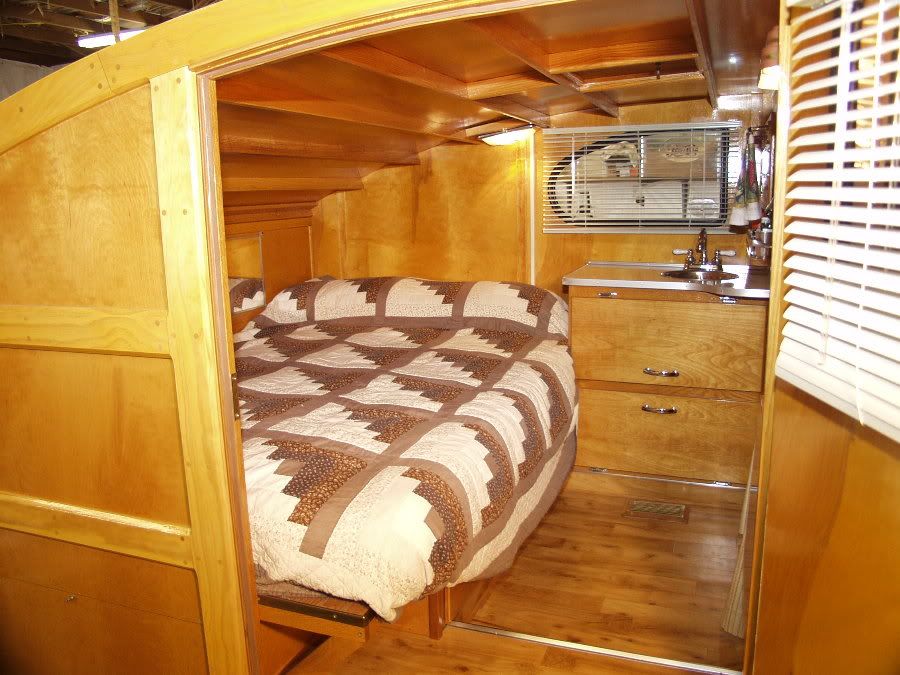
Wall construction choices

Anything to do with mechanical, construction etc

Wall construction choices

Postby IslandStorm62 » Wed May 22, 2013 1:32 pm

From what I've seen there are two basic wall constructions (I think)

1 - Use a 3/4" Birch Plywood and layer on your preferred outside skin and inside skin. Spares run from one wall to the other, creating space for insulation in the roof. There does not appear to be insulation in the walls or space to connect light switches (did I miss something?). It also appears that the 3/4" Plywood provides enough support for the door and window frames.

or

2 - Use 1/2" Birch Plywood with internal framing (not sure what is used for the framing) to support doors and windows, as well as provide space for mounting light switches and adding wall insulation. Again, apply choice of exterior and interior skin. In this case the spares would run from wall to wall. But, will there also need to be framing a around the wall edges?

Any pros or cons you can provide to help me decide which technique to use, is as always, appreciated. :thinking:
IslandStorm62
Teardrop Advisor
 
Posts: 90
Images: 13
Joined: Mon May 20, 2013 6:57 pm

Re: Wall construction choices

Postby halfdome, Danny » Wed May 22, 2013 2:29 pm

I build with 3/4" plywood and make 1/4" x 3/4" stop dadoes where I need light switch wire chases.
I also dado in the front & rear bulkheads and the floor.
The glued on 1/8" Oak interior plywood covers up the dadoes and the glued on aluminum covers the exterior.
I've tried your #2 and the extra materials and effort weren't worth it to me.
Good luck with your build.
:D Danny
ImageImage
"Conditions are never just right. People who delay action until all factors are favorable do nothing". William Feather
Don't accept "It's Good Enough" build to the best of your abilities.
Image
Teardroppers Of Oregon & WashingtonImage
User avatar
halfdome, Danny
*Happy Camper
 
Posts: 5894
Images: 252
Joined: Sun Aug 14, 2005 11:02 pm
Location: Washington , Pew-al-up

Re: Wall construction choices

Postby IslandStorm62 » Wed May 22, 2013 3:27 pm

I have little (almost none) wood working skills, so I have google everything.

If I understand correctly, your dado runs from the ceiling down to where you want the light switch, and you have no wall insulation. Just an interior skin that covers all you wiring.

As far a the front bulkhead, I don't understand that. The front of the teardrop (what I assume you are calling the front bulkhead), as i understand it, is just part of the roof extended down or it starts from the front and follow the form of the teardrop to make the roof, outside of the spares.
IslandStorm62
Teardrop Advisor
 
Posts: 90
Images: 13
Joined: Mon May 20, 2013 6:57 pm
Top

Re: Wall construction choices

Postby halfdome, Danny » Wed May 22, 2013 5:08 pm

IslandStorm62 wrote:I have little (almost none) wood working skills, so I have google everything.

If I understand correctly, your dado runs from the ceiling down to where you want the light switch, and you have no wall insulation. Just an interior skin that covers all you wiring.

As far a the front bulkhead, I don't understand that. The front of the teardrop (what I assume you are calling the front bulkhead), as i understand it, is just part of the roof extended down or it starts from the front and follow the form of the teardrop to make the roof, outside of the spares.


IslandStorm62, You could take a woodworking class at your local community college to hone up on your skills.
It would be very helpful with your build.

Yes, I run just the wires that operate the light switch in that dado and nothing else.

My teardrop is a 5' x 10' and it affords a front closet, therefore a front bulkhead.
:D Danny
ImageImage
"Conditions are never just right. People who delay action until all factors are favorable do nothing". William Feather
Don't accept "It's Good Enough" build to the best of your abilities.
Image
Teardroppers Of Oregon & WashingtonImage
User avatar
halfdome, Danny
*Happy Camper
 
Posts: 5894
Images: 252
Joined: Sun Aug 14, 2005 11:02 pm
Location: Washington , Pew-al-up
Top

Re: Wall construction choices

Postby markhusbands » Fri May 31, 2013 2:41 pm

I'm doing the same thing as Danny but running the dadoes for wires on the outside and just staining the interior finished ply. And for clarification, all my interior lights and switches I'm just going to put on the roof or wire through a cabinet. The exterior dadoes are for wires to running and porch lights (just a few inches each), and will get covered by aluminum.
133923
User avatar
markhusbands
Teardrop Master
 
Posts: 285
Images: 58
Joined: Tue Jul 03, 2012 3:17 pm
Location: Denver, Colorado, USA
Top

Re: Wall construction choices

Postby Oldragbaggers » Fri May 31, 2013 3:01 pm

If you are using solid 3/4" plywood for your walls you do not need to skin them inside and out unless you are planning on an aluminum or other such exterior. You can either get ply with one nice face and put that toward the inside if you are covering the exterior with aluminum or painting it. Or if you want woodie on both sides get plywood with two nice faces. Running wires can be done inside your roof and cabinets. The dado idea is perfect for wire runs that have to go into the wall. No need buying 3 sheets of anything when one sheet will do.

The second method, with sandwich construction (framing covered on both sides with ply) would certainly not require 1/2" ply for a skin. That seems like overkill to me. I have sandwich construction and my skins are only 1/8" inside and out. I did fiberglass mine, so that gives my exterior skin some strength and puncture resistance, but I think even if I had not fiberglassed, the thickest skin I would have used is 1/4".

If I had it to do over, considering the additional work and expense of the sandwich construction, I would go with 3/4" solid walls. And especially if you have little or no woodworking skills. Building a frame, figuring out where you need to leave solid wood for all your cabinet, fender, and other attachment points and so forth lends a fair amount of complication to the project. And I think I only saved myself about 25 pounds over all with my sandwich construction (I used plywood for my interior frame) so for the weight savings, and the most likely limited amount of sound and temperature insulation gained, I don't think it was worth it.

Just my 2 cents.
Life is sooooo good.........
Sail...camp....bike...repeat
Becky

Build Journal http://www.tnttt.com/viewtopic.php?f=50&t=45917
Visit our blog at http://www.oldragbaggers.com
Image Image
User avatar
Oldragbaggers
Gold Donating Member
 
Posts: 1842
Images: 331
Joined: Mon Aug 01, 2011 9:22 pm
Location: Essex, MD
Top

Re: Wall construction choices

Postby halfdome, Danny » Fri May 31, 2013 3:27 pm

Oldragbaggers wrote:If you are using solid 3/4" plywood for your walls you do not need to skin them inside and out unless you are planning on an aluminum or other such exterior. You can either get ply with one nice face and put that toward the inside if you are covering the exterior with aluminum or painting it.

I use 1/8" Oak plywood on the interior as vertical grain looks nicer than horizontal.
In a house, wainscot, cabinets including door panels run vertical too.
The flames in the grain should go vertical.
On drawer fronts & tops, the flames should go to the right.
It was the way I was trained as a cabinetmaker.
Some may not care, but that's the way our eyes see things more pleasing.
I use 3/4" plywood that has a not so attractive face and back as it all gets covered.
:D Danny
ImageImage
"Conditions are never just right. People who delay action until all factors are favorable do nothing". William Feather
Don't accept "It's Good Enough" build to the best of your abilities.
Image
Teardroppers Of Oregon & WashingtonImage
User avatar
halfdome, Danny
*Happy Camper
 
Posts: 5894
Images: 252
Joined: Sun Aug 14, 2005 11:02 pm
Location: Washington , Pew-al-up
Top

Re: Wall construction choices

Postby doug hodder » Fri May 31, 2013 8:37 pm

+1 on the interior grain direction Danny. Nothing looks more our of place to me than horizontal grain on an interior. Others opinions may vary. Yes, it does take more time but it's worth it. Doug
doug hodder
*Snoop Dougie Doug
 
Posts: 12625
Images: 562
Joined: Tue Dec 14, 2004 11:20 pm
Top

Re: Wall construction choices

Postby Oldragbaggers » Fri May 31, 2013 9:25 pm

I guess I must have very unsophisticated eyes. Wood grain looks great to me running horizontal, vertical, diagonal or whatever. :lol: :lol: Good thing I painted mine I guess.
Life is sooooo good.........
Sail...camp....bike...repeat
Becky

Build Journal http://www.tnttt.com/viewtopic.php?f=50&t=45917
Visit our blog at http://www.oldragbaggers.com
Image Image
User avatar
Oldragbaggers
Gold Donating Member
 
Posts: 1842
Images: 331
Joined: Mon Aug 01, 2011 9:22 pm
Location: Essex, MD
Top

Re: Wall construction choices

Postby 48Rob » Sat Jun 01, 2013 6:14 pm

Becky,

I agree that wood grain, no matter the direction, is pretty, but sometimes orientation makes it better...

Image

Image

Rob
Waiting for "someday" will leave you on your deathbed wondering why you didn't just rearrange your priorities and enjoy the time you had, instead of waiting for a "better" time to come along...
User avatar
48Rob
Super Lifetime Member
 
Posts: 3882
Images: 4
Joined: Thu Nov 17, 2005 6:47 pm
Location: Central Illinois
Top

Re: Wall construction choices

Postby Oldragbaggers » Sat Jun 01, 2013 6:20 pm

Very beautiful, Rob. No doubt you know your wood!!
Life is sooooo good.........
Sail...camp....bike...repeat
Becky

Build Journal http://www.tnttt.com/viewtopic.php?f=50&t=45917
Visit our blog at http://www.oldragbaggers.com
Image Image
User avatar
Oldragbaggers
Gold Donating Member
 
Posts: 1842
Images: 331
Joined: Mon Aug 01, 2011 9:22 pm
Location: Essex, MD
Top

Re: Wall construction choices

Postby working on it » Sat Jun 01, 2013 7:54 pm

Oldragbaggers wrote:I guess I must have very unsophisticated eyes. Wood grain looks great to me running horizontal, vertical, diagonal or whatever. :lol: :lol: Good thing I painted mine I guess.

+2... I love the look of plywood for some reason; I sorta regret painting over my exterior, poly-urethaned and glossy, every time I look thru my gallery photos. But, I had a plan to paint it black/gray/silver and did it. Needed UV protection anyway.
2013 HHRv "squareback/squaredrop", rugged, 4x8 TTT, 2225 lbs
  • *3500 lb Dexter EZ-Lube braked axle, 3000 lb.springs, active-progressive bumpstop suspension
  • *27 x 8.5-14LT AT tires (x 3) *Weight Distribution system for single-beam tongue
  • *100% LED's & GFCI outlets, 3x fans, AM/FM/CD/Aux. *A/C & heat, Optima AGM, inverter & charger(s)
  • *extended-run, on-board, 2500w generator *Coleman dual-fuel stove & lantern, Ikea grill, vintage skillet
  • *zinc/stainless front & side racks *98"L x 6" diameter rod & reel carrier tube on roof
173193172890148599
User avatar
working on it
2000 Club
2000 Club
 
Posts: 2189
Images: 457
Joined: Tue Oct 04, 2011 9:05 pm
Location: DFW Texas
Top

Re: Wall construction choices

Postby markhusbands » Sun Jun 02, 2013 6:47 am

Boys, my flames run horizontal because I'm fast. Real fast.

Okay, it's mainly because I'm cheap. Two walls, two 80 dollar sheets of plywood with a finished side. Done.
133923
User avatar
markhusbands
Teardrop Master
 
Posts: 285
Images: 58
Joined: Tue Jul 03, 2012 3:17 pm
Location: Denver, Colorado, USA
Top


Return to Teardrop Construction Tips & Techniques

Who is online

Users browsing this forum: Bing [Bot] and 3 guests