Sandman's Build FINALLY Underway

Anything to do with mechanical, construction etc

Sandman's Build FINALLY Underway

Postby sandman » Mon Jan 08, 2007 11:05 am

Hey Guys,

Haven't posted much but thought I would finally share some pics as I finally begin my build. I am using Steve Wolverton's Cowper plans but have changed the design to be a copy of the Little Guy Sport. After building a floor assembly a few weeks ago andf screwing it up, I took some days off the build to sit and plan more carefully before cutting the first piece of wood. I am one of those guys that gets too enthusiastic and forgets to slow down. I beat back my demons and put together the new floor assembly and it came out perfectly square..HOOORRAY!!!! :applause:

I am building my Teardrop 6 feet wide just like the Little Guy Sport. This sucker is going to be huge. Anyway, the specs on the floor are as follows.

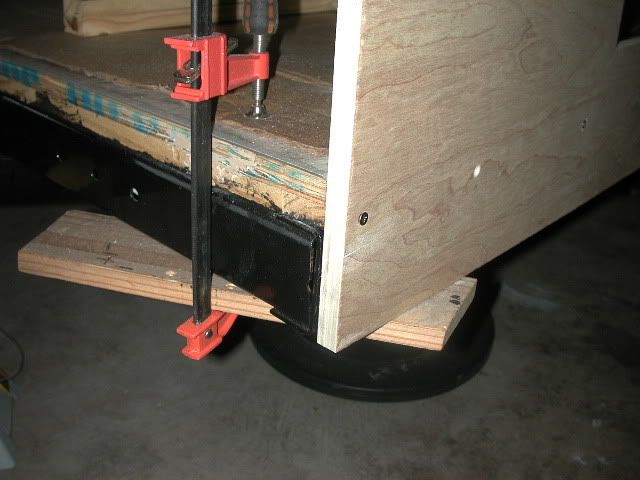
Floor is built of 2 pieces of 3/4" Baltic Birch with the outer floor joists made of 1x2 Select Pine. The cross members are 1x3 Select Red Oak. The measurements of the floor are 85 3/4" Long x 74" Wide.
I just finished putting on the second coat of asphalt emulsion and now waiting for it to dry before cutting out my profile.

Image
Image
User avatar
sandman
Donating Member
 
Posts: 326
Images: 154
Joined: Sat Oct 28, 2006 6:29 pm
Location: Bartlett, TN

Postby Miriam C. » Mon Jan 08, 2007 11:09 am

:applause: :thumbsup: Good job! It is all up from here :thumbsup:
Now why does it need to dry? I just let mine dry to the touch and put it on. It stuck :D

Are you going to put the bed acrosss?
“Forgiveness means giving up all hope for a better past.â€
User avatar
Miriam C.
our Aunti M
 
Posts: 19675
Images: 148
Joined: Wed Feb 15, 2006 3:14 pm
Location: Southwest MO

Postby sandman » Mon Jan 08, 2007 11:21 am

I have never worked with Emulsion before and have read here about how long it takes dry. It's cold here today so the coating will be wet for a while. I do have my shop heater running to help cure it faster. The bed will be longways as far as I have planned.

Here's a good question I just thought of, when I get ready to mount my walls, where on the floor assembly should I install the screws? Into the 3/4" Plywood floor or the 1x2 pine sub floor joists? The pine seems it would split very easily as it did when I was screwing it to the plywood. Is pine going to be strong enough to accept the dry walls screws if that's indeed where I need to drill?
User avatar
sandman
Donating Member
 
Posts: 326
Images: 154
Joined: Sat Oct 28, 2006 6:29 pm
Location: Bartlett, TN
Top

Postby Miriam C. » Mon Jan 08, 2007 11:30 am

sandman wrote:I have never worked with Emulsion before and have read here about how long it takes dry. It's cold here today so the coating will be wet for a while. I do have my shop heater running to help cure it faster. The bed will be longways as far as I have planned.

Here's a good question I just thought of, when I get ready to mount my walls, where on the floor assembly should I install the screws? Into the 3/4" Plywood floor or the 1x2 pine sub floor joists? The pine seems it would split very easily as it did when I was screwing it to the plywood. Is pine going to be strong enough to accept the dry walls screws if that's indeed where I need to drill?


My point was it doesn't really need to dry just wear gloves. :lol:

I had the same problem with spliting on some of the pine. Be sure to predrill the screw holes. A second drill or dremel to make holes helps. I used deck screws because they aren't going to rust and get a good grip.

I drilled into the wood. Plywood will not hold a screw if in the end-grain. The other thing you can do is use a couple of pieces of aluminum angle to help brace it. See MadJacks build. My walls are framed so the walls are screwed to the frame and the frame screwed to the floor from the top.

Good luck :thumbsup:
“Forgiveness means giving up all hope for a better past.â€
User avatar
Miriam C.
our Aunti M
 
Posts: 19675
Images: 148
Joined: Wed Feb 15, 2006 3:14 pm
Location: Southwest MO
Top

Postby madjack » Mon Jan 08, 2007 11:49 am

...go 'man go...on the subject of wall attachment, think cleats...we used 1"x1"x1/16th Al angle attached with 3/4" screws and gorilla glue...worked very well...check our build photos under the WWW button.....
madjack 8)
...I have come to believe that, conflict resolution, through violence, is never acceptable.....................mj
User avatar
madjack
Site Admin
 
Posts: 15128
Images: 177
Joined: Thu Dec 02, 2004 5:27 pm
Location: Central Louisiana
Top

Postby sandman » Mon Jan 08, 2007 12:07 pm

Hey Madjack,

Thanks for the reply. I am looking at your pics but I am not seeing the angle iron concept. I see the angle irons screwed to the walls but how are you attaching it to the floor? Are you mounting to the top of your plywood floor? Pardon my stupidity.. :? Where/how are you using the Gorilla Glue? Need to learn your technique. Any advice is most appreciated. :D
User avatar
sandman
Donating Member
 
Posts: 326
Images: 154
Joined: Sat Oct 28, 2006 6:29 pm
Location: Bartlett, TN
Top

Postby Mary K » Mon Jan 08, 2007 12:29 pm

Sweet!!! :applause: :thumbsup: You go Sandman!!

I attached my walls to the 1x2 for the same reason Miriam said.

Image


Madjack's way is cool too. a little more work involved, but might be worth it for the "good feeling" when you consider that this is how the whole TD is attached to the trailer.

Mk
Mary K

I don't know half of you half as well as I should like; and I like less than half of you half as well as you deserve. Bilbo Baggins
User avatar
Mary K
6000 Club
6000 Club
 
Posts: 6425
Images: 44
Joined: Wed Aug 02, 2006 3:07 pm
Location: Florida, Pensacola
Top

Postby madjack » Mon Jan 08, 2007 12:38 pm

'man, the cleats were attached 2.5"s up on the wall and then set on the floor allowing the overhang to cover the frame(floor is 1/2 ply alone, sitting on 2"steel frame)...scuff up the Al angle with some sandpaper...apply Gorilla glue...lightly dampen wood surface...screw the angle in place...glued and screwed forever(I hope)...if you have never used Gorilla Glue, read and follow instructions...GG foams as it sets up and the foam can be very hard to remove...keep a rag with solvent on it to clean up the foam about 15mins after it appears to solve this problem...you can also put a bead of constuction adhesive between the wall and steel frame for additional mounting strength...
madjack 8)
...I have come to believe that, conflict resolution, through violence, is never acceptable.....................mj
User avatar
madjack
Site Admin
 
Posts: 15128
Images: 177
Joined: Thu Dec 02, 2004 5:27 pm
Location: Central Louisiana
Top

Postby Miriam C. » Mon Jan 08, 2007 1:32 pm

If you are not hanging the walls over the frame you can still use angle just attach the angle after you get a couple of screws in to hold the wall up. Or you can turn it to cover the corner and use it to give the screws some bite. You need to drill. (thats what I did)

This is how MJ did it. It is in the WWW not the Gator Tears w w w.
http://new.photos.yahoo.com/marlene71360/album/576460762329689831
“Forgiveness means giving up all hope for a better past.â€
User avatar
Miriam C.
our Aunti M
 
Posts: 19675
Images: 148
Joined: Wed Feb 15, 2006 3:14 pm
Location: Southwest MO
Top

Postby sandman » Wed Jan 10, 2007 7:15 pm

Well, after letting the asphalt emulsion dry for two days on the subfloor, I decided to go ahead and install the insulation tonight. The floor will be insulated to an R-11(i think) Rating which means, my back and big butt will be nice and warm on those cold nights.

I went to Home Depot and bought the EPS Insulation and cut it to fit between the floor joists. After cutting the insulation to fit, I coated the subfloor with 3M Super 90 Spray Adhesive and laid the EPS in place between each joist. AFter laying down the insulation, I went back with and fastened the insulation down with #10 1-1/4 wood screws with fender washers. With this step being done, the subfloor assembly is now complete and now it's on to cutting out the two side wall profiles.

Image
Here's the floor all insulated and finished.
Image
A close-up of the EPS in place with fender washers.
User avatar
sandman
Donating Member
 
Posts: 326
Images: 154
Joined: Sat Oct 28, 2006 6:29 pm
Location: Bartlett, TN
Top


Return to Teardrop Construction Tips & Techniques

Who is online

Users browsing this forum: No registered users and 4 guests