
Teardrops n Tiny Travel Trailersor t n ttt for short (tnttt.com) |
galley hatch help
7 posts
• Page 1 of 1
galley hatch help
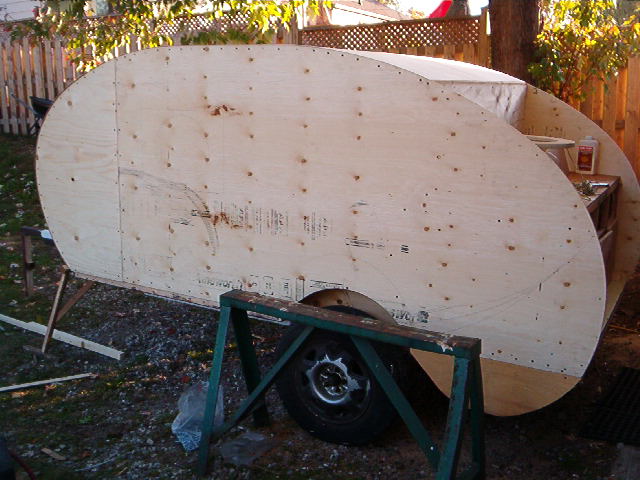
![]() by jasoncpg » Tue Jan 08, 2008 10:44 pm
by jasoncpg » Tue Jan 08, 2008 10:44 pm
hi all i am just going to start my galley hatch but dont know what to do. so this is what i have. what would you do? ps 1/8 skin - thank you
There's a beer in my tear
-

jasoncpg - Teardrop Master
- Posts: 133
- Images: 152
- Joined: Fri Jun 29, 2007 12:07 am
- Location: ont canada
![]() by CASHCOW » Tue Jan 08, 2008 11:04 pm
by CASHCOW » Tue Jan 08, 2008 11:04 pm
jason you can look at the top of this page click on Generic Benroy and look on page #56 that is what i used and good luck
Serro Scotty Hilander http://txmc08.blogspot.com/
-

CASHCOW - The 300 Club
- Posts: 473
- Images: 1
- Joined: Sat Jul 28, 2007 3:33 pm
- Location: amarillo texas


