Built in Cooler in the Galley

Anything to do with mechanical, construction etc

Built in Cooler in the Galley

Postby 2bits » Wed Jan 30, 2008 9:38 pm

So I was thinking of doing a modern cub style where the hatch is extended all the way down and under, but I had a thought last night about doing it the old style and having the space underneath the counter be a built in cooler. I have seen these on the older models, and I was thinking with all the new advancements, there has to be a better way to keep the thing from sweating. If I am just inviting rot, I would rather skip it, but if it can be done I think it would be cool, not to mention simplify construction, and maximize space utilization. So what are some suggestions for this? I would like to wall in all the open space below the countertop and insulate it somehow and build a custom cooler that follows the shape of the rear of the tear. Here's some pics that inspire me. Any construction, insulation suggestions?

Image

Image

Just like this, but there's got to be a better way to insulate...

Image
Thomas

Image
User avatar
2bits
2bit Member
 
Posts: 5132
Images: 8
Joined: Thu Dec 27, 2007 6:04 pm
Location: Lake Tawakoni, TX

Postby Bigwoods » Thu Jan 31, 2008 12:47 am

Thomas,

dakotamouse really did a nice job on their "ice box." It's a top loader too.

Here is s picture of the cooler and there are more in her album.


Image
Greg in Northern Minnesota

Image

Image
User avatar
Bigwoods
500 Club
 
Posts: 602
Images: 104
Joined: Thu May 27, 2004 10:45 pm
Location: Northern Minnesota

Postby Esteban » Thu Jan 31, 2008 12:55 am

Here's a 4 page pdf for building your own efficient icebox from plywood, rigid foam, epoxy, and fiberglass.
http://members.aol.com/juneaudave/icebox.pdf :)
Steve - SLO, CA
Esteban
Donating Member
 
Posts: 1684
Images: 15
Joined: Fri Jul 28, 2006 4:39 pm
Location: California, San Luis Obispo
Top

Postby 48Rob » Thu Jan 31, 2008 8:43 am

Another option is to use a regular cooler, and add a top loading door, and drain with shut off valve.

The wood cutting board is the door to access the cooler.
It has a sliding shelf at the top to keep things out of the ice/water.

Rob

<img src="http://img.photobucket.com/albums/v284/1948rob/awning/ins1.jpg?t=1201786711">

It was my plan to build a custom ice box, but after calculating the space needed, and the expense, using a plastic cooler made more sense for my application.

<IMG SRC="http://img.photobucket.com/albums/v284/1948rob/awning/aaacooler.jpg?t=1201786874">
Waiting for "someday" will leave you on your deathbed wondering why you didn't just rearrange your priorities and enjoy the time you had, instead of waiting for a "better" time to come along...
User avatar
48Rob
Super Lifetime Member
 
Posts: 3882
Images: 4
Joined: Thu Nov 17, 2005 6:47 pm
Location: Central Illinois
Top

Postby doug hodder » Thu Jan 31, 2008 10:21 am

Great idea Rob...and a wonderful galley to boot!!! I wonder where I got the idea for the color of the wood that I'm using??? :thinking: Doug
doug hodder
*Snoop Dougie Doug
 
Posts: 12625
Images: 562
Joined: Tue Dec 14, 2004 11:20 pm
Top

Postby Miriam C. » Thu Jan 31, 2008 11:23 am

Boy I really like the whole counter lifting but think it would be better in sections. That would allow you to use more than one cooler or a smaller one depending on your wet/dry needs.

I would definitely epoxy every surface a few times. :thumbsup:
“Forgiveness means giving up all hope for a better past.â€
User avatar
Miriam C.
our Aunti M
 
Posts: 19675
Images: 148
Joined: Wed Feb 15, 2006 3:14 pm
Location: Southwest MO
Top

Postby 48Rob » Thu Jan 31, 2008 6:07 pm

Thanks Doug!

Um, lemme guess...

:lol: :lol: :lol:

Rob, who hopes to make the 2009 gathering!
Lots of people to meet!
Waiting for "someday" will leave you on your deathbed wondering why you didn't just rearrange your priorities and enjoy the time you had, instead of waiting for a "better" time to come along...
User avatar
48Rob
Super Lifetime Member
 
Posts: 3882
Images: 4
Joined: Thu Nov 17, 2005 6:47 pm
Location: Central Illinois
Top

Postby Airspeed » Thu Jan 31, 2008 6:18 pm

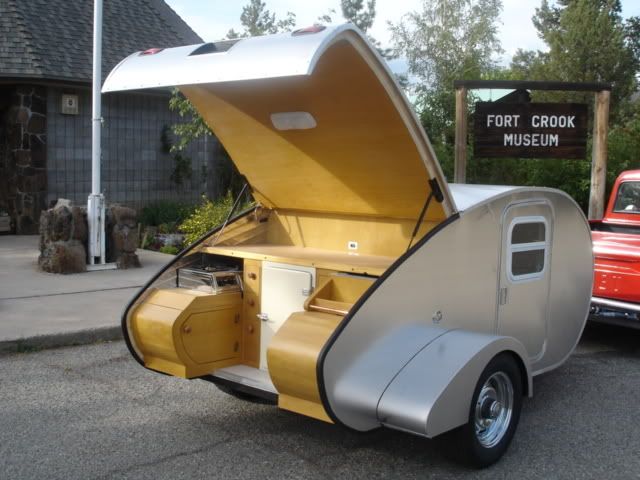
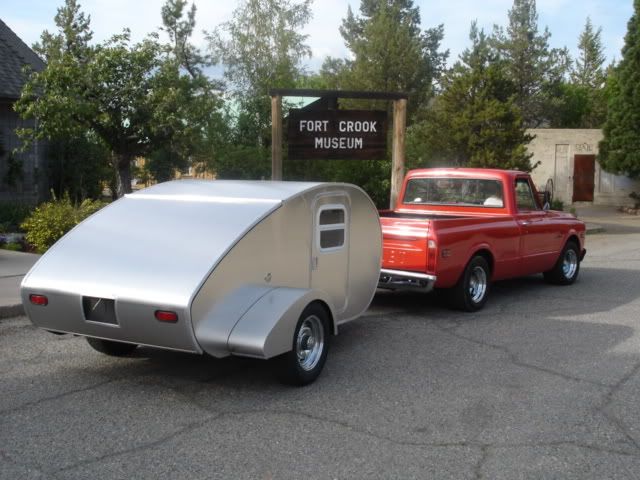
My hatch wraps all the way around, I just mounted my cooler in the center . I think you would lose a lot of storage space if you wall up the rear end, you would have to pile stuff on top of everything to store anything below the counter. It didnt take much to get the entire rear end open, even with the hatch wraping around.
Image
Image
User avatar
Airspeed
500 Club
 
Posts: 718
Images: 16
Joined: Sun Mar 04, 2007 7:26 pm
Location: North California
Top

Postby 2bits » Thu Jan 31, 2008 7:25 pm

Airspeed, your Teardrop makes me salivate especially since I drive a 71 Chevy truck!

One question. I cant tell now it seals in the middle, it looks like there would be an open space there in the middle unless those are two slide outs on the sides. How is your lower section constructed? I am thinking again of doing the wraparound, and having two slideouts on each side with a cooler on each one. One for can drinks and one for food.
Thomas

Image
User avatar
2bits
2bit Member
 
Posts: 5132
Images: 8
Joined: Thu Dec 27, 2007 6:04 pm
Location: Lake Tawakoni, TX
Top

Postby Airspeed » Fri Feb 01, 2008 9:37 am

Thanks Thomas, There is a removable panel that slides into a pair of aluminum tracks, when the hatch is down it holds it in place, when I open the hatch I just slide the panel out. I was going to make the panel slide under when the hatch opened and had a simple mechanism designed but I got in a hurry to go camping and wanted to finish. The stove and sink both slide out for use, the cabinets below stay in place.
Thanks again! Aaron
User avatar
Airspeed
500 Club
 
Posts: 718
Images: 16
Joined: Sun Mar 04, 2007 7:26 pm
Location: North California
Top


Return to Teardrop Construction Tips & Techniques

Who is online

Users browsing this forum: No registered users and 6 guests