Ultralight wall laminations

Anything to do with mechanical, construction etc

Ultralight wall laminations

Postby Larry C » Sat Jan 02, 2010 1:48 pm

New builder here,
I am planning to build Mike's Ultralight design with some mods. I have several questions, but the first one is the wall profile laminations that Mike used by glueing thin strips around dowels. I am looking for more detailed info on this method. I searched the forum, but don't see where others have used this method. I know it looks pretty straight forward and I have used the method in strip kayak building, I just like having as much info as I can before starting. Any help appreciated........

Larry
"If its worth doing it's worth doing Light"

http://www.tnttt.com/viewtopic.php?f=50&t=35852
Larry C
500 Club
 
Posts: 732
Images: 78
Joined: Sun Dec 27, 2009 9:37 am
Location: Finger Lakes

Postby wannabefree » Sun Jan 03, 2010 11:37 pm

Larry -
You won't find a lot on this site, but there is some because I put it there. Try searching for "bent lamination" and you'll come across what I have done for side molding. Also google it. Boatbuilding sites will have some good info.

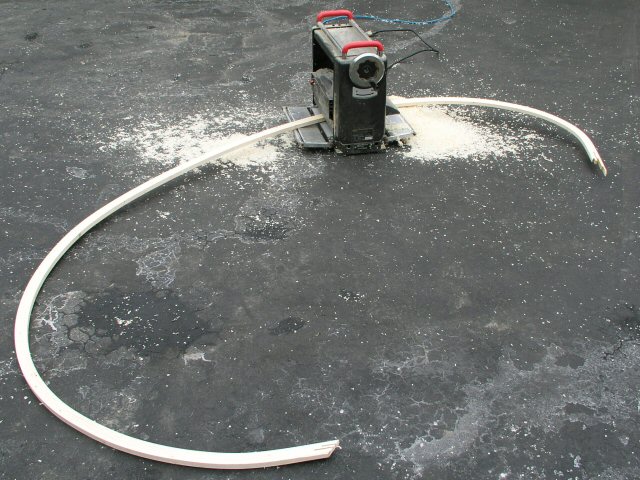
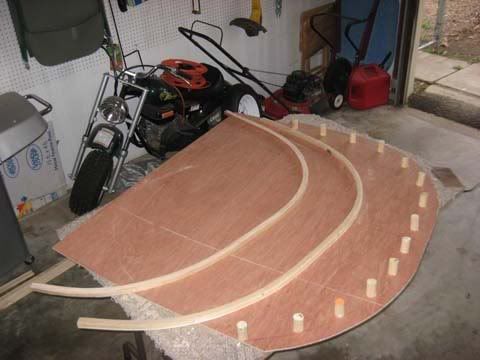
If I recall what Mike did correctly, the dowels were set into a sheet of particle board or such and used as a form. That's one good way to make a bending form. You can also just cut the profile out of scrap and use that as a form, which is how I did it.

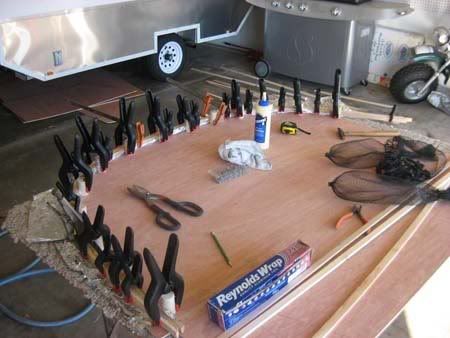
Have LOTS of clamps on hand!
In anything at all, perfection is finally attained not when there is no longer anything to add, but when there is no longer anything to take away.
-- Antoine de Saint-Exupery
User avatar
wannabefree
The 300 Club
 
Posts: 380
Images: 82
Joined: Fri Jul 11, 2008 11:00 pm
Location: Phoenix

Postby starleen2 » Mon Jan 04, 2010 12:01 am

Used the same method on the lady bug WW

Image

Image

Image[/img]
User avatar
starleen2
5th Teardrop Club
 
Posts: 16272
Images: 224
Joined: Sat May 12, 2007 8:26 pm
Location: Pea Ridge ,AR
Top

Postby dwgriff1 » Mon Jan 04, 2010 12:10 am

The advantage is that it gives you a good crisp, properly smoothed edge. I did not do it that way, but I wish I had.

The jig would not have to be dowels. A sheet of cheap chip board could be cut to make a jig. Seems that might be easier.

If the walls were framed, one could even use that framing for a mold. That is what I did for the front laminations on my woody.

dave
User avatar
dwgriff1
500 Club
 
Posts: 947
Images: 4
Joined: Mon Jul 04, 2005 4:20 pm
Location: SW Idaho
Top

Postby Rock » Tue Jan 05, 2010 3:32 pm

Larry,

I followed Mike's method except that I glued all the strips togther at once due to the long open time afforded by epoxy.

Made an 1/8" MDF template from Mike's XY coordinates in the PDF plan:

Image

I'm fortunate to have a nice tablesaw so I was able to saw up clear (knot free) framing lumber into even 1/8" strips. Following the method used to joint plywood for my Pygmy kayak, I end glued them with epoxy and fiberglas tape to get 16' lengths. (Weight and a little heat in the nasty cold basement)

Image

Mounted the template to 3/4" MDF and used the "offset dowel" method in Mike's PDF to get the laminations dead nuts. As mentioned glued them all up at once with every single clamp I owned.

Image

Very happy with the results of this method.

Image

Eric
Rock
Teardrop Master
 
Posts: 273
Images: 48
Joined: Tue Oct 14, 2008 10:38 am
Location: Fremont, OH
Top

Postby mikeschn » Tue Jan 05, 2010 4:40 pm

First I drew a line representing the inside of the profile on the top of the table.

Then I bought a dowel, and cut it up into short lengths... 1" I think. Then I drilled 11/64" holes in the end of the dowels... Anywhere but the center.

Then I screwed the dowels to the table top. Because the screw was not in the center, I could rotate the dowel around until it matched up with the line perfectly.

I used Titebond III to glue the strips together.

Mike...
The quality is remembered long after the price is forgotten, so build your teardrop with the best materials...
User avatar
mikeschn
Site Admin
 
Posts: 19202
Images: 475
Joined: Tue Apr 13, 2004 11:01 am
Location: MI
Top

Postby Larry C » Tue Jan 05, 2010 6:52 pm

Thanks All.....
I now have a better idea of the process. I have used the method in boat building for stem laminations, but this is a small lamination and is glued in place. I have the equipment to cut the strips and lots of clamps.
I see Mike used 8' and Rock used full length strips, butt glued and taped both sides (Pygmy panel method). I would think the thickness build-up would be an issue, especially if several strips had joints on top of each other. How did you handle that, Rock. I can work this out myself, just wondering what you all did.

Thanks,
Larry
"If its worth doing it's worth doing Light"

http://www.tnttt.com/viewtopic.php?f=50&t=35852
Larry C
500 Club
 
Posts: 732
Images: 78
Joined: Sun Dec 27, 2009 9:37 am
Location: Finger Lakes
Top

Postby Juneaudave » Tue Jan 05, 2010 7:57 pm

Just a slight mod on the technique (probably no better or worse), I drilled the hole in the center of the dowels, and then took a chisel and whacked off a flat side to clamp to...that helps keep the clamp and dowel from rolling when your in a hurry...
Image
User avatar
Juneaudave
Super Duper Lifetime Member
 
Posts: 3237
Images: 380
Joined: Sun Jul 03, 2005 12:11 pm
Location: Juneau, Alaska
Top

Postby Rock » Wed Jan 06, 2010 8:55 am

Larry,

When end gluing the strips the weight of the bricks helps keep the "bumps" minimized. Still they are there. So I made sure to offset the bumps in the lamination. Like laying up a brick wall or laying shingles - keep offsetting. The 16' length gave me plenty of latitude to do that.

In the end I had only a couple of "bumps" in the finished profile which I quickly whacked off with a hand plane. Even if I hadn't I don't think anyone would see in the finished product.

Eric
Rock
Teardrop Master
 
Posts: 273
Images: 48
Joined: Tue Oct 14, 2008 10:38 am
Location: Fremont, OH
Top

Postby mikeschn » Wed Jan 06, 2010 4:31 pm

I ran my laminate profile thru a planer. I'll be back with a pic.

Mike...

P.S. Here it is...


Image
The quality is remembered long after the price is forgotten, so build your teardrop with the best materials...
User avatar
mikeschn
Site Admin
 
Posts: 19202
Images: 475
Joined: Tue Apr 13, 2004 11:01 am
Location: MI
Top


Return to Teardrop Construction Tips & Techniques

Who is online

Users browsing this forum: No registered users and 3 guests