Spraying the interior paneling

Anything to do with mechanical, construction etc

Spraying the interior paneling

Postby Joanne » Wed Dec 21, 2005 12:17 am

Hi all,

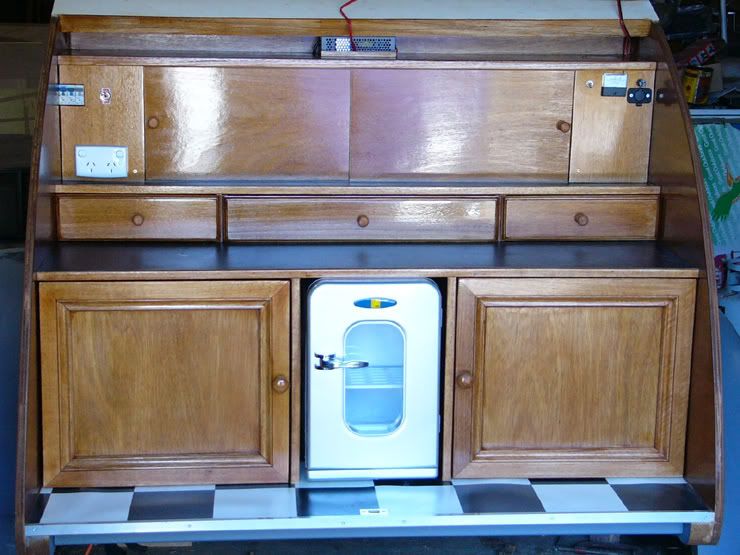
It's getting time to start seriously working on the inside of my trailer. I've installed the insulation and cut the wall paneling to size. I think it will be easier to finish the panels before installing them. I used a couple of scraps to see if I could find a stain that I like. In the end I decided to skip the stain and only apply the finish. For the finish I decided to use the Minwax Polycrylic rather than varnish or polyurethane. I like the fact that it's a water based material.

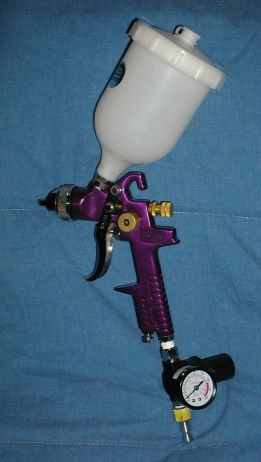
The only thing I didn't like about my test panels was the brush marks. There was a discussion a while back about spraying the finish rather than brushing it. Made sense to me, so now I have a spray gun. (Harbor Freight of course)

Image

This past weekend I decided to do another test panel to see if I could get a decent finish with the spray gun. I read Sumner's directions on how to adjust the gun and dove in head-first. I sprayed two coats, letting the first one dry before lightly sanding with 220. It was dark before I had the opportunity to spray the third coat, but the test panel still came out great. I'm really encouraged with my test. :thumbsup: It won't be long before I start spraying all of the panels that I currently have cut.

I just wanted to pass along my experience to those of you who are considering your options for interior finishing.

Joanne
New! My Camp Cooking Forum

Project Desert Dawg website


Universal Health Care
Health care with the efficiency of the Department of Motor Vehicles
and the compassion of the Internal Revenue Service.
User avatar
Joanne
Queen of Cast Iron
 
Posts: 2111
Joined: Thu Jul 01, 2004 9:43 pm
Location: Las Vegas, NV

Postby madjack » Wed Dec 21, 2005 1:06 am

Joanne...I am a true believer in spraying...beats the heck outta any type brush...I also am a true believer in doing everything possible on the bench(saw horses) before going vertical...sounds like ya gotta good plan going...
madjack 8)
...I have come to believe that, conflict resolution, through violence, is never acceptable.....................mj
User avatar
madjack
Site Admin
 
Posts: 15128
Images: 177
Joined: Thu Dec 02, 2004 5:27 pm
Location: Central Louisiana

Postby cracker39 » Wed Dec 21, 2005 7:46 am

I second what Jack says. I've made many craft show items from wood, and sprayed all of them with both varnish and latex paint. It takes a pressure gun to spray the latter with success.

I used Minwax Polyshades, stain and varnish in one can...it's great...no mess, no wiping and it's all done in two spray coats (three if you want a really great finish). But the finish gets darker with each spraying. If the first coat is dark enough, you just substitute clear Minwax varnish for the next coat.

I haven't tried the water based, but will see how it works. Cleaning up water based finishes may not be any easier, but certainly cheaper than using mineral spirits and more environmentally friendly.

I have regular two pressute/siphon guns with screw on cups, and bought one like you have from HF, but haven't used it yet. I do plan on using it to spray my varnish. Glad to hear that yours works well.
:thumbsup:
Dale

Sometimes I pretend to be normal. But, that gets boring...so I go back to being me.

Squidget Pop Top Build Pages http://www.thesquidget.com/ptbuild/ptbuild.html

Squidget and Pop Top Plans Info and Photos: http://www.TheSquidget.com
User avatar
cracker39
3000 Club
3000 Club
 
Posts: 3069
Images: 233
Joined: Thu Jun 30, 2005 2:18 pm
Location: Lake Alfred, Florida, USA
Top

Postby purplepickup » Wed Dec 21, 2005 8:22 am

Joanne, the HF gun should give you a really nice finish. I reduce polyurethane down a little when I spray it. It atomizes better when it's thinner but you have to be patient and not spray too much per coat on vertical surfaces to avoid runs. Let each coat get dry to the touch before you put the next one on.

One thing to pay attention to with a HF gun is the nut that is molded into the cup where it attaches to the gun. The plastic has a tendency to crack right there and leak. It probably wouldn't if you use a wrench every time but I don't. I'm lazy and usually just twist the cup to remove it. We just happen to be having a discussion about this on another forum and I've posted some pics there of how one of mine cracked. Metal cups are available if yours cracks. Here's a link to the thread http://www.roddingroundtable.com/forums ... php?t=3977
George
:)
User avatar
purplepickup
Silver Donating Member
 
Posts: 413
Images: 3
Joined: Thu Jan 27, 2005 11:20 pm
Location: SW Michigan
Top

Postby cracker39 » Wed Dec 21, 2005 9:06 am

Thanks for the tip, George. I'll make sure I'm careful when removing the plastic cup. What pressure do you use on the compressor with the HF top cup gun? I haven't unpacked mine and read the instructions yet. I'll probably use it only for the varnishing. I'll put exterior latex enamel on the exterior for the finish coats and I'll use one of my pressure guns for that. Most likely 3 coats and maybe a clear coat over that.
Dale

Sometimes I pretend to be normal. But, that gets boring...so I go back to being me.

Squidget Pop Top Build Pages http://www.thesquidget.com/ptbuild/ptbuild.html

Squidget and Pop Top Plans Info and Photos: http://www.TheSquidget.com
User avatar
cracker39
3000 Club
3000 Club
 
Posts: 3069
Images: 233
Joined: Thu Jun 30, 2005 2:18 pm
Location: Lake Alfred, Florida, USA
Top

Postby purplepickup » Wed Dec 21, 2005 10:13 am

cracker39 wrote: What pressure do you use on the compressor with the HF top cup gun?

My compressor holds 100-110 psi but I have a regulator on my paint line and for my large gun I set the pressure around 45 to 50 psi. I set pressure to my smaller detail gun (my favorite) at anywhere between 30 to 45 psi depending on what material I'm spraying and what the part is I'm painting. You'll learn to balance viscosity and pressure to atomize the material to suit your own likes and needs.

Pressures required varies depending on what model gun you have too. Some require more air than others. I like guns with lower CFM ratings so that my single stage compressor can keep up if I'm painting something large like a car. Plus the lower CFM guns put out less material and that 's a good thing for those of us that are amateurs and haven't mastered a high degree of gun control. You can get in trouble real quick with a gun that puts out a lot of material, especially in areas where you have to spray the same area from different directions to get coverage on all sides. Temporarily changing the spray pattern to more focused can help in those areas too.

I know we've got some painters here that have more experience than I do. Maybe they can offer some more tips....or correct me if I'm wrong.
George
:)
User avatar
purplepickup
Silver Donating Member
 
Posts: 413
Images: 3
Joined: Thu Jan 27, 2005 11:20 pm
Location: SW Michigan
Top


Return to Teardrop Construction Tips & Techniques

Who is online

Users browsing this forum: No registered users and 3 guests