EMERGENCY!!!!! PLEASE NEED SOME HELP HERE - WITH GAS SPRINGS

Anything to do with mechanical, construction etc

EMERGENCY!!!!! PLEASE NEED SOME HELP HERE - WITH GAS SPRINGS

Postby benzu » Sun May 17, 2009 5:12 pm

Got my gas springs in from McMaster-Carr and installed them rather easily on my galley door. I was really surprised how easy it was to install them. :) :)

Now comes the Emergency, after closing the door I noticed that my hinge was displace upward by about an inch and the whole door was being pushed upwards allowing it not to close properly. :cry: :cry::x I know those gas springs are putting a lot of force on the hinge, but wow it's a lot! What do I do to keep the hinge in place?

I already have the hinge in place with 1 1/2" screws, should I go longer and beefier?

Image

Image


Image

Image
User avatar
benzu
Teardrop Master
 
Posts: 230
Images: 119
Joined: Mon Feb 05, 2007 4:37 pm
Location: Denver, Colorado

Postby mikeschn » Sun May 17, 2009 5:30 pm

Gas spring are always a challenge.

If it were possible to climb into the hatch with the springs in the closed position, it would be easy to figure out where to put it. But since it like to stay in the open position when there in no load on it, we have to resort to plan B.

Estimate what the closed length is, from bracket to bracket. Then climb into the hatch with a flashlight and a tape measure, and have someone close the hatch on you. Now measure the approximate location from the top bracket to a place on the wall where the bottom bracket could go.

The trick is to have the bottom bracket just slightly lower than the compressed length. that will allow the hatch to close snugly.

If the top of the hatch is lifting up too much, then you don't have your bottom bracket low enough...

Mike...

Image
The quality is remembered long after the price is forgotten, so build your teardrop with the best materials...
User avatar
mikeschn
Site Admin
 
Posts: 19202
Images: 475
Joined: Tue Apr 13, 2004 11:01 am
Location: MI

Postby benzu » Sun May 17, 2009 5:49 pm

I think the bottom bracket is the problem, I was trying to cut corners with the bottom bracket because where you see it now is higher then I planned it just because below where it should be I didn't account for a gas spring mount and my solid wood framing stops just below the bracket it's just 1/8 luan and foam insulation. I guess I'm going to my plan B and attach another board to the wall for added support for the lower bracket to mount on.

Thanks,

Mike
User avatar
benzu
Teardrop Master
 
Posts: 230
Images: 119
Joined: Mon Feb 05, 2007 4:37 pm
Location: Denver, Colorado
Top

Postby tonyj » Sun May 17, 2009 6:00 pm

Instead of trying to climb in the galley, set up a digital camera and use its timer. Using some masking tape, draw some reference marks on the wall being photographed. Set up the camera, press the shutter button, close the hatch, wait for ten seconds, open the hatch and check the picture. You might have to repeat this procedure a few times to get the correct angle and shot, but it is easier than trying to squeeze in with a flashlight!
Still graced with two eyes and ten fingers (due in no small part to luck!).

Just when you think a problem is solved, an uglier result replaces it.

tony
User avatar
tonyj
Super Lifetime Member
 
Posts: 2468
Images: 160
Joined: Mon Sep 26, 2005 10:18 pm
Location: Texas, Corpus Christi
Top

Postby kennyrayandersen » Sun May 17, 2009 6:58 pm

tonyj wrote:Instead of trying to climb in the galley, set up a digital camera and use its timer. Using some masking tape, draw some reference marks on the wall being photographed. Set up the camera, press the shutter button, close the hatch, wait for ten seconds, open the hatch and check the picture. You might have to repeat this procedure a few times to get the correct angle and shot, but it is easier than trying to squeeze in with a flashlight!


ooooh... clever! :thumbsup:
User avatar
kennyrayandersen
1000 Club
1000 Club
 
Posts: 1750
Images: 38
Joined: Sun Apr 29, 2007 10:27 pm
Location: TX
Top

Postby tonyj » Sun May 17, 2009 8:06 pm

kennyrayandersen wrote:
tonyj wrote:Instead of trying to climb in the galley, set up a digital camera and use its timer. Using some masking tape, draw some reference marks on the wall being photographed. Set up the camera, press the shutter button, close the hatch, wait for ten seconds, open the hatch and check the picture. You might have to repeat this procedure a few times to get the correct angle and shot, but it is easier than trying to squeeze in with a flashlight!


ooooh... clever! :thumbsup:


All credit for this technique goes to Warpony.
:thumbsup:
Still graced with two eyes and ten fingers (due in no small part to luck!).

Just when you think a problem is solved, an uglier result replaces it.

tony
User avatar
tonyj
Super Lifetime Member
 
Posts: 2468
Images: 160
Joined: Mon Sep 26, 2005 10:18 pm
Location: Texas, Corpus Christi
Top

Postby Micro469 » Mon May 18, 2009 11:41 am

tonyj wrote:
kennyrayandersen wrote:
tonyj wrote:Instead of trying to climb in the galley, set up a digital camera and use its timer. Using some masking tape, draw some reference marks on the wall being photographed. Set up the camera, press the shutter button, close the hatch, wait for ten seconds, open the hatch and check the picture. You might have to repeat this procedure a few times to get the correct angle and shot, but it is easier than trying to squeeze in with a flashlight!


ooooh... clever! :thumbsup:


All credit for this technique goes to Warpony.
:thumbsup:


Now that's thinking inside the box!!! :lol: :thumbsup:
John
Image
User avatar
Micro469
Super Lifetime Member
 
Posts: 3185
Images: 382
Joined: Mon Nov 07, 2005 10:46 pm
Location: Brampton,Ontario,Canada
Top

Re: EMERGENCY!!!!! PLEASE NEED SOME HELP HERE - WITH GAS SPR

Postby Endo » Mon May 18, 2009 12:58 pm

benzu wrote:I know those gas springs are putting a lot of force on the hinge, but wow it's a lot! What do I do to keep the hinge in place?

I already have the hinge in place with 1 1/2" screws, should I go longer and beefier?


What type of hinge is that?? Could the hinge be part of the problem?
Brad (aka Endo)
ImageImage Image
In God We Trust
User avatar
Endo
500 Club
 
Posts: 721
Images: 138
Joined: Fri Apr 01, 2005 9:59 am
Location: Ohio
Top

Postby Jiminsav » Wed May 20, 2009 5:14 pm

you need to go to Lil Bear and order you a hurricane hinge..that plastic ain't gonna cut it.
Jim in Savannah
If you can read this bumper sticker, my camper fell off.
User avatar
Jiminsav
3000 Club
3000 Club
 
Posts: 3059
Images: 40
Joined: Sat Apr 17, 2004 8:49 pm
Location: Georgia, Savannah
Top

Postby planovet » Wed May 20, 2009 5:29 pm

Jiminsav wrote:you need to go to Lil Bear and order you a hurricane hinge..that plastic ain't gonna cut it.


I would have to agree.

Also, I think the positioning of the struts is placing too much tension on the hinge. In my humble opinion, you should reverse the strut mounting positions. I know you will have some holes to cover but I think it will help put less stress on the hinge. Here is a discussion on the subject, red highlights are my own. Of course, many have installed struts like you have and had no problems. My guess your problem is a combination of strut positioning and hinge strength (or lack thereof).

Betsey wrote:Hi Heikki,

This is Craig, I’m hijacking Betsey’s account again.

Hopefully this will make sense.

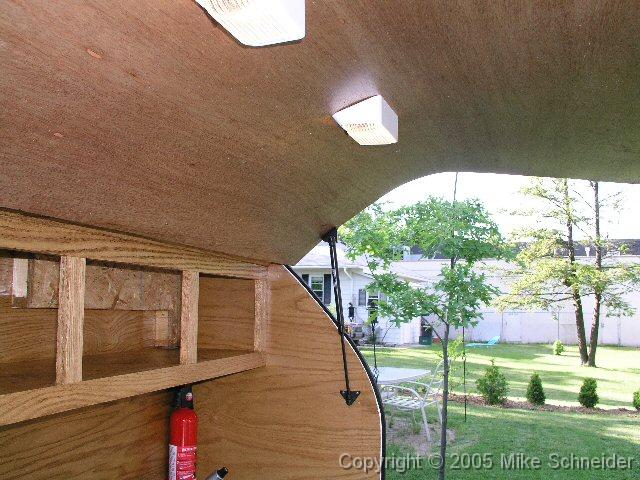
There are two ways to mount gas springs. Here is a picture showing the two ways.
Image

The picture shows the hatch in the open position with the gas spring extended and it shows the hatch in the closed position with the gas spring collapsed.

Style 1 is, in my opinion, a less desirable configuration. Since the gas spring mounts closer to the hinge, it must be stronger to hold the hatch open and therefore, it puts more stress on the hatch and the hinge.

Style 2 puts the force farther away from the hinge and therefore requires a lighter spring. Since the spring is lighter, it puts lower stresses on the frame and hinge.

Here are a couple pointers to keep in mind:

1. The further you mount the spring from the hinge, the less stress the spring puts on the hatch and hinge.
2. The further you mount the spring from the hinge, the lighter the spring needed to hold the hatch open.
3. The spring should be mounted with the plunger down, when the hatch is closed. This will allow the lubricant in the gas spring to help keep the seal from drying out. If the seal dries out, the compressed gas leaks out and the spring loses some of it’s force.
4. When figuring out the closed length of the gas spring, add a little bit to the length. This will prevent the gas spring from bottoming out and binding.

For more info and pointers go to: http://www.mcmaster.com/
In the search on the left, type in “about gas springs”
You will see a page from their catalog that shows a lot of info about selecting and mounting gas springs.

Hope this helps,

Craig
ImageMark (& Cindi)
Visit our website: Little Swiss Teardrop

I was wondering why the water balloon was getting bigger... and then it hit me.

ImageImageImageImage
User avatar
planovet
The Cat Man
 
Posts: 5583
Images: 3
Joined: Tue Nov 27, 2007 4:48 pm
Location: Plano, Texas
Top

Postby dan galvin » Thu May 21, 2009 8:02 pm

jim is right i had a plastic hinge :thumbdown: when i put the gas strut to it i had the same thinh happen also i had too stronge of a strut that was pushing up with to much force I got new struts 50 lb all is good now

[for what is worth]
Dan
User avatar
dan galvin
Teardrop Master
 
Posts: 245
Images: 43
Joined: Thu Sep 25, 2008 4:46 pm
Location: Chesterton,In
Top

Postby benzu » Mon May 25, 2009 10:21 am

Thanks everyone for their input, the hinge could be the problem but this is my second one, the first one was a hurricane hinge from grant and due to my lack of building knowledge it did not work as planned so I went to an alternative this plastic hinge. There are many people on this forum that have these types of hinges and swear by them so far I agree. They are very UV resistant and can with stand extreme temperatures. Some people have had them on their trailers for almost five years with no cracking or splitting to speak of. I'm sticking to the hinge and I'll try the style two placement with the gas spring. I did buy my gas springs from McMaster-carr so exchanging them for something different shouldn't be a problem.

I'm about to take the trailer out on it's first long camping trip to SLC, utah for 12 days currently I don't have anything to use for door props other then some wood. For now that will work.

Thanks again,

Benzie
User avatar
benzu
Teardrop Master
 
Posts: 230
Images: 119
Joined: Mon Feb 05, 2007 4:37 pm
Location: Denver, Colorado
Top

Postby madjack » Mon May 25, 2009 10:36 am

...to make that hinge work OH SO MUCH BETTER...get some 1/2 or 3/4 x 1/16th flat stock aluminum and place a strip all the way across the hinge between the screws and hinge...this will eliminate the pucker between screws...I also put a screw every 2"s...whether it is needed or not...............
madjack 8)
...I have come to believe that, conflict resolution, through violence, is never acceptable.....................mj
User avatar
madjack
Site Admin
 
Posts: 15128
Images: 177
Joined: Thu Dec 02, 2004 5:27 pm
Location: Central Louisiana
Top

Postby benzu » Mon May 25, 2009 10:42 am

...to make that hinge work OH SO MUCH BETTER...get some 1/2 or 3/4 x 1/16th flat stock aluminum and place a strip all the way across the hinge between the screws and hinge...this will eliminate the pucker between screws...I also put a screw every 2"s...whether it is needed or not...............
madjac


Madjac,

Already done, that was something I already planned to do but couldn't wait when I got the gas springs in. I'll have to take some pictures, I used 1/2 red oak. That worked better but was still lifting was too much. I bought 120lbs gas springs, now I remeasure and get longer and less force ones.

Thanks,
User avatar
benzu
Teardrop Master
 
Posts: 230
Images: 119
Joined: Mon Feb 05, 2007 4:37 pm
Location: Denver, Colorado
Top

Postby Barefoot » Mon May 25, 2009 5:15 pm

Planovet wrote: ...I think the positioning of the struts is placing too much tension on the hinge. In my humble opinion, you should reverse the strut mounting positions. I know you will have some holes to cover but I think it will help put less stress on the hinge. Here is a discussion on the subject, red highlights are my own.
_________
I agree. As it is, the struts are mainly lifting the hinge (as you saw) instead of mainly lifting the hatch. Seriously consider moving the top mounting points closer to the middle or bottom end of the hatch sides, repositioning the bottom mounting points if needed. You may even find you don't such stout strts, as the leverage will be so much better.
User avatar
Barefoot
Teardrop Master
 
Posts: 138
Images: 52
Joined: Mon Feb 16, 2009 8:44 am
Location: east central FL
Top

Next

Return to Teardrop Construction Tips & Techniques

Who is online

Users browsing this forum: No registered users and 14 guests