Screws and 1/4 ply walls

Anything to do with mechanical, construction etc

Postby dglenn1960 » Wed Jul 05, 2006 9:58 am

Miriam,

Are you using a variable speed drill (hopefully yes)? If so you really just need more practice.

Suggestions would be to stop short of setting the screw and use a screwdriver (I often do this on sensitive joints). And I normally hand-tighten after using the drill on important joints as well (get a much better torque feel with your hand vs. the drill).

Another suggestion would be to pre-drill (and countersink) before driving the screws (use one of the combo drill/countersink bits). This would give you a better overall result as well (and makes it easier to stop at the correct depth/place). I did all my 1/4 attachment this way (in fact nearly all screws in my tear are countersunk) as luan is very touchy when trying to power set a screw.
User avatar
dglenn1960
Teardrop Builder
 
Posts: 41
Images: 15
Joined: Wed Apr 12, 2006 8:19 am

Postby Miriam C. » Wed Jul 05, 2006 3:16 pm

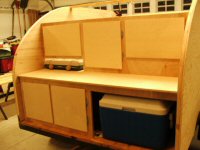
I have the only hidden bed frame in town with counter sunk screws. :lol:
I am still practicing cause I am heavy handed with the countersink too.

Hand setting them might not be a bad idea. There won't be too many. :worship:

Thank you very much
Aunti M
“Forgiveness means giving up all hope for a better past.â€
User avatar
Miriam C.
our Aunti M
 
Posts: 19675
Images: 148
Joined: Wed Feb 15, 2006 3:14 pm
Location: Southwest MO

Postby Roly Nelson » Wed Jul 05, 2006 6:59 pm

Miriam, you asked about fastening 1/8" plywood on the roof. I can share with you how I did it on mine. I installed the first layer with the good side down, simply glued and nailed the dickens out of it with cement-coated box nails. (they hold so well, you pull the heads off trying to get them out). I nailed all edges and cross members while holding the plywood down tight with ropes streached over the top from front to back.

Next, the upper layer of 1/8" was installed good side up, and simply glued to the first layer, edges and cross members using panel adhesive, liquid nails, etc. I did the same rope trick and nailed the edges down with coated nails. The ends of the roof sheets, at their butt joints were covered with a thin strip of wood (since the whole thing is wood) and with liberal coats of varnish, it has held up well for over 3 years. The roof edge-nails can be covered with trim members, but mine has a husky laminated hunk of pine covering all nails (and mistakes). Good luck.

Roly, removing US flags from the tear, after the the July 4th Parade.
See the little 1/2 Nelson Woody constructions pics at: http://gages-56.com/roly.html
User avatar
Roly Nelson
L'il Ol' Woody Builder
 
Posts: 2971
Images: 13
Joined: Sun Jan 30, 2005 12:45 pm
Location: Wildomar, Calif
Top

Postby Miriam C. » Wed Jul 05, 2006 8:39 pm

Hi Roly'
Thanks for sharing how you made that beautiful woody. We just love it. Get the biggest kick outa showing people the picture.
I nailed a subfloor with coated sinkers and needed to get one out. :lol: Ended up cutting it off.

Got the flag in. (our entire neighborhood had a flag out.)
Miriam
“Forgiveness means giving up all hope for a better past.â€
User avatar
Miriam C.
our Aunti M
 
Posts: 19675
Images: 148
Joined: Wed Feb 15, 2006 3:14 pm
Location: Southwest MO
Top

Postby oklahomajewel » Wed Jul 05, 2006 9:30 pm

Hey Miriam.... kinda late piping in, but here's for what it's worth.

I have 1/4" walls, and the supports on the door are 1x2's.
I screwed from the outside w/ 3/4" deck screws I believe. I have had no problem with them coming thru on the 'inside' of a support peice. Only in a place or two did it start to poke , but that was where my countersinking went too deep.


SLOW , good advice, wish I 'd had sooner. Don't try to screw them in too quick !

Julie
Some things are way over my head !! ...but it keeps me looking UP!
oklahomajewel
3000 Club
3000 Club
 
Posts: 3693
Images: 82
Joined: Fri Jul 22, 2005 11:12 am
Location: McLoud, OK
Top

Postby Miriam C. » Wed Jul 05, 2006 9:57 pm

:lol: Thanks Julie.
I guess some things don't get slower as I age. I found I was pushing the countersink too. I am trying to do a lot of the inside stuff while I wait out the lumber issues. :roll: I am getting lots of practice. I tried to find smaller deck screws and couldn't. Perhaps I need to look when I have more time. YMBBATD
Looking forward to Sept.
Aunti M
“Forgiveness means giving up all hope for a better past.â€
User avatar
Miriam C.
our Aunti M
 
Posts: 19675
Images: 148
Joined: Wed Feb 15, 2006 3:14 pm
Location: Southwest MO
Top

Postby bledsoe3 » Thu Jul 06, 2006 1:40 am

Miriam, Have you considered buying a cordless drill with a clutch. It will limit the amount of torque your drill will apply no matter how fast you go.
:thinking:
If you do what you've always done, you'll get what you've always got.
User avatar
bledsoe3
3000 Club
3000 Club
 
Posts: 3694
Images: 112
Joined: Tue Jun 07, 2005 5:55 am
Location: Oregon, Portland
Top

Postby EZ » Thu Jul 06, 2006 9:32 am

bledsoe3 wrote:Miriam, Have you considered buying a cordless drill with a clutch. It will limit the amount of torque your drill will apply no matter how fast you go.
:thinking:


A drill with a clutch is a must if you are going to be consistent. I have a cheap Ryobi from Home Depot that is 14 volt and with 2 batteries and was about $40. I can't seem to kill it no matter how bad I abuse it.

I fastened my top skin using adhesive (Liquid Nails) and nails from the air nailer. Unfortunately in my haste to get the stuff nailed while bending it I shot a nail right through some of my wiring. Connected it and poof, blew a fuse. Thank goodness the wiring was for one existing light and another that wasn't installed yet. I can run something internal for the existing light and forget the other one. I was depressed but oh well. Just don't get carried away......

Ed
User avatar
EZ
Donating Member
 
Posts: 427
Images: 72
Joined: Sun Jan 15, 2006 12:32 am
Location: Circle Pines, Minnesota
Top

Postby Miriam C. » Thu Jul 06, 2006 11:15 am

:lol: :lol: :lol:
Bledso, you would be amazed at what I have considered buying. Do you know Sears has a drill with a dial on it for the type of screw you are going to use. Has a speed dial too. $99. :twisted: Might make a great Christmas present cause I am going to run out of money if I keep buying tools. :(

Ez :o
Maybe I can sneak in a little Newbie wiring tip. Plan your wires on a sheet of paper. One sheet should have all your wood and wiring together.

Never plan to put your wires where your nails and screws are going.

If you forget things :oops: draw them out lightly on your wood. Just don't forget to erase them. :lol:

Thanks guys.
Miriam
“Forgiveness means giving up all hope for a better past.â€
User avatar
Miriam C.
our Aunti M
 
Posts: 19675
Images: 148
Joined: Wed Feb 15, 2006 3:14 pm
Location: Southwest MO
Top

Postby Todah Tear » Thu Jul 06, 2006 12:14 pm

Miriam,

I have been using various sizes of the Lath screw as well have have been please with them not going all the way through the wood. Plus, they look good too. They have a rivet, finished look to them once in place. I get mine from Lowes (The package doesn't have "lath" on it though, but they look like the one in the picture.) Also, I have been using the self-drill type of screw that has the same phillip head as the latch. These are really helpful in areas where I normally would have to bear down really hard to get the screw to penetrate or otherwise drill a pilot hole first. The self-drill screw's tip "drills" a path for it which makes it go in with ease.

Todah
"It is not good to have zeal without knowledge, nor to be hasty and miss the way." Proverbs 19:2 Image
User avatar
Todah Tear
Platinum Donating Member
 
Posts: 1723
Images: 282
Joined: Mon Feb 13, 2006 3:30 pm
Location: Texas
Top

Postby stedi » Thu Jul 06, 2006 9:45 pm

Miriam,
a drywall screwgun will automatically stop driving once the preset depth is reached. available at hd, lowes, tool king etc.
regards,
steve
the government does not produce one single bushel of corn, one single barrel of oil, or one unit of any other commodity. the only way it obtains the money that it awards to its chosen recipients is by taking it from others who earned it. this is called "voluntary taxation".
stedi
Teardrop Builder
 
Posts: 47
Joined: Sat Feb 18, 2006 5:03 pm
Location: Dowagiac MI
Top

Postby Roly Nelson » Sat Jul 15, 2006 8:31 pm

Ah yes, Ed, the old drive a screw thought the wiring, trick. Been there, done that. I even took pics of all of the routered out members with the wires in them before installing the plywood. Nevertheless, the reading light over the pillows never would work, must have cut the wire in half. Had to surface wire it after-the-fact. At any rate, the picture trick did work out pretty well with only one mistake. The old mind seems to forget exactly where the wires are after the plywood covers things up.

Roly. :x
See the little 1/2 Nelson Woody constructions pics at: http://gages-56.com/roly.html
User avatar
Roly Nelson
L'il Ol' Woody Builder
 
Posts: 2971
Images: 13
Joined: Sun Jan 30, 2005 12:45 pm
Location: Wildomar, Calif
Top

Previous

Return to Teardrop Construction Tips & Techniques

Who is online

Users browsing this forum: No registered users and 1 guest