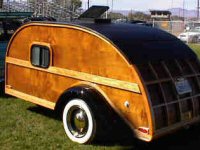
Would love feedback on my original, tiny trailer design

Anything to do with mechanical, construction etc

Re: Would love feedback on my original, tiny trailer design

Postby KCStudly » Tue Oct 16, 2012 8:07 pm

If you can do a shaped side wall, you can do a shaped door, too.

You just have to want it bad enough to work for it. Sometimes the eye takes precedent over practicality. And yet all design elements are compromises. Bigger door? Needs to be curved. Too complicated? Put up with a smaller door. Check your scale and make a cardboard mock-up. Can you sit in the doorway and not hit your head? How about your husband/boyfriend/sig-other? What if you decide to sell?

Re: your frame drawing. The "A" looks to me to be too far rearward. The torsion style axles need support ahead of the wheel centerlines where the torsion tube is attached ahead of the trailing arms. The main advantage of the A-frame is to triangulate the forces between the hitch point and main frame and/or axle load points. By having the "A" tucked so far back in the main frame, most of that advantage is lost. The center tongue member still has to be relatively strong/heavy because it still sticks out by itself unsupported for a ways.

I would either push the A forward and eliminate the straight center tongue, or run the center tongue back a couple of cross members and eliminate the A-frame. With all of the other members you do not need both.

To truly reap the benefit of light weight construction using the basic A-frame, take another look at Angib's pico light designs. There are a few out there using this type of frame.

Speaking of light, have you looked at the Foamie section? Lots of possibilities there. :thumbsup:
KC
My Build: The Poet Creek Express Hybrid Foamie

Poet Creek Or Bust
Engineering the TLAR way - "That Looks About Right"
TnTTT ORIGINAL 200A LANTERN CLUB = "The 200A Gang"
Green Lantern Corpsmen
User avatar
KCStudly
Donating Member
 
Posts: 9640
Images: 8169
Joined: Mon Feb 06, 2012 10:18 pm
Location: Southeastern CT, USA

Re: Would love feedback on my original, tiny trailer design

Postby Bogo » Wed Oct 17, 2012 12:06 am

Stacie Tamaki wrote:I was thinking I'd insulate the ceiling especially if I used aluminum on the interior. The luan vs aluminum is an eco-conscious issue for me after reading about how the tropical luans in particular are a deforestation issue in the countries where the wood is harvested. If there are any eco-friendly luan options I'd go that way but so far I haven't found anything online that leads me to believe there are. I have yet to call a lumber shop though so perhaps I'm just in the dark on this.

Try 1/8" Baltic birch plywood. Get it in cabinet grade with no blemishes. It will be easily bendable for 18" and larger radius curves. I know in the past I've bought 1/8"/3mm thick sheets with a hardwood face. The hardwood ones I bought were in a 5'x5' format, not 4'x8'.

If you can't get a hardwood faced Baltic birch, but still want a different wood type for the interior surface, you can laminate a veneer to the inside face. The veneering can be done before the sheet is cut and installed. If veneering is done after plywood installation, then vacuum bagging can be used to hold the pieces in place as the glue sets. When laminating on veneers, you can parquet the surface and make interesting designs.
User avatar
Bogo
500 Club
 
Posts: 658
Images: 39
Joined: Tue Oct 02, 2012 4:32 pm
Location: The land between two rivers.

Re: Would love feedback on my original, tiny trailer design

Postby deleted » Wed Oct 17, 2012 2:10 am

I checked out the Pico Light design. Thanks for mentioning it. And I did spend some time the other day going through the foamie forum. There's so much to learn!

New chassis iterations with the A pulled forward. Not sure if this is better than the previous version? I'm definitely leaning towards the traditional axle unless I decide I really need the dropped storage, then the Timbrens will work better. I think :thinking: Here are both options:

Image

Image
deleted
1000 Club
1000 Club
 
Posts: 1233
Images: 85
Joined: Wed Oct 10, 2012 12:46 pm
Top

Re: Would love feedback on my original, tiny trailer design

Postby deleted » Wed Oct 17, 2012 2:33 am

Thanks for the tips Bogo, I appreciate them. Glad to know the Baltic birch is an eco-friendly option!

Definitely up to the challenge of a shaped door. Just trying to choose my challenges wisely. I don't want the entire thing to be too hard.

And here's the new entry door. I tried the arched but didn't care for the severity of the shape (it looks like a giant shark's fin) and it looked too modern for the rest of the design. I included the mock-up here as an example. Then I tried what I'm calling the "mouse" door and really like it. It's 23.5" wide x 35" high so I will be able to sit in the entry way with 2" of vertical to spare and it's giving me 3.5 more inches in width than the previous version.

I realize I'm building this exactly to my own height/size but I'm really not concerned with resale value. Some may think that's foolish but I feel very confident if and when I ever do decide to sell I'll be able to find a buyer. Particularly another woman of short stature. Oh, and husband has made it clear he has no interest in ever accompanying me on an overnight trip with the trailer. So it's just me and the dog and fortunately he's not too big. We fall asleep on the couch together no problem so I know we can fit in the trailer together. Though I did come up with a simple bunk bed idea. By day the platform can double as an outdoor table, by night, doggie sleeping platform.

Image

Image
deleted
1000 Club
1000 Club
 
Posts: 1233
Images: 85
Joined: Wed Oct 10, 2012 12:46 pm
Top

Re: Would love feedback on my original, tiny trailer design

Postby alaska teardrop » Wed Oct 17, 2012 9:36 am

KCStudly wrote:Re: your frame drawing. The "A" looks to me to be too far rearward. The torsion style axles need support ahead of the wheel centerlines where the torsion tube is attached ahead of the trailing arms. The main advantage of the A-frame is to triangulate the forces between the hitch point and main frame and/or axle load points. By having the "A" tucked so far back in the main frame, most of that advantage is lost. The center tongue member still has to be relatively strong/heavy because it still sticks out by itself unsupported for a ways.

I would either push the A forward and eliminate the straight center tongue, or run the center tongue back a couple of cross members and eliminate the A-frame. With all of the other members you do not need both.

To truly reap the benefit of light weight construction using the basic A-frame, take another look at Angib's pico light designs. There are a few out there using this type of frame.

KC, Please go back & carefully reread all of this thread. viewtopic.php?f=35&t=12220
    :peace: Fred
Northern Lite Traveler design: viewtopic.php?f=27&t=51991
Minimalist torsion axle frame: viewtopic.php?f=35&t=12220
Alaska Teardrop photo gallery: http://tnttt.com/gallery/album.php?album_id=2014
Glampette photo gallery; gallery/album.php?album_id=2983&sk=t&sd=d&st=0
User avatar
alaska teardrop
Platinum Donating Member
 
Posts: 1113
Images: 177
Joined: Wed Aug 24, 2005 1:41 pm
Location: Greenville, Michigan
Top

Re: Would love feedback on my original, tiny trailer design

Postby KCStudly » Wed Oct 17, 2012 3:07 pm

alaska teardrop wrote:KC, Please go back & carefully reread all of this thread. viewtopic.php?f=35&t=12220


The images in the linked thread are down at the moment (possibly related to the notice earlier that the forum was changing servers).

I will admit that my memory seems to be not as good as it used to be, so I am open to helpful reminders. Thank you AlaskaTD. I will check back again later and see what I may have missed, or miss stated.

In the end I am trying to be helpful, and hope that I am at least doing that in part. How badly did I screw up? :frightened:
KC
My Build: The Poet Creek Express Hybrid Foamie

Poet Creek Or Bust
Engineering the TLAR way - "That Looks About Right"
TnTTT ORIGINAL 200A LANTERN CLUB = "The 200A Gang"
Green Lantern Corpsmen
User avatar
KCStudly
Donating Member
 
Posts: 9640
Images: 8169
Joined: Mon Feb 06, 2012 10:18 pm
Location: Southeastern CT, USA
Top

Re: Would love feedback on my original, tiny trailer design

Postby mezmo » Wed Oct 17, 2012 7:09 pm

Hi Stacie,

Take a look at the interior of this restored 1935 Bowlus
Road Chief [If it's not birch, it's cherry or maple, but my
bet is, it's birch]:

http://www.openthinkinc.com/bowlus/trailers.html

Can you say "Gorgeous!".


Cheers,
Norm/mezmo
If you have a house - you have a hobby.
User avatar
mezmo
1000 Club
1000 Club
 
Posts: 1817
Images: 194
Joined: Fri Jan 01, 2010 4:11 am
Location: Columbia, SC
Top

Re: Would love feedback on my original, tiny trailer design

Postby deleted » Wed Oct 17, 2012 7:37 pm

Hey KC. No worries. It'll all get sorted out :) Thanks for trying to help me!

Norm that trailer is GORGEOUS and so shiny 8)

Annnnnnnnnnnnd I spent a lot of time on the SingCore website this morning. WOW. I'm wondering if anyone here has ever used their products before. Will have to do a search. It sure seems appealing, if not for my trailer then for something else in the future. Went and watched all of their videos. Strong, lightweight, and eco-frienldy. All the features I want. Seems like it would be great for flooring and for my door. Thanks again for that link.
deleted
1000 Club
1000 Club
 
Posts: 1233
Images: 85
Joined: Wed Oct 10, 2012 12:46 pm
Top

Re: Would love feedback on my original, tiny trailer design

Postby Bogo » Wed Oct 17, 2012 9:44 pm

Stacie Tamaki wrote:The shower pan built in floor idea had not occurred to me. But I like it a lot. Then I could have it empty into a gray water tank under the trailer. I found one that is only 3.5 inches high which is important since my floor will be low. It only has a 1.75 gallon capacity but I'm thinking I'll use less than that each time I shower. I'm going to have to seriously rethink this part of my design.


First off I strongly recommend going to a larger capacity gray water tank. I'd go for 5 to 10 gallons. It really isn't that much volume. Places like The Tank Depot http://www.tank-depot.com/product.aspx?id=163 can get you tanks of nearly any shape and size. 7.5 gallons fits in 1 cubic foot. For your use I'd consider using one or two of the plastic jerry cans for gray water storage. After figuring out how to handle freezing conditions, I decided that jerry cans were the way to go for a micro RV idea I had. Space for 4 of them could be designed into the trailer. 2 for fresh water, and two for gray water. The nice thing about jerry cans is they can easily be dumped down a regular toilet.

The shower bags can get to hot. Have some water you can mix with the shower bag water to cool if down if needed.

Shower pan floor/grey water tank idea I came up with awhile ago for a micro RV. It takes two deep drawn pans with flanges but of different depths. The shallow pan serves as the shower pan, and the deep one serves as the gray water tank. My plan was for drains in each corner, so 4 drains. Each drain is made from a 1" bathroom sink drain fitting, u-pipe, and 1" check valve. The reason for 4 drains is then the trailer or RV doesn't need to be leveled for the water to drain into the gray water tank. It would be nice if the bathroom sink drain fitting has a hair screen. That will help keep hair out of the check valves. The u-pipe needs to drop down enough that the check valve can be mounted on it's output which will be pointing up.

Here is a quick rough sketch. I'd have done it in Sketchup, but after the last OS upgrade it isn't working so you get a very rough drawing. This is a cross section through two of the drains.
Image
Black line = shower pan. This pan will need to be strong enough to support your weight. I was thinking of having the pan deep drawn into the middle of my floor pan which was to be a 0.125" diamond plate aluminum sheet.
Blue line = grey water pan. This pan only needs to hold water, and could be plastic. I was looking at having it deep drawn from a sheet of HDPE plastic.
Green = caulking to seal between the two pans. A rubber gasket could also be used.
Turquoise = bathroom sink drain fittings.
Yellow-green = u-pipes.
Red = check valves.

On one side of the pan you would attach a standard RV grey water tank drain valve, etc. for emptying it.

It is necessary to have at least one vent hose that is run up to a point high on the outside of the trailer. The check valves prevent any of the u-traps from serving as impromptu vents. The vent hose should be run so no water will collect in it. It is there to allow air to escape when water flows into the tank.

The two pans are caulked together, then every 2" around the flanges they have a fastener holding them together. These fasteners could also be used to hold the pans to the floor.

There are some issues with the design. Dirt, like a hair, in one of the check valves would allow gray water to seep back into the shower pan, and possibly over the floor if the trailer is at a steep enough angle. Operation with the floor at an angle reduces the capacity of the gray water tank. I also was not able to find suitable trays with edge flanges as an off the shelf part. Because of the minimum height for the u-traps and shower pan depth, it may not be a viable option.

After thinking about the expected use I changed my plans to use a 48"sq by 12" deep foldable tray with a pump and hose. The pump and hose are for emptying it into a gray water jerry can. When the tray wasn't in use it gets dried off, folded up and gets stored in the cabinet where the 2 fresh and 2 gray water jerry cans are to be stored. Part of the reason I decided to change plans was due to freezing weather. I mostly can only go camping in the winter. So I ditched all built in plumbing except for a hot water tank heated by engine waste heat, which isn't an option for a trailer. I was going to use some of the engine waste heat stored in the hot water tank to heat an insulated cabinet large enough for the 4 jerry cans. The foldable tray would be made out of a 72" square of heavy weight waterproof fabric. A folding wire frame would be used to support the sides. A closed cell foam pad under it should help prevent punctures. The shower curtain would be fastened to the inside of the tray sides. When used inside a trailer, mounting points could be put on the walls, cabinets, etc. to hold the edges of the up. The type of fabric I figured would work best is the type they use for river rafts. I was also thinking of making my shower curtain/sidewalls out of the same fabric. As for the pump. I was thinking of using a small diaphragm pump to pump out the water as I showered. It would be pumping it into an empty gray water jerry can. I figured the input line to the pump would need a filter screen to keep hairs out.
User avatar
Bogo
500 Club
 
Posts: 658
Images: 39
Joined: Tue Oct 02, 2012 4:32 pm
Location: The land between two rivers.
Top

Re: Would love feedback on my original, tiny trailer design

Postby alaska teardrop » Thu Oct 18, 2012 3:57 am

    Oh no, KC, we're cool. I should have been more clear. I just wanted you to reread the Minimilist torsion axle thread so that I could point out a couple of things. Andrews' Pico light tow bar concept & my concept developed about the same time out of two different threads. His for a wooden cabin & mine for a metal cabin. Both require a cabin with torsional integrity (torsion box).
    And that Stacie is apparently photo-shopping over the picture of the underside of the Northern Lite. The steel tubing in the floor is only 16 ga.x 1". It was originally going to be aluminum like the rest of the cabin. For strength of attachment to the tow bar I switched to steel & welded it on. So therefore, your statements are correct. I'm not sure that Stacie is clear on the concept, but then again, she's just learning.
    :peace: Fred
Northern Lite Traveler design: viewtopic.php?f=27&t=51991
Minimalist torsion axle frame: viewtopic.php?f=35&t=12220
Alaska Teardrop photo gallery: http://tnttt.com/gallery/album.php?album_id=2014
Glampette photo gallery; gallery/album.php?album_id=2983&sk=t&sd=d&st=0
User avatar
alaska teardrop
Platinum Donating Member
 
Posts: 1113
Images: 177
Joined: Wed Aug 24, 2005 1:41 pm
Location: Greenville, Michigan
Top

Re: Would love feedback on my original, tiny trailer design

Postby alaska teardrop » Thu Oct 18, 2012 5:41 am

    Stacie,
    Wow, your new shape with the flat back & hinged at the top back door looks great & very workable. Nothing wrong with a narrow door for you. It's your trailer after all. Just send the larger visitors to the back door!
    I jumped in to suggest a lighter way to build with metal cabin framing with aluminum exterior. As I mentioned, the minimum torsion axle frame concept (at least mine ) really isn't designed for under-chassis storage or the Timbren axles.
    Also again, unless I'm missing it, the Timbren axles have no provision for brakes in case you felt the need. The add doesn't mention brakes, the video shows no brakes or the flange to mount them. So, you might check on that.
    :peace: Fred
Northern Lite Traveler design: viewtopic.php?f=27&t=51991
Minimalist torsion axle frame: viewtopic.php?f=35&t=12220
Alaska Teardrop photo gallery: http://tnttt.com/gallery/album.php?album_id=2014
Glampette photo gallery; gallery/album.php?album_id=2983&sk=t&sd=d&st=0
User avatar
alaska teardrop
Platinum Donating Member
 
Posts: 1113
Images: 177
Joined: Wed Aug 24, 2005 1:41 pm
Location: Greenville, Michigan
Top

Re: Would love feedback on my original, tiny trailer design

Postby deleted » Thu Oct 18, 2012 8:01 am

Thanks Bogo for all of the shower info. I really like the idea of multiple drains. That makes a lot of sense since the ground won't always be level.

One question: If I use one (or more) of these http://www.trapguard.com/ can I skip the vent hose?

Also, My original idea to shower with a gallon of water and just use a rubbermaid container to stand in (with shower curtain) would make it so that I could just empty the water right into my sink using the same trap guard I linked to above which removes all of the more intricate plumbing considerations out of the equation. Is there anything inherently wrong with that plan? I keep saying to myself, after spending hours thinking through things and illustrating them, "Keep it simple, stupid" :lol: because my brain thinks up more possibilities than I can keep up with and that my TV can haul.

Thanks for the feedback and additional info Fred!

After reading Becky's inspiring build log and her struggle with the rear hatch I'm thinking even more so a flat panel rear hatch will make things a lot easier for me. Being multi functional by converting to a built in awning and tent frame makes it a no brainer even though I like the original look more. Thanks again to Norm for that inspiration.

Over on etrailer they write this about the Timbren Axle-Less Suspension:
4" Drop, EZ Lube spindles with electric brake hubs accept any 5-bolt wheels with regular tires
Electric brakes offer more control than hydraulic brakes
Requires an electric brake controller (sold separately)
http://www.etrailer.com/Trailer-Suspension/Timbren/A35RD545E.html


And yes, I copied the chassis with a photoshop layer then slid things around a bit to fit my design.

Wow! So I can go 1" steel tubing on the chassis and that's enough? I'd been using 2" tubing in my illustrations and weight estimations. That would drop my weight significantly! My new numbers if I can go to 1" tubing on the chassis are now under 700 lbs. If I go with the Timbren system I may still need to use the 2" tubing in that area to give extra support? Or I can use a traditional axle and fit the dropped storage around it. Or forego the dropped storage altogether. I guess I'd like to design with the option to add it in later if needed. :thinking:

I got more accurate weights on some items using online calculators and calling around. I could be way off on some of the metal and wood estimations. Math was always my worst subject. At a glance you may be able to spot if I miscalculated something severely. On some things I had to guess at a thickness or alloy so I'm not sure how accurate these are:

6 lbs - Top aluminum skin
18 lbs -Side Aluminum Skin x 2
26 lbs - Floor 48 x 72 (SingCore)
17 lbs - Top and Sides Interior 128"x48" (1/8" luan)
70 lbs - A Frame Chassis (41' of 1" steel tube)
126 lbs- Steel Frame side wall x 2 (ESTIMATE)
48 lbs- Steel Frame top/front (ESTIMATE)
18 lbs Rear Door 48"x40" (SingCore)
? Insulation
(329 lbs)

70 lbs Axle-less Wheels 1200 reg straight spindles 5 studs Part #a12rs545 (Jim)
48 lbs - Tires x 3 16 lbs each
55 lbs Battery
2 lbs - Plastic Vented Battery Box
19 lbs - Diamond Plate rock guard
20 lbs - Trailer Jack / Wheel
? lbs - Dropped Storage Compartments x 2
(214 lbs)

10 lbs - Door Exterior (SingCore)
12 lbs - Door Interior (screen security) (SingCore)
30 lbs - Cabinets 25 lbs 1/4". 5.5 lbs 1/8
8 lb - Window
20 lbs - Tongue Box
(80 lbs)

6 lbs - Inverter
1 lb - Smoke Detector
1 lb - C02 Detector
11 lbs - Vent/Fan + resistor in power line
5 lbs - Sink
4 lbs - Cooler
16 lbs - 2 gallons potable water
6 lbs - Fondue Pot as stove
15 lbs - Toilet with + 1 gallon water
2 lbs - Shelf
1 lb - Bed
1 lb - Pillow
2 lbs - Banket
(71 lbs)

694 LBS TOTAL
deleted
1000 Club
1000 Club
 
Posts: 1233
Images: 85
Joined: Wed Oct 10, 2012 12:46 pm
Top

Re: Would love feedback on my original, tiny trailer design

Postby droid_ca » Thu Oct 18, 2012 10:06 am

This is a great thread
I have enjoyed following it and it has helped inspire me on my own build. I just need to know how to build my frame to keep it light as well?? I want to use aluminium for a few reasons No Rust and to hopefully stay light....
There is a world, just beyond now,
where reality runs a razor thin seam between fact and possibility;

Anywhere I roam where I lay my head is home....
Image
“Fide Canem”
Please check out my build thread
viewtopic.php?f=5&t=52816
User avatar
droid_ca
Donating Member
 
Posts: 1981
Images: 176
Joined: Thu Sep 30, 2010 5:08 am
Location: Prince George BC Canada
Top

Re: Would love feedback on my original, tiny trailer design

Postby KCStudly » Thu Oct 18, 2012 11:45 am

Stacie Tamaki wrote:One question: If I use one (or more) of these http://www.trapguard.com/ can I skip the vent hose?


That is cool! I hadn't seen that before. Real space saver and very practical to the application. I think a link to this post in the plumbing section may be in order (...but I don't look over there much, so maybe that's where you found it?)

Still thinking that you will build your own trailer/chassis? Big project in itself. Maybe you are an experienced metal worker and I just missed that part. Check yourself.

Re: thin 1 inch steel tube for the chassis; be careful. The tongue members and attachment points still need to be robust and the unity of the whole assembly needs to be well considered so that the loads are transferred well (spring mounts, stablizer jacks, safety chains, etc.). Stressed skin construction may be much more critical in making a "lightweight" or steel bird cage work. Also, consider what your fabrication capabilities are. Can you cut, form and weld square tubing, do you have the equipment and space to do this, or would you have to farm it out? It would be a major sub out in cost, and would put you out of a big portion of your build if you had to farm this part out. Your sense of self accomplishment might be diminished...there is a reason that we build these ourselves rather than just buying a commercial unit. There is nothing wrong with that if it suits your wants and needs, and is within budget, but I am getting a sense that you are looking for something a bit more basic and maybe are just falling into the new TD enthusiasm trap of wanting high tech, cutting edge, all the whistles and bells. Coming from someone that jumped into the deep end of the pool on his first build, my advice is to keep the first one simple and "get 'er done".

Farming out a major portion of your build would mean relying on someone else to commit to your schedule. Some shops have a hard time doing this, especially on a budget project that won't necessarily stay a priority for them. In hot rod terms this is called "body shop purgatory"; projects get started and take forever to complete.

Will a steel frame really be lighter than other methods that might suit your abilities better. Look at GPW's little camo foamie build nested into the big Thrifty Foamie thread...incredibly simple, small, very light, weather proof, could go on an inexpensive readymade trailer that is easy to find new or used on CL, can be built quickly, and would be easy to modify to your profile and hatch design. Easy to decorate in your unique style.

Did you study Andrew's (Angib's) trailer frame guidelines? Lot's of experience there.

That being said, if a light weight tubular construction is w/in your capabilities, both in design and fab, then “Wahoo” :applause: go for it. :thumbsup:

My advice is to keep studying what others have done, and don't assume that you can "cut and paste" from one design to another. Understand why something works, then apply it to your own design. Many of the big engineering disasters in history happen when people make "field changes" w/o fully understanding a design, or when working on the cutting edge of technology without understanding all of the unknowns (e.g. using 1x spars flat on a 6 wide and getting roof sag, or same for hatch ribs on a monster hatch and getting twist..."I don't understand it, I did it just like everyone else did").

Remember this, regardless of weight, the further apart the outer "fibers" of a given part are the stronger that part will be exponentially, so the 2 inch tube might weigh a little more than the 1 inch, but it will be much more than twice as strong over the same span (look up moment of inertia).

Oh heck, here's a snipet from wiki, "The moment of inertia of an object about a given axis describes how difficult it is to change its angular motion about that axis. Therefore, it encompasses not just how much mass the object has overall, but how far each bit of mass is from the axis. The further out the object's mass is, the more rotational inertia the object has, and the more rotational force (torque, the force multiplied by its distance from the axis of rotation) is required to change its rotation rate."

In other words, structural members that have the mass further away from the center axis will always be stronger in bending than a member with the same mass located closer to the load axis. That's why tubing is stronger for its weight than bar that weighs the same; the mass is further out from the center axis. On the side walls, provided that they are tied into the trailer frame uniformly, you create a really deep beam with the outer fibers several feet apart, but what about that rear hatch where the rear cross member is basically unsupported over the width of your trailer? Take a 4 ft long piece of 1x sq tube 1/16 thick, support it on the ends and bounce a heavy cooler full of ice and beverages off it a couple of hundred (neigh thousand) times. Maybe I'm just exaggerating to make a point. :thinking: There are success stories out there ( :applause: ) so it is not all doom and gloom. Be informed. Read. Learn. Have fun!

When you get closer, post a dimensioned drawing up on the trailer forum and you will get plenty of help.
KC
My Build: The Poet Creek Express Hybrid Foamie

Poet Creek Or Bust
Engineering the TLAR way - "That Looks About Right"
TnTTT ORIGINAL 200A LANTERN CLUB = "The 200A Gang"
Green Lantern Corpsmen
User avatar
KCStudly
Donating Member
 
Posts: 9640
Images: 8169
Joined: Mon Feb 06, 2012 10:18 pm
Location: Southeastern CT, USA
Top

Re: Would love feedback on my original, tiny trailer design

Postby Bogo » Thu Oct 18, 2012 9:17 pm

Stacie Tamaki wrote:One question: If I use one (or more) of these http://www.trapguard.com/ can I skip the vent hose?


Simple answer, no.

The vent is to allow air in the gray water tank to escape when water flows in. You would still need the vent hose. The alternative is the air in the tank builds up in pressure, then maybe bubbles up into the interior of the TD. Any holding tank will need a proper vet hose. The vent hose could be a simple 1/2" PVC hose run up to a suitably high spot. It would be good to have a screen of some sort on the end to discourage mud daubers from plugging it.

The Trapguards would likely work in place of the drain structures I had in each corner.
User avatar
Bogo
500 Club
 
Posts: 658
Images: 39
Joined: Tue Oct 02, 2012 4:32 pm
Location: The land between two rivers.
Top

PreviousNext

Return to Teardrop Construction Tips & Techniques

Who is online

Users browsing this forum: No registered users and 4 guests