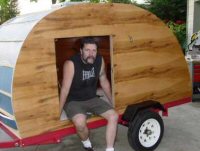
Puffin 2

Anything to do with mechanical, construction etc

Postby steve wolverton » Tue Dec 23, 2008 2:26 pm

Elumia wrote:how about a flip step with angle on each side. The angle would go in notches on either side of the door. You could flip it up for travel, but have the door operate normally with the step flipped out as it would be flush with the bottom of the door. Sounds like you only need 6" or so to give you a 12" step which would be a sufficient stair tread


Wow! That's a damn good idea. Thanks. :applause:
�veni, vidi, vici.�
User avatar
steve wolverton
1000 Club
1000 Club
 
Posts: 1676
Images: 11
Joined: Sun Nov 07, 2004 9:39 pm
Location: Brazoria, TX

Postby steve wolverton » Tue Dec 23, 2008 3:30 pm

More parts just arrived.

Image

Windows, door handle, aluminum hinges, bed liner, and 30' of vinyl for the roof.
�veni, vidi, vici.�
User avatar
steve wolverton
1000 Club
1000 Club
 
Posts: 1676
Images: 11
Joined: Sun Nov 07, 2004 9:39 pm
Location: Brazoria, TX

Postby starleen2 » Tue Dec 23, 2008 6:58 pm

Why even make a step?? It appears to me that perhaps a small storge place may be in order - Attached from the underside. If your just going to step over it, why not?
User avatar
starleen2
5th Teardrop Club
 
Posts: 16272
Images: 224
Joined: Sat May 12, 2007 8:26 pm
Location: Pea Ridge ,AR
Top

Postby shopfabricator » Tue Dec 23, 2008 6:58 pm

Steve- My current build has a 6&1/2" step, same as the last. If you have 8" from frame to side then subtract 1&1/2" for framing underneath and you will have the same step.
My camping buddy says that it was plenty to "help" the step up and in. She found her way in every night of the stay! :D
...materials can no longer be purchaced at quite those prices mentioned here!
User avatar
shopfabricator
Donating Member
 
Posts: 189
Images: 138
Joined: Fri Aug 24, 2007 9:51 pm
Location: Mooresville, NC
Top

Postby steve wolverton » Wed Dec 24, 2008 7:49 pm

I got quite a bit done today on the camper. I got the door frame installed. I painted the floor area black, although it seems kind of silly as it will all be hidden. I got all the plywood pieces cut out for the bed, counter, and storage area. I'm hoping to get all of it installed tomorrow, and cover the face plates in vinyl. If things go well, I should be done with the interior Friday. I plan to put the first coat of epoxy on the exterior tonight.

Image
Image
Image
Image
Image
Image
Image
�veni, vidi, vici.�
User avatar
steve wolverton
1000 Club
1000 Club
 
Posts: 1676
Images: 11
Joined: Sun Nov 07, 2004 9:39 pm
Location: Brazoria, TX
Top

Postby shopfabricator » Thu Dec 25, 2008 10:03 am

Merry Christmas!
I hope your weather stays nice and allows the epoxy fillets to quickly cure. I see that you put the A side out. That should really help in fairing the side for a super smooth finish. Maybe you won't be too wore out using that fairing block! Looking Good! :applause:
Gary
...materials can no longer be purchaced at quite those prices mentioned here!
User avatar
shopfabricator
Donating Member
 
Posts: 189
Images: 138
Joined: Fri Aug 24, 2007 9:51 pm
Location: Mooresville, NC
Top

Postby steve wolverton » Thu Dec 25, 2008 2:22 pm

shopfabricator - Thanks Gary. I hope you're having a nice Christmas too. Weather should be close to 70's here, so no problems with that epoxy. :thumbsup: I'm building in a very small garage, so even when it's cold my little electric heater has no problem keeping it warm.
�veni, vidi, vici.�
User avatar
steve wolverton
1000 Club
1000 Club
 
Posts: 1676
Images: 11
Joined: Sun Nov 07, 2004 9:39 pm
Location: Brazoria, TX
Top

Postby steve wolverton » Thu Dec 25, 2008 2:25 pm

I just finished the framing for the back section of the bed. The rear section measures 64" x 47". This thing is going to have a huge bed for such a small camper. :)

Image

I'm now working on the wheel wells.
�veni, vidi, vici.�
User avatar
steve wolverton
1000 Club
1000 Club
 
Posts: 1676
Images: 11
Joined: Sun Nov 07, 2004 9:39 pm
Location: Brazoria, TX
Top

Postby steve wolverton » Thu Dec 25, 2008 3:20 pm

Wheel wells are finished. Well, they will be as soon as the epoxy sets up.

There are a few ways to do them, and I thought I'd try making them out of two pieces of 1/4" plywood. They'll be sealed with epoxy, and an epoxy fillet will bond them to the camper.

I cut two pieces of 1/4" plywood 30" x 7".

I then placed two wood screws on each so of the frame to hold the shape of the wheel well.

Image
Wood screws holding it in place.

I then traced the curve on another sheet of 1/4" and cut it out.

Image
Ta da! Wheel well.

Moving on. Now to texture the walls.
�veni, vidi, vici.�
User avatar
steve wolverton
1000 Club
1000 Club
 
Posts: 1676
Images: 11
Joined: Sun Nov 07, 2004 9:39 pm
Location: Brazoria, TX
Top

Postby doug hodder » Thu Dec 25, 2008 3:47 pm

Steve...thanks for the pics, I'm enjoying watching your build. I'm thinking about a Standy...or in my case a "stoopy", at any rate...you got my gears turning. :thumbsup: Doug
doug hodder
*Snoop Dougie Doug
 
Posts: 12625
Images: 562
Joined: Tue Dec 14, 2004 11:20 pm
Top

Postby steve wolverton » Thu Dec 25, 2008 7:42 pm

doug hodder wrote:Steve...thanks for the pics, I'm enjoying watching your build. I'm thinking about a Standy...or in my case a "stoopy", at any rate...you got my gears turning. :thumbsup: Doug


Thanks Doug. I'd love to see a standy that you come up with. :thumbsup:
�veni, vidi, vici.�
User avatar
steve wolverton
1000 Club
1000 Club
 
Posts: 1676
Images: 11
Joined: Sun Nov 07, 2004 9:39 pm
Location: Brazoria, TX
Top

Postby steve wolverton » Thu Dec 25, 2008 7:47 pm

I got one of the face plates cut for the underseat storage area. I wrapped it in marine vinyl, and it's clamped for an idea what it will look like. I like it. It will offer access to the storage under the bed.

Image
Image

I still need to paint the wheel well I made this morning, and the bed support.

I also installed the storage area on the side opposite the door. It's mostly to reinforce the side wall, but I'll made a face plate and cover that in vinyl too. I need to pick up more staples and some decorative doo-thingys to attach all these face plates.

Image
�veni, vidi, vici.�
User avatar
steve wolverton
1000 Club
1000 Club
 
Posts: 1676
Images: 11
Joined: Sun Nov 07, 2004 9:39 pm
Location: Brazoria, TX
Top

Postby kirkman » Thu Dec 25, 2008 7:58 pm

Looking great Steve. :thumbsup: I like the wheel well Idea!
"If you think you are too small to make a difference, try sleeping with a mosquito." -- Dalai Lama XIV
User avatar
kirkman
1000 Club
1000 Club
 
Posts: 1270
Images: 55
Joined: Sat Mar 19, 2005 11:42 am
Location: Elmira, NY
Top

Postby steve wolverton » Thu Dec 25, 2008 9:17 pm

kirkman wrote:Looking great Steve. :thumbsup: I like the wheel well Idea!


Thanks Kirkman. I'm quite pleased with them. Very easy to make. :D
Last edited by steve wolverton on Thu Dec 25, 2008 10:51 pm, edited 1 time in total.
�veni, vidi, vici.�
User avatar
steve wolverton
1000 Club
1000 Club
 
Posts: 1676
Images: 11
Joined: Sun Nov 07, 2004 9:39 pm
Location: Brazoria, TX
Top

Postby steve wolverton » Thu Dec 25, 2008 9:20 pm

I changed the spacing on the storage area. I originally had it at 8" spacing, but I moved it to 12". The bottom panel will be separate for electrical access. It's 3.5" deep, there is a coke can in there to give an idea of the size.

I will cover all of it in vinyl tomorrow when I get some more screws.

Image

The white stuff on the walls is spray texture. I plan to paint the interior tomorrow. I plan to cover the ceiling with foam panels covered in fabric.
�veni, vidi, vici.�
User avatar
steve wolverton
1000 Club
1000 Club
 
Posts: 1676
Images: 11
Joined: Sun Nov 07, 2004 9:39 pm
Location: Brazoria, TX
Top

PreviousNext

Return to Teardrop Construction Tips & Techniques

Who is online

Users browsing this forum: No registered users and 2 guests