Feel free to pick it apart if I have made any mistakes. Thanks. Aaron
![]() by Airspeed » Sat Mar 24, 2007 11:37 pm
by Airspeed » Sat Mar 24, 2007 11:37 pm
![]() by doug hodder » Sat Mar 24, 2007 11:41 pm
by doug hodder » Sat Mar 24, 2007 11:41 pm

![]() by Airspeed » Sat Mar 24, 2007 11:44 pm
by Airspeed » Sat Mar 24, 2007 11:44 pm
![]() by Kevin A » Sat Mar 24, 2007 11:47 pm
by Kevin A » Sat Mar 24, 2007 11:47 pm


![]() by Airspeed » Sat Mar 24, 2007 11:50 pm
by Airspeed » Sat Mar 24, 2007 11:50 pm
![]() by Lynn Coleman » Sun Mar 25, 2007 12:20 am
by Lynn Coleman » Sun Mar 25, 2007 12:20 am
Airspeed wrote:

![]() by jdarkoregon » Sun Mar 25, 2007 12:51 am
by jdarkoregon » Sun Mar 25, 2007 12:51 am

![]() by Miriam C. » Sun Mar 25, 2007 12:56 am
by Miriam C. » Sun Mar 25, 2007 12:56 am

 I see now. Very nicely done.

 and a vent... Just teasin.
![]() by asianflava » Sun Mar 25, 2007 3:42 am
by asianflava » Sun Mar 25, 2007 3:42 am


![]() by tonyj » Sun Mar 25, 2007 5:38 am
by tonyj » Sun Mar 25, 2007 5:38 am

![]() by Ira » Sun Mar 25, 2007 6:42 am
by Ira » Sun Mar 25, 2007 6:42 am
asianflava wrote:
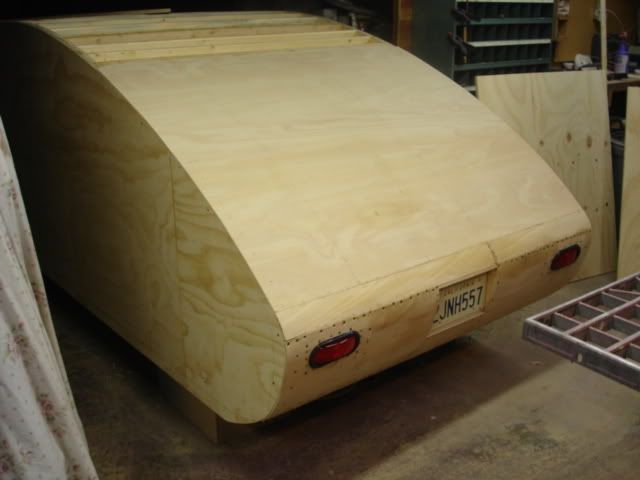
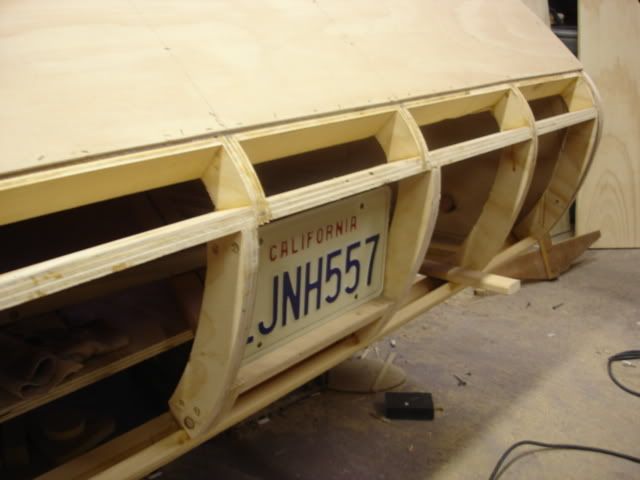
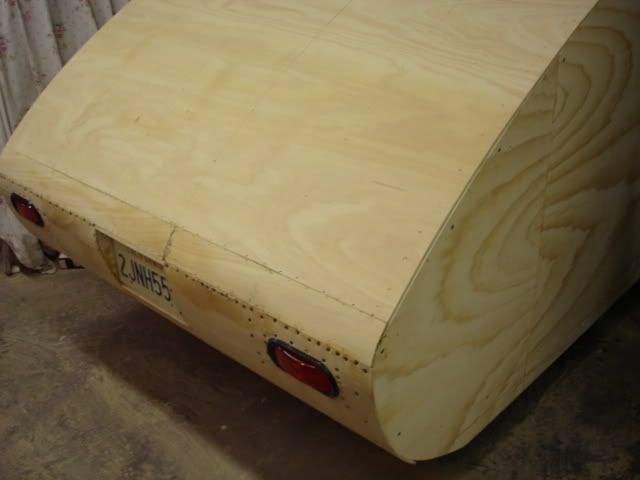
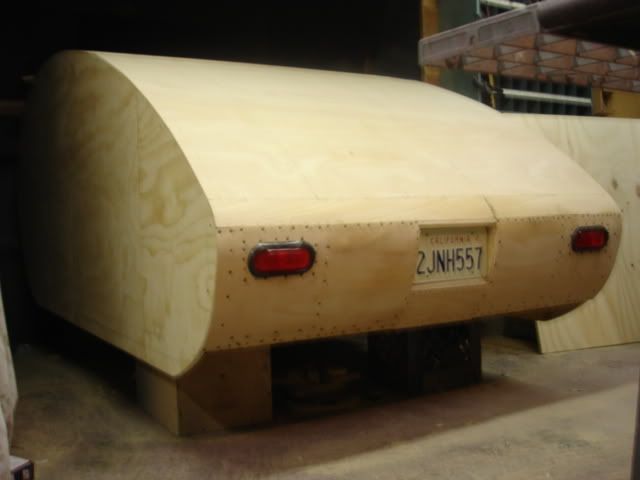
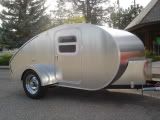
I noticed a change from your other hatch pics. I thought you had a wrap around hatch. These pics look like it stops right above the license plate recess. Am I seeing that correctly?


Return to Teardrop Construction Tips & Techniques
Users browsing this forum: Bing [Bot], Google [Bot] and 6 guests