Trim curvy cuts thingies

Anything to do with mechanical, construction etc

Trim curvy cuts thingies

Postby Mary K » Sat May 19, 2007 12:28 am

Well, me and Auntie M wuz-a-thanken and discussing how to make the cuts for 2" wide WOOD trim on the sides of our TD's. Ya know the curvy part... She was talking about eyeballing it and making my butt splice pucker in the process. :lol:

Miriam C. wrote:
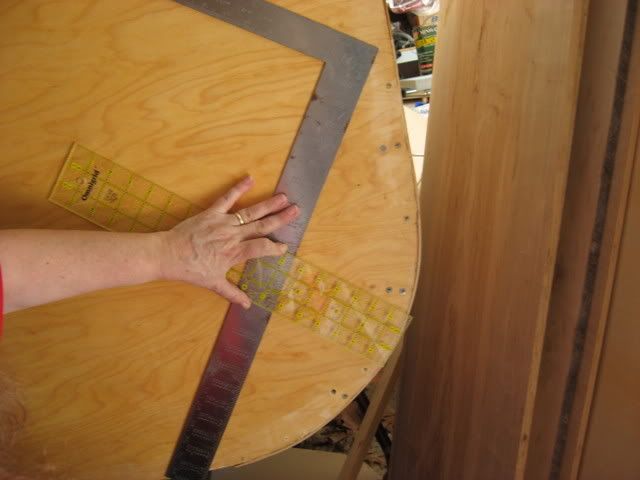
Now if we cut the outside curve and overlay the boards then mark where they come together real carefully and cut a little wide and then sand real carefully, it might make a really big mess---or it could work. :lol:

Now if you have a good way then I am all eyes.
Miriam


I am of the impression, that is if I did that, I'd just waste{edit sp} a lot of wood. I think one would have to have a compound miter saw or something that could cut angles precisely. But, I am NO woodworker...

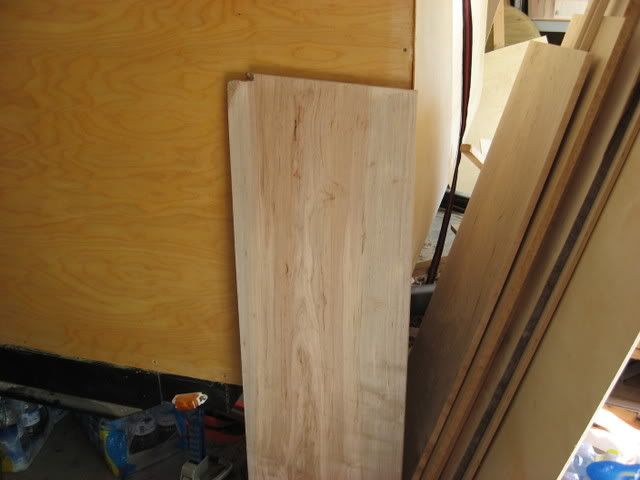
I figure I would have to use a 6" or so board to cut out 2 pieces for the 19" radius on the Generic Benroy for example.

Image
(had to find a freebee program to convert the file)

Red is the board, Cyan is the trim to be cut out. The cuts are 90* and 45*

Maybe I'm confused about how to do this :?

Any input would be appreciated. :thumbsup:

Mk
Last edited by Mary K on Sat May 19, 2007 10:35 am, edited 1 time in total.
Mary K

I don't know half of you half as well as I should like; and I like less than half of you half as well as you deserve. Bilbo Baggins
User avatar
Mary K
6000 Club
6000 Club
 
Posts: 6425
Images: 44
Joined: Wed Aug 02, 2006 3:07 pm
Location: Florida, Pensacola

Postby doug hodder » Sat May 19, 2007 1:20 am

Mary....unfortunately if you want to cut it out of a single piece of flat material, that's the easiest way, at least that is my experience. What I do is cut the pieces long, and then fit them up to the curve, and split the difference between the 2 trim pieces so that the angle looks appropriate between the 2, you know, split the difference. You may not have one, but a disk sander can really make them fit up well. I usually cut the outer edge, and sand it up, then make a jig with a hole for a pencil that gives me the inside curve for whatever width you want, then cut it out. Overlay it on the previous piece and make the mark for the butt joint....It may have lost something in translation as I've been spraying paint today and am goofy, or goofier, you decide, but if you check out my album I think you'll see what I'm talking about....I have framed out all 3 tears the same way. doug
doug hodder
*Snoop Dougie Doug
 
Posts: 12625
Images: 562
Joined: Tue Dec 14, 2004 11:20 pm

Postby Podunkfla » Sat May 19, 2007 1:53 am

Mary K... Here's how I do it for anything round and segmented. I make a full sized paper pattern... (Traced off or otherwise) Then cut every other piece out pretty close on the bandsaw (jig saw will do too). Next I lay out boards to cover the parts I didn't cut on the pattern. Then place the cut parts in place on top and trace around them onto the uncut boards. I usually make them with a 1.5 or 2" overlap. I mark all the overlapped parts with a cut line too to show how mush to rabbit out. Then I cut out the overlapped wood areas with a router. I use router in a table set to as close to half the thickness as I can get it using scraps to test the joints. I like to do lap joints then use countersunk screws to put them together. Last I fill the countersunk holes with contrasting 3/8" wood plugs or dowels cut off flush. Makes a real good looking joint with the wood plugs. Last last... I sand everything to get it faired and even. Usually, I use a router with a roundover bit on all the edges after it is all assembled.

Good grief... I just read what I wrote... I hope it makes some kind of sense? It is not all that hard to do... It just sounds that way when I try to put it in words. :o :lol:
<B>~ Brick
<I>... I've done so much with so little for so long... Now I can do almost anything with nothing! </I></B>
Image...Lots more pix here!
User avatar
Podunkfla
ol' noodle haid
 
Posts: 2261
Images: 5
Joined: Fri Aug 04, 2006 9:25 pm
Location: North Florida near the Suwannee River
Top

Postby Steve Frederick » Sat May 19, 2007 7:11 am

I'm with Doug! make segments as long as looks good to you, overlap them. If you connect where the edges cross, you'll get the angle to cut at. Join the sections with dowels or biscuits.
Image
Then I'd trim to the profile on the outer edge. Make a gauge, for your router or a pencil, to get a uniform width on the trim.
Blessings, Steve
Adirondacks, Upstate New York
Building Journals
The Shop Manual's 8-years old!! Thank's everyone!
New! 'Rondack Lodge Plans!Order Here!
Image
User avatar
Steve Frederick
Custom Teardrop Builder
 
Posts: 1984
Images: 29
Joined: Thu Apr 15, 2004 5:02 pm
Location: Upstate New York, Adirondacks (Great Sacandaga Lake)
Top

Postby BrwBier » Sat May 19, 2007 7:13 am

For cutting the joints where the pieces come together I use a Japanese pull saw. It has a very thin blade and as the name says it cuts on the pull stroke. You can make very close cuts with that. It is my favorite non powered saw.
Brwbier
User avatar
BrwBier
1000 Club
1000 Club
 
Posts: 1120
Images: 100
Joined: Fri Oct 21, 2005 8:28 pm
Location: Sheboygan, WI
Top

Postby Miriam C. » Sat May 19, 2007 8:01 am

Good morning everyone. I am thinking this would be easier if done before the sides are put up. At least the marking and cutting parts. I borrowed Dougs trim picture for reference.

Image

Doug, is this trim just butt joined or is there some over lap?

Mary K. I cleared out the picture we were discussing last night. :(
“Forgiveness means giving up all hope for a better past.â€
User avatar
Miriam C.
our Aunti M
 
Posts: 19675
Images: 148
Joined: Wed Feb 15, 2006 3:14 pm
Location: Southwest MO
Top

Postby Steve_Cox » Sat May 19, 2007 8:02 am

MK,

The way I did that for my fender mounting curved oak boards was to take the full sized boards and cut the miters first, glue them up, then cut the curves on the full size blank. Much easier than miter cuts on finished pieces.
Steve
User avatar
Steve_Cox
4000 Club
4000 Club
 
Posts: 4903
Images: 196
Joined: Sun Apr 03, 2005 8:46 am
Location: Albuquerque New Mexico
Top

Postby doug hodder » Sat May 19, 2007 9:53 am

Miriam...that's just butt jointed but the pieces are epoxied up really well. Plugs are fake, no screws were injured in the construction of the framing, I just shot them in till the epoxy cured then pulled them out and plugged...Doug
doug hodder
*Snoop Dougie Doug
 
Posts: 12625
Images: 562
Joined: Tue Dec 14, 2004 11:20 pm
Top

Postby b.bodemer » Sat May 19, 2007 10:48 am

Oh ya......................it's trim time. :thumbsup:

Here's a trim time dance for ya!
:dancing :sneakers: :dancing :sneakers: :dancing

Also means you are close to the finish line too!
Barb
User avatar
b.bodemer
1000 Club
1000 Club
 
Posts: 1608
Images: 328
Joined: Mon May 08, 2006 5:43 pm
Location: Lakewood OH
Top

Postby Mary K » Sat May 19, 2007 11:08 am

Doug, Brick, Steve F, Brwbier and Steve C...WOW! Thanks! :thumbsup:

I know that trying to explain woodworking methods is not easy with words but after reading this over and over and over I think I get it.

#1 Make a template :thumbsup:

I like idea about gluing up the boards first and then cut the trim out... and the lap joint too ...need to make a simple router table for that. :thinking:

Thanks Guys. I do appreciate all of your help. Thanks for taking the time to answer. :thumbsup:

Auntie M, does that help you out any too????

Mk
Mary K

I don't know half of you half as well as I should like; and I like less than half of you half as well as you deserve. Bilbo Baggins
User avatar
Mary K
6000 Club
6000 Club
 
Posts: 6425
Images: 44
Joined: Wed Aug 02, 2006 3:07 pm
Location: Florida, Pensacola
Top

Postby Mary K » Sat May 19, 2007 11:12 am

b.bodemer wrote:Oh ya......................it's trim time. :thumbsup:

Here's a trim time dance for ya!
:dancing :sneakers: :dancing :sneakers: :dancing

Also means you are close to the finish line too!
Barb


:lol: :lol: :lol:
Well, :oops: 
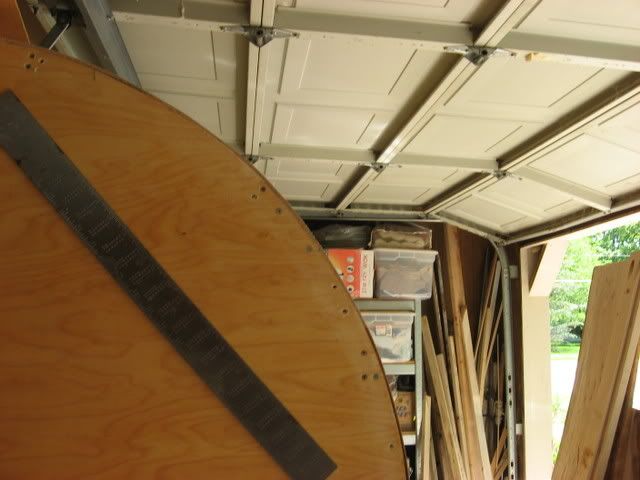
I'm just preparing myself for that curve cut. I still can not find the 1/4" thick wood for the top trim... Lowes didn't have it. :cry: Guess I will have to get the cabinet guy to plane down 1/2 boards for me.

Mk
Mary K

I don't know half of you half as well as I should like; and I like less than half of you half as well as you deserve. Bilbo Baggins
User avatar
Mary K
6000 Club
6000 Club
 
Posts: 6425
Images: 44
Joined: Wed Aug 02, 2006 3:07 pm
Location: Florida, Pensacola
Top

Postby Podunkfla » Sat May 19, 2007 11:20 am

I like idea about gluing up the boards first and then cut the trim out... and the lap joint too ...need to make a simple router table for that. :thinking:

That is prolly the best way... gluing them up first, I agree. Lap joints are overkill when they are not structural like on tears glued to plywood. I like Dougs way of pulling the screws back out them pluging the holes... cool. :thumbsup:

Oh yeah... I made a simple portable router table out of an upside down milk crate and a scrap of 1/2" plywood. Cheapest way I know to make one. :lol:
Last edited by Podunkfla on Sat May 19, 2007 11:22 am, edited 1 time in total.
<B>~ Brick
<I>... I've done so much with so little for so long... Now I can do almost anything with nothing! </I></B>
Image...Lots more pix here!
User avatar
Podunkfla
ol' noodle haid
 
Posts: 2261
Images: 5
Joined: Fri Aug 04, 2006 9:25 pm
Location: North Florida near the Suwannee River
Top

Postby Miriam C. » Sat May 19, 2007 11:22 am

Mary K wrote:Doug, Brick, Steve F, Brwbier and Steve C...WOW! Thanks! :thumbsup:

I know that trying to explain woodworking methods is not easy with words but after reading this over and over and over I think I get it.

#1 Make a template :thumbsup:

I like idea about gluing up the boards first and then cut the trim out... and the lap joint too ...need to make a simple router table for that. :thinking:

Thanks Guys. I do appreciate all of your help. Thanks for taking the time to answer. :thumbsup:

Auntie M, does that help you out any too????

Mk


What she said. Yes it helps. I am afraid I am not going to put long pieces together and then cut cause the longer the cut the more I am likely to get my jig saw going the wrong way.

Mary K if you can find an old school desk it might make a suitable router table.

Thanks guys and Thank you Mary K for posting. You sure save me a lot of typing these days. 8) ;)
“Forgiveness means giving up all hope for a better past.â€
User avatar
Miriam C.
our Aunti M
 
Posts: 19675
Images: 148
Joined: Wed Feb 15, 2006 3:14 pm
Location: Southwest MO
Top

Postby apratt » Sat May 19, 2007 11:35 am

There is another way that I saw someone did I though it was easy and looked nice. He took thin strip of wood like 3/16" thick. For the top part on the roof he made it 1 1/2 or 2" wide, screwed the first one on then each layer he just glued and clamped them on so that way you don't see any screws, oh when you put the first trim on leave it sticking over the roof edge about 3/4". When you have 4 layers of trim on top then glue 3 or 4 layers of 3/16" x 3/4" strip below the trim that you put on top of the roof. I hope I explained that ok, I can't remember who was it that did it that way here on board. Sorry I can't draw pictures. 8)
Last edited by apratt on Sat May 19, 2007 4:35 pm, edited 1 time in total.
Arthur,

ASL spoken here
User avatar
apratt
Gold Donating Member
 
Posts: 966
Images: 16
Joined: Fri Feb 24, 2006 11:43 pm
Location: Washington, Chehalis
Top

Postby Miriam C. » Sat May 19, 2007 3:39 pm

K---I sat down and tried to put all the pieces of "how to" in some kind of order. This is the result.

1.. measure the depth so you know how wide a board you need.

Image
Image

There is a ruler dissecting the space. Just hard to see.

2.. trace your curve or if you have your curve exact to pattern just draw it.

Image

Cut the outside then scribe the inside line and cut it. With a 4' trailer you can make the whole front line in one piece if your curve isn't too wide. All your ends fall at 90* degrees. No miters. :twisted:

Have I got it all right? Or did I miss a step or two?
Last edited by Miriam C. on Sat May 19, 2007 4:44 pm, edited 1 time in total.
“Forgiveness means giving up all hope for a better past.â€
User avatar
Miriam C.
our Aunti M
 
Posts: 19675
Images: 148
Joined: Wed Feb 15, 2006 3:14 pm
Location: Southwest MO
Top

Next

Return to Teardrop Construction Tips & Techniques

Who is online

Users browsing this forum: No registered users and 6 guests