Plastic Hinge install questions - Pictures and Q's added
I have purchased the Plastic Hinge from McMaster-Carr for the hatch and I need some help on the trim covering it.
I have a drawing to help.... Remember I am using WOOD trim, not alum and I would like to countersink the screws and use plugs.
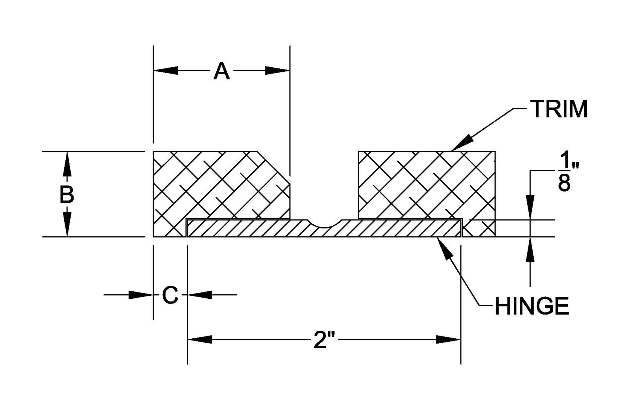
Do I have the right idea on how to do this?? If so, what would you make dimensions A, B & C?
Thanks for your help.
Mk
I have a drawing to help.... Remember I am using WOOD trim, not alum and I would like to countersink the screws and use plugs.
Do I have the right idea on how to do this?? If so, what would you make dimensions A, B & C?
Thanks for your help.
Mk


 Jim
Jim You okay Geron?

 However, that is currently being debated by my wife and boys.

