Page 1 of 1

galley hatch help

PostPosted: Tue Jan 08, 2008 10:44 pm
by jasoncpg
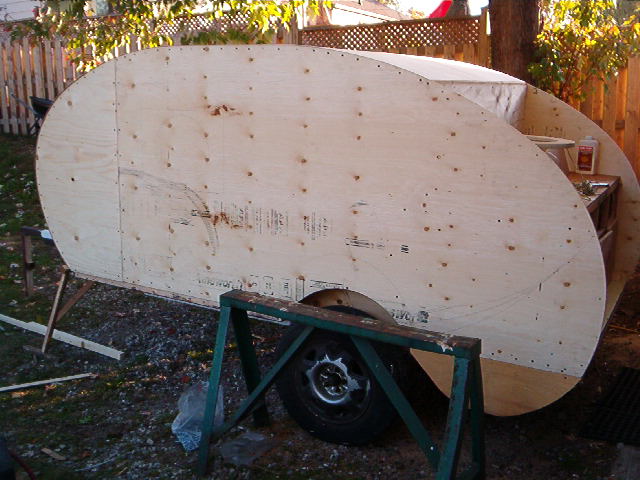
hi all i am just going to start my galley hatch but dont know what to do. so this is what i have. what would you do? ps 1/8 skin - thank you

Image

:?

PostPosted: Tue Jan 08, 2008 11:04 pm
by CASHCOW
jason you can look at the top of this page click on Generic Benroy and look on page #56 that is what i used and good luck

PostPosted: Wed Jan 09, 2008 8:28 am
by SkipperSue
I love the way you did the rear overhang behind the wheels! :thumbsup:

PostPosted: Wed Jan 09, 2008 9:28 am
by Miriam C.
The generic benroy plans are a good place to start.

I put a pattern piece of wood (thin) on the side of my td and traced out the curve needed. Cut some framing members from thick plywood that I doubled. You can make the frame inside the TD so it fits with about 1/4" on each side for clearance.

Look through the builds in the Hall of fame or the build forums too. Most show how the hatch was done.

Steve Frederick's site's lil diner has some good pictures. http://www.campingclassics.com/diner7.html

Here is a picture of mine getting started. Sorry for the bad camera.

Image

On page 7 of my build thread (members design) I have a pretty detailed photo log of the hatch being skinned. The rest is before that.
Miriam's page 7

PostPosted: Wed Jan 09, 2008 3:02 pm
by jasoncpg
SkipperSue wrote:I love the way you did the rear overhang behind the wheels! :thumbsup:


thanks there is one in the front to put junk in.back is to hide the spare tire.
thanks to all that posted


Image

:)

PostPosted: Wed Jan 09, 2008 3:08 pm
by jasoncpg
"Miriam C."
Steve Frederick's site's lil diner has some good pictures.

thanks miriam c that was just what i am looking for. :thumbsup: :worship:

PostPosted: Wed Jan 09, 2008 11:46 pm
by Bigwoods
Here's how I did it on my Generic Benroy. I Made a pattern from the side and made a simple jig with dowels.
Image


The strips I used were simply 1/8th strips cut on the table saw from a 2X4.

The strips were glue to each other inside the jig. I let each dry overnight.


Image


The shape was perfect and they have not changed since I made this. It was actually fun. I dreaded the hatch, but it turned out well.

Final product before skinning

Image