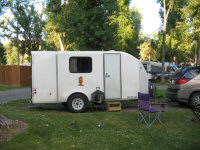
KIT teardrop rebuild

Anything to do with mechanical, construction etc

KIT teardrop rebuild

Postby Gage » Wed Feb 20, 2008 10:12 pm

The KIT teardrop has a 3" skirt that over hangs the frame. I guess meant to hide the frame. How do you think I should go about making this skirt and then how should I attach it? :thinking:
Image Image Image
Remember 'Teardrop Time'.......Take your time, you don't have to have it finished NOW.
User avatar
Gage
8000 Club
8000 Club
 
Posts: 8321
Images: 28
Joined: Sat Apr 17, 2004 9:14 pm
Location: Palmdale, CA

Re: KIT teardrop rebuild

Postby Kevin A » Wed Feb 20, 2008 10:21 pm

Gage wrote:The KIT teardrop has a 3" skirt that over hangs the frame. I guess meant to hide the frame. How do you think I should go about making this skirt and then how should I attach it? :thinking:

Gage, do you have a photo of it?
"Follow me, I'm right behind you"

ImageImage
User avatar
Kevin A
The other guy
 
Posts: 3222
Images: 289
Joined: Mon Jan 17, 2005 1:16 am
Location: California, Eureka

Re: KIT teardrop rebuild

Postby Miriam C. » Wed Feb 20, 2008 10:27 pm

Kevin A wrote:
Gage wrote:The KIT teardrop has a 3" skirt that over hangs the frame. I guess meant to hide the frame. How do you think I should go about making this skirt and then how should I attach it? :thinking:

Gage, do you have a photo of it?


:whistle: :angel: Well if I was making a skirt 8) :lol: Sorry Gage. Got pic. ;)
“Forgiveness means giving up all hope for a better past.â€
User avatar
Miriam C.
our Aunti M
 
Posts: 19675
Images: 148
Joined: Wed Feb 15, 2006 3:14 pm
Location: Southwest MO
Top

Postby doug hodder » Wed Feb 20, 2008 10:39 pm

Gage....isn't it part of the entire side height? Just make the sides and then hang them lower attached to a cleat with the floor to hide the frame. Sorry, I just can't remember what was done on my '49, but it was only a 4 x 8 sheet of material on the sides. No resto on it so never tore it apart, used it as it was. Maybe I don't understand what you're asking. doug
doug hodder
*Snoop Dougie Doug
 
Posts: 12625
Images: 562
Joined: Tue Dec 14, 2004 11:20 pm
Top

Postby Ma3tt » Wed Feb 20, 2008 10:53 pm

Mine was as Doug described the wood came down too.
Image

Does that help?
Be Good
1967 Siesta del Sobrino "Standy"
If you lived here... you would be home by now.
http://www.Camp-Cook.com
User avatar
Ma3tt
Dutch Oven GURU
 
Posts: 1140
Images: 179
Joined: Tue Apr 19, 2005 10:19 am
Location: Noodleberry Park. Ca.
Top

Postby Gage » Thu Feb 21, 2008 12:36 am

:rofl: I can't believe I got you guys. But seriously, what do you think about this approach. The KIT I'm rebuilding had the sides over hanging the floor and was glued and nailed. What I'm thinking about doing is building the main 'box' on top of the floor and then hang my outside skins over the floor. :thinking:
Image
Image Image Image
Remember 'Teardrop Time'.......Take your time, you don't have to have it finished NOW.
User avatar
Gage
8000 Club
8000 Club
 
Posts: 8321
Images: 28
Joined: Sat Apr 17, 2004 9:14 pm
Location: Palmdale, CA
Top

Postby doug hodder » Thu Feb 21, 2008 12:40 am

Gage...looks like more work that either Matt or I mentioned....Nuff said!!! :lol: Doug

3/4" floor on a 4x8...I think you're yanking someones chain!
:thinking:
doug hodder
*Snoop Dougie Doug
 
Posts: 12625
Images: 562
Joined: Tue Dec 14, 2004 11:20 pm
Top

Postby Juneaudave » Thu Feb 21, 2008 1:08 am

That 3" overhang is pretty tricky...if it were me, I would ditch the 2x hardwood and substitute 1/8 box 2x steel welded right to the frame. You can't be too careful!!!

:thinking: :thinking: :thinking:
User avatar
Juneaudave
Super Duper Lifetime Member
 
Posts: 3237
Images: 380
Joined: Sun Jul 03, 2005 12:11 pm
Location: Juneau, Alaska
Top

Postby madjack » Thu Feb 21, 2008 1:29 am

Gage, we use 1"aluminum angle as a cleat to hang the wall over the floor and frame...we then use trailer deck screws to fasten the side wall to the frame...our floors are single sheet, usually 1/2" and sit directly on the chassis frame...we actually allow it to float and then attach the front bulkhead/tongue box and walls with the cleats(along with the rear bulkhead) and then fasten the sides to the trailer frame.......
madjack 8)
...I have come to believe that, conflict resolution, through violence, is never acceptable.....................mj
User avatar
madjack
Site Admin
 
Posts: 15128
Images: 177
Joined: Thu Dec 02, 2004 5:27 pm
Location: Central Louisiana
Top

Postby Gage » Thu Feb 21, 2008 1:29 am

doug hodder wrote:Gage...looks like more work that either Matt or I mentioned....Nuff said!!! :lol: Doug
3/4" floor on a 4x8...I think you're yanking someones chain!
:thinking:

I think it's considered part of the frame. I've only got 1/2 inch on the Scotsman. But the frame on the Scotsman is beefier than the KIT. I had asked Grant about the thickness and he said to stay with the 3/4 inch. I'm going to cut the 1/2" wall ply and insert foam board in the voids. You can see what I'm working with HERE.

-edit add-
The main frame is only 36" wide, 6" in from the sides and is made of 1.25 dia steel tubing (1/8" thick).
Image Image Image
Remember 'Teardrop Time'.......Take your time, you don't have to have it finished NOW.
User avatar
Gage
8000 Club
8000 Club
 
Posts: 8321
Images: 28
Joined: Sat Apr 17, 2004 9:14 pm
Location: Palmdale, CA
Top

Postby doug hodder » Thu Feb 21, 2008 1:48 am

Gage wrote::rofl: I can't believe I got you guys. :thinking:


Well, you have what you need to know, and am pretty sure you have decided on it... I'm not willing to set myself up for a hosing!!! :lol: I've seen what you've built previously...it'll work out whatever direction you decide on! Doug
doug hodder
*Snoop Dougie Doug
 
Posts: 12625
Images: 562
Joined: Tue Dec 14, 2004 11:20 pm
Top

Postby Gage » Thu Feb 21, 2008 2:04 am

:surrender: Oh wait a minute. I'm the one who fired the first shot. ;)
But I do have some things to think about now. :thinking: Thank you all.
Image Image Image
Remember 'Teardrop Time'.......Take your time, you don't have to have it finished NOW.
User avatar
Gage
8000 Club
8000 Club
 
Posts: 8321
Images: 28
Joined: Sat Apr 17, 2004 9:14 pm
Location: Palmdale, CA
Top

Postby grant whipp » Thu Feb 21, 2008 2:44 am

Yo, Gage!

What happened to that drawing I sent along with the profile ... :thinking: ...? That should have shown you what you want to know ... ;) ...

CHEERS!

Grant
Celebrating Retirement after over 32 Years of Building, Promoting, Supporting, Supplying, Living the Lifestyle, and Loving Teardrop Trailers!
"Life Moves a Little Slower When You're On Teardrop Time"
The nature of Life, itself, is change ... "Those who matter, don't mind, and those who mind, don't matter."
Image
User avatar
grant whipp
Teardrop Manufacturer
 
Posts: 1815
Images: 117
Joined: Sun Jan 16, 2005 2:00 pm
Location: Jefferson State ('tween CA & OR!)
Top

Postby Gage » Thu Feb 21, 2008 3:17 am

grant whipp wrote:Yo, Gage!
What happened to that drawing I sent along with the profile ... :thinking: ...? That should have shown you what you want to know ... ;) ...
CHEERS!
Grant
I've got it. After I did up the sketch, I looked at your drawing and they are almost the same with the exception of the 1/4" exterior ply skin . Just goes to show you that great minds think alike. :lol:
Image Image Image
Remember 'Teardrop Time'.......Take your time, you don't have to have it finished NOW.
User avatar
Gage
8000 Club
8000 Club
 
Posts: 8321
Images: 28
Joined: Sat Apr 17, 2004 9:14 pm
Location: Palmdale, CA
Top


Return to Teardrop Construction Tips & Techniques

Who is online

Users browsing this forum: No registered users and 5 guests